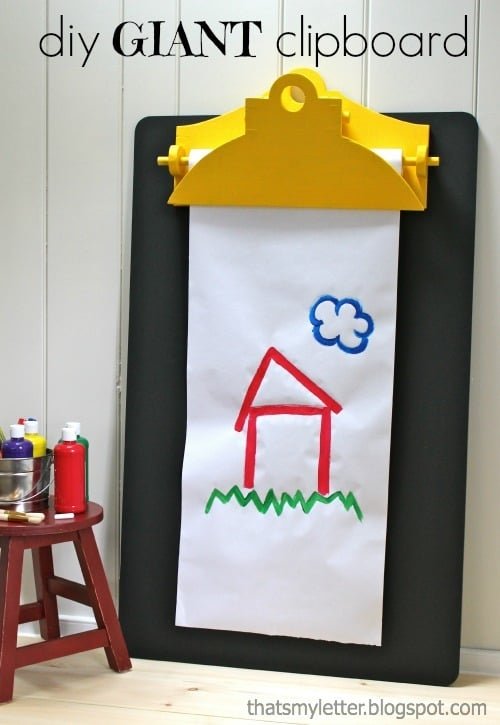
Giant Clipboard Wall Easel Chalkboard
DIY a jumbo clipboard that you can make! from
Specifications
| Project type | Toys |
|---|---|
| Room | Kids and Toys |
| Style | Children's and Kid's Room Furniture and Toy Plans |
| Difficulty | Intermediate |
Dimensions
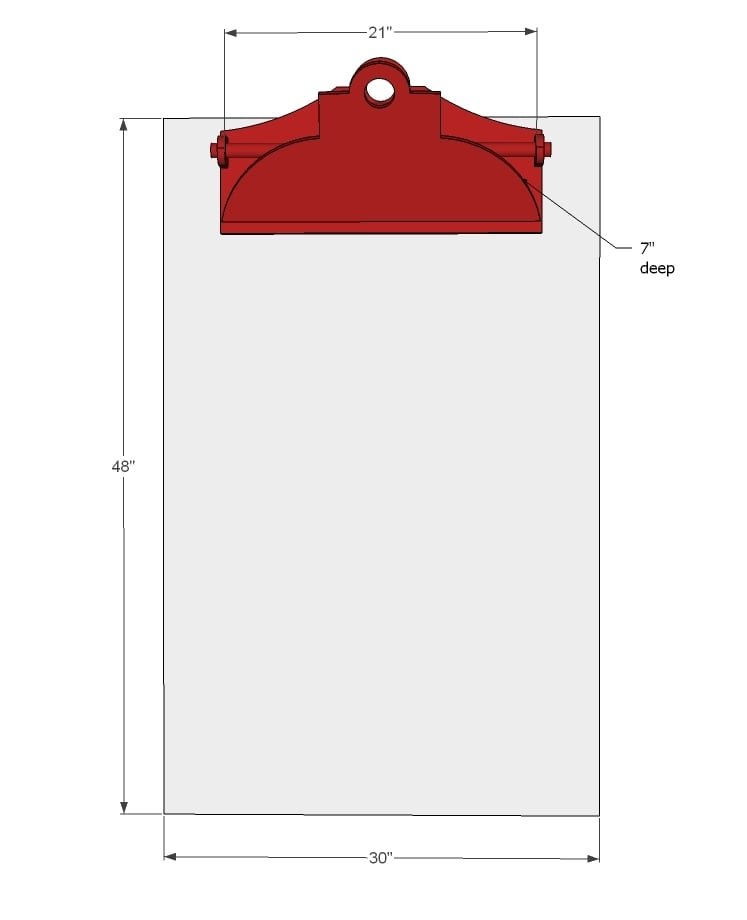
Use the size-specific shopping and cut lists below.
Shopping List
1 - 4x4 sheet of 1/2" thick plywood, particle board or MDF or other smooth sheet goods
1 - 36" dowel (1/2" to 3/4" thick is ideal - must have matching drill or spade bit)
Cut List
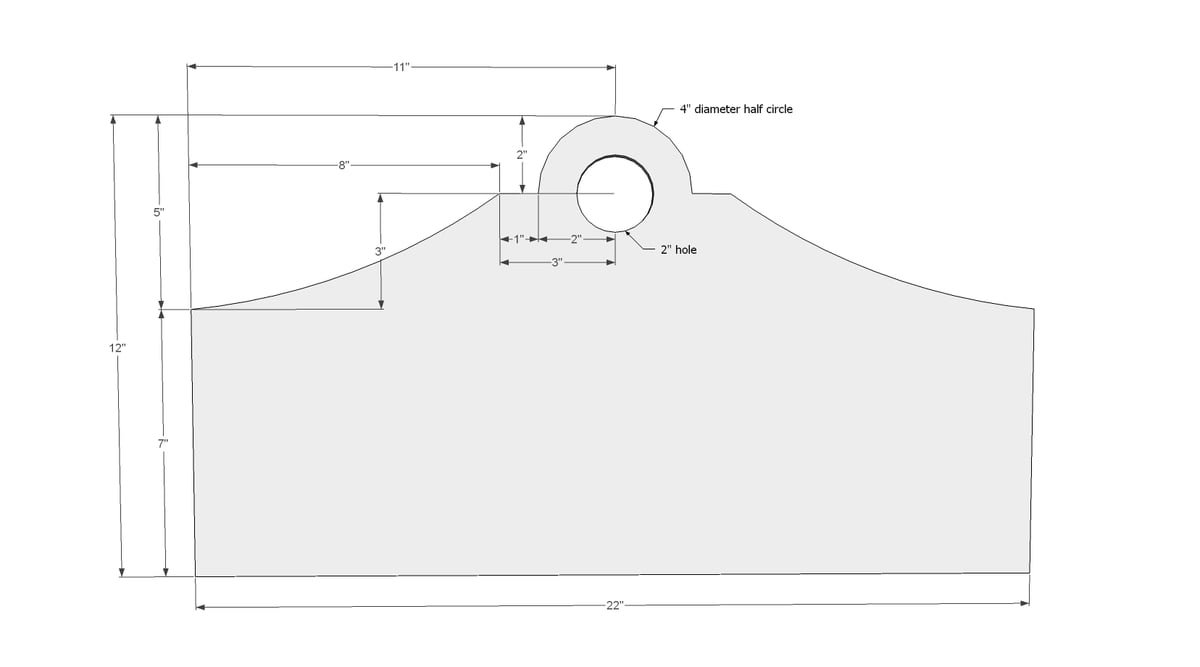
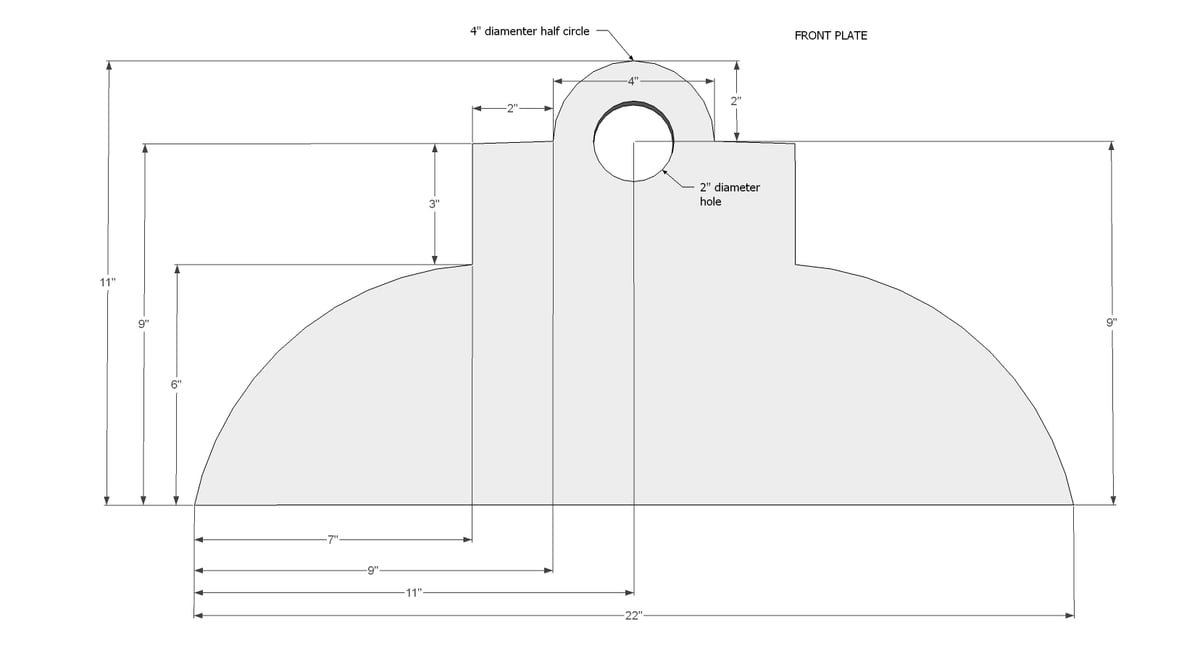
1 - 1/2" plywood 22" x 12" (Back Plate)
1 - 1/2" plywood @ 22" x 11" (Front Plate)
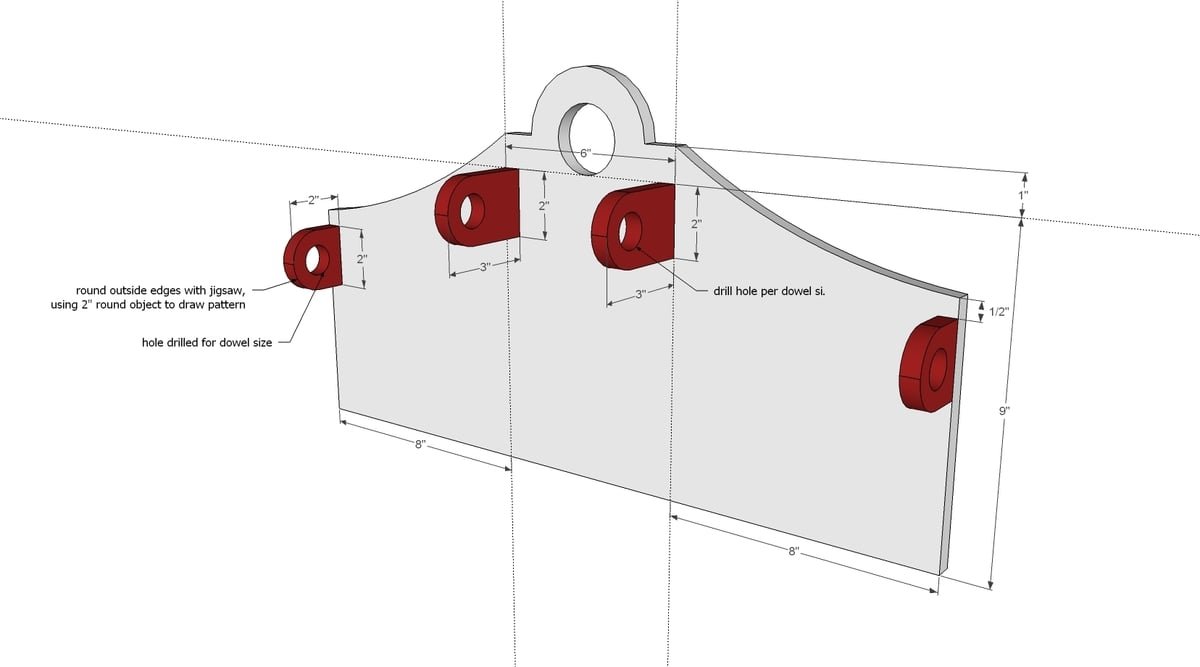
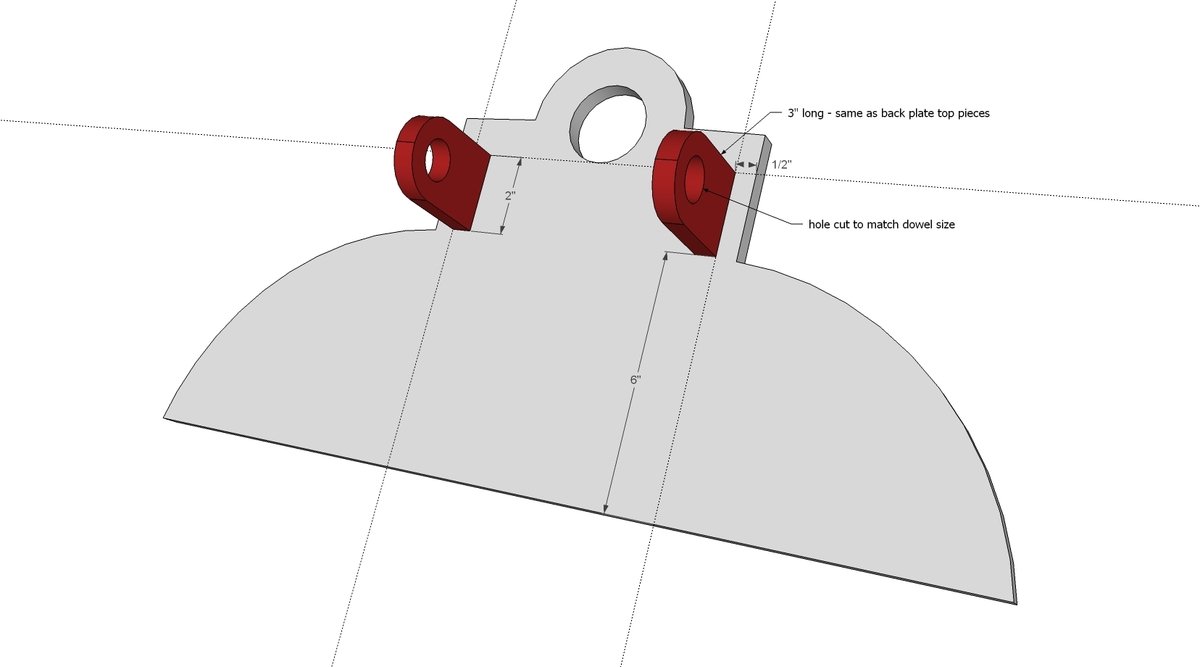
4 - 1/2" plywood 2" x 3" (top dowel holder pieces)
2 - 1/2" plywood 2" x 2" (bottom dowel holder pieces)
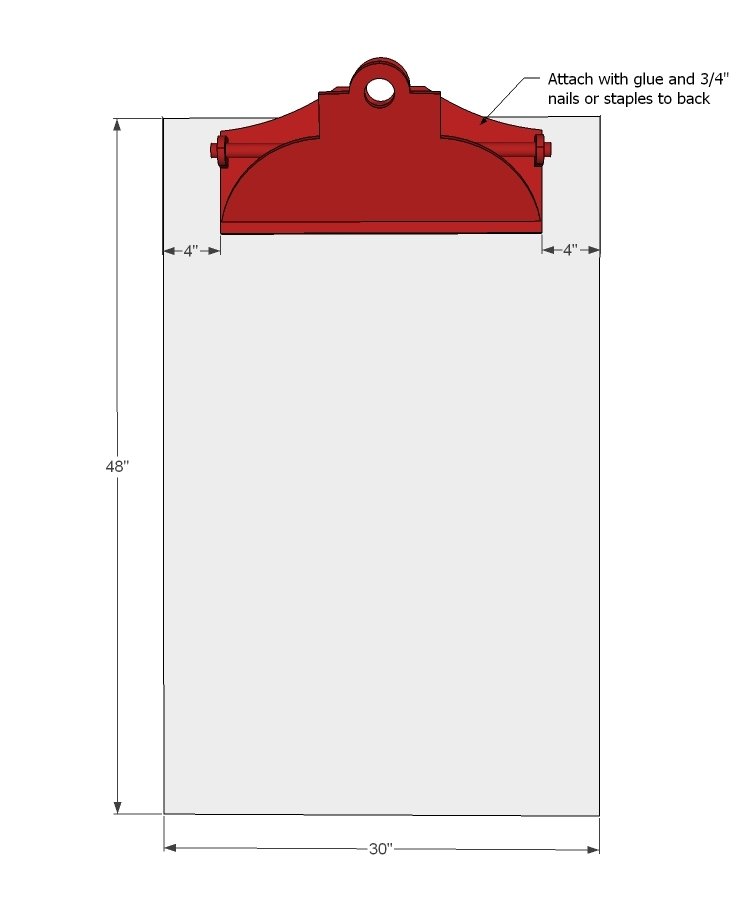
back is 48" x 30
Tools
- measuring tape
- square
- pencil
- safety glasses
- hearing protection
- jigsaw
- sander
Step-by-step Instructions
Step 1
Take the larger piece of plywood for the back plate, and transfer the measurements from the diagram above on to it. Then draw arches and center point for whole and cut out carefully with a jigsaw. Sand edges smooth.
Step 2
To cut these small pieces, try first cutting a strip 2" wide by at least 16" long (20" is ideal). Then clamp one end to the table, and cut the arch shape out of the oppostie end overextending the table with a jigsaw. Drill the center hole. Then cut to length. This way you aren't trying to clamp a 2" long piece down and jigsaw it.' An alternative is to use 1x3 boards like Jaime did here. Then attach the pieces to the back plate - you can use glue and nails or screws from back side (use 1" screws) or 1/2" pocket holes and 1" pocket hole screws (from the front to attach).
Step 3
Then repeat the steps on the front plate piece as you did the back plate.
Step 4
And attach the top pieces as you did for the back plate.
Step 5
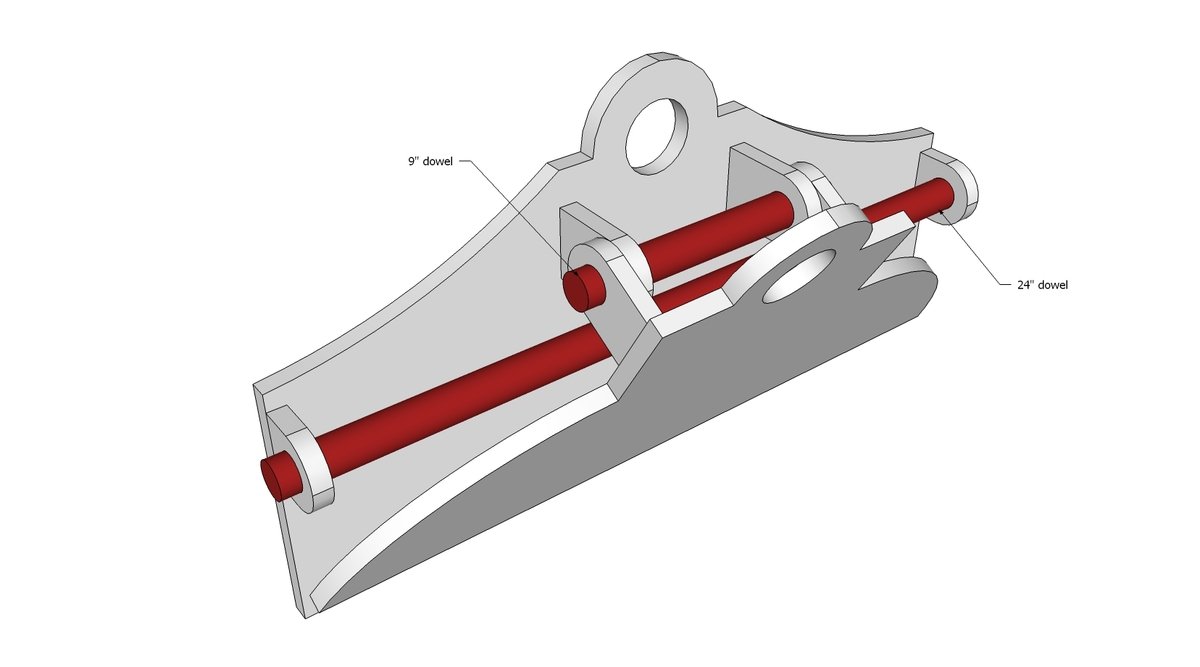
Step 6
Then attach the entire clipboard piece to the back plywood. You can also round corners of the back as well.
Finishing
Sand all surfaces, starting with a medium grit and finishing with fine. Wipe off the dust, fill any holes or gaps with wood filler, and sand smooth once dry. Apply primer if you're painting, then finish with your choice of paint or stain and seal with a durable clear topcoat. For outdoor projects, use exterior-rated primer, paint or stain, and sealer so the piece stands up to the weather.
Source (temporary): https://www.ana-white.com/woodworking-projects/giant-clipboard-wall-easel-chalkboard