Gift Wrap Organizer Toolbox
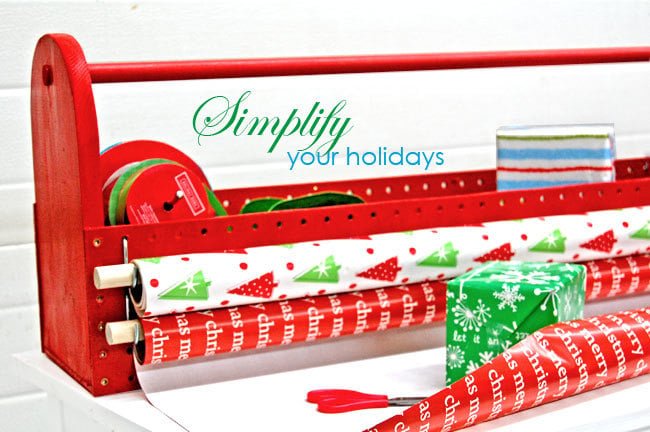
Bring wrapping paper dispensing to the tabletop, while keeping essentials like ribbon and tape handy and organized. holds up to four rolls of wrapping paper and an abundance of ribbons and other essentials. Easy to carry handle. Easily stows on a closet shelf.
Specifications
| Project type | Home DIY |
|---|---|
| Room | Storage Solutions |
| Style | Cottage Style Furniture Plans |
| Difficulty | Beginner Projects |
| Estimated cost | Under $20 |
Dimensions
Use the size-specific shopping and cut lists below.
Shopping List
Peg Board 3/4″ wood dowels, 36″ long 1 – 1×8, six feet long 2″ screws wood glue and finishing supplies Pegboard Hooks
Cut List
2 – 1×8 @ 14″
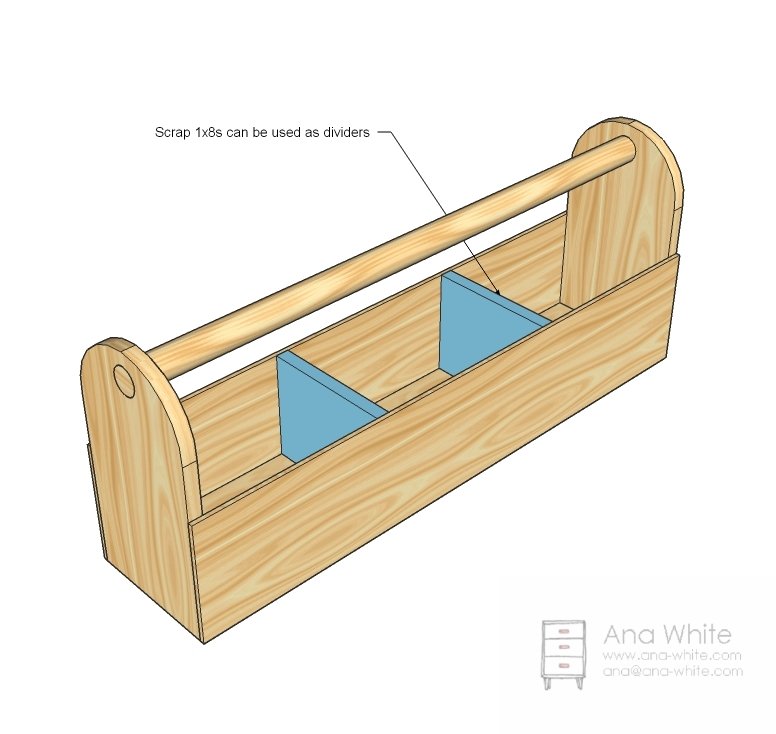
1 – 1×8 @ 33″ (for 32″ wide wrapping paper rolls) you can also add 1x8s @ 7″ as dividers
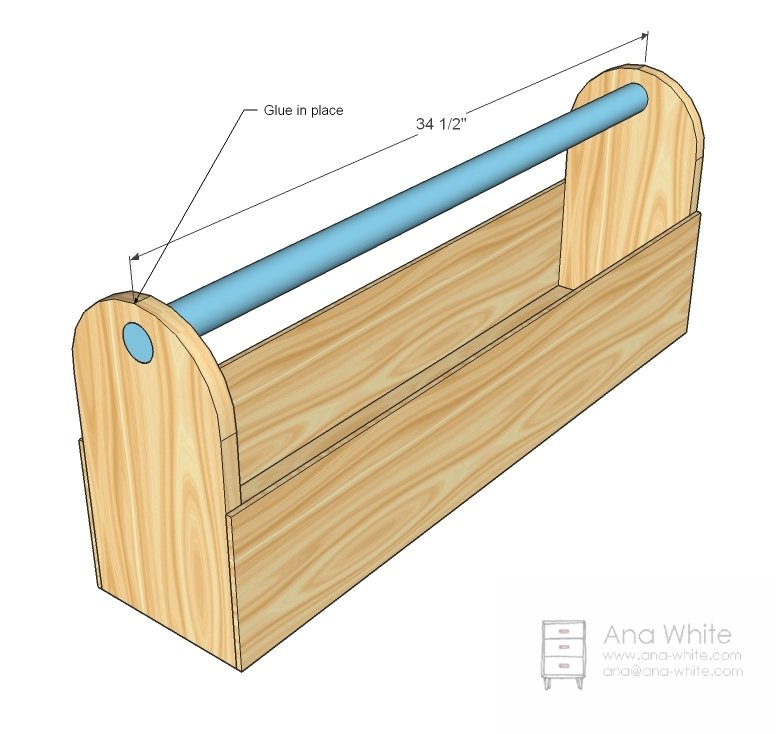
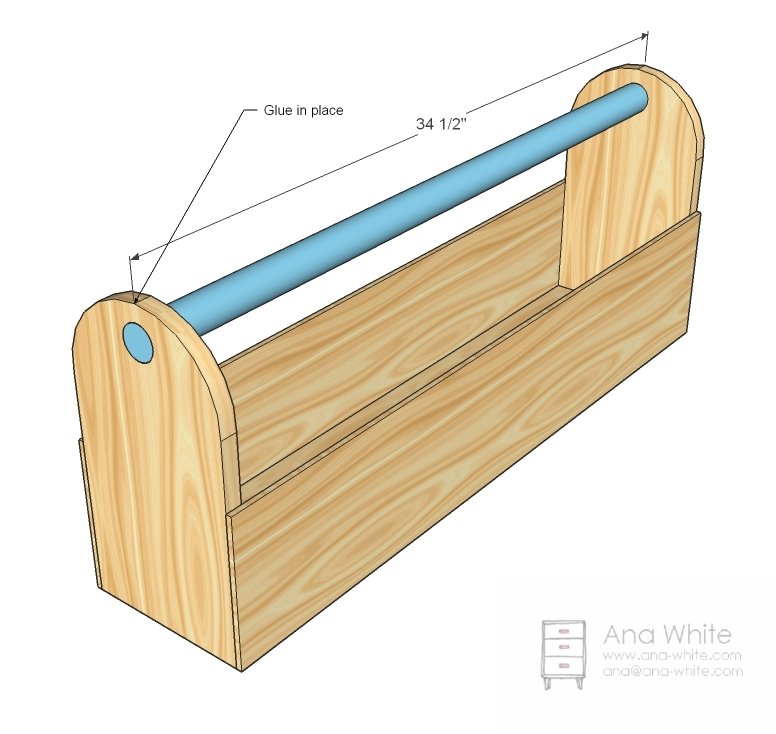
1 – 3/4″ dowel @ 34 1/2″ (handle)
Additional 3/4″ dowels for wrapping paper spools
Tools
- measuring tape
- square
- pencil
- hammer
- safety glasses
- hearing protection
- drill
- jigsaw
- sander
- countersink drill bit
Step-by-step Instructions
Cut the ends
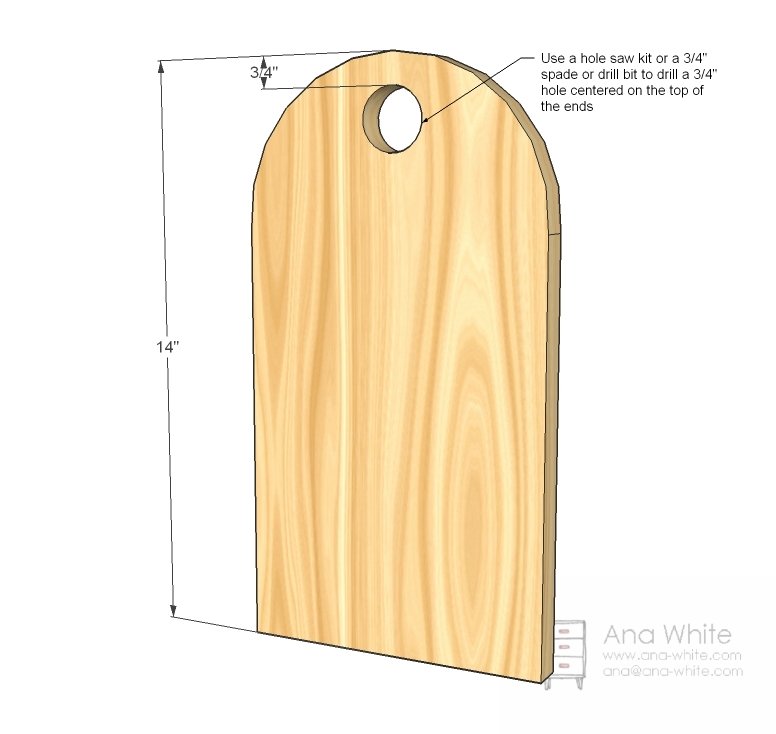
Round the corners off ( I used a coffee can) and drill a 3/4″ hole in the center for your handle. Sand the edges now, with the two ends sandwiched together with clamps. It’ll be eaiser now than later.
Bottom
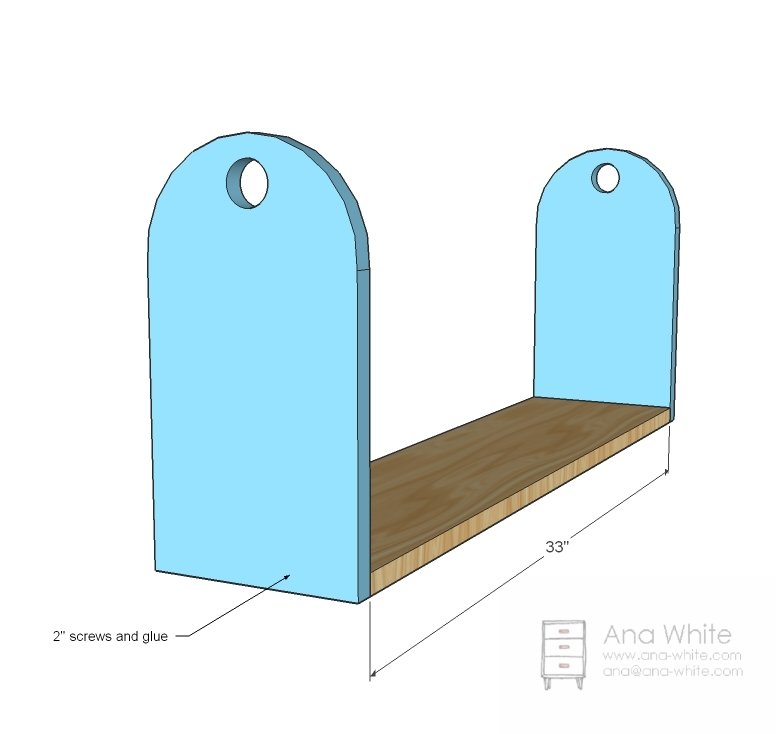
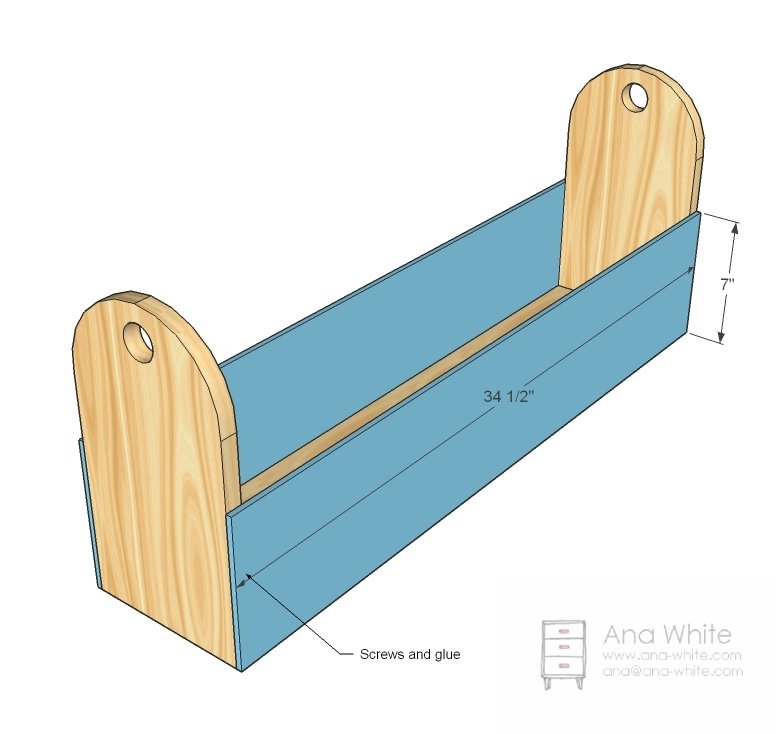
Now just screw the ends to the bottom. You should be into this one about ten minutes now.
Sides
Now the pegboard. Just screw it on, along the bottom too. You can go up higher if you like.
Handle
Now just thread the handle through and glue it in place.
Step 5
Finishing
Sand all surfaces, starting with a medium grit and finishing with fine. Wipe off the dust, fill any holes or gaps with wood filler, and sand smooth once dry. Apply primer if you're painting, then finish with your choice of paint or stain and seal with a durable clear topcoat. For outdoor projects, use exterior-rated primer, paint or stain, and sealer so the piece stands up to the weather.
Source (temporary): https://www.ana-white.com/woodworking-projects/gift-wrap-organizer-toolbox