Grandy Barn Door Console
How to build barn door console or buffet - free

Specifications
| Project type | Media and Entertainment Centers |
|---|---|
| Room | Storage Solutions |
| Difficulty | Intermediate |
Dimensions
Use the size-specific shopping and cut lists below.
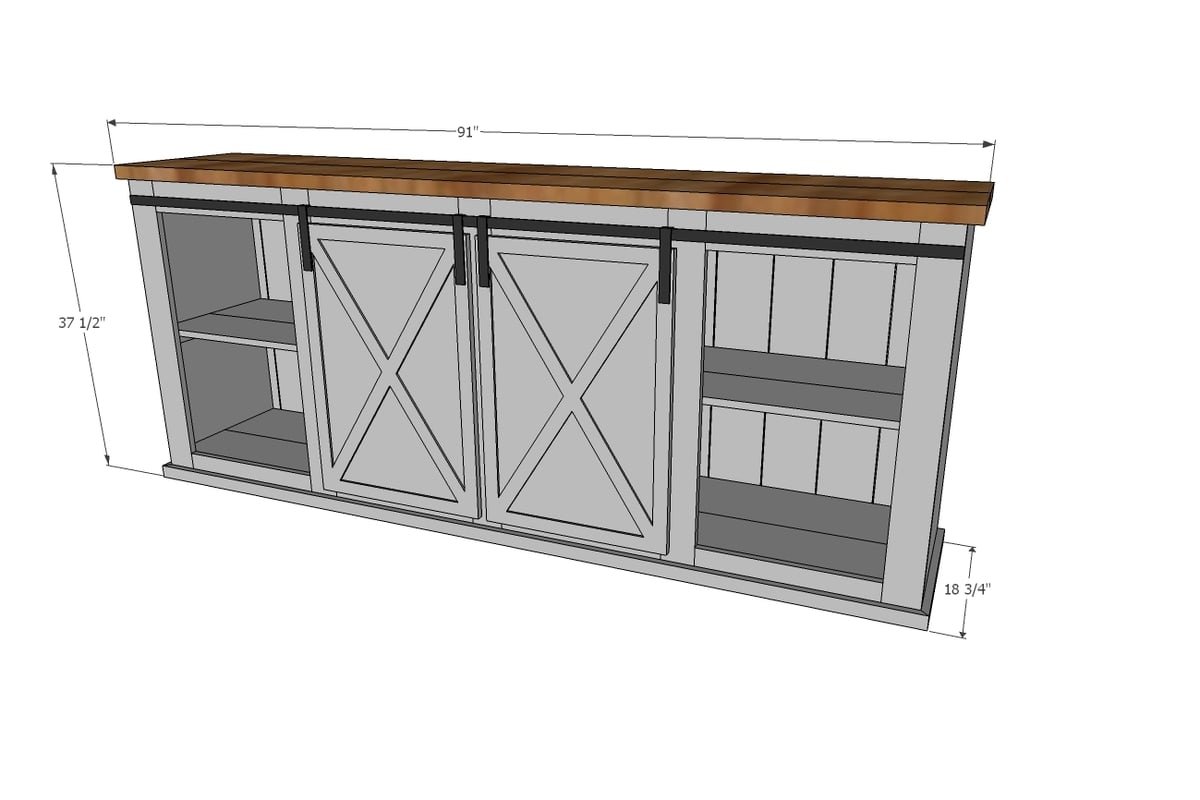
Shopping List
- 2 - 2x10 @ 8 feet long
- 2 - 1x8 @ 8 feet long
- 2 - 1x10 @ 8 feet long
- 1 sheet of 1/4" thick plywood or hardboard (for back)
- 3 - 1x2 @ 8 feet long
- 4 - 1x4 @ 8 feet long
- 6 - 2x3 @ 8 feet long
- 2 - project panel pieces 17-1/4" x 36" (may be advertised as 18" wide project panel - measure in store)
- Hardware for sliding doors
Cut List
Frames
- 4 - 2x3 @ 84"
- 4 - 2x3 @ 17"
- 4 - 2x3 @ 14"
Sides
- 2 - 3/4" thick project panels or plywood 36" x 17-1/4"
Face Frame
- 5 - 1x4 @ 36"
- 8 - 1x4 @ 17-3/4"
Shelves
- 2 - 1x8 @ 87"
- 2 - 1x10 @ 87"
Middle Shelf Supports and Cleats
- 5 - 1x2 @ 14"
- 5 - 1x2 @ 17"
Back
- 1/4" plywood pieces 36" long
Bottom Trim
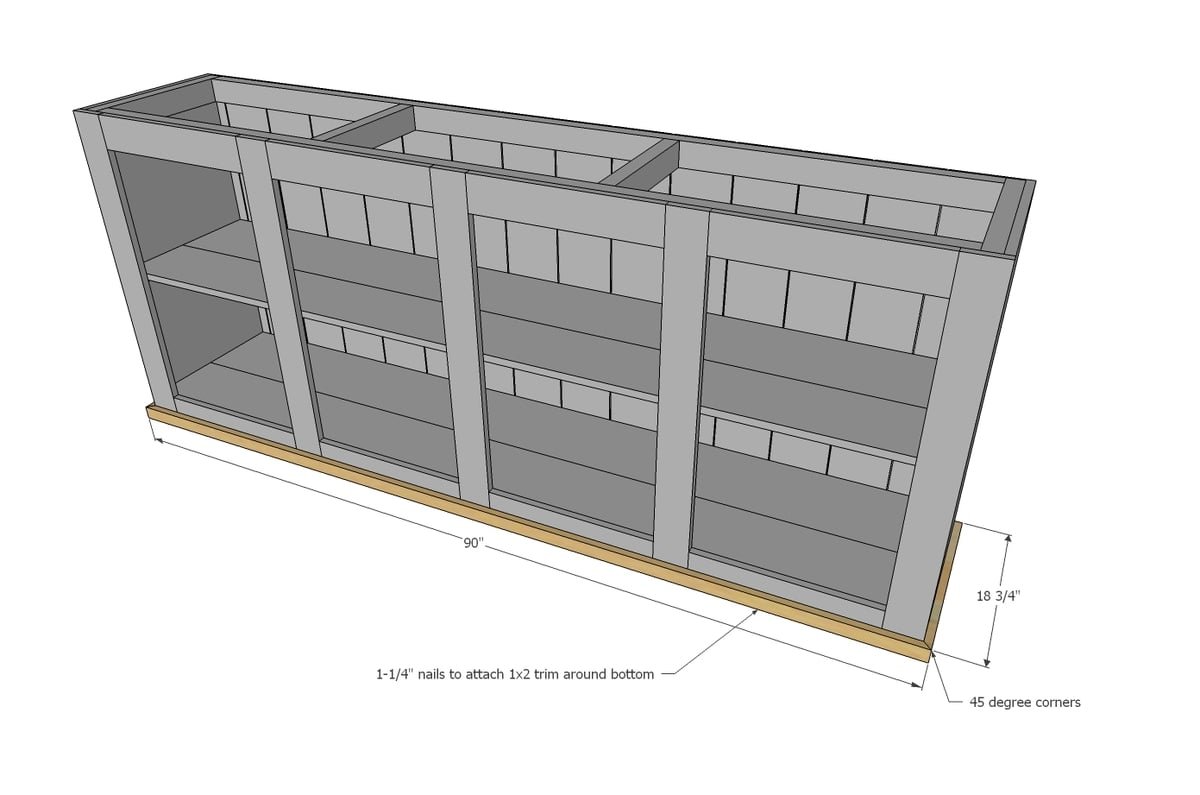
- 1 - 1x2 @ 90" - both ends cut at 45 degrees, NOT parallel, longest point measurement
- 2 - 1x2 @ 18-3/4" - one end cut at 45 degrees, longest point measurement
Top
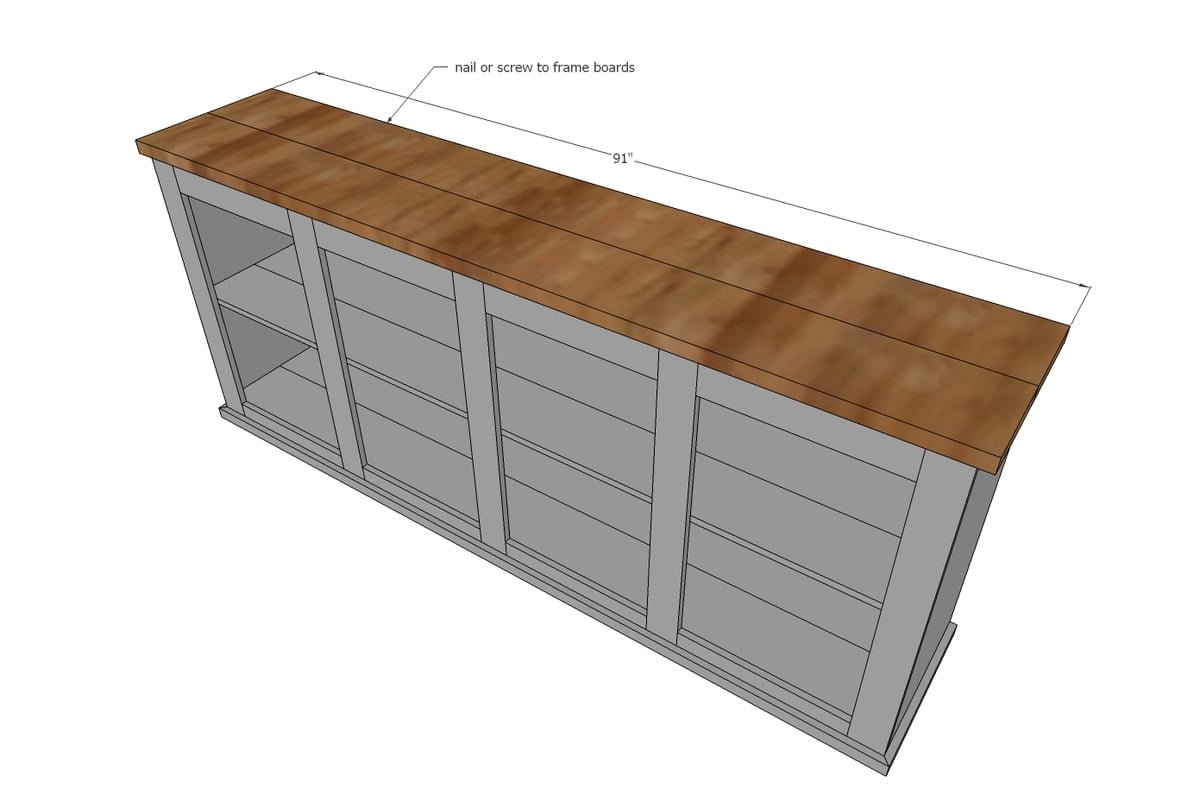
- 2 - 2x10 @ 91"
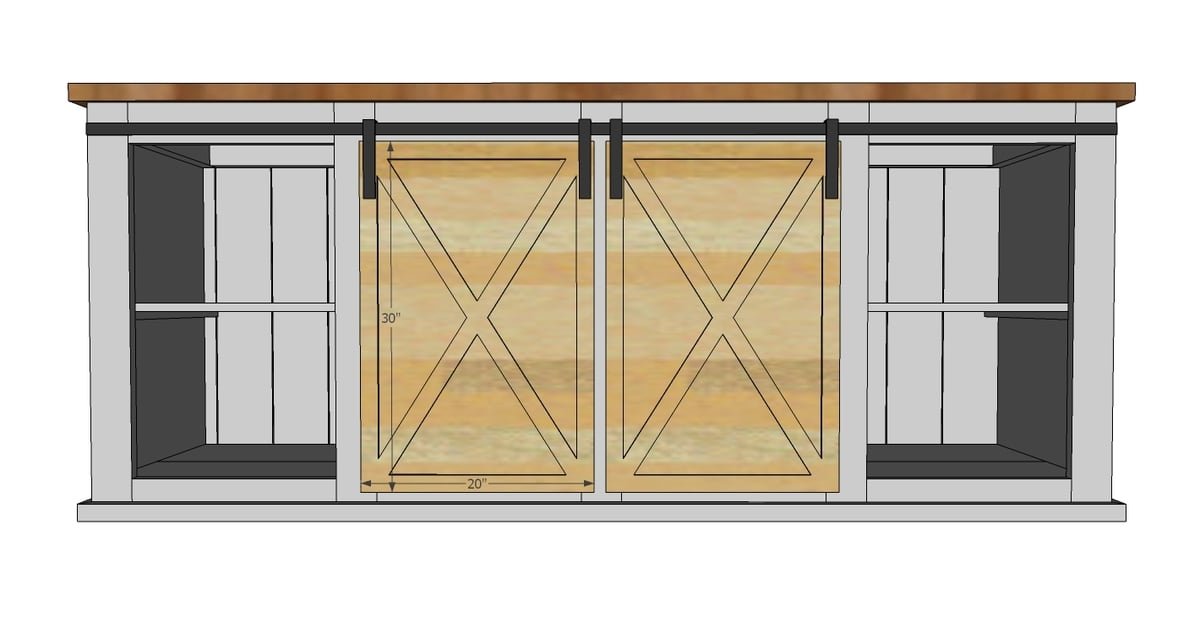
- Doors are cut to fit, overall 20" x 30"
Tools
- measuring tape
- square
- pencil
- safety glasses
- hearing protection
- drill
- compound miter saw
- table saw
- nailer
Step-by-step Instructions
Step 1
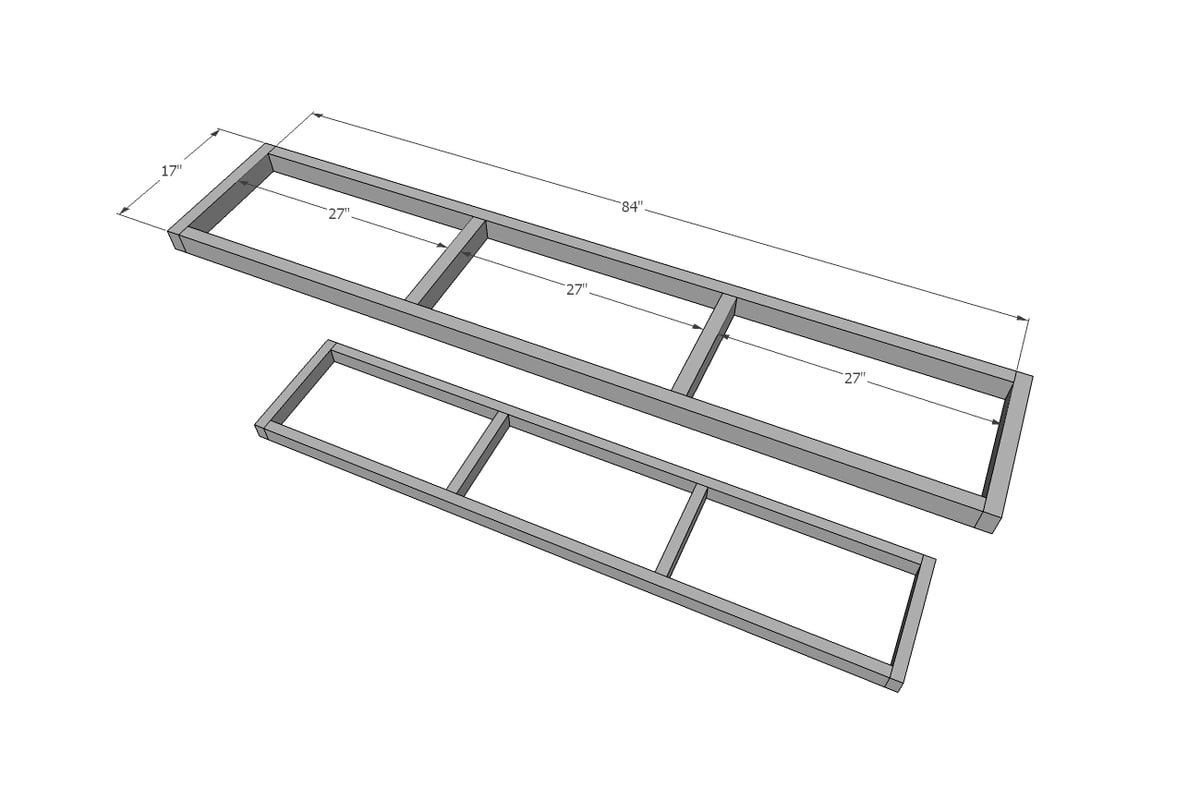
Build two frames out of 2x3s. The frames should be screwed together as this is the main support for the entire piece. Use 2-1/2" or longer screws, or for those of you with a Kreg Jig, use 1-1/2" pocket holes and 2-1/2" pocket hole screws. Don't forget to glue the joints. Don't be concrened about being perfect here, the entire frame is concealed.
Step 2
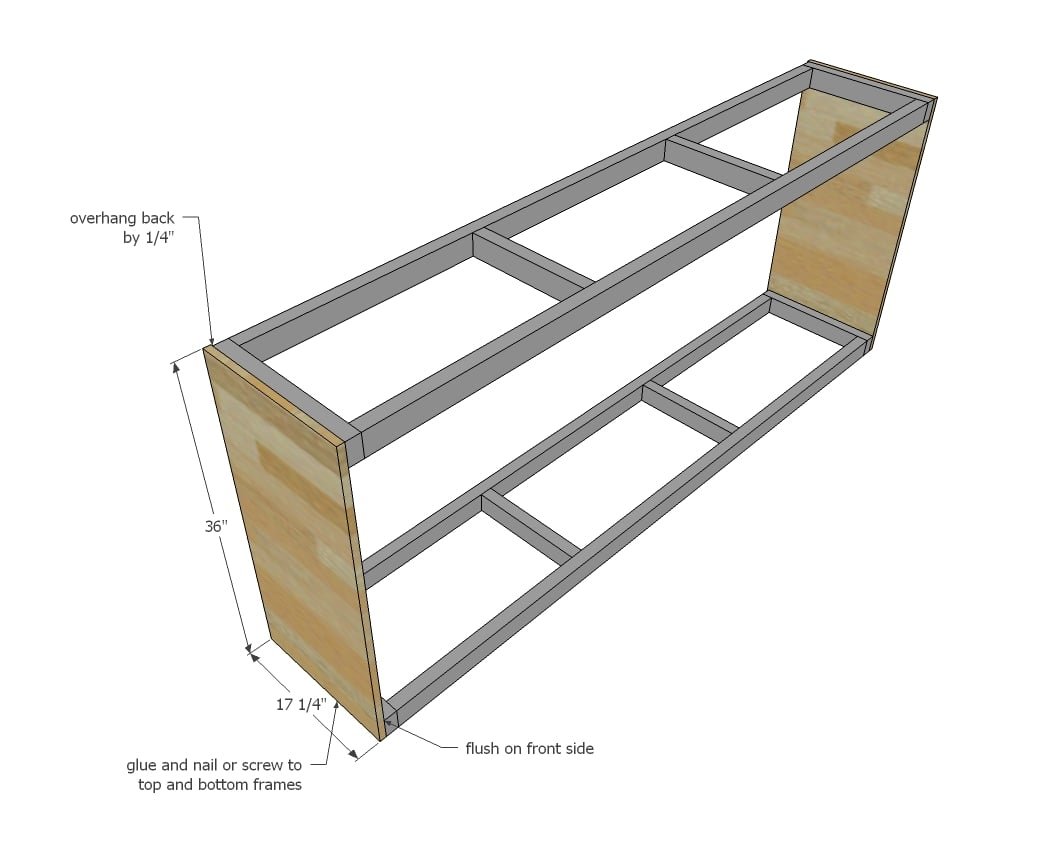
For the sides, add the side panels. This plan is designed to work with project panels 17-1/4" wide. You can use any material here, plywood or reclaimed wood too. I recommend screwing these to the frames, but you could also use nails and glue - nails should be at least 1-1/4" long. I love how the back overhangs by 1/4" to conceal the back (will put that on in later steps).
Step 3
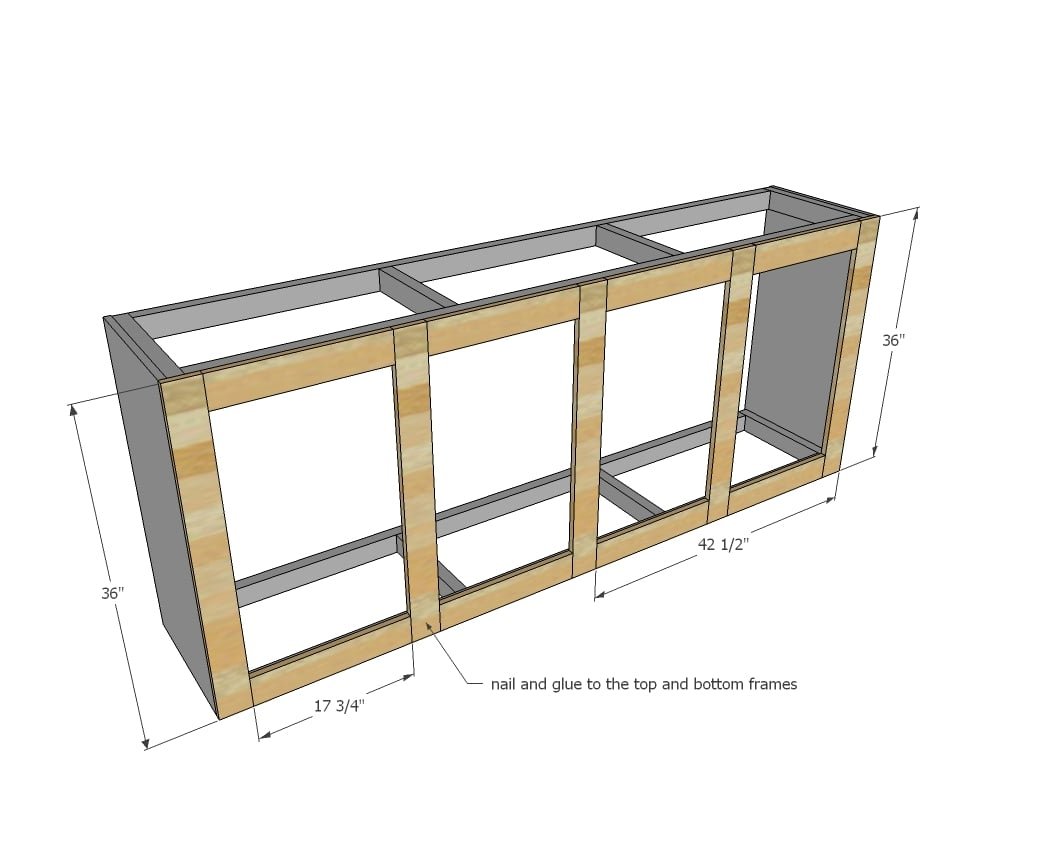
Now the face frame. With the projec ton it's back, lay out all the face frame boards and glue and nail down. Nails should be at least 1-1/4" long. Pocket hole users could also build the face frame seperately and attach.
Step 4
Lay the bottom shelf boards down on the bottom frame. Nail and glue down, with nails longer than 1-1/4". There can be a gap between the boards, but the shelf should not go past the back of the bottom frame (sides overhang by 1/4" to allow for the back).
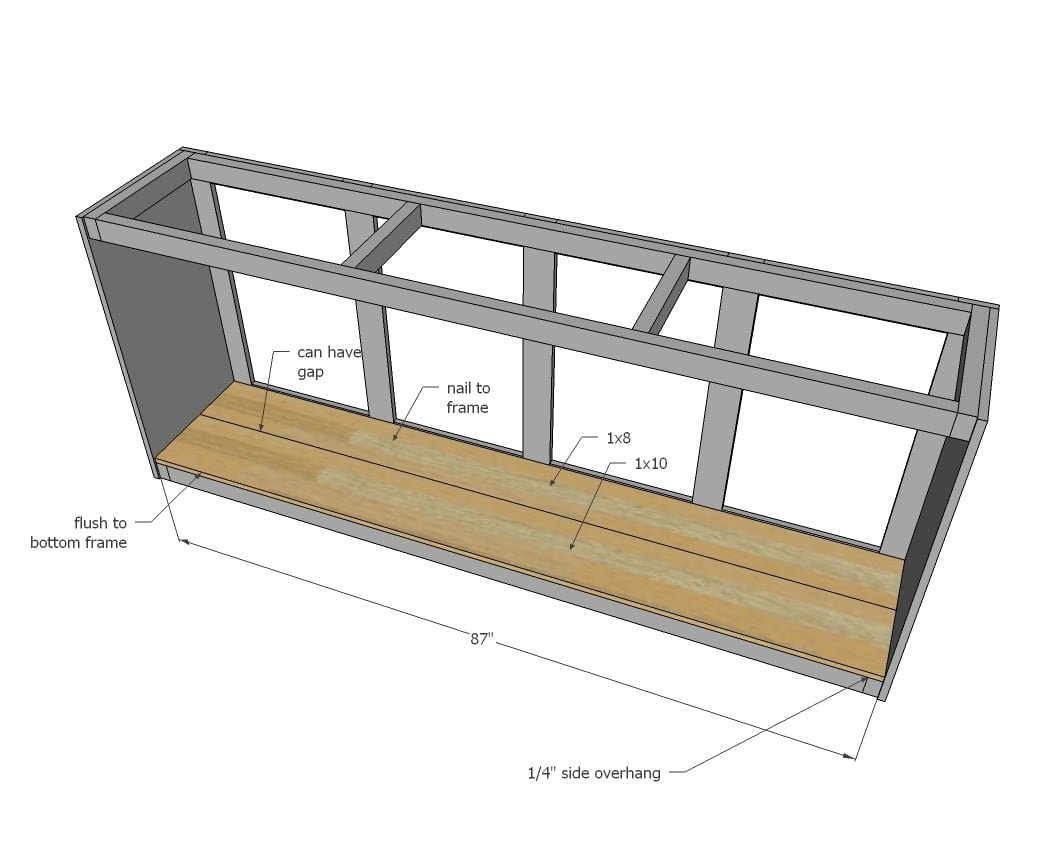
Step 5
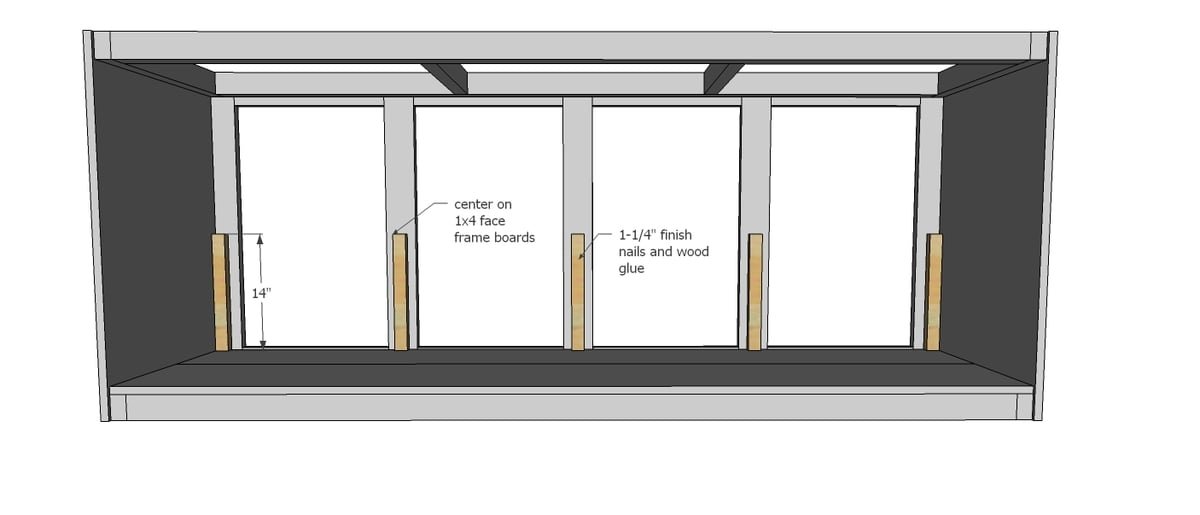
Step 6
Build your bottom shelf by attaching bottom shelf boards to the shelf cleats. Use 1-1/4" long nails and glue to attach. Can have a gap in the middle.
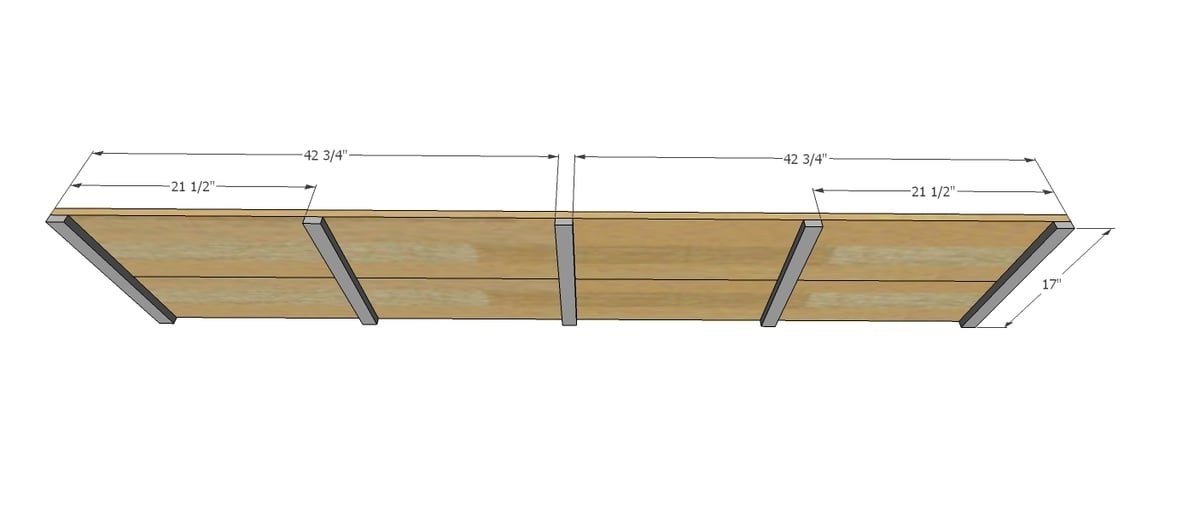
Step 7
Place shelf inside console and attach from outsides to secure in place.
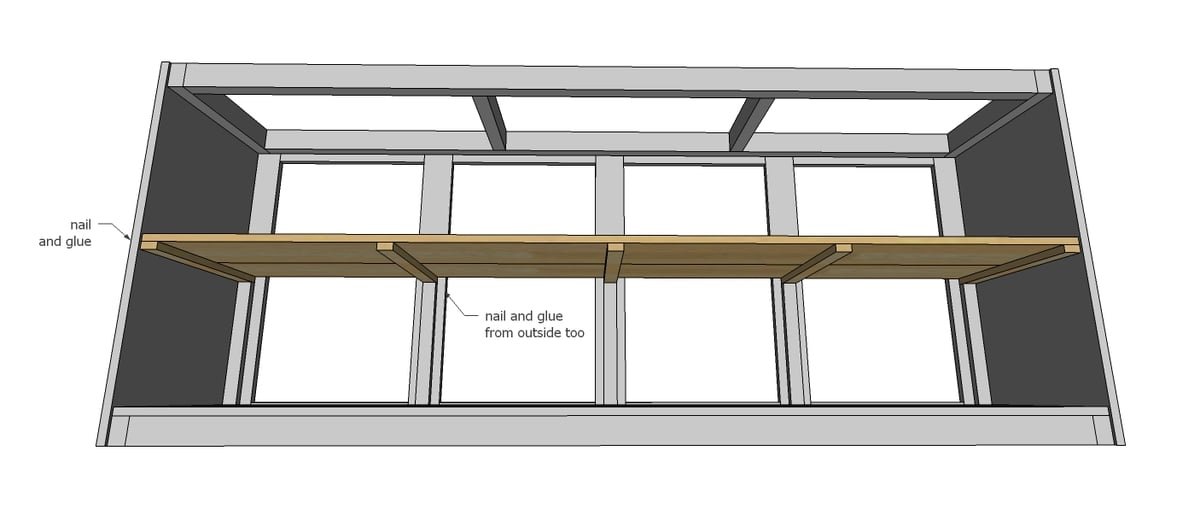
Step 8
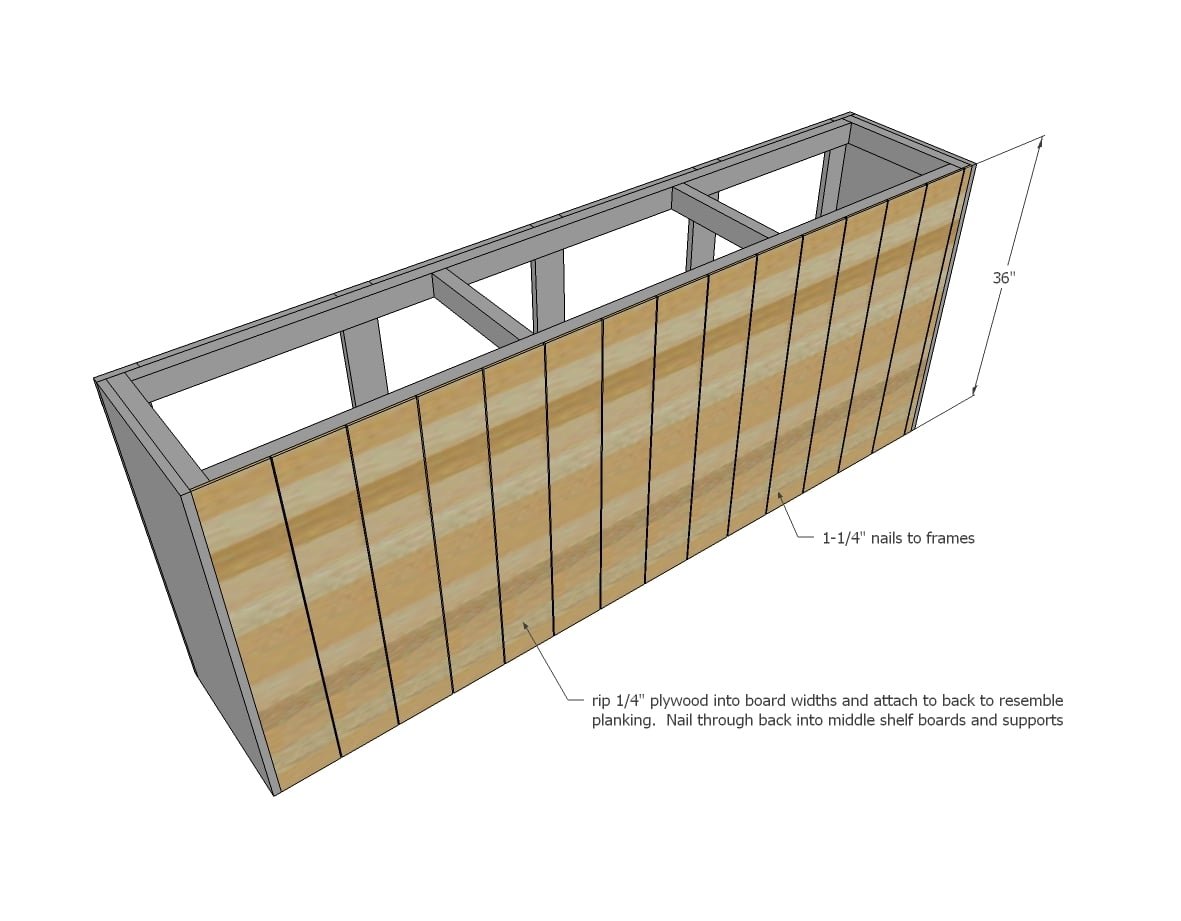
To get the planked look on the back of the console, Nikki ripped 1/4" plywood into strips and then attached the individual strips to the back. You can also use full sheet of 1/4" plywood. You can use shorter nails here but if you don't want to buy a shorter nail (3/4" would be ideal) the 1-1/4" nails would be fine.
Step 9
The bottom is trimmed out in simple 1x2s, mitered around corners. Use 1-1/4" nails and glue to secure.
Step 10
Attach top with the longer screws you used to build the top frames (2-1/2" or longer) so top is flush to back and side overhangs are even. TIP: You may wish to stain the top boards first.
Step 11
Nikki built the doors shown with 1/2" plywood with smaller strips nailed on top, but you can use a variety of different methods to build the doors (love the reclaimed wood!) Nikki makes her own sliding door hardware too. Jaime from That's My Letter provides a good tutorial on her sliding door hardware if you want to check that out.
Finishing
Sand all surfaces, starting with a medium grit and finishing with fine. Wipe off the dust, fill any holes or gaps with wood filler, and sand smooth once dry. Apply primer if you're painting, then finish with your choice of paint or stain and seal with a durable clear topcoat. For outdoor projects, use exterior-rated primer, paint or stain, and sealer so the piece stands up to the weather.
Source (temporary): https://www.ana-white.com/woodworking-projects/grandy-barn-door-console