Grant Base
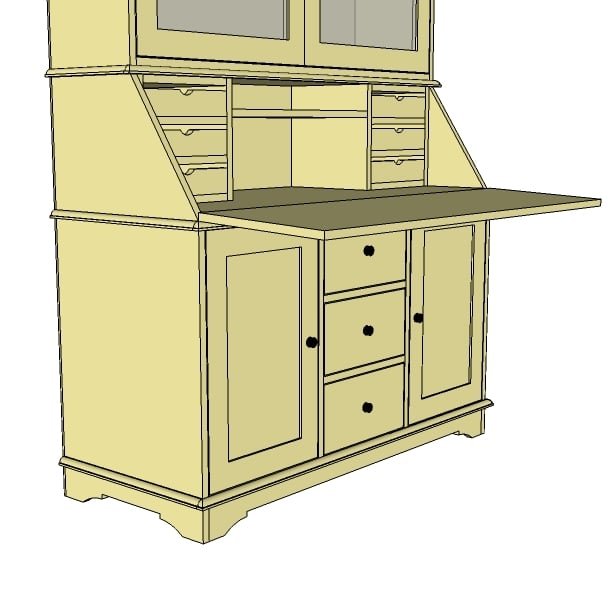
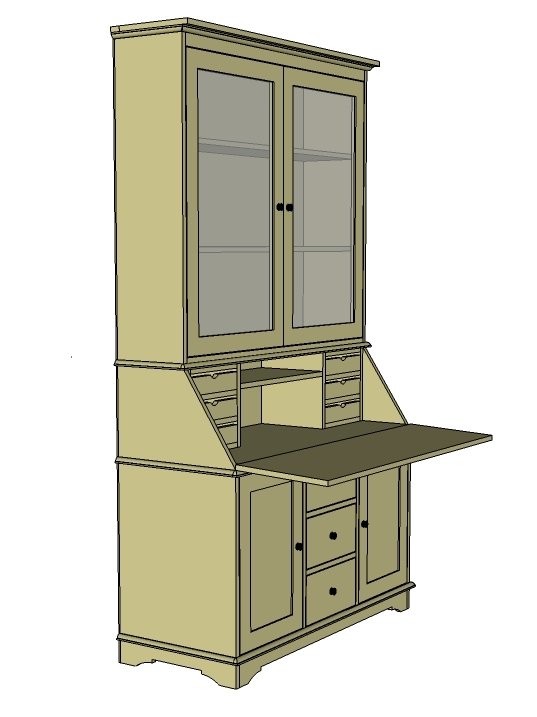
The base for the Grant collection. Features three drawers and two doors, decorative footer, and is useable without the hutches.
Specifications
| Project type | Buffet, Sideboard and Credenza Plans |
|---|---|
| Room | Storage Solutions |
| Style | Cottage Style Furniture Plans |
| Difficulty | Advanced |
| Estimated cost | $100-$150 |
Dimensions
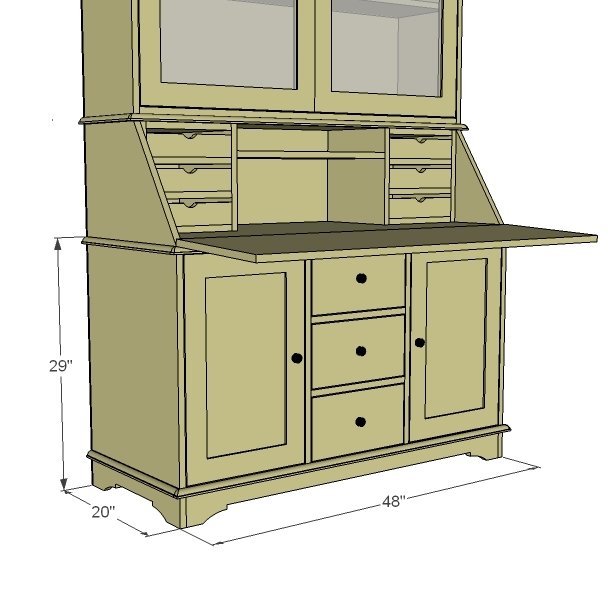
Use the size-specific shopping and cut lists below.
Shopping List
2 – 3/4″ Plywood or MDF @ 4×8 Sheets
1 – 1×4 @ 4 feet long
1 – 1/4″ plywood @ 4×4 Sheet
2 – 3/4″ Wide Moulding @ 8 feet long
2″ Screws (Drywall for MDF) or 1 1/4″ Pocket Hole Screws
1 1/4″ Finish Nails
Wood Glue
Wood Filler
3 – Sets of 18″ Drawer Slides
2 – Sets of Hinges
5 Knobs
Finishing Supplies
Cut List
2 – 1×20 @ 24″ (Divider Sides)
2 – 1×20 @ 14″ (Drawer Box)
1 – 1×20 @ 46 1/2″ (Bottom Shelf)
1 – 1×20 @ 48″ (Top)
2 – 1×20 @ 29″ (Sides)
1 – 1×4 @ 46 1/2″
1 – 1/4″ plywood @ 48″ x 29″ (Back)
Moulding, Door and Drawer cuts are located within the instructions as you should build to fit.
Tools
- measuring tape
- square
- pencil
- hammer
- safety glasses
- hearing protection
- kreg-jig
- drill
- circular saw
- compound miter saw
- sander
- countersink drill bit
Step-by-step Instructions
2 – 1×20 @ 24″ (Divider Sides)
2 – 1×20 @ 14″ (Drawer Box) 1 – 1×20 @ 46 1/2″ (Bottom Shelf) 1 – 1×20 @ 48″ (Top) 2 – 1×20 @ 29″ (Sides) 1 – 1×4 @ 46 1/2″ 1 – 1/4″ plywood @ 48″ x 29″ (Back) Moulding, Door and Drawer cuts are located within the instructions as you should build to fit.
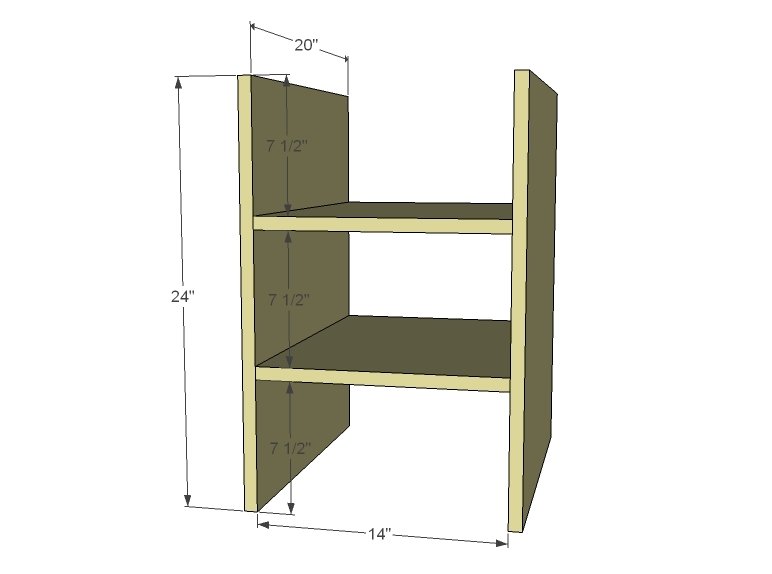
Center Drawer Divider
Adding shelves to your center cubbies does add weight to the piece, and isn’t entirely necessary, but if you have the boards (and we do because you have to buy 2 sheets of plywood/MDF) it can add structure and stability and give you a better aligned drawer box.
Top and Bottom Shelf
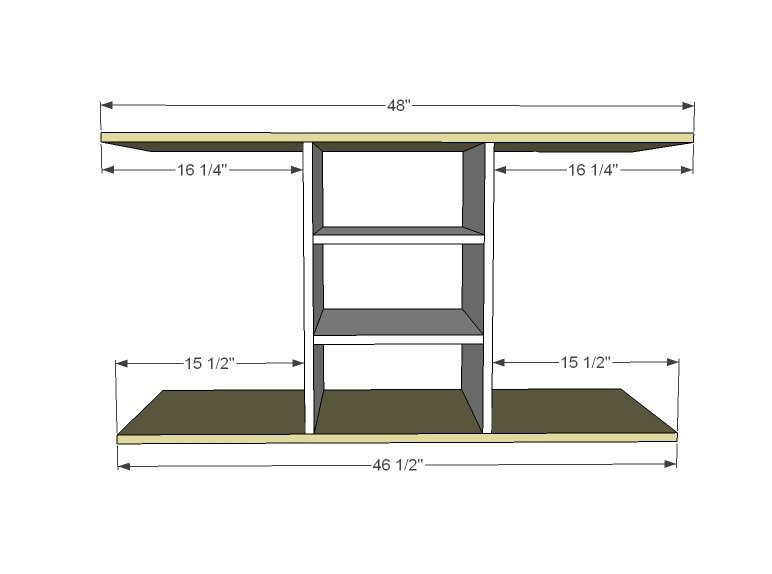
Carefully mark out the top and bottom shelf as shown above and attach the center divider to the top and bottom. Use 2″ screws and glue or 1 1/4″ pocket hole screws and glue.
Sides Cutout
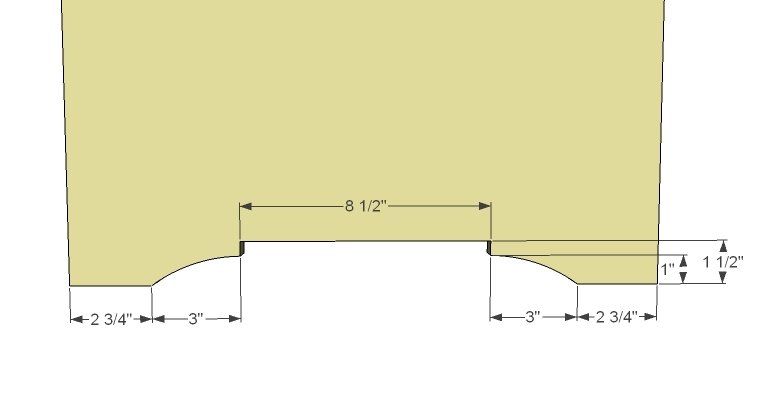
Mark the sides as shown above and carefully cut out with a jigsaw. Make sure the sides. Note that the sides are different than the front footer cutout.
Step 5
Front Footer
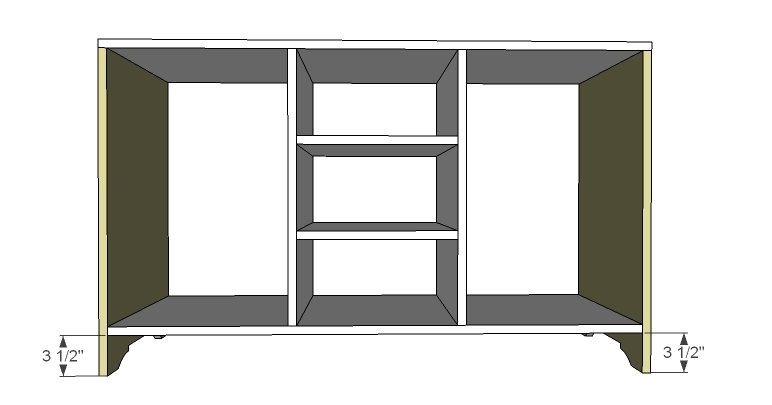
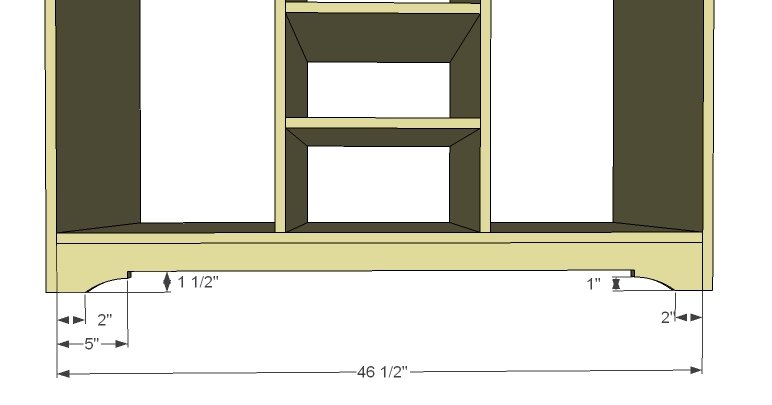
Attach the front footer to the bottom, inset as shown above. Mark and cut out (I would cut in place – if you are confident of your jigsaw skills – because you won’t have to worry about clamping and such). You can use a nailer and 1 1/4″ or 2″ finish nails and glue here.
Back
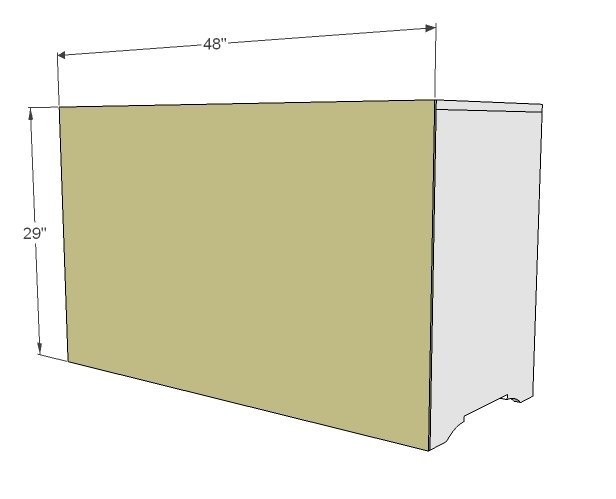
Attach the back with either 1 1/4″ screws or 1 1/4″ glue. It is important that you attach to the shelves and dividers to help keep the piece square. Be certain that your project is perfectly square at this point. You will only need to make one cut here.
Moulding
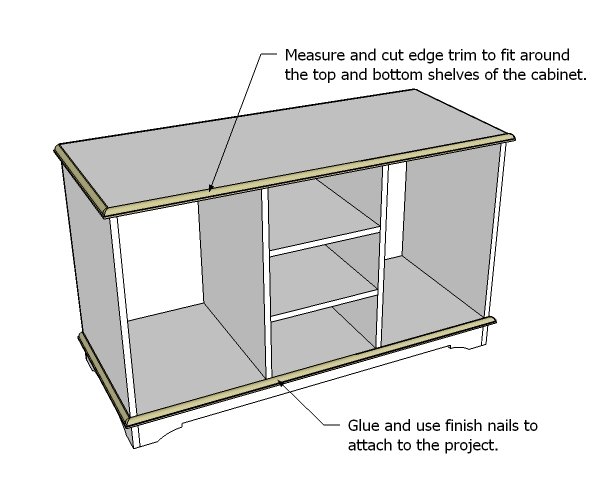
You should cut your moulding to fit perfectly. What I do is start by getting the center piece (the one with both ends mitered at 45 degrees) right, then doing the sides to fit perfectly to the center. Sometimes I make a half dozen cuts before I’m satisfied with the fit. Check out my Mom’s Bed to see moulding in action and more details on choosing moulding.
Doors
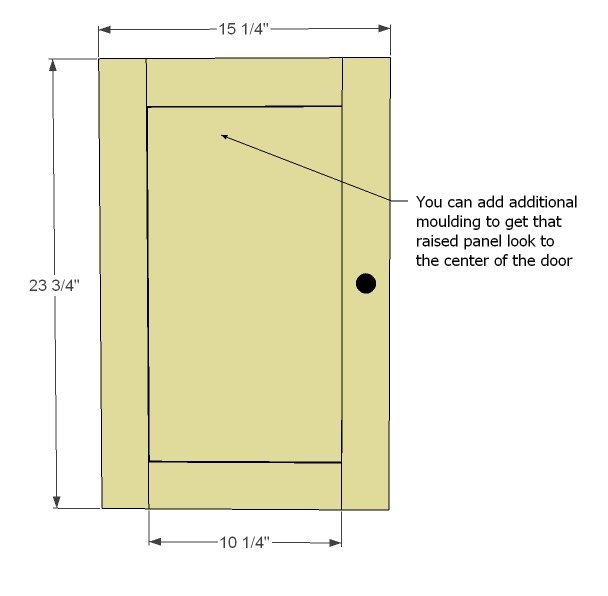
There are many ways that you can build doors. Because you will have some scrap 3/4″ plywood leftover, why not use it up on this project? Measure the door opening and cut a piece of the 1×20 3/4″ stock to fit the door opening, leaving approximately 1/8″ to 1/16″ gap around the door (you may need to adjust depending on the type of hinges that you use. When you are satisfied with the fit, cut 1/4″ plywood into 2 1/2″ wide strips (you’ll have some leftover from the back) and glue and clamp to the face of the door, making sure that the corners are securely clamped (TIP: Don’t clamp so tight that all the glue seeps out and you have nothing to glue the wood together with!). You will need to build two doors.
Drawers
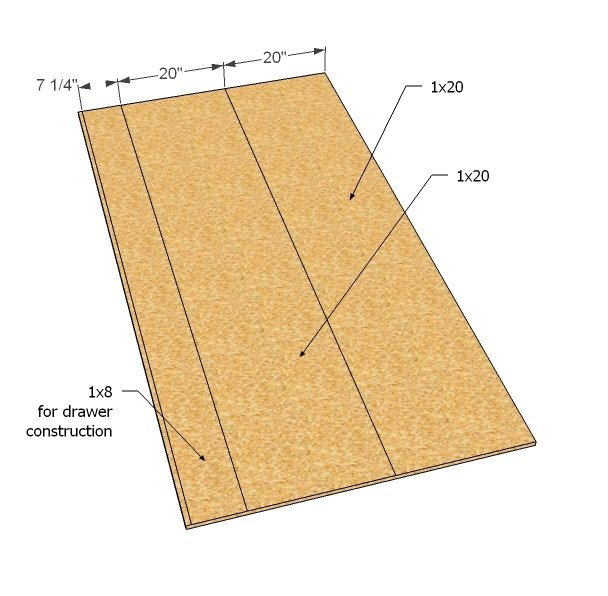
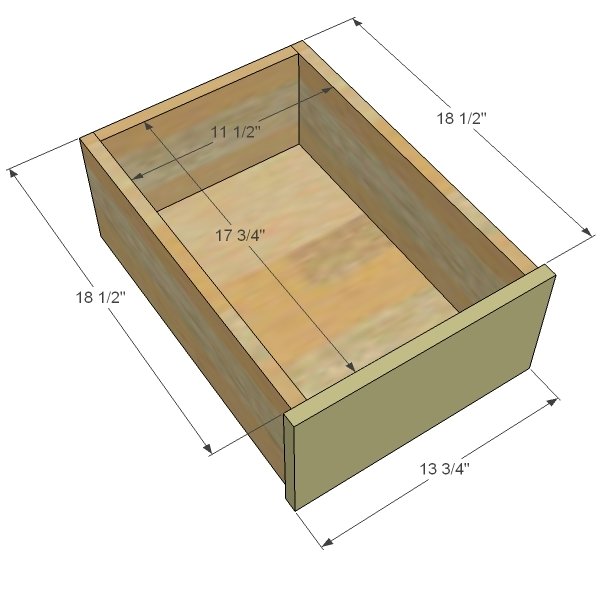
From the 3/4″ plywood strips cut at 7 1/4″, build the drawers. The bottoms of the drawers should be cut from leftover 1×20 stock from building the box, and will be inset to the sides (as in you will nail or screw through the sides into the drawer bottom). The above drawer is designed to work with standard drawer slides, but you should always measure the drawer box before constructing your drawer to be certain that you are leaving 1/2″ on either side of the drawer for drawer slide clearance (standard drawer slides require 1/2″ clearance on each side of the drawer). Also, I like NOT attach the face until the drawer is fully installed, so I can attach the face floating in the drawer box, with an equal gap around all sides.
Finishing
Remove the doors and drawers and fill and exposed holes with wood filler. If you used plywood, fill exposed plywood edges with wood filler. Sand and apply edge banding to plywood edges (for a stain) or prime and paint as desired. Replace doors and drawers and add hardware.
Finishing
Sand all surfaces, starting with a medium grit and finishing with fine. Wipe off the dust, fill any holes or gaps with wood filler, and sand smooth once dry. Apply primer if you're painting, then finish with your choice of paint or stain and seal with a durable clear topcoat. For outdoor projects, use exterior-rated primer, paint or stain, and sealer so the piece stands up to the weather.
Source (temporary): https://www.ana-white.com/woodworking-projects/grant-base-plans