Grant Secretary Top Hutch with Doors
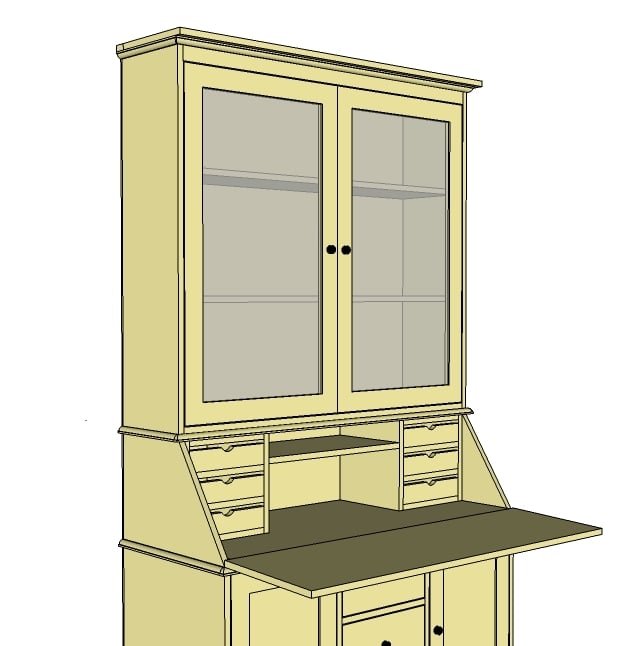
A hutch for the Grant Secretary Collection. Features two doors, three shelves, and a solid top for extra storage.
Specifications
| Project type | Hutch Plans |
|---|---|
| Room | Craftroom |
| Style | Farmhouse Furniture |
| Difficulty | Advanced |
| Estimated cost | $20 - $50 |
Dimensions
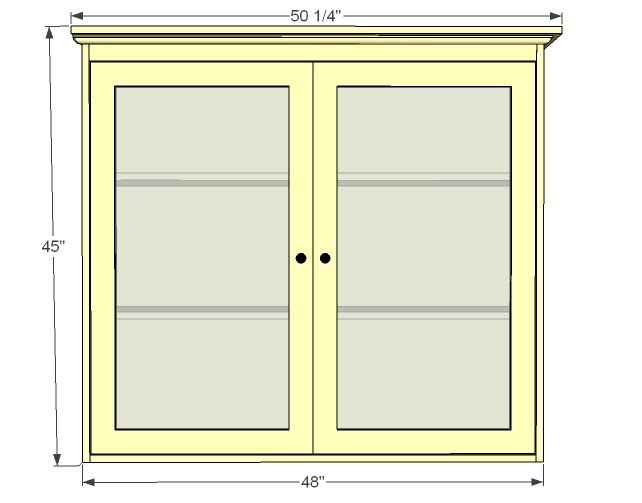
Use the size-specific shopping and cut lists below.
Shopping List
- 2 – 1×12 @ 8 feet long
- 1 – 1×10 @ 8 feet long
- 3 – 1×3 @ 8 feet long
- 1 – 1×2 @ 8 feet long
- 1/4″ plywood for the back (check your leftovers first from the base units)
- 1 – 7′ long 3/4″ moulding
- 2 sets of frameless full inset hinges
- 2 knobs
- 2 mirror catches
- 40″ x 40″ of Plexiglass, 1/8″ thick
- Mirror Clips and screws less than 3/4″ long
Cut List
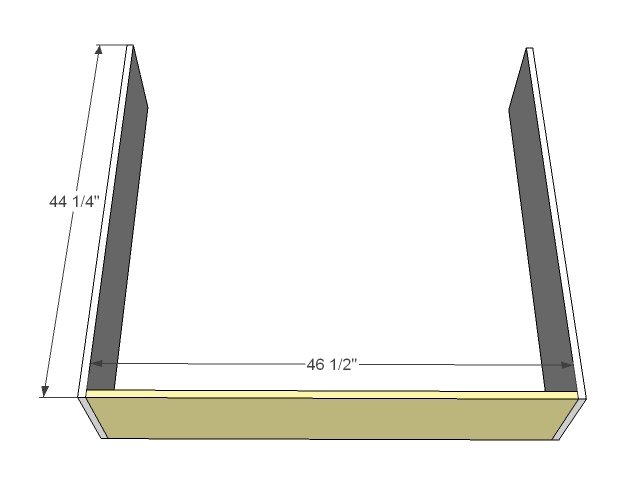
- 2 – 1×12 @ 44 1/4″ (Sides)
- 1 – 1×12 @ 46 1/2″ (Bottom)
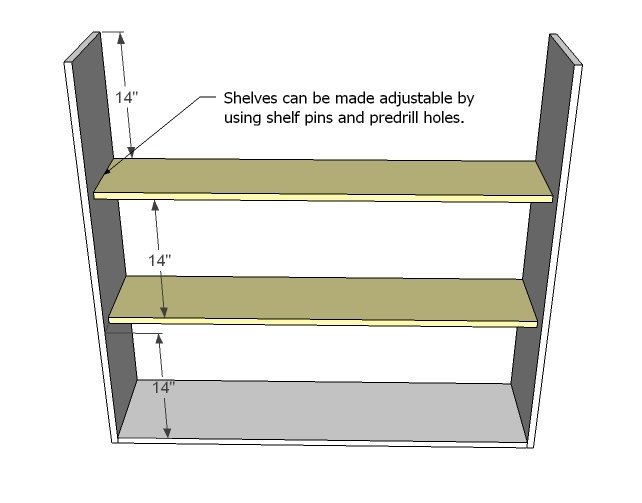
- 2 – 1×10 @ 46 1/2″ (Shelves)
- 1 – 1×12 @ 51″ (Top – cut this board first)
- 1 – 1×2 @ 51″ (Top)
- 1 – 1/4″ plywood 48″ x 45″ (Back)
- Doors, moulding shown in post
Tools
- measuring tape
- square
- pencil
- safety glasses
- hearing protection
- kreg-jig
- drill
- circular saw
- sander
- level
- countersink drill bit
Step-by-step Instructions
Build the Box
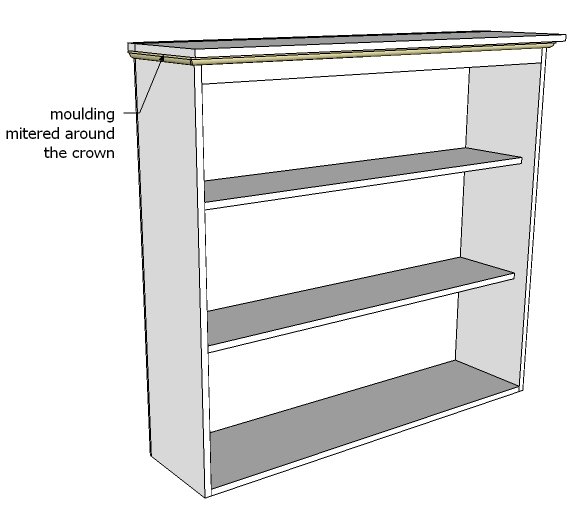
Build the box as shown above. If you can, use 1 1/4″ pocket holes or 2″ countersunk screws and glue. Adjust for square.
Shelves
If you choose fixed shelves, add them now, flush to the back. Otherwise, you can add these later with shelf pins.
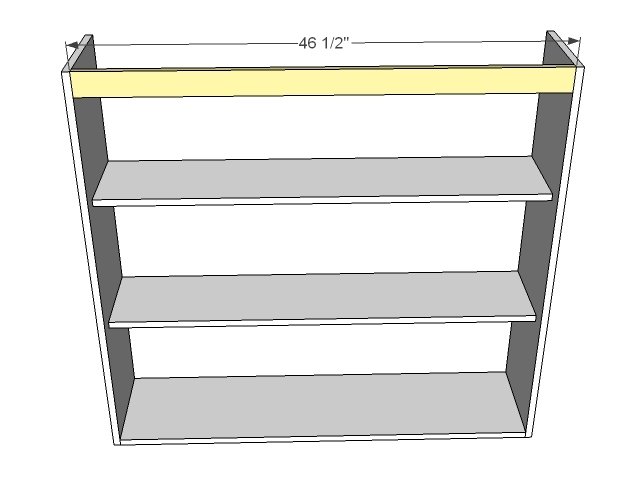
Header
Attach the header as shown above.
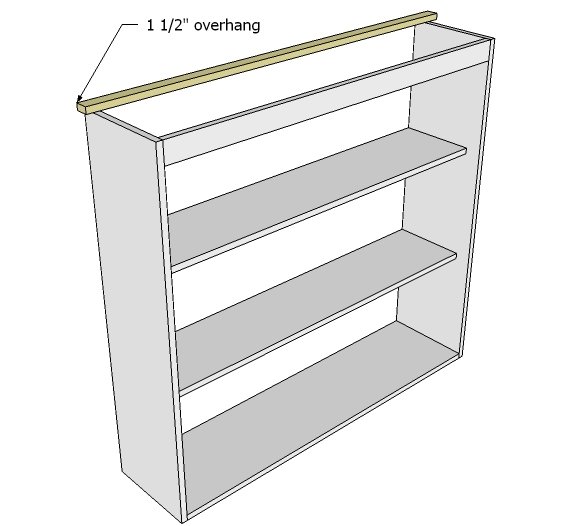
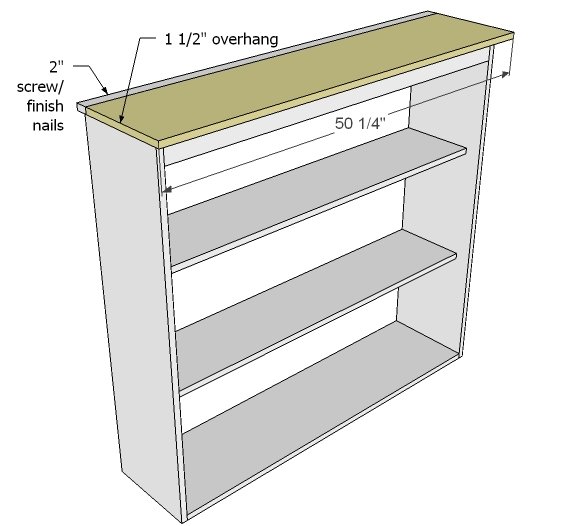
Top, Back
Mark the top back 1 1/2″ from both ends. Attach to the top with either 2″ screws or finish nails with wood glue. Adjust the shelf for square.
Step 5
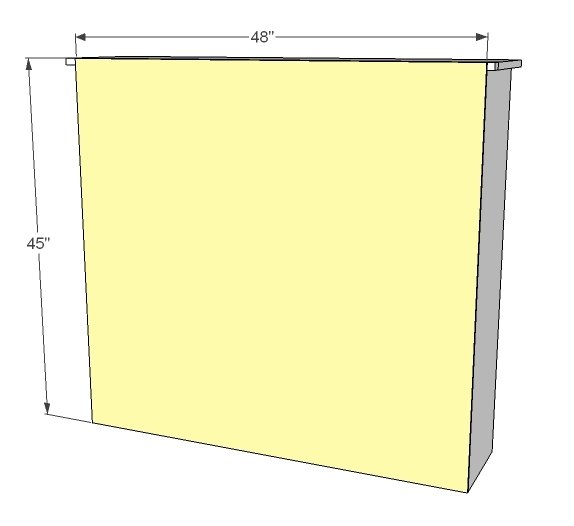
Back
Attach the back with 1 1/4″ finish nails and glue. If your shelves are fixed, attach to the shelves too.
Moulding
Glue and 3/4″ finish nails (or just glue and clamps) to attach moulding, mitered at 45 degrees around corners.
Doors
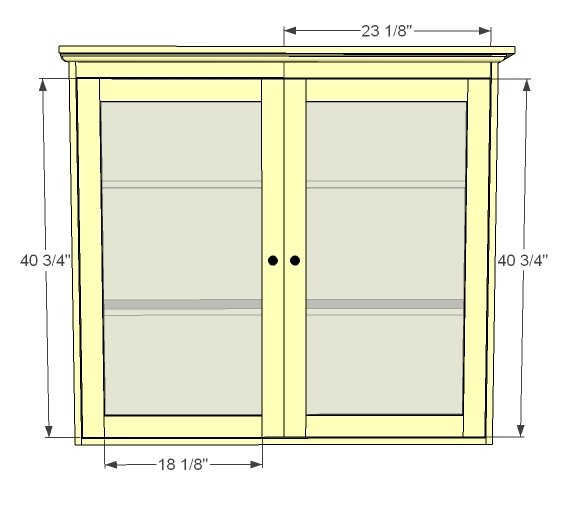
In a perfect world, your doors would measure as shown above. But it is always best to build your doors to fit the opening. I like to leave a 1/8″ gap around my doors. These doors are shown with a 1×3 frame, with 1/8″ lexan glass attached to the backside using mirror clips. Use Frameless Full Inset Euro Style Hinges to attach doors with hidden hinges. You will need to install mirror catches to keep the doors flush on the front when closed.
Step 9
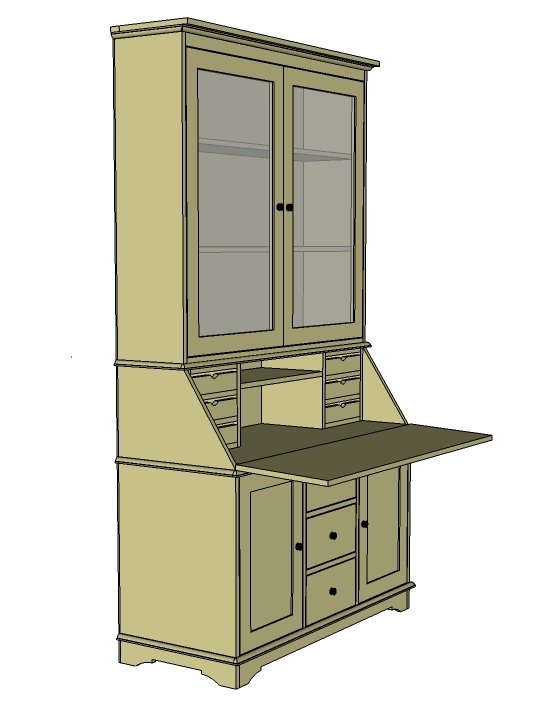
When you assemble the entire secretary, you will need to screw all of the pieces together. I recommend 1 1/4″ screws, from the top underside of the lower cabinet, into the bottom of the upper cabinets. You will also need to install a tip resistant kit to ensure the piece does not topple forward, especially when the secretary top is down with weight applied or the glass doors are open. Attach the tip resistant kit to a stud in the wall behind the secretary.
Finishing
Sand all surfaces, starting with a medium grit and finishing with fine. Wipe off the dust, fill any holes or gaps with wood filler, and sand smooth once dry. Apply primer if you're painting, then finish with your choice of paint or stain and seal with a durable clear topcoat. For outdoor projects, use exterior-rated primer, paint or stain, and sealer so the piece stands up to the weather.
Source (temporary): https://www.ana-white.com/woodworking-projects/grant-secretary-top-hutch-doors