Grasshopper Base for Build Your Own Study Desk
We are finally home!!! Four different rental cars, six different hotel rooms, over ten thousand miles of air travel.... I can tell you, down coats, snowpacked roads and the joy of plugging in your car have never been so welcoming. We had a great trip, but there's nothing like that crisp coldness that says Sweet Home Alaska. I'd give you a big wet smooch, Alaska... if I wasn't afraid of getting stuck to you.
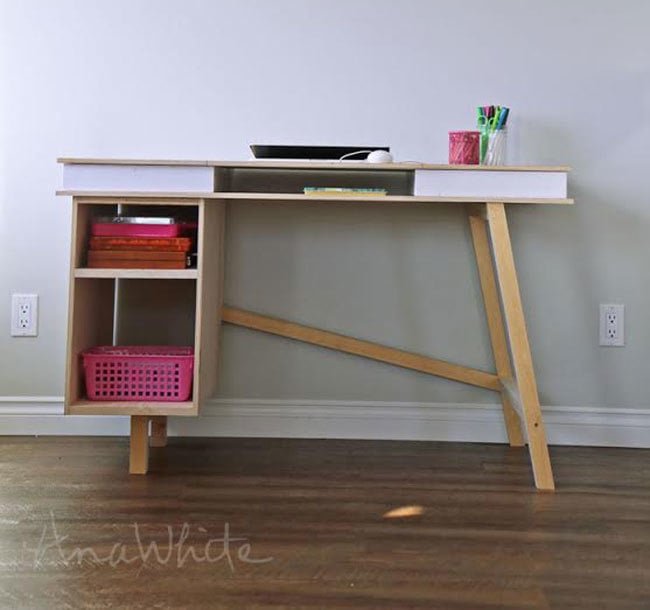
Specifications
| Project type | Desk, Desk Systems and Project Table Plans |
|---|---|
| Room | Teens |
| Style | Modern Style Furniture Plans |
| Difficulty | Intermediate |
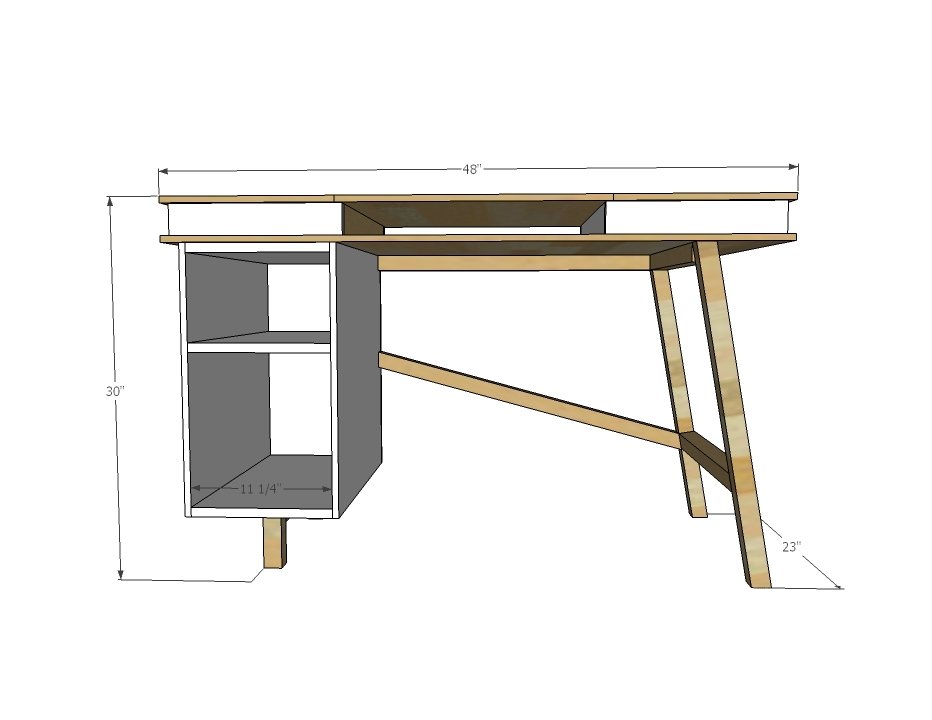
Dimensions
Use the size-specific shopping and cut lists below.
Shopping List
1 - 1/2" plywood panel 24" x 48" 1 - 1x12 @ 6 feet long 3 - 2x2 @ 8 feet long
Cut List
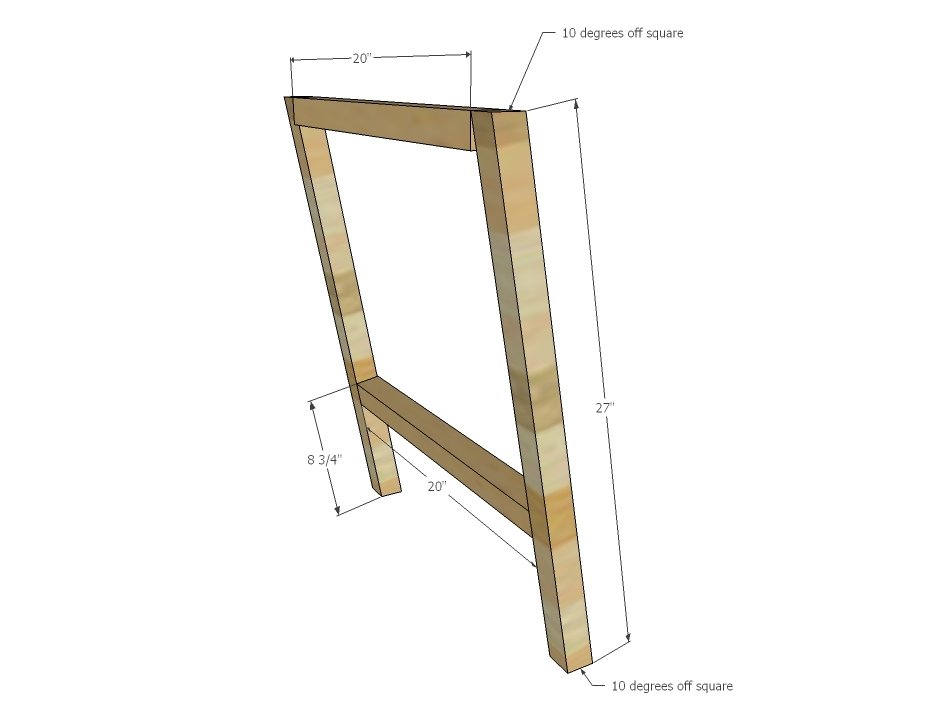
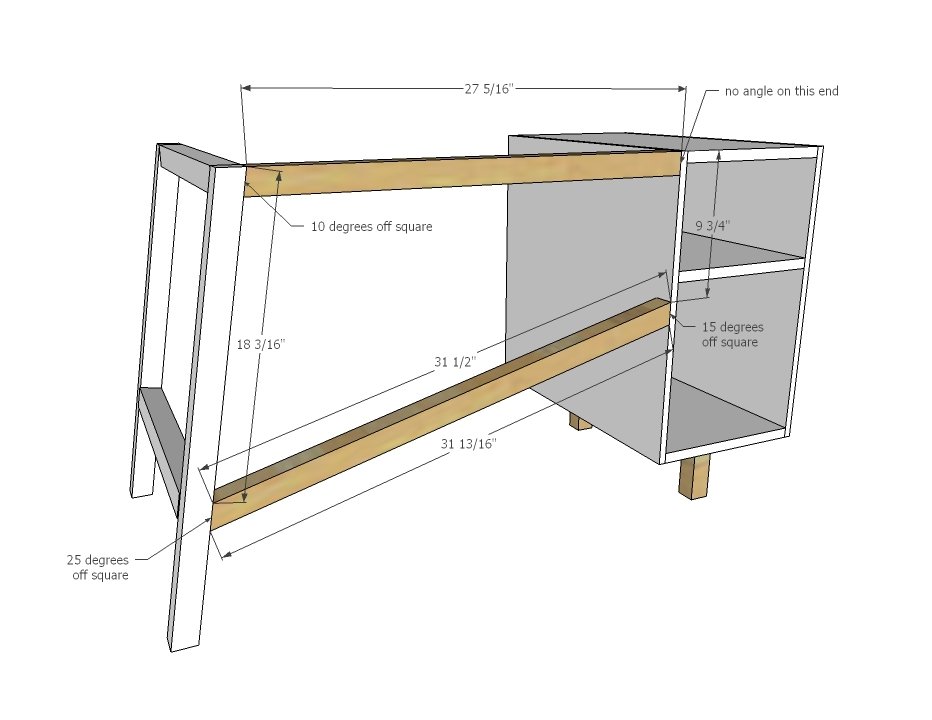
3 - 1x12 @ 23" long (shelves) 2 - 1/2" plywood @ 21-1/2" x 23" (sides of storage area) 1 - 1/4" plwyood @ 21-1/2" x 12-1/4" (back of storage area - optional) 2 - 2x2 @ 5" (legs under storage area) 1 - 2x2 @ 14-1/2" (support for legs under storage area) 2 - 2x2 @ 27" long both ends cut parallel at 10 degrees off square (legs) 2 - 2x2 @ 20" (leg supports) 1 - 2x2 @ 27 - 5/16" with one end cut at 10 degrees off square, shortest point measurement (top back support) 1 - 2x2 @ 34" long to be cut to fit in later steps (bottom cross support)
Tools
- measuring tape
- square
- pencil
- safety glasses
- hearing protection
- kreg-jig
- drill
- compound miter saw
- table saw
- nailer
- sander
Step-by-step Instructions
Step 1
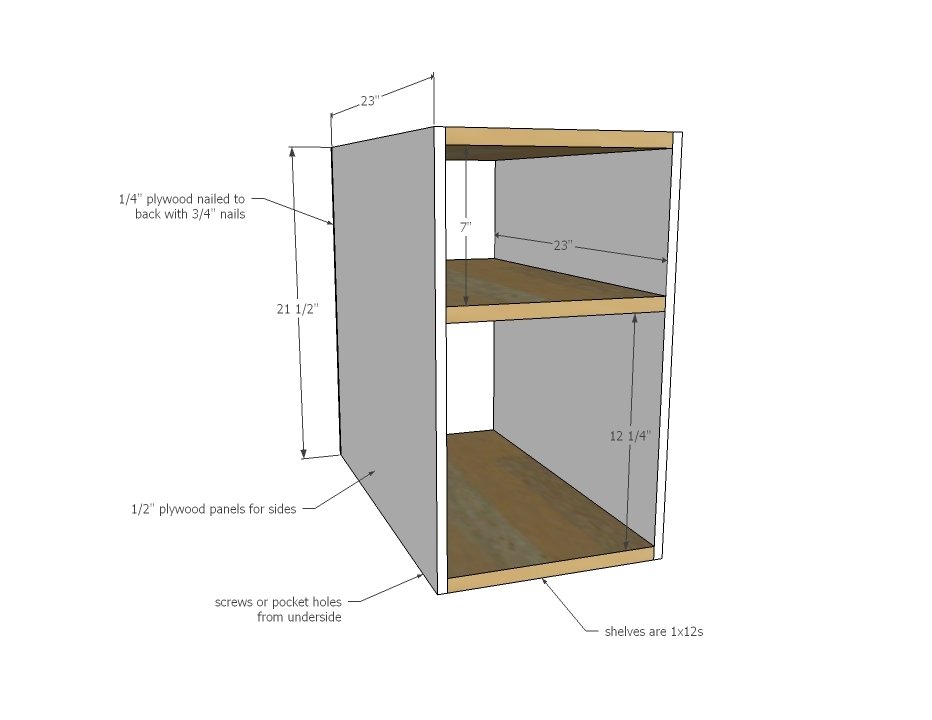
First build the storage box. You can just nail the 1/2" plywood to the shelves with 1-1/4" nails and wood glue, or use pocket holes. If using pocket holes, drill 3/4" pocket holes, but use 1" pocket hole screws. Place top pocket holes on top (will be covered by the desktop in later steps. One challenge with pocket holes is it will be hard to fit the drill in for the shelf, so you may wish to just attach top and bottom shelves from outsides, and nail the middle shelf in place. You may wish to leave the back off until after the back cross support is attached.
Step 2
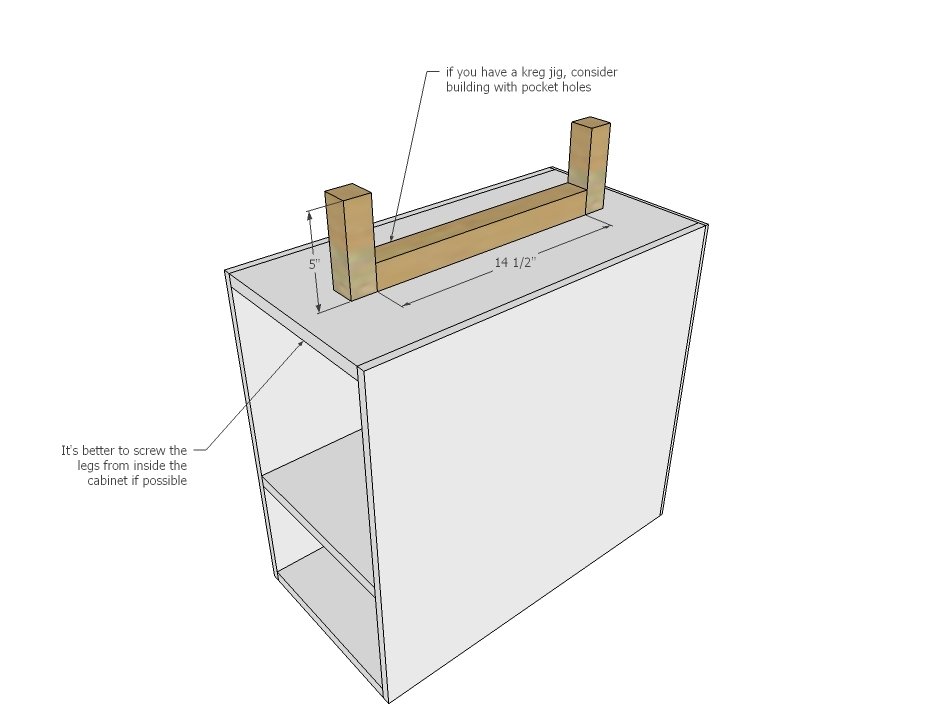
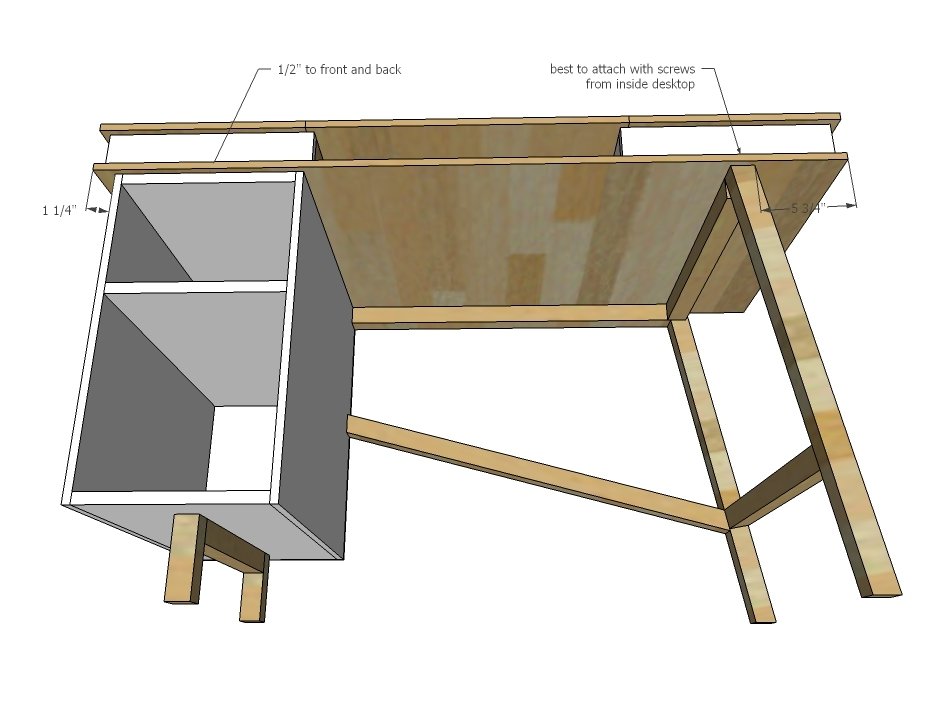
Build the leg set separately, then attach from bottom shelf with 2" long screws, centered on bottom shelf.
Step 3
Build the remaining leg set, recommend with 1-1/2" pocket holes and 2-1/2" pocket hole screws. You could also use predrilled and countersunk 2-1/2" long screws from outsides.
Step 4
Attach leg to storage area with top support. Place bottom support in position, and mark with a pencil. Cut marks and attach to shelf area and leg. You can use pocket holes for the 2x2 to 2x2 joint, but I'd recommend just a countersunk screw from the storage area to the leg end.
Step 5
Finishing
Sand all surfaces, starting with a medium grit and finishing with fine. Wipe off the dust, fill any holes or gaps with wood filler, and sand smooth once dry. Apply primer if you're painting, then finish with your choice of paint or stain and seal with a durable clear topcoat. For outdoor projects, use exterior-rated primer, paint or stain, and sealer so the piece stands up to the weather.
Source (temporary): https://www.ana-white.com/woodworking-projects/grasshopper-base-build-your-own-study-desk