Hailey Planked Headboard
Build your own planked wood headboard with just a saw and nails! This simple to build headboard is made of off the shelf lumber, and is just glued and nailed together. Our step by step plans are perfect for the beginner. We love it paired with our matching Hailey Platform Bed Frame.
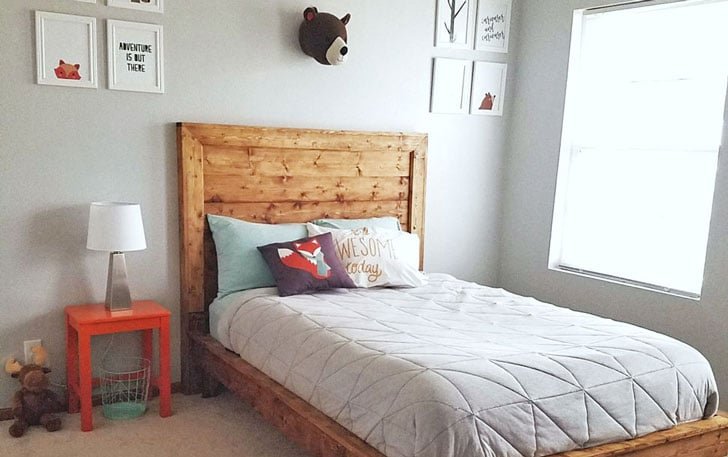
Specifications
| Project type | Headboard |
|---|---|
| Room | Bedroom |
| Style | Farmhouse Furniture |
| Difficulty | Beginner Projects |
| Estimated cost | $50 - $100 |
Dimensions
Use the size-specific shopping and cut lists below.
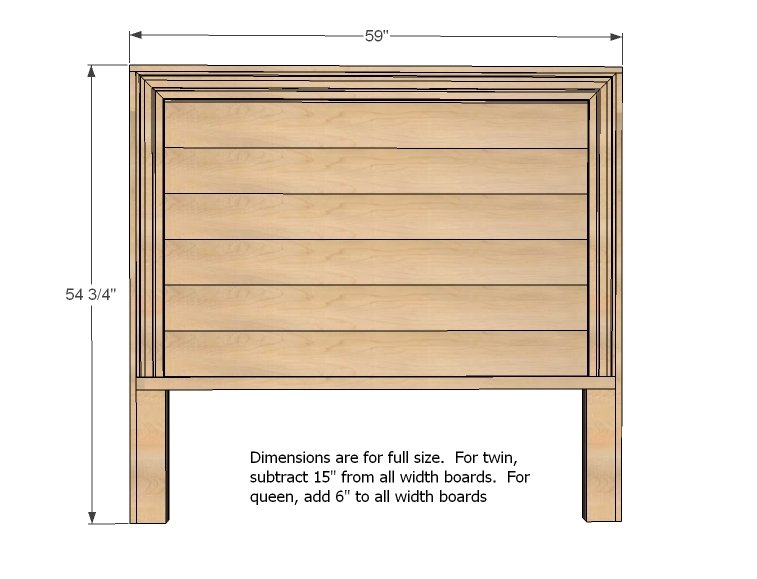
Shopping List
- 2 sticks 7 feet long, 3 ¼” wide casing or other moulding
- 3 – 1x6 @ 10 feet long
- 1 – 2x2 @ 8 feet long
- 3 – 1x3 @ 6 feet long
- 1 – 2x4 @ 4 feet long
- 2 – 1x4 @ 8 feet long
- ¾” brad nails (For nailing moulding on)
- 1 ¼” brad nails
- 2” brad nails
Cut List
- 1 – 1x4 @ 57 ½”
- 6 – 1x6 @ 57 ½”
- 2 – 1x4 @ 54”
- 1 – 2x2 @ 57 ½”
- 2 – 2x4 @ 16”
- 2 – 1x3 @ 54”
- 1 – 1x3 @ 59”
- Cut moulding to fit
Step-by-step Instructions
Step 1
Nail the panel boards to 1x4 boards on back. Nail holes will be covered by trim. Also, if you have a pocket hole jig, attach panel boards to each other down the center. If your boards are not lining up well in centers without a pocket hole jig, you can add a scrap board to back down the center. TIP: For a painted finish, consider painting planked boards first, then distressing joints before assembly. You can also run a flat bladed screw driver down joints to enhance.
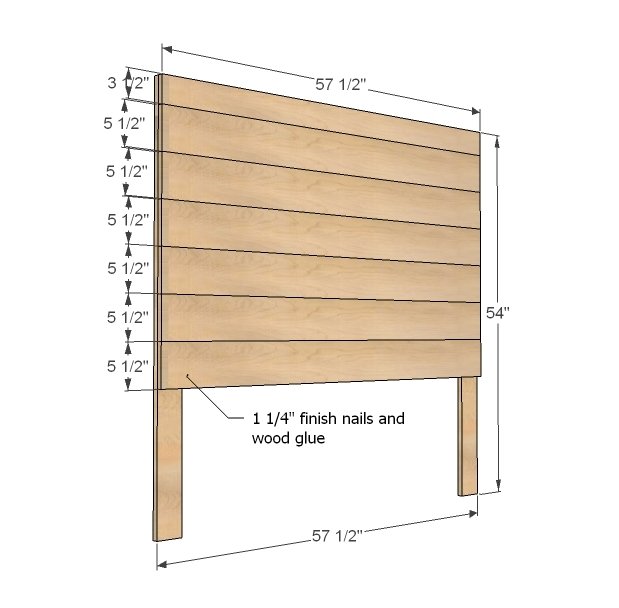
Step 2
Now add the bottom board. Nail from back for the biggest bite or you can use screws and glue. Kreg Jig users - consider attaching with 3/4" pocket holes from bottom planked board as well.
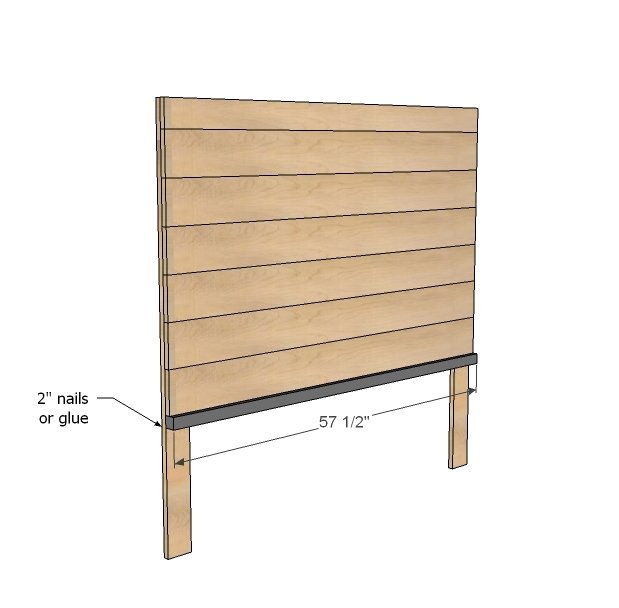
Step 3
Now we'll beef up the legs a little, giving you something to bolt a bed frame too if you are doing that. Nails or screws from back to hide.
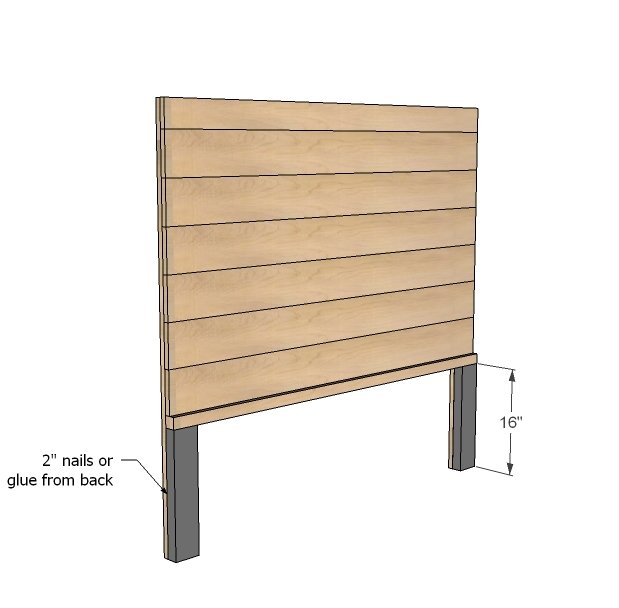
Step 4
Cut your moulding to fit, mitering corners at 45 degrees off square. Nail on with short finish nails and glue. TIP: You can just glue and clamp to hide all nail holes, but make sure you glue and let dry for a good bond.
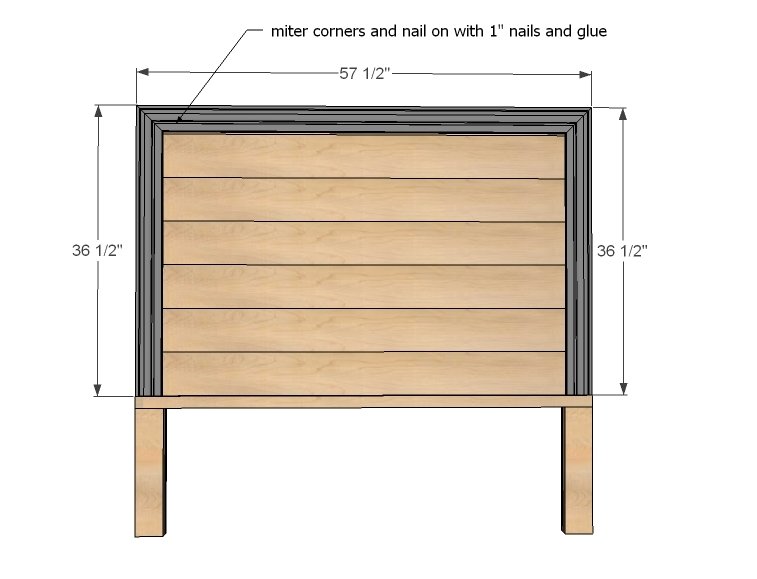
Step 5
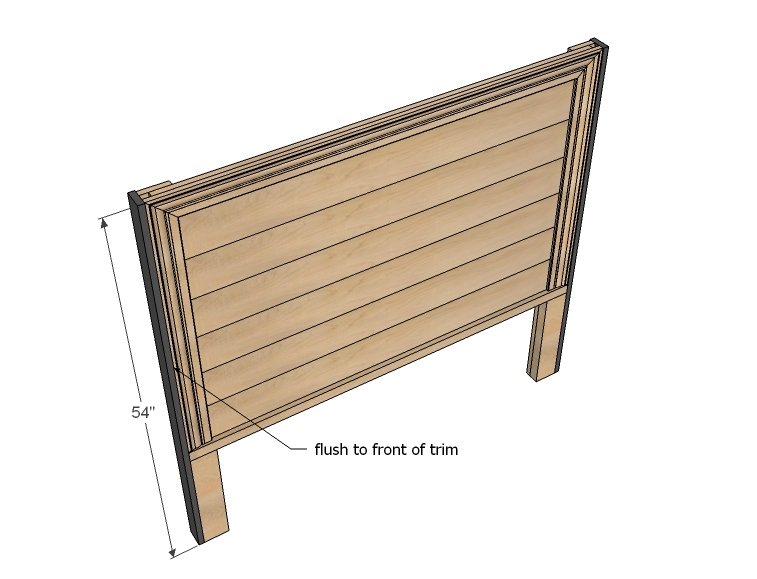
Step 6
Finally, add top, with outsides flush with legs.
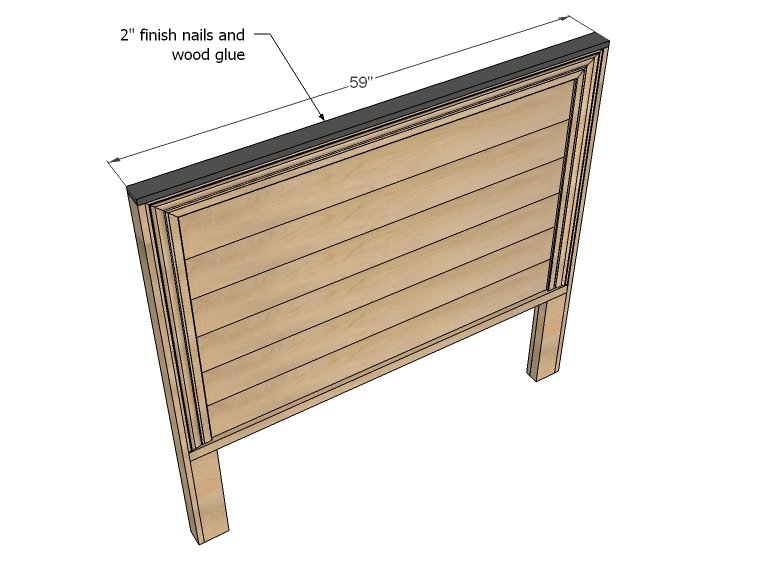
Finishing
Sand all surfaces, starting with a medium grit and finishing with fine. Wipe off the dust, fill any holes or gaps with wood filler, and sand smooth once dry. Apply primer if you're painting, then finish with your choice of paint or stain and seal with a durable clear topcoat. For outdoor projects, use exterior-rated primer, paint or stain, and sealer so the piece stands up to the weather.
Source (temporary): https://www.ana-white.com/woodworking-projects/hailey-planked-headboard