Hailey Storage Bed
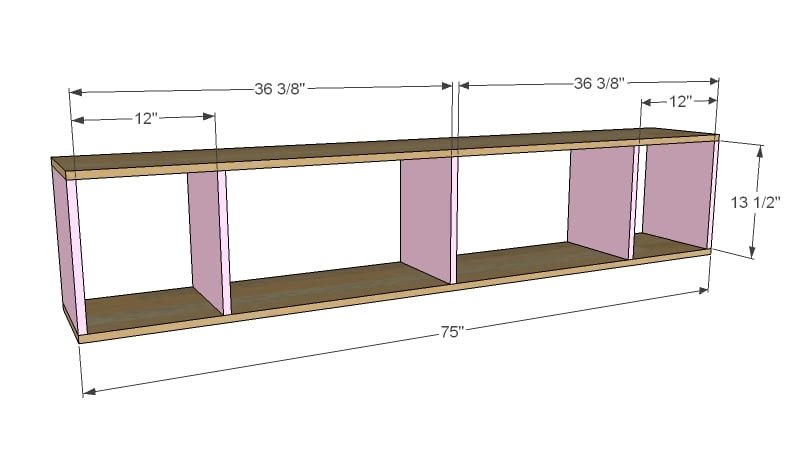
Start by building a simple box out of 1x12 boards as shown above. You can place the cubbies at any spacing, just try to keep the middle cubby in the center. I built one bench with pocket holes, one with 2 inch finish nails and glue - and either way works just fine.
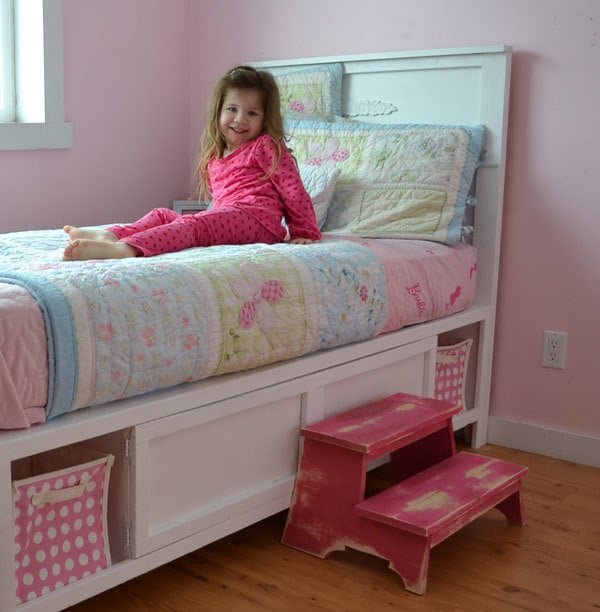
Specifications
| Project type | Twin Beds and Twin Bed Frames |
|---|---|
| Room | Bedroom |
| Style | Children's and Kid's Room Furniture and Toy Plans |
| Difficulty | Intermediate |
| Estimated cost | $100-$150 |
Dimensions
Use the size-specific shopping and cut lists below.
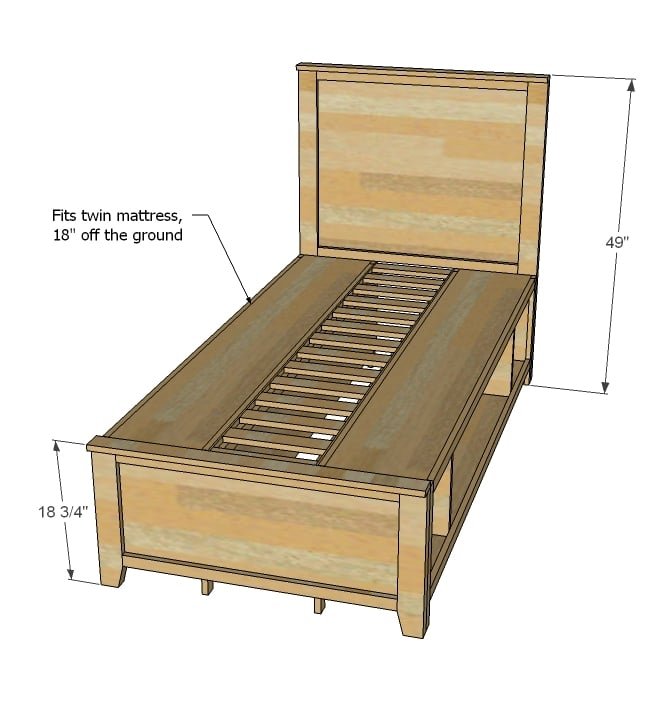
Shopping List
4 - 1x12 @ 8 feet long OR 1 sheet of 3/4" plywood or MDF ripped into 11 1/2" wide strips, 8 feet long 12 - 1x2 @ 8 feet long
1 - sheet of 1/4" plywood or hardboard
1/2 sheet of 3/4" particle board
3 - 1x3 @ 8 feet long
2 - 2x4 @ 8 feet or stud length
Cut List
4 - 1x12 @ 75" (Bench Top/Bottom) 5 - 1x12 @ 13 1/2" (Dividers)
8 - 1x2 @ 18" (Legs)
8 - 1x2 @ 72" (Top/Bottom Trim)
2 - 1/4" Plywood @ 15" x 75" (Backs)
1 - 3/4" Particle board @ 33" x 30 1/4" (Headboard Panel)
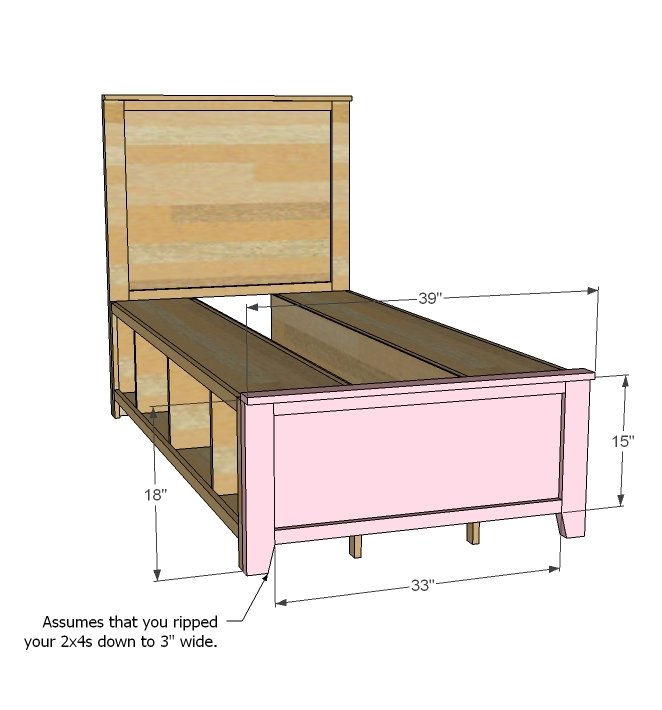
1 - 3/4" Particle Board @ 33" x 15"
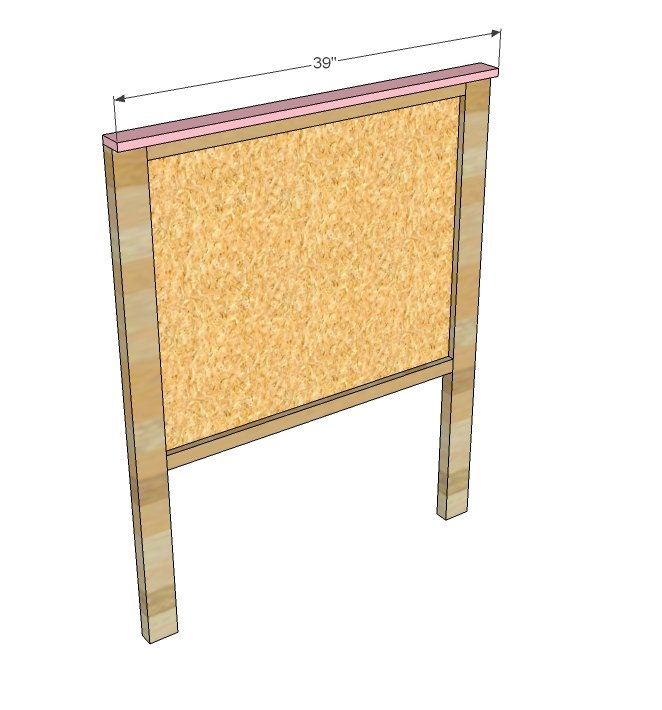
2 - 1x3 @ 39" (Headers)
4 - 1x2 @ 33" (Panel Trim)
2 - 2x4 Ripped down to 3" width @ 18" (Footboard Legs)
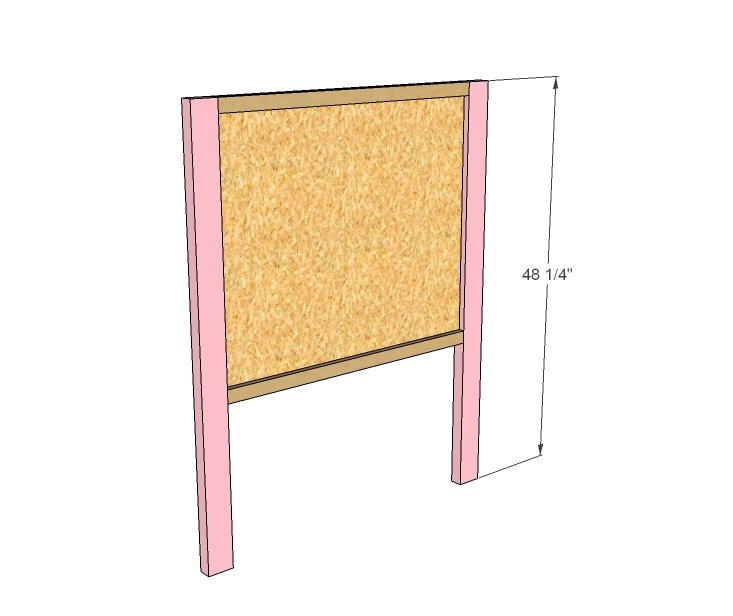
2 - 2x4 Ripped down to 3" width @ 48 1/4" (Headboard Legs)
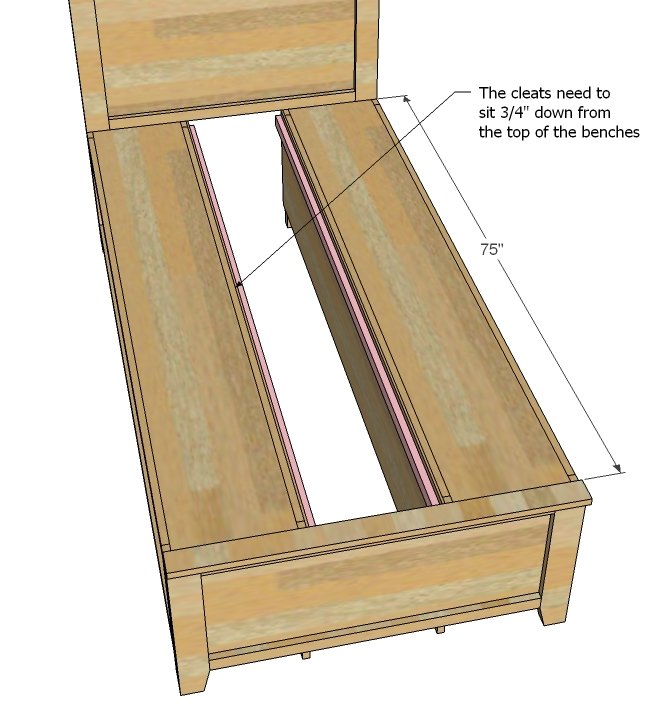
2 - 1x2 @ 75" (Cleats)
14 - 1x3 @ 13" Approx (Slats)
Tools
- measuring tape
- square
- pencil
- safety glasses
- hearing protection
- kreg-jig
- drill
- table saw
- nailer
- sander
- level
- countersink drill bit
Step-by-step Instructions
Step 1
Start by building a simple box out of 1x12 boards as shown above. You can place the cubbies at any spacing, just try to keep the middle cubby in the center. I built one bench with pocket holes, one with 2 inch finish nails and glue - and either way works just fine.
Step 2
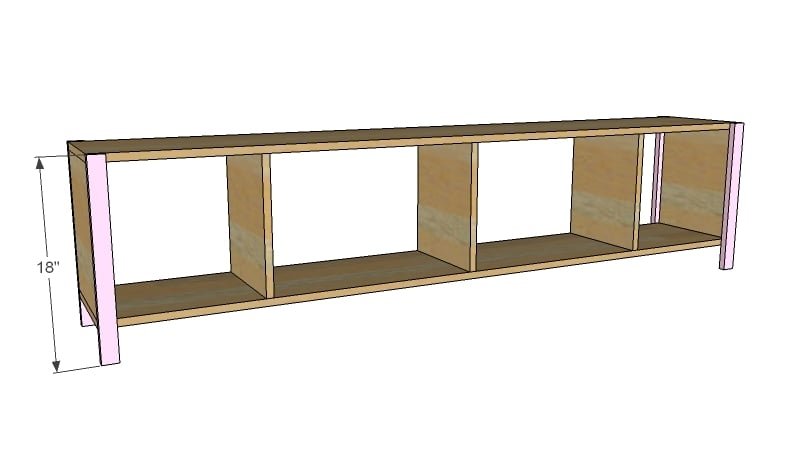
Then add the legs as shown here. Again, use either finish nails or pocket holes. Tops and outsides are flush.
Step 3
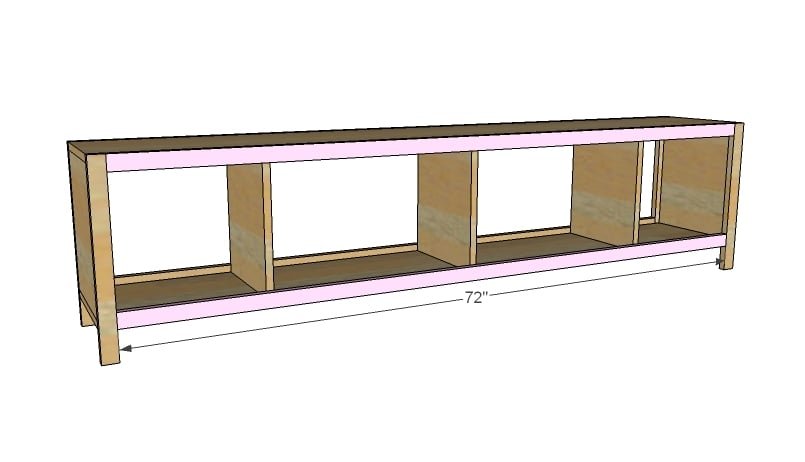
Now trim out the tops and bottoms. It's a good idea to also secure the top/bottom trim to the cubbies as well.
Step 4
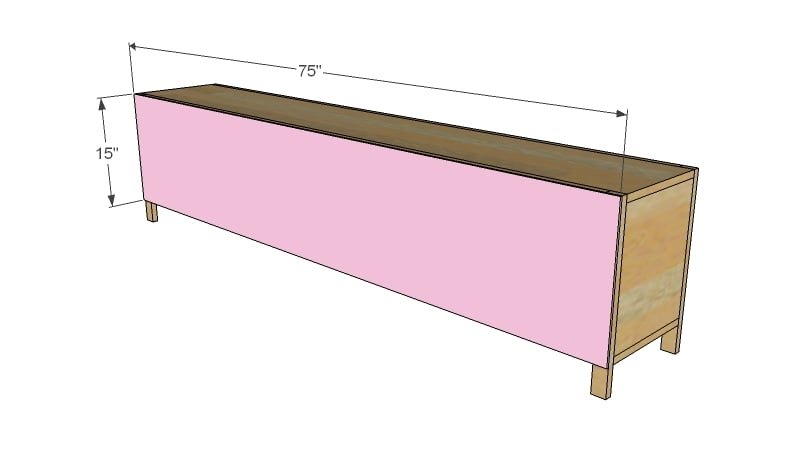
And then tack some 1/4" plywood to the backs. Use 1 1/4" finish nails and glue.
Step 5
Step 6
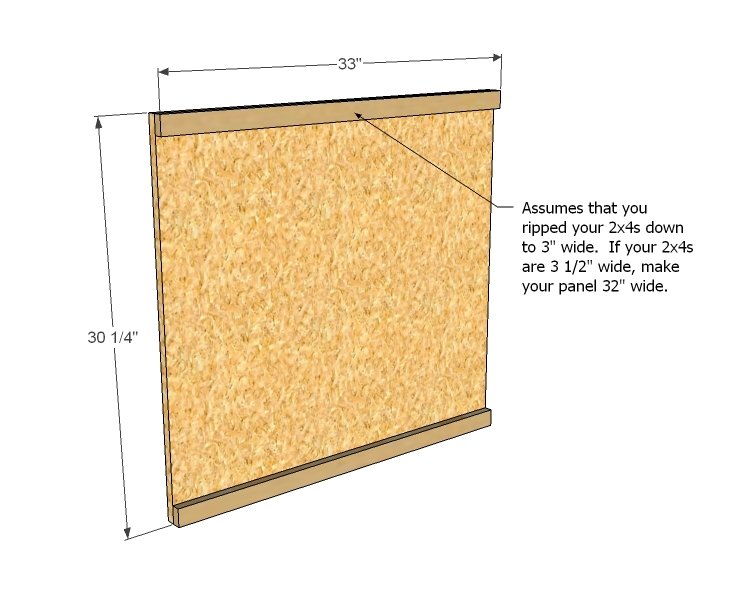
Now it's time to build the headboard. First we must make a decision. If you have a table saw, rip 1/4" off each side of your 2x4 boards so that the total width of your 2x4s are 3". Also, this will give you a nice square edge to your 2x4s. I ripped mine, and all dimensions given are for ripped 2x4s. If you do not have a tablesaw, it's really okay. You will just need to subtract an inch from the headboard/footboard panels and trim. This is noted in the diagram. Once you have decided on your leg widths, cut your particle board panel to the correct width, and the trim. Attach the trim with 1 1/4" finish nails and glue.
Step 7
Now the legs. On Grace's bed, we tapered the legs slightly. Taper the footboard first, to match the clearance under the benches. The headboard is really not necessary, as you can barely see this.
Step 8
Use 2" finish nails and glue to attach the headers to the bed. On Grace's bed, we glued a flower applique for an added touch of girly to the headboard.
Step 9
Build the footboard in the same manner as the headboard.
Step 10
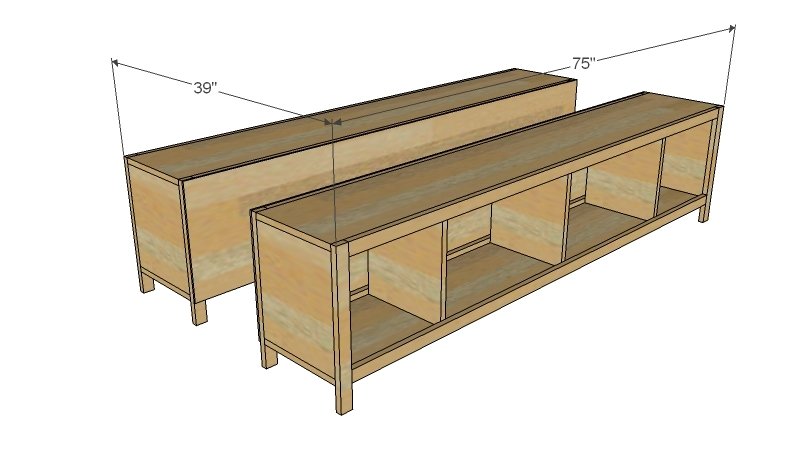
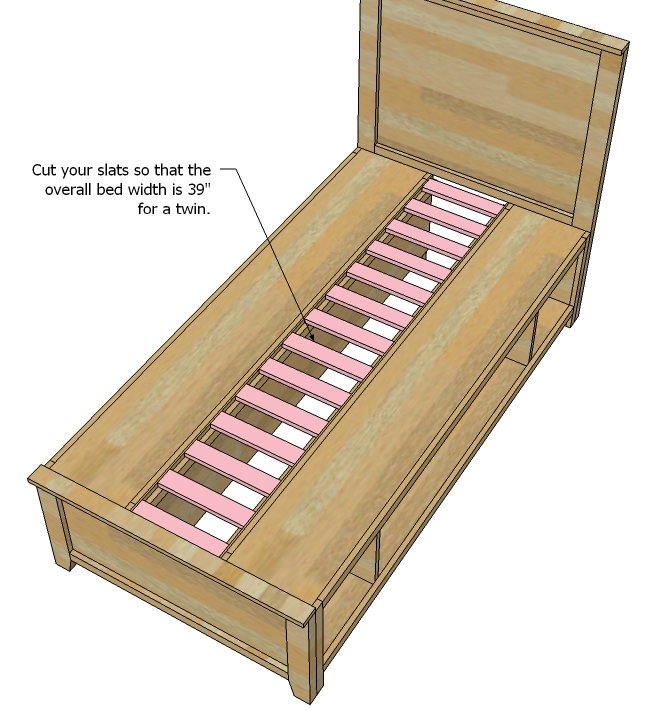
As we go to assemble the beds, we will need to do something about the gap in between. I wanted the mattress to be able to breathe, as children can have accidents. So I choose a slatted system. To begin, use 1 1/4" finish nails and glue (on the top edge of the cleat so you don't poke through) to attach cleats 3/4" down from the bench tops.
Step 11
Then I took a measurement (important, as your 1x12s could be a different width) of the space in between and cut a pile of slats and screwed them down.
Step 12
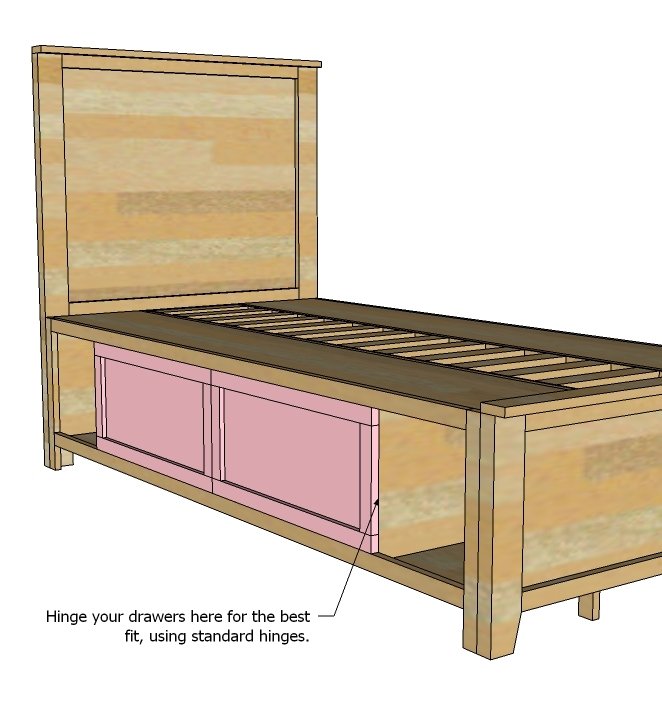
If you want to have some hidden storage (the cubbies on the ends are perfect for fabric bins, and also allow for a nightstand) it's easy to build doors. You should measure the opening, with your doors starting in the center of the bed and covering the outer dividers. I used 1x2s to build a frame, placed plywood on the back (make sure that the plywood is 3/4" short on the ends, so that the door can sit fully inset) with 3/4" finish nails and glue, and attached with hinges and clasps. After many trials and as many errors, the easiest method I found was to use hinges as shown above.
Step 13
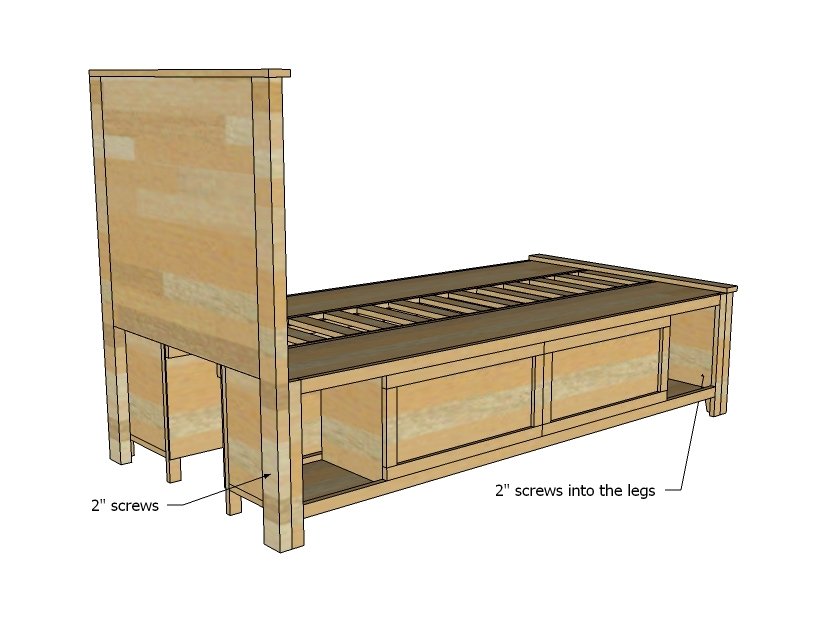
Assemble the bed by attaching the headboard and footboard to the benches with 2" screws as shown above. Grace's bed is extremely sturdy.
Finishing
Sand all surfaces, starting with a medium grit and finishing with fine. Wipe off the dust, fill any holes or gaps with wood filler, and sand smooth once dry. Apply primer if you're painting, then finish with your choice of paint or stain and seal with a durable clear topcoat. For outdoor projects, use exterior-rated primer, paint or stain, and sealer so the piece stands up to the weather.
Source (temporary): https://www.ana-white.com/woodworking-projects/hailey-storage-bed-twin