Hailey Storage Daybed with Back and Arms
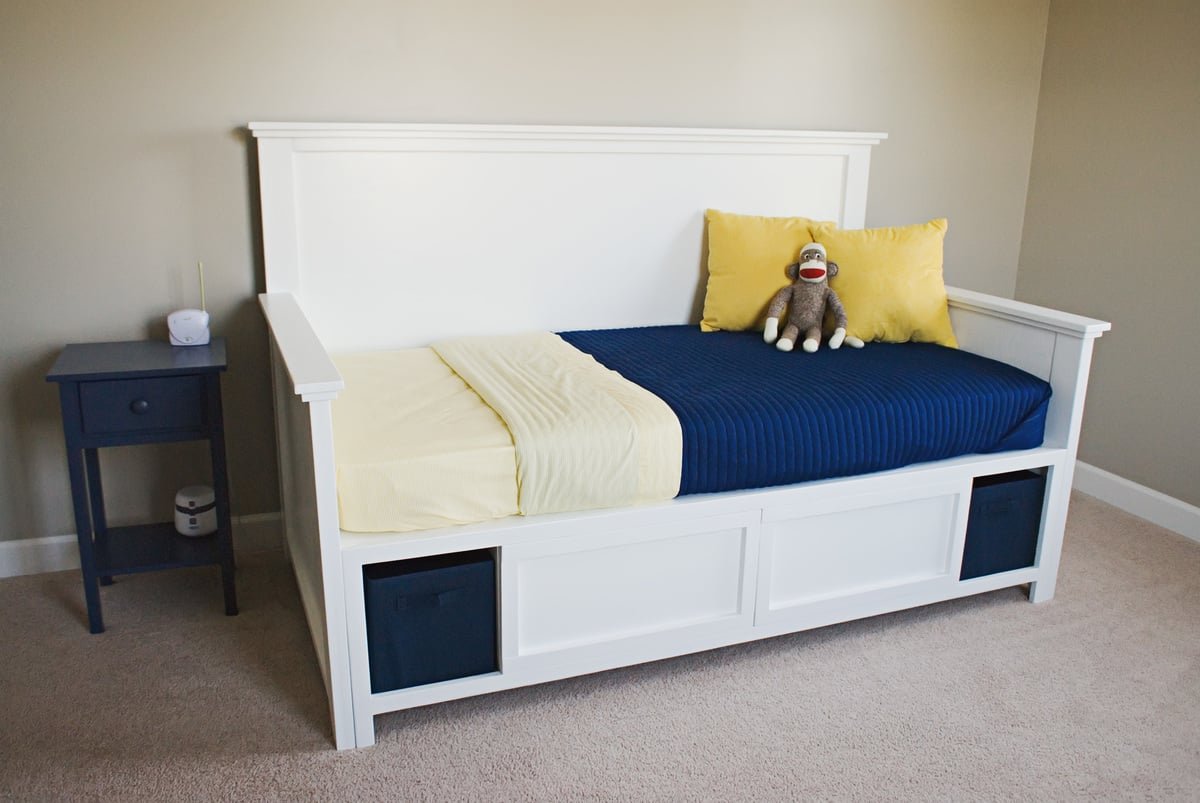
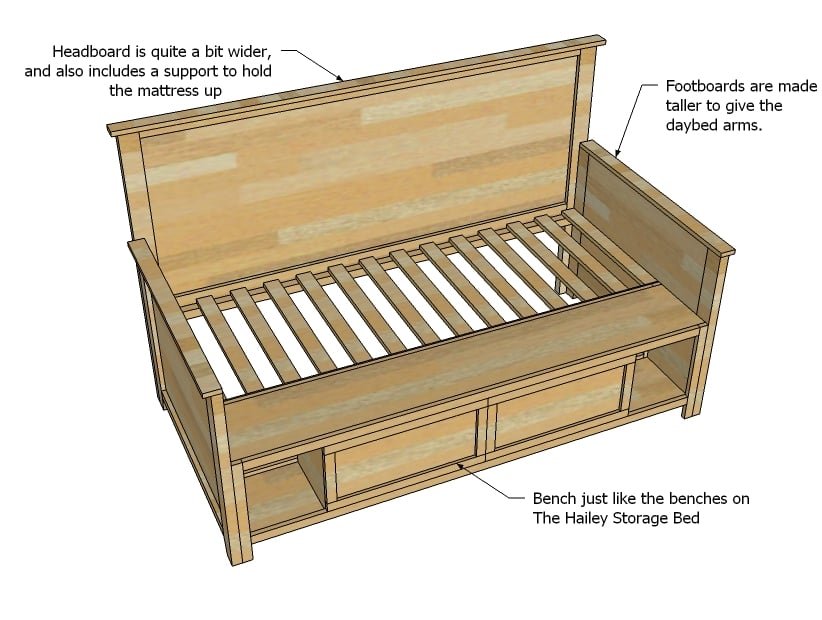
Build your own daybed with storage! You'll love. This daybed is a simple modification of the Hailey Twin Storage bed, and features front only storage compartments.
Specifications
| Project type | Daybed |
|---|---|
| Room | Bedroom |
| Style | Cottage Style Furniture Plans |
| Difficulty | Intermediate |
| Estimated cost | $150 - $200 |
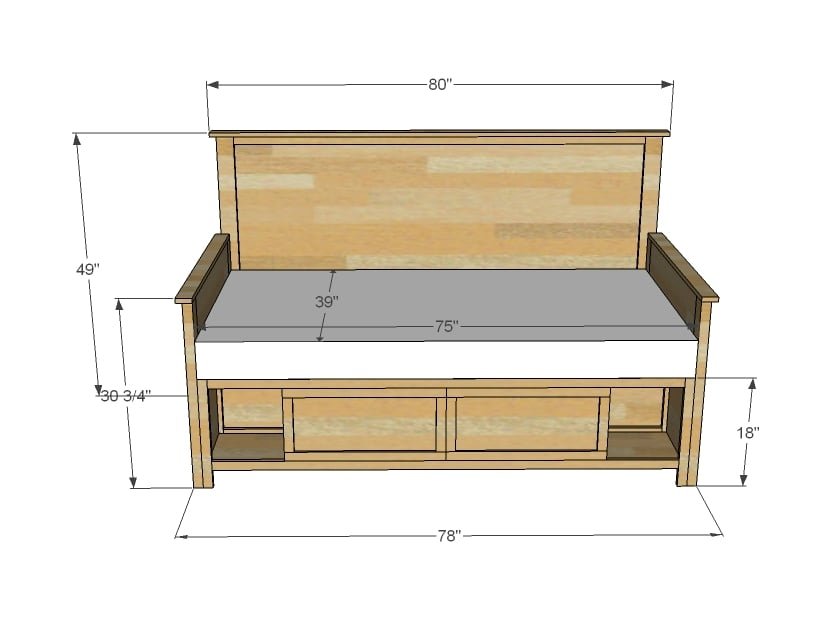
Dimensions
Use the size-specific shopping and cut lists below.
Shopping List
Materials to build one bench from the Hailey Storage Bed Plan
2 - Sheets of Particle Board, 4x8
1 - 1x4 @ 6 feet long
3 - 1x2 @ 8 feet long
3 - 2x4 @ 8 feet long
2 - 1x3 @ 8 feet long PLUS 1x3s for the slats
1 - 2x2 @ 8 feet long
Cut List
1 - 3/4" Particle Board @ 72" x 32 1/2" (Headboard Panel)
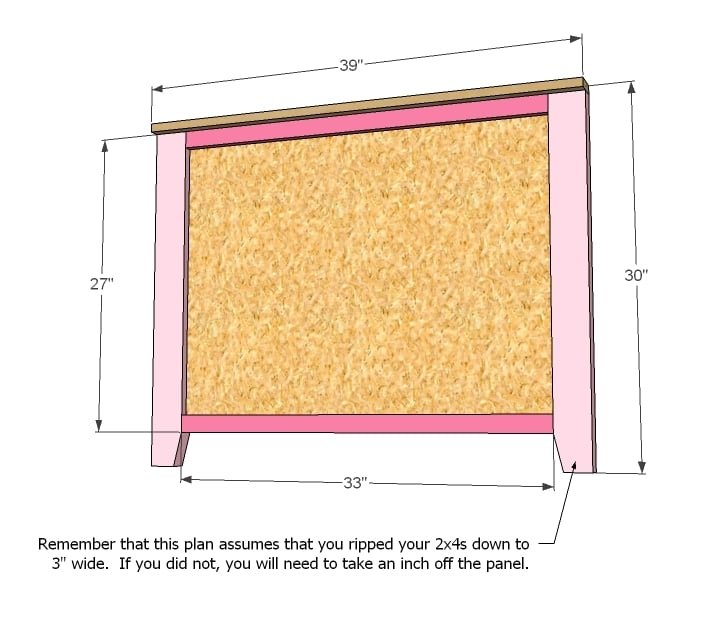
2 - 3/4" Particle Board @ 33" x 27" (Arm Panels)
1 - 1x4 @ 72" (Headboard Trim, Bottom)
1 - 1x2 @ 72" (Headboard Trim, Top)
2 - 2x4 @ 48 1/4" (See step 1 about ripping legs down to 3" wide)
1 - 1x3 @ 80" (Top of Headboard)
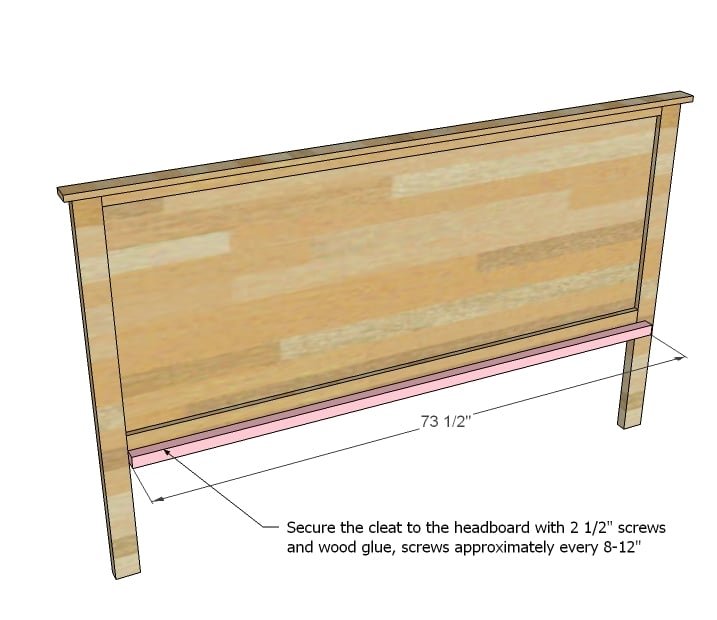
1 - 2x2 @ 75" (Cleat for Slats)
4 - 2x4 @ 30" (Arm Legs - See step 1 about ripping down to 3" wide)
4 - 1x2 @ 33" (Arm Trim)
2 - 1x3 @ 39" (Top of Arms)
Approximately 14 slats cut to length from 1x3s
Tools
- measuring tape
- square
- pencil
- safety glasses
- hearing protection
- kreg-jig
- drill
- circular saw
- table saw
- nailer
- sander
- level
- countersink drill bit
Step-by-step Instructions
Step 1
This bed heavily relies on the information provided in the Hailey Storage Bed plans, so please review that plan for detailed instructions and to build the storage bench.
Step 2
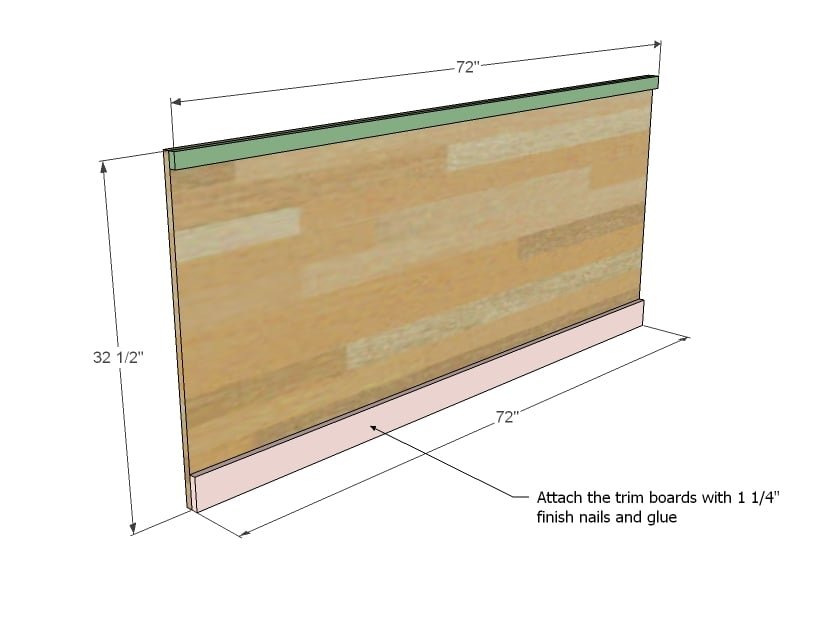
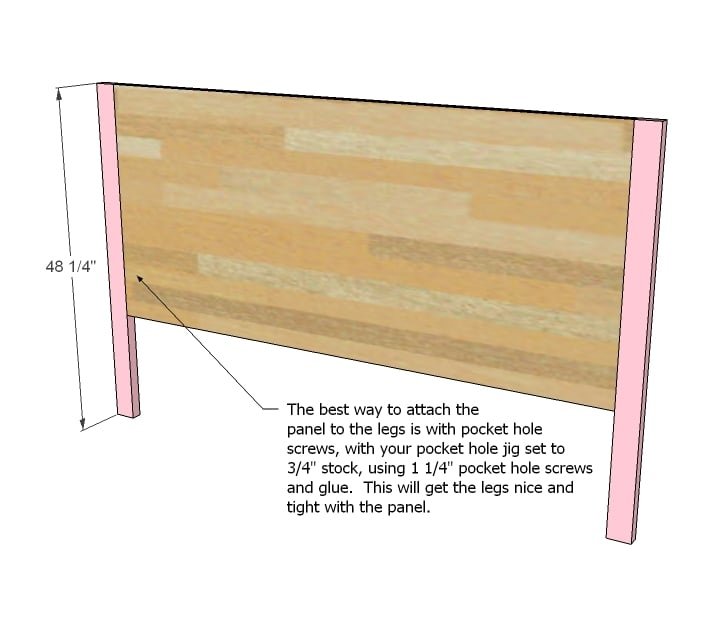
Build the headboard panel as shown above. Please review step 3 because and the Hailey Storage Bed Plan, because this bed assumes that you ripped your 2x4 legs down to 3" wide (take 1/4" off each edge to make the edges nice and square). You will need a table saw to do this right. But you can use standard with 2x4s by simply subtracting an inch to the panel and trim (so you would cut your panel 71" wide and the trim 71" wide too). Attach trim as shown above.
Step 3
The best way to get a nice tight joint here is to use pocket holes drilled every 8-12" on the back, with the jig set to 3/4" stock. Use glue and attach with 1 1/4" pocket hole screws. It's going to be tricky to drill these pocket holes, so get some help holding that plywood up:)
Step 4
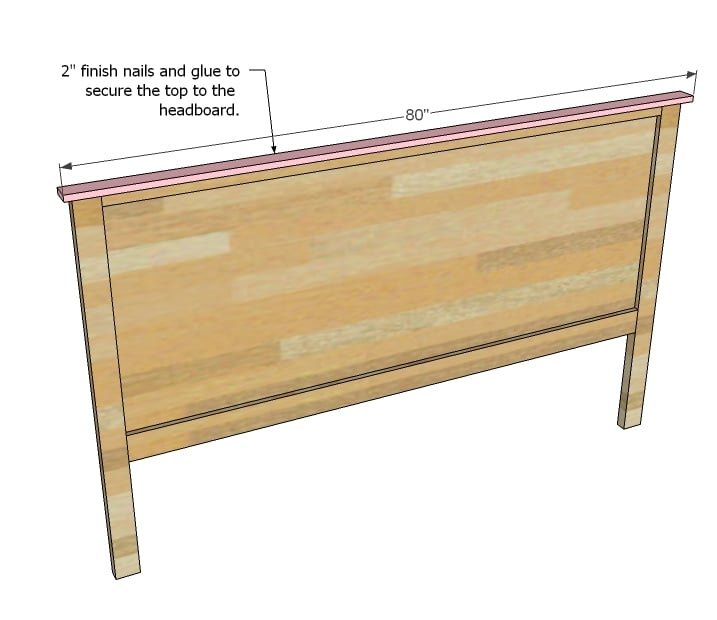
Now we simply add the top trim as shown above.
Step 5
Step 6
Now it's time to build the arms - which are basically taller footboards from the Hailey Storage Bed plans. Build exactly as the headboard - with the different dimensions. Remember that the dimensions shown above are for legs made from 2x4s that are ripped down to 3" wide. If you use off the shelf 2x4s, you will need to subtract and inch from the panel and panel trim.
Step 7
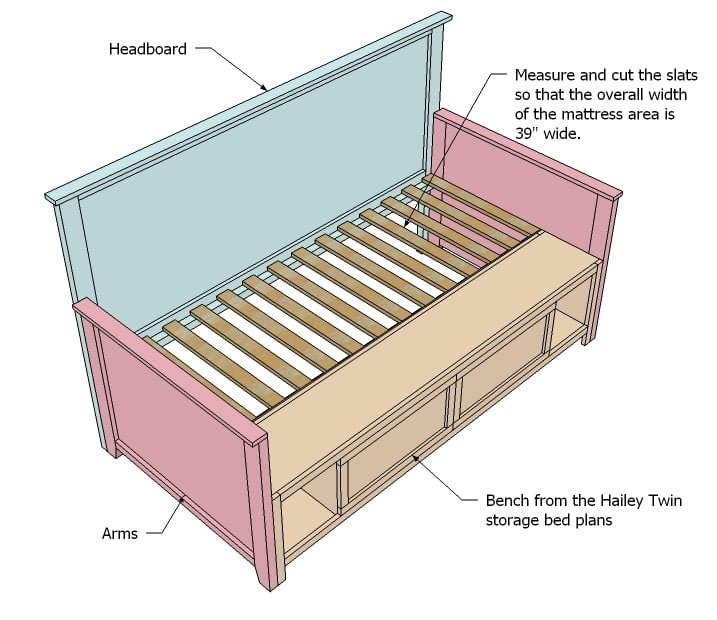
Now the exciting part, the can't wait till the hubs gets home to help me haul it into the house and assemble it! You've made the bench, you made the arms, and the headboard. Now assemble as shown above, without the slats. Start in this order: 1) attach the arms to the front bench with 2" screws from the insides of the cubbies into the legs of the arms 2) attach the headboard to the arms with 2 1/2" screws from the back into the legs of the arms 3) adjust so that the spacing for the mattress is square 4) take a measurement of the slat length and cut your slats to fit 5) screw slats down and put your mattress on top!
Finishing
Sand all surfaces, starting with a medium grit and finishing with fine. Wipe off the dust, fill any holes or gaps with wood filler, and sand smooth once dry. Apply primer if you're painting, then finish with your choice of paint or stain and seal with a durable clear topcoat. For outdoor projects, use exterior-rated primer, paint or stain, and sealer so the piece stands up to the weather.
Source (temporary): https://www.ana-white.com/woodworking-projects/hailey-storage-daybed-back-and-arms