Hailey Towers for the Storage Bed System
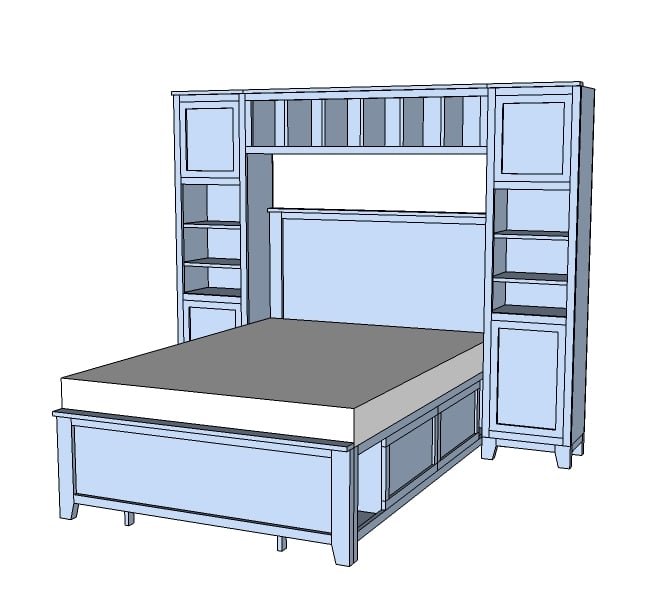
Storage Towers that can act as both a nightstand and a support system for a bed hutch. Add tons of storage to your child or teens room without taking up more space than nightstands. Works with the Hailey Storage Bedroom Collection.
Specifications
| Project type | Bookshelf and Bookcase Plans |
|---|---|
| Room | Bedroom |
| Style | Children's and Kid's Room Furniture and Toy Plans |
| Difficulty | Intermediate |
| Estimated cost | $50 - $100 |
Dimensions
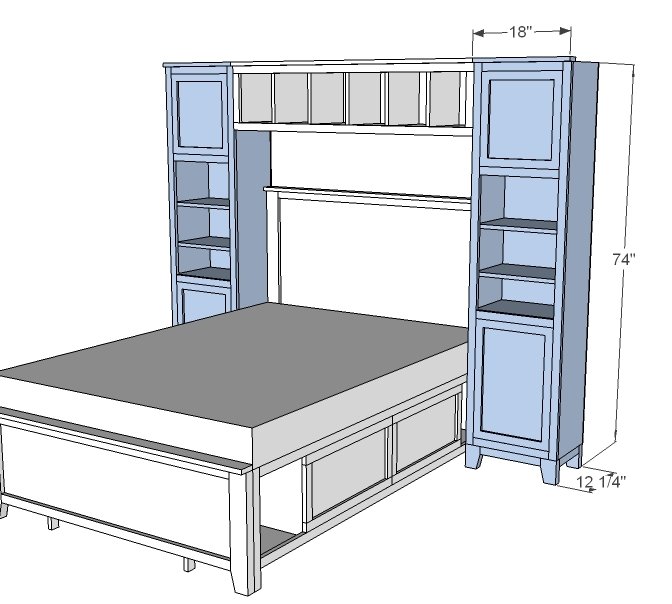
Use the size-specific shopping and cut lists below.
Shopping List
3 - 1x12 @ 8 feet long 4 - 1x2s @ 8 feet long
1 - sheet 1/4" plywood
2x4 scraps
1x3 scrap
Cut List
2 - 1x12 @ 69 1/2" (Tower Sides) 7 - 1x12 @ 16 1/2" (Shelves)
2 - 1x2 @ 69 1/2" (Face Frame Sides)
4 - 1x2 @ 15" (Shelf Trim)
1/4" Plywood @ 18" x 69 1/2" (Back)
2 - 2x2 @ 12" (For 2x4s that are ripped to 3" widths)
4 - 2x4 @ 4 1/2" (Legs, ripped down to 3" wide)
2 - 2x4 @ 9" (Base Supports - measure to fit)
1 - 1x3 @ 18" (Crown)
1 x2s and plywood for the doors
Tools
- measuring tape
- square
- pencil
- safety glasses
- hearing protection
- drill
- nailer
- sander
- level
- countersink drill bit
Step-by-step Instructions
Step 1
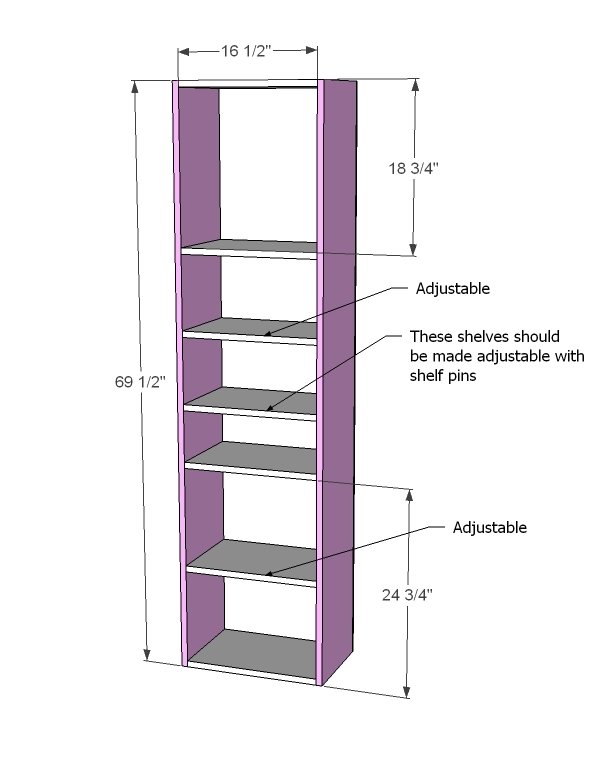
Like most storage, we start out by building a box. Pretty simple. Because this one is fully face framed with a plywood back, you can use your nailer to build the box. Just make sure that you adjust everything for square, and you use glue. Also, some of the shelves should be fixed, and some should be adjustable. My favorite means of making adjustable shelves is with shelf pins.
Step 2
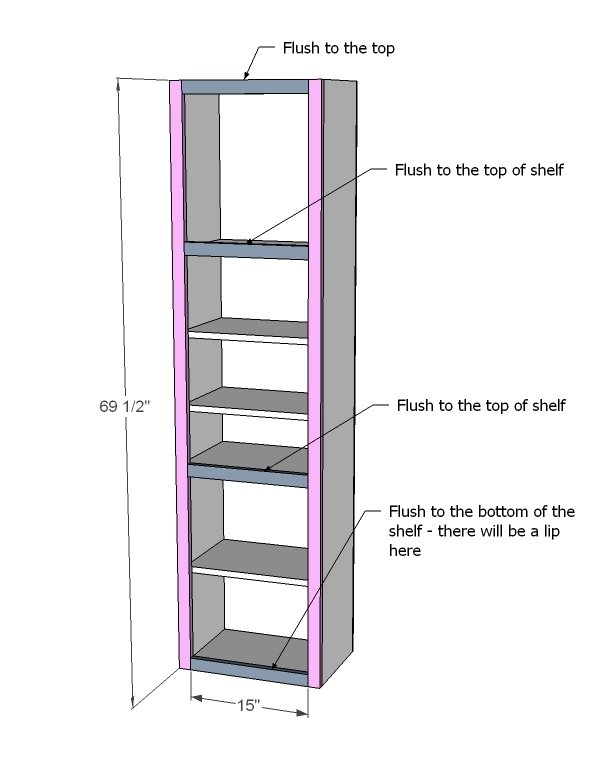
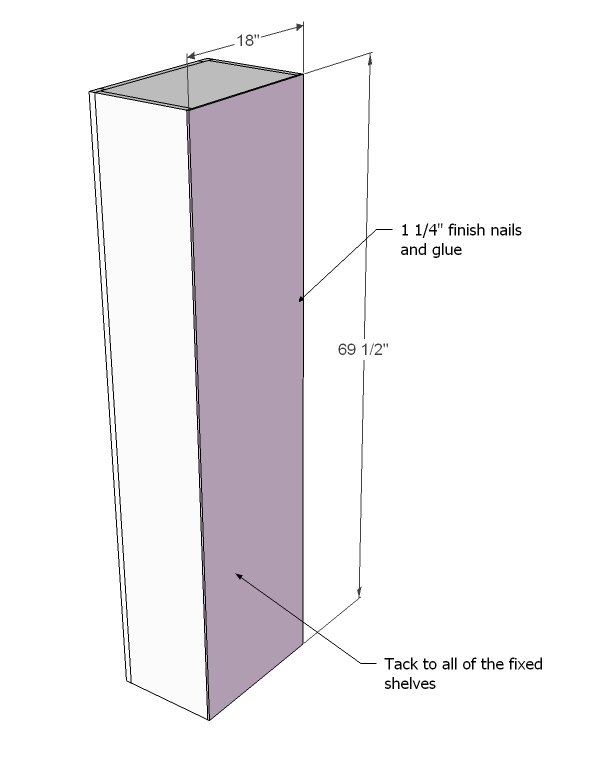
Now it's time for that face frame. Start by adding the longer side trim, using 1 1/4" finish nails and glue. Nail to the shelves that are fixed for added support.
Step 3
Attach the 1/4" plywood to the back as shown here. Use glue and attach to all fixed shelves.
Step 4
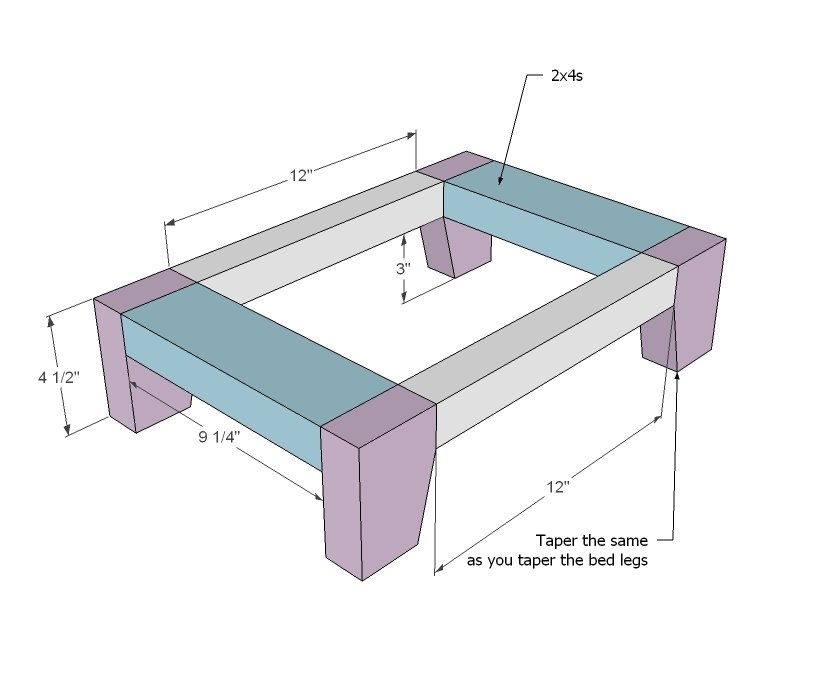
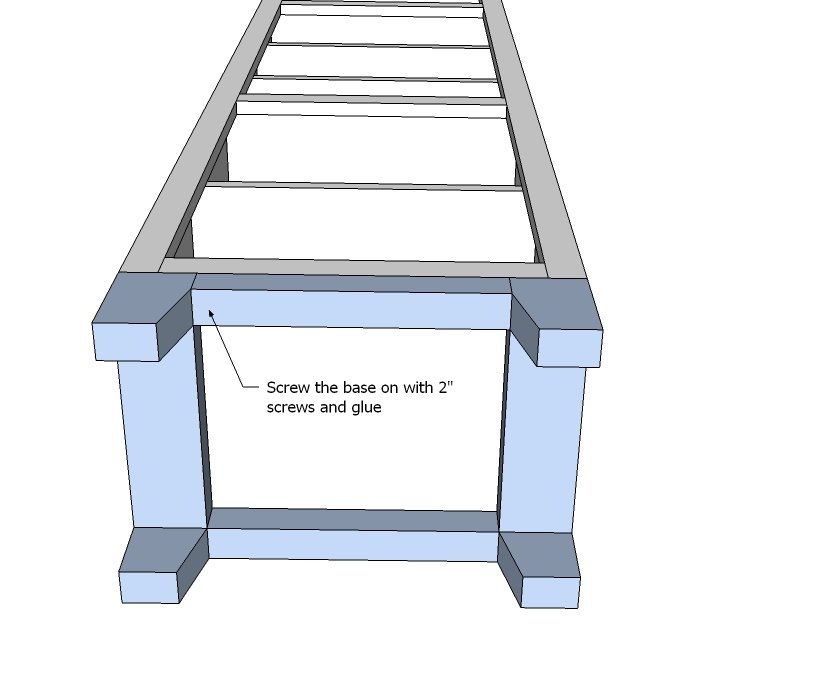
Build the base as shown above. The base above is shown with 2x4s that are ripped down to 3" widths - so if you don't rip yours down, the 2x2s will need to be 1" shorter. Optimally, you would want to use pocket hole screws to build this base. But if you do not have pocket hole screws, simply screw the 2x4 pieces together as shown above, ignoring the joint to the 2x2s. Then attach the pieces to the base in step 5.
Step 5
Step 6
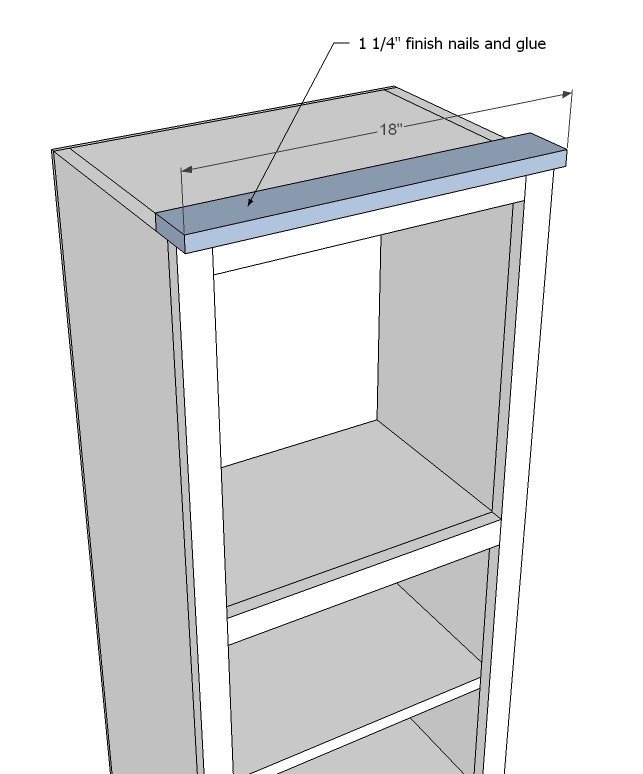
And a little crown to match the bed.
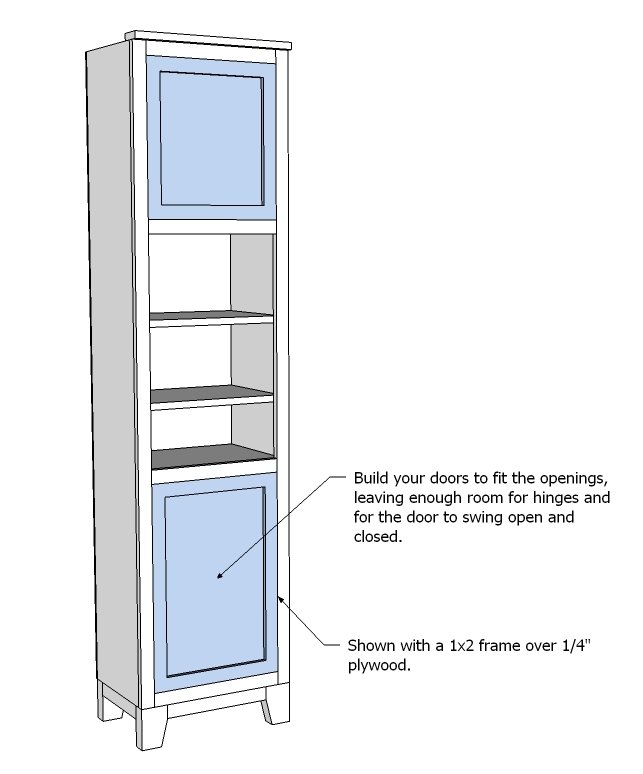
Step 7
You should always build your doors to fit the openings. I like to leave a 1/8" gap around the doors. If you are worried about making inset doors, you can also build overlay doors (easier to get right than inset doors). The main things with doors is to use very straight boards, plywood that is not warped, and to measure and fit just right.
Finishing
Sand all surfaces, starting with a medium grit and finishing with fine. Wipe off the dust, fill any holes or gaps with wood filler, and sand smooth once dry. Apply primer if you're painting, then finish with your choice of paint or stain and seal with a durable clear topcoat. For outdoor projects, use exterior-rated primer, paint or stain, and sealer so the piece stands up to the weather.
Source (temporary): https://www.ana-white.com/woodworking-projects/hailey-towers-storage-bed-system