Hanging Outdoor Bed
Simple hanging beds designed for outdoor... or indoor use. Sturdy and strong, made from 2x4s. Photos from Marion at The Bumper Crop.
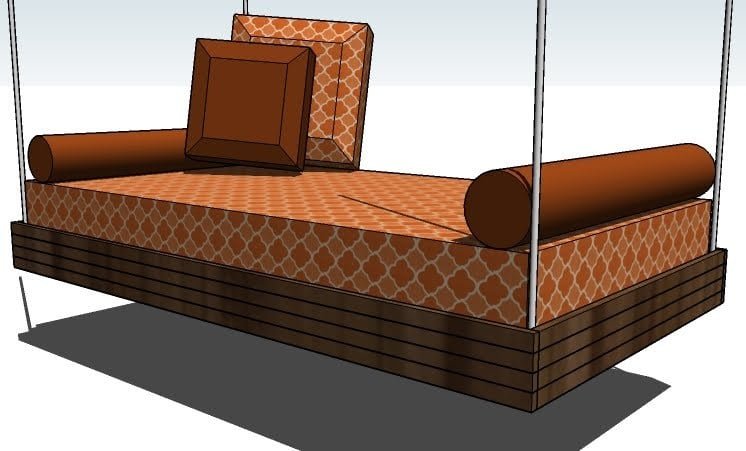
Specifications
| Project type | Beds and Bed Frames |
|---|---|
| Room | Bedroom |
| Style | Cottage Style Furniture Plans |
| Difficulty | Beginner Projects |
| Estimated cost | $50 - $100 |
Shopping List
8 Eyebolts (4 for the bed and 4 for the ceiling) Approximately 24′ of chain (for a standard 8′ ceiling) 3 – 2×6 boards (8′ or stud length) 2 - 2×4 boards (8′ or stud length) 12 – 1×2 Furring Strips, 8′ Length 6 – 1×3 Furring Strips, 8′ Length 2 1/2″ Screws* 1 1/4″ Nails* Wood Glue Finishing Supplies Twin Mattress *Choose exterior fasteners for exterior applications
Cut List
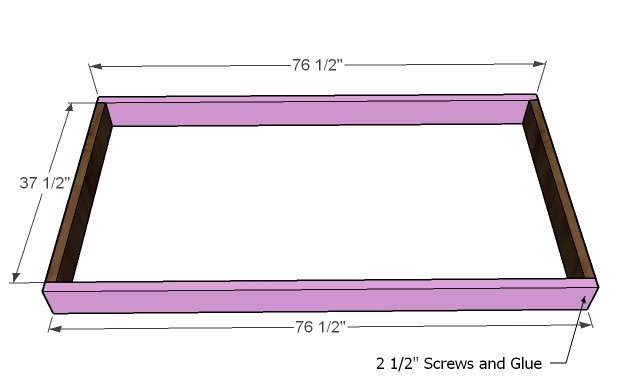
2 – 2×6 @ 76 1/2″ (Support Frame Sides) 2 – 2×6 @ 37 1/2″ (Support Frame Ends) 2 – 2×4 @ 73 1/2″ (Cleat Supports) 12 – 1×3@ 37 1/2″ (Slats) 8 – 1×2 @ 40 1/2″ (End Trim) 8 – 1×2 @ 78″ (Side Trim)
Tools
- measuring tape
- square
- pencil
- safety glasses
- hearing protection
- drill
- circular saw
- nailer
- sander
Step-by-step Instructions
SUPPORT FRAME
Use 2 1/2″ screws and glue to build your support frame. I would use 3 screws per corner. Check for square.
CLEATS FOR SLATS
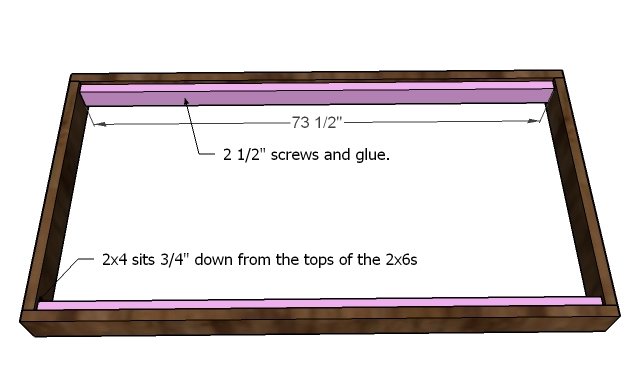
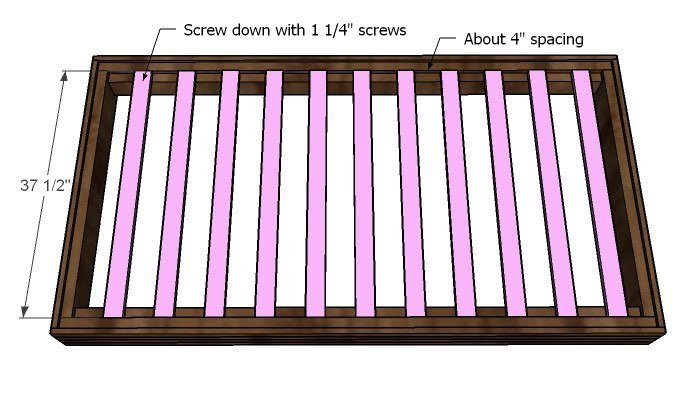
Attach your cleats 3/4″ from the top edge of the 2x6s with the 2 1/2″ screws and glue. By doubling up the 2×6 and the 2×4, we’ve created a super strong support system for the slats. Also use 2 1/2″ screws from the outside of the frame support ends into the end edges of the cleats.
END TRIM
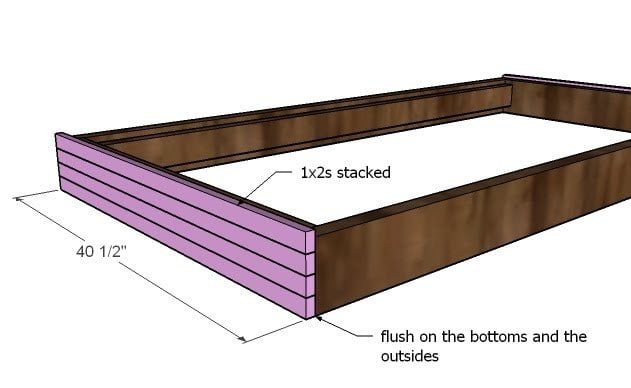
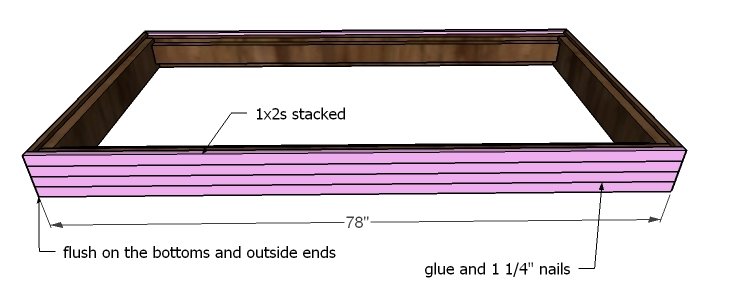
The frame is plenty strong enough without this step, but for just a couple of dollars, you can dress up the outsides of your lounger bed. You can use nails and glue to fasten in place as nails are easier to hide. You can also use a more expensive wood here (and keep the stud grade frame) to make the lounger bed even more refined looking. Bottom and end edges are flush, top will create a lip for you bed to keep it from sliding off the platform.
SIDE TRIM
Add your side trim just like you did your end trim.
Step 5
HANGING
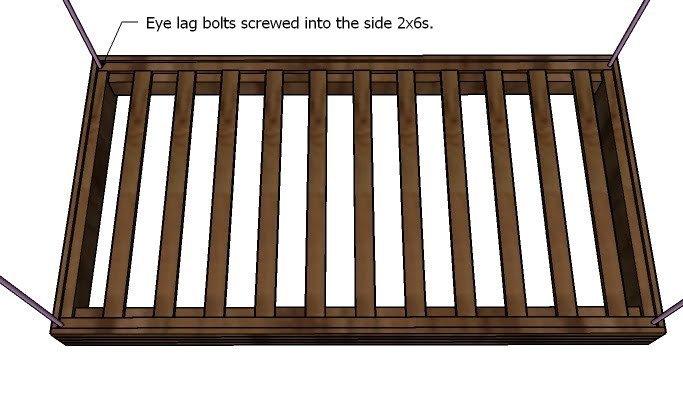
Predrill and install the eye bolts in the corners as shown above. It is very important that the eye bolts are attached to the longer 2×6, as the weight of the bed will be transferred from the slats to to the cleats to the side 2x6s and then to the eye bolts.
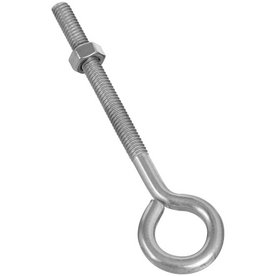
I like this eye bolt from Lowes.
Rest the bed on sawhorses or a table under where you want to hang it. You will also need to purchase eye bolts and attach the eye bolts to rafters in the ceiling and hang the bed with a chain. from all four corners. The type of bolt you should use will vary depending on your rafters.
Finishing
Sand all surfaces, starting with a medium grit and finishing with fine. Wipe off the dust, fill any holes or gaps with wood filler, and sand smooth once dry. Apply primer if you're painting, then finish with your choice of paint or stain and seal with a durable clear topcoat. For outdoor projects, use exterior-rated primer, paint or stain, and sealer so the piece stands up to the weather.
Source (temporary): https://www.ana-white.com/woodworking-projects/hanging-outdoor-bed