Hanging Wood Wall Bins
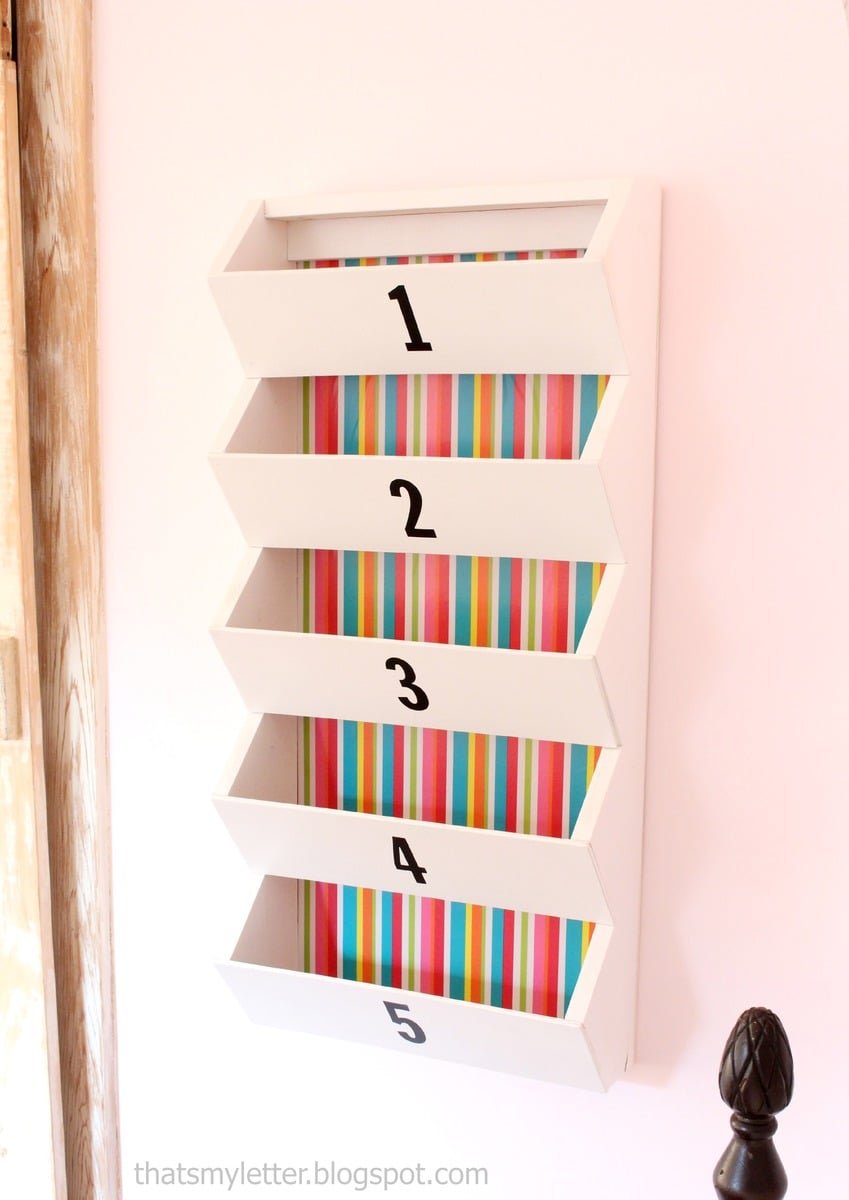
Wood bins perfect for storing accessories, toys and more! Hangs on the wall. Free
Specifications
| Project type | shelves |
|---|---|
| Room | Storage Solutions |
| Style | Children's and Kid's Room Furniture and Toy Plans |
| Difficulty | Beginner Projects |
Dimensions
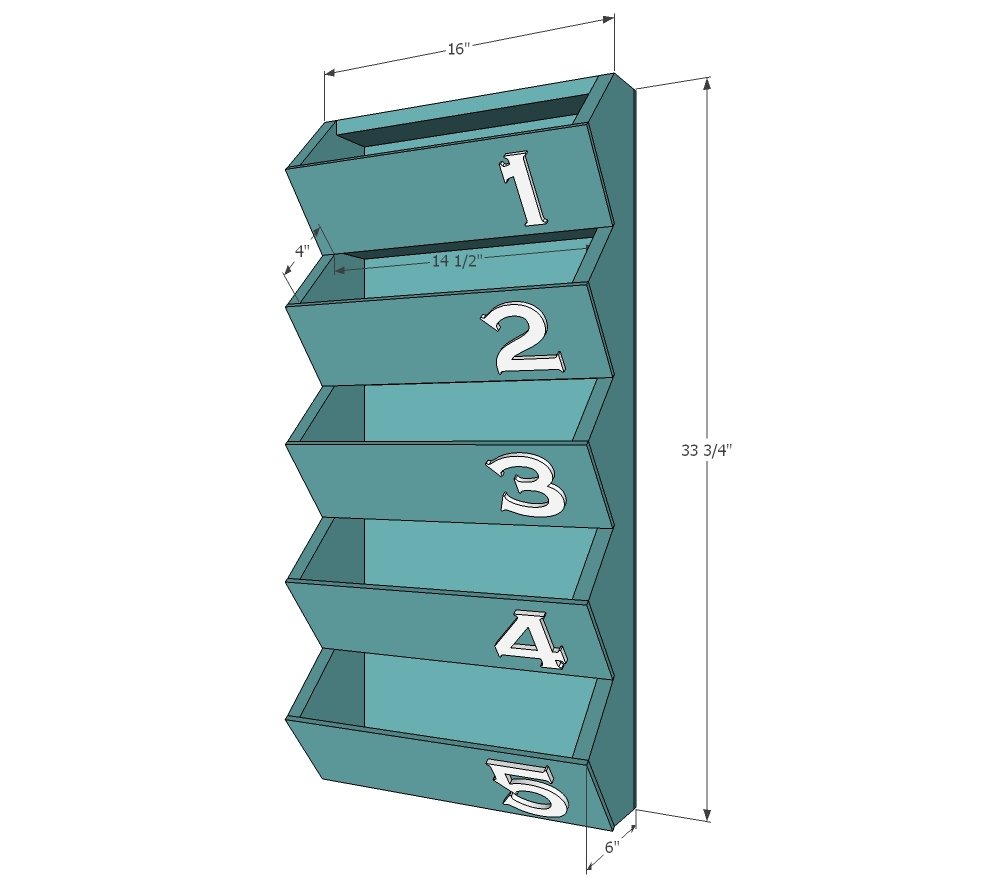
Use the size-specific shopping and cut lists below.
Shopping List
1 - 1x6 @ 6 feet long
1 - 1x3 @ 8 feet long
14-1/2" of 1x2 (can also use a 1x3 here)
1 - 24" x 48" piece of 1/4" thick plywood or hardboard
can use 2" wood screws instead of 1-1/4" pocket hole screws
Cut List
2 - 1x6 @ 33-3/4"
6 - 1x3 @ 14-1/2"
1 - 1x2 @ 14-1/2"
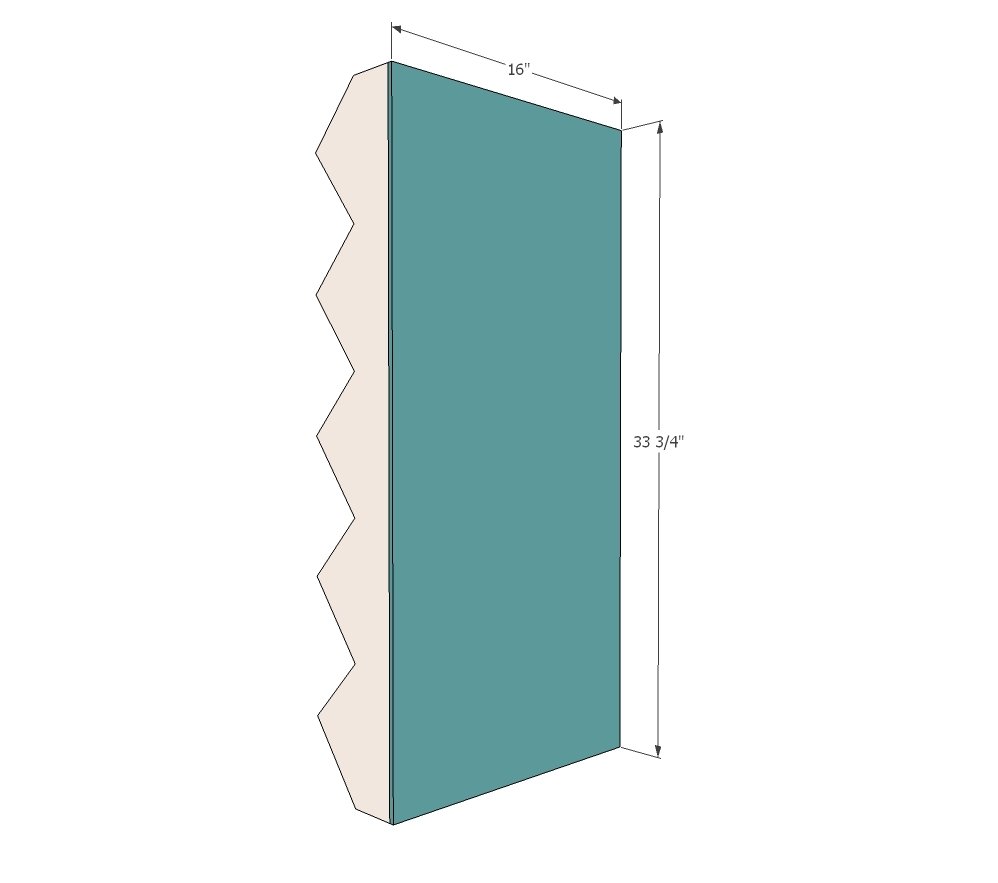
1 - 1/4" plywood @ 16" x 33-1/4"
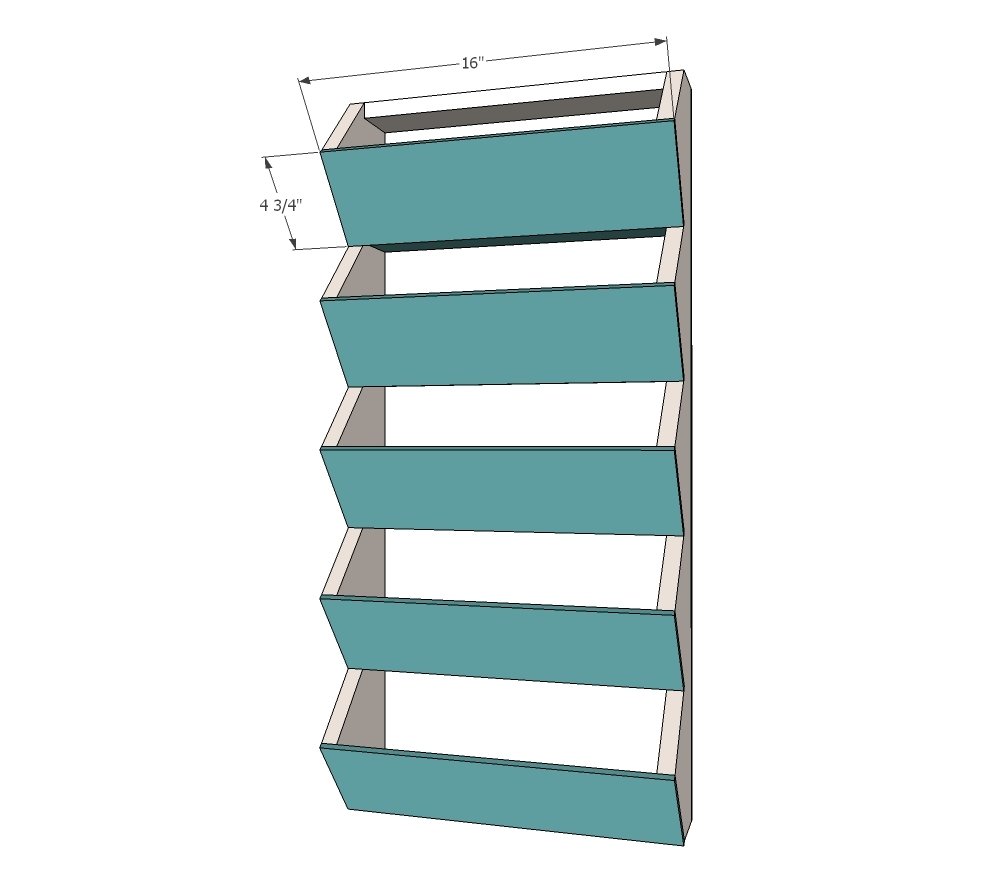
5 - 1/4" plywood @ 16" x 4-3/4"
Tools
- measuring tape
- square
- pencil
- safety glasses
- hearing protection
- drill
- circular saw
- jigsaw
- nailer
- sander
Step-by-step Instructions
Step 1
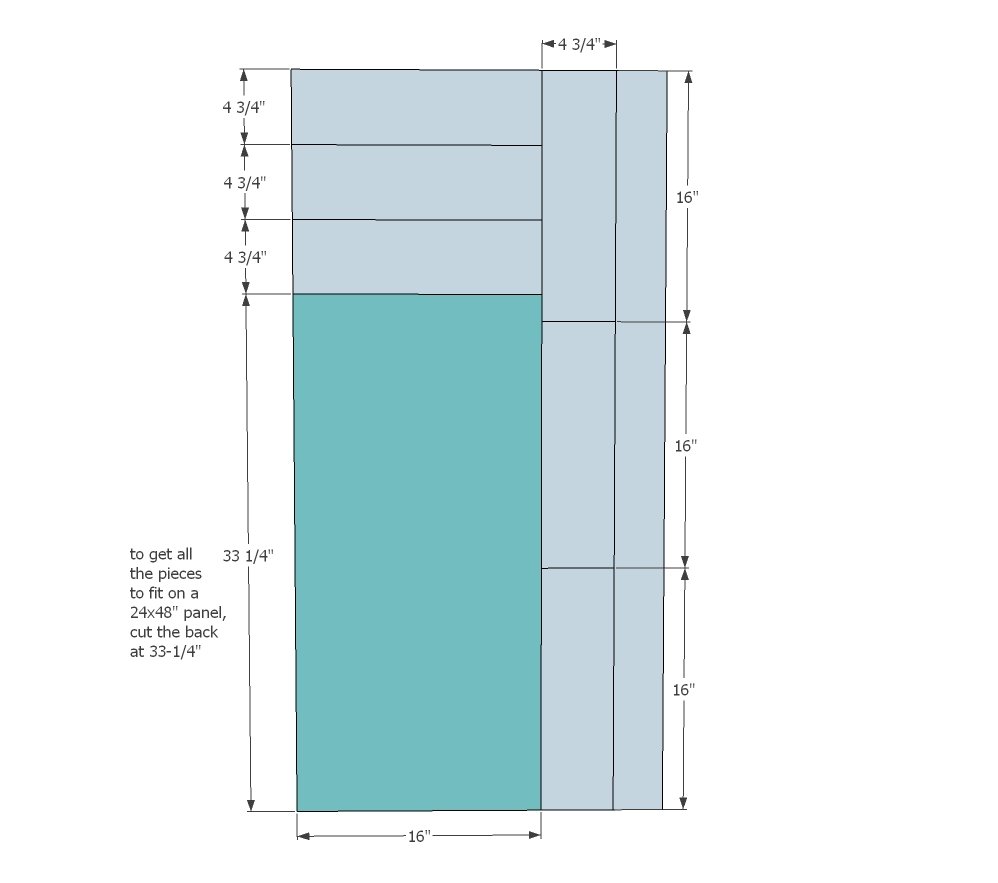
To get all the of the 1/4" plywood cuts on the 24" x 48" sheet, cut as shown here. The back will be a little smaller, but since the 1x2 hanging cleat is there (see step 4) it won't matter. Use a circular saw or table saw to make these cuts.
Step 2
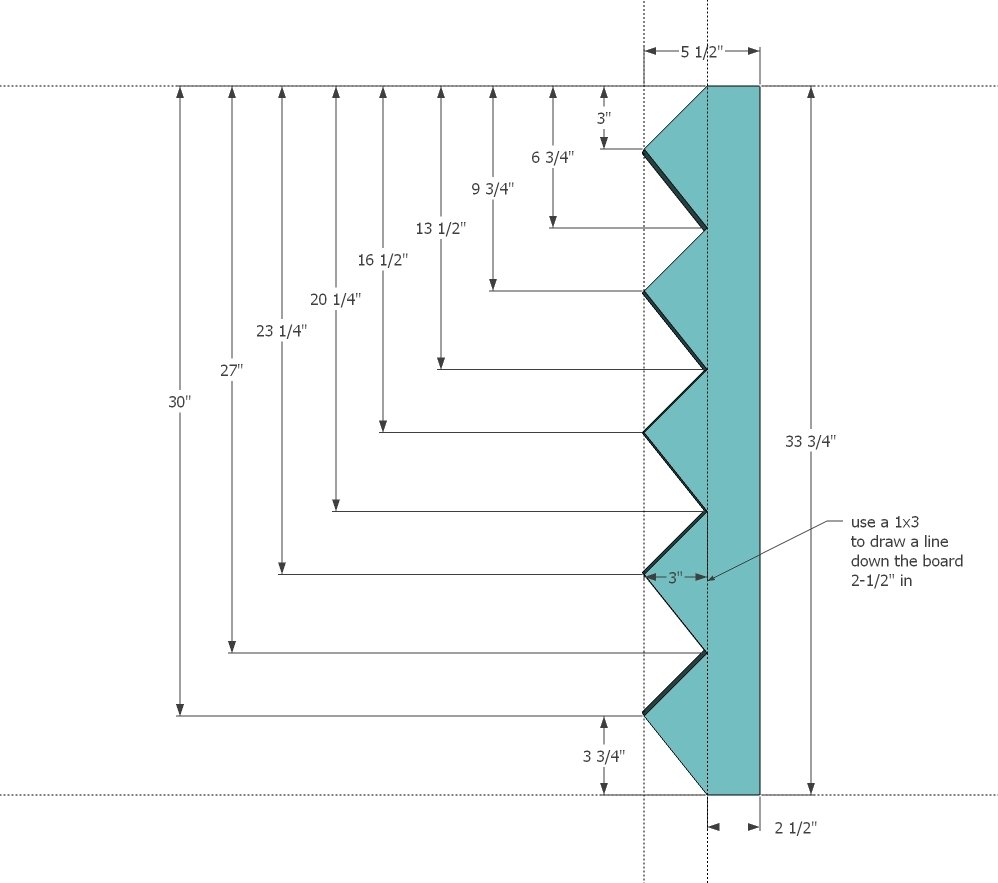
Place a 1x3 board on top of the 1x6 board, with one edge flush. Draw line down the 1x6 board. Then mark the indents in the 1x6 and carefully cut out with a jigsaw. Sand the cut edges smooth.
Step 3
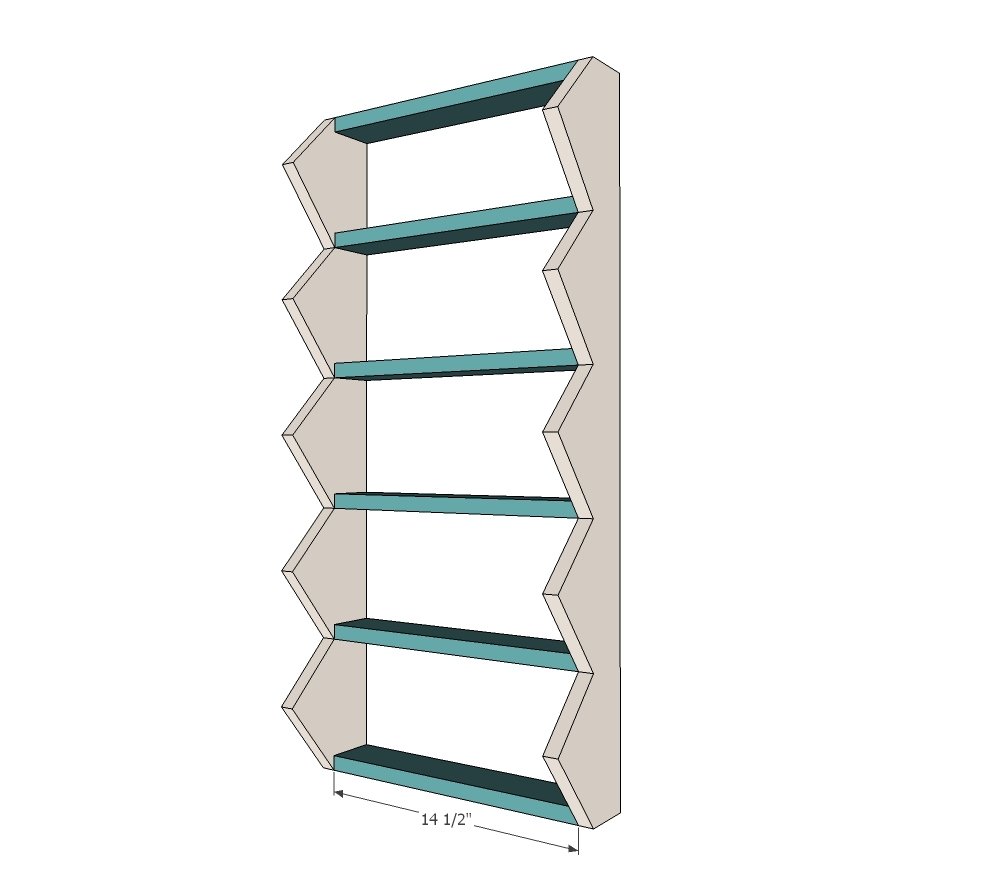
Attach the two sides together with the 1x3 shelf bottoms. Use either 3/4" pocket holes and 1-1/4" pocket hole screws or 2" construction screws.
Step 4
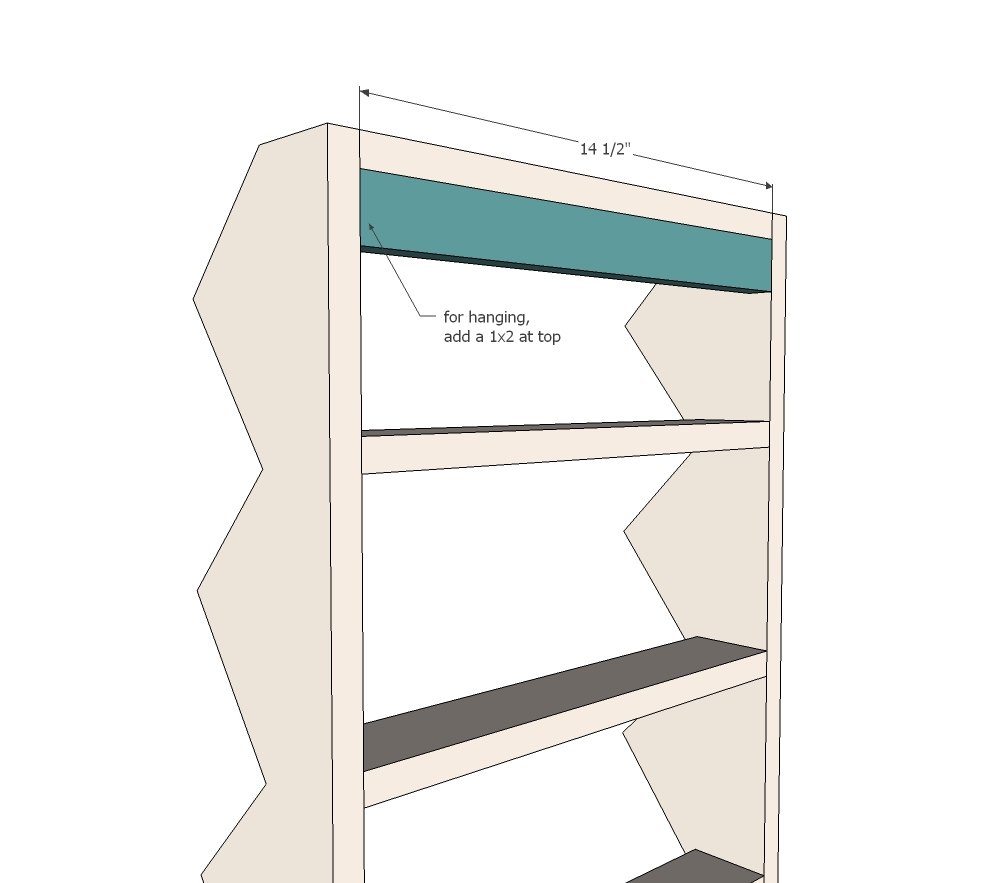
Attach the 1x2 cleat to the top as you did the shelves. Use this cleat later to hang the shelf on the wall.
Step 5
Step 6
Glue and nail the front pieces on with 3/4" brad nails.
Finishing
Sand all surfaces, starting with a medium grit and finishing with fine. Wipe off the dust, fill any holes or gaps with wood filler, and sand smooth once dry. Apply primer if you're painting, then finish with your choice of paint or stain and seal with a durable clear topcoat. For outdoor projects, use exterior-rated primer, paint or stain, and sealer so the piece stands up to the weather.
Source (temporary): https://www.ana-white.com/woodworking-projects/hanging-wood-wall-bins