Hannah Canopy Bed
Pencil post canopy bed plans in full size from
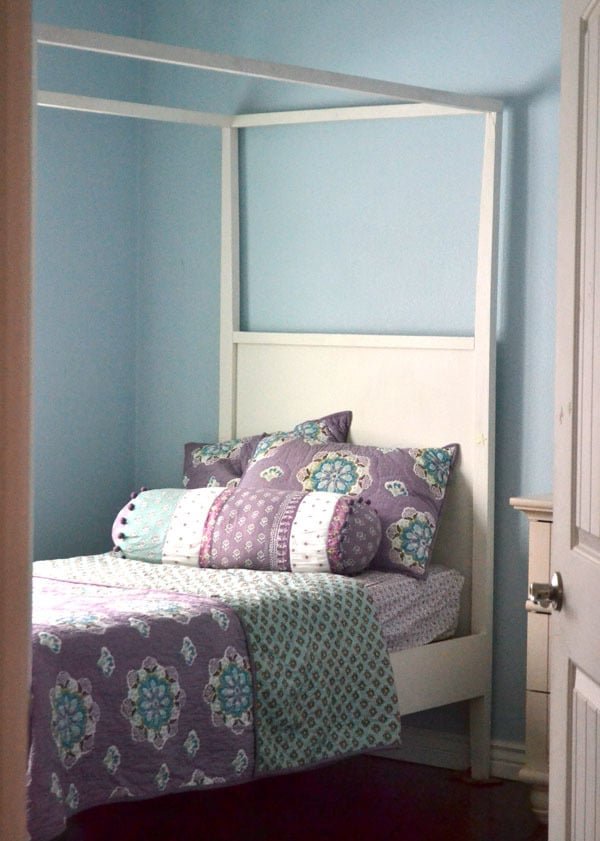
Specifications
| Project type | Full Size Beds and Full Bed Frames |
|---|---|
| Room | Bedroom |
| Style | Children's and Kid's Room Furniture and Toy Plans |
| Difficulty | Intermediate |
Dimensions
Use the size-specific shopping and cut lists below.
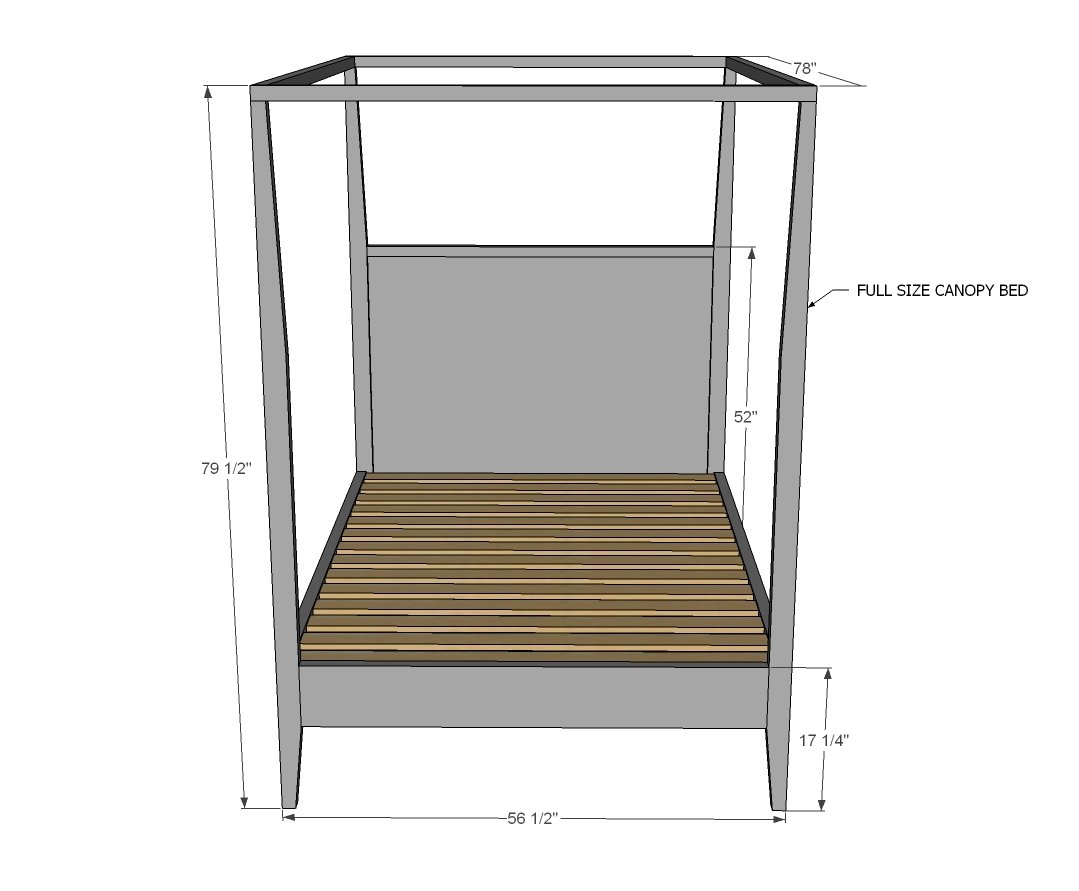
Shopping List
4 - 2x3s or 2 - 2x6s ripped in half (for legs) 8 feet or stud length
5 - 2x2 @ 8 feet long
2 - 2x8 @ 12 feet long
3 - 2x4 @ 8 feet or stud length
1 - full sheet (4x8) hardwood plywood
boards for slats or box spring (measure box spring if using and make sure it is less than 53 1/2" wide x 75" long)
1-1/4" and 2-1/2" pocket hole screws
Cut List
4 - 2x3 @ 78" (if you can't find 2x3s, you can rip a 2x6 in half and use it, or cut down 2x4s)
1 - 2x2 @ 51 1/2" (panel top)
2 - 2x8 @ 51 1/2" (panel bottom/footboard bottom)
1 - 3/4" hardwood plywood 51 1/2" x 33 1/4" (panel)
2 - 2x2 @ 56 1/2' (canopy top for headboard/footboard)
2 - 2x2 @ 75" (canopy sides)
2 - 2x8 @ 75" (siderails)
3 - 2x4 @ 75" (cleats)
slats are 53 1/2" long - cut to fit as needed
Tools
- measuring tape
- square
- pencil
- safety glasses
- hearing protection
- kreg-jig
- drill
- circular saw
- sander
Step-by-step Instructions
Step 1
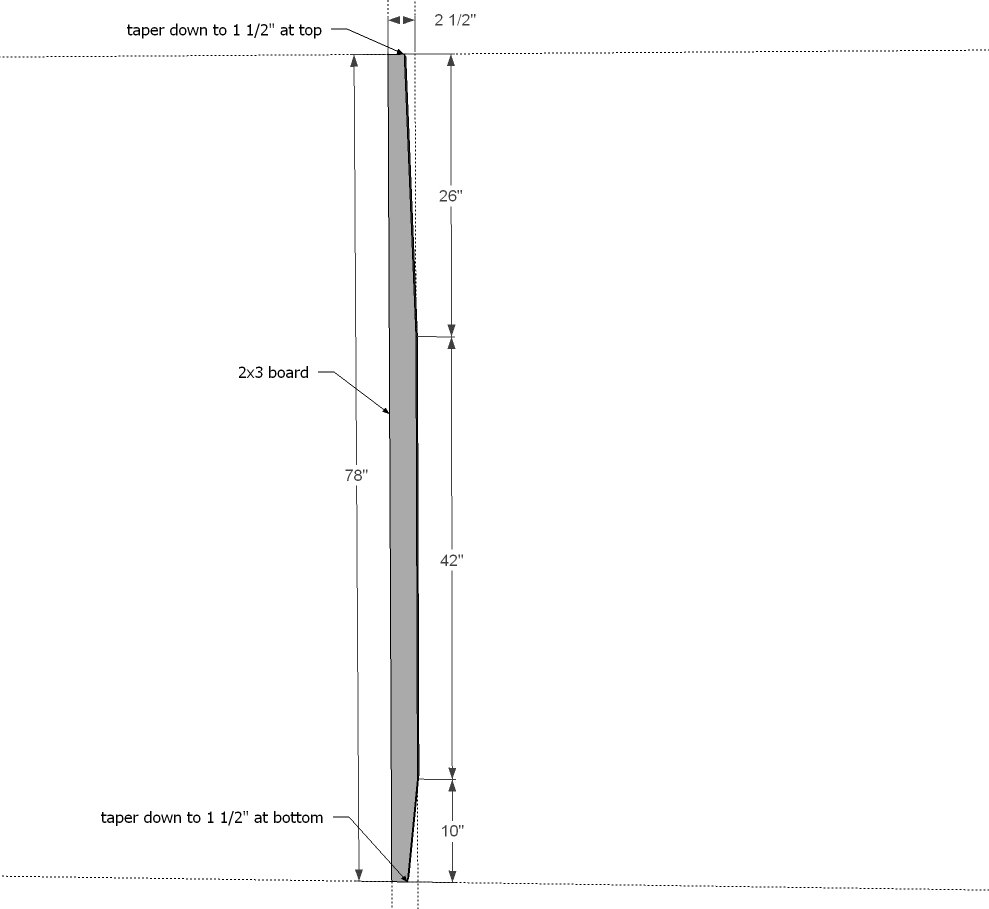
First cut the four leg tapers. We used a circular saw, and started at the end grain of each board, and cut toward the outside edge. The cuts were then sanded with a belt sander to smooth out.
Step 2
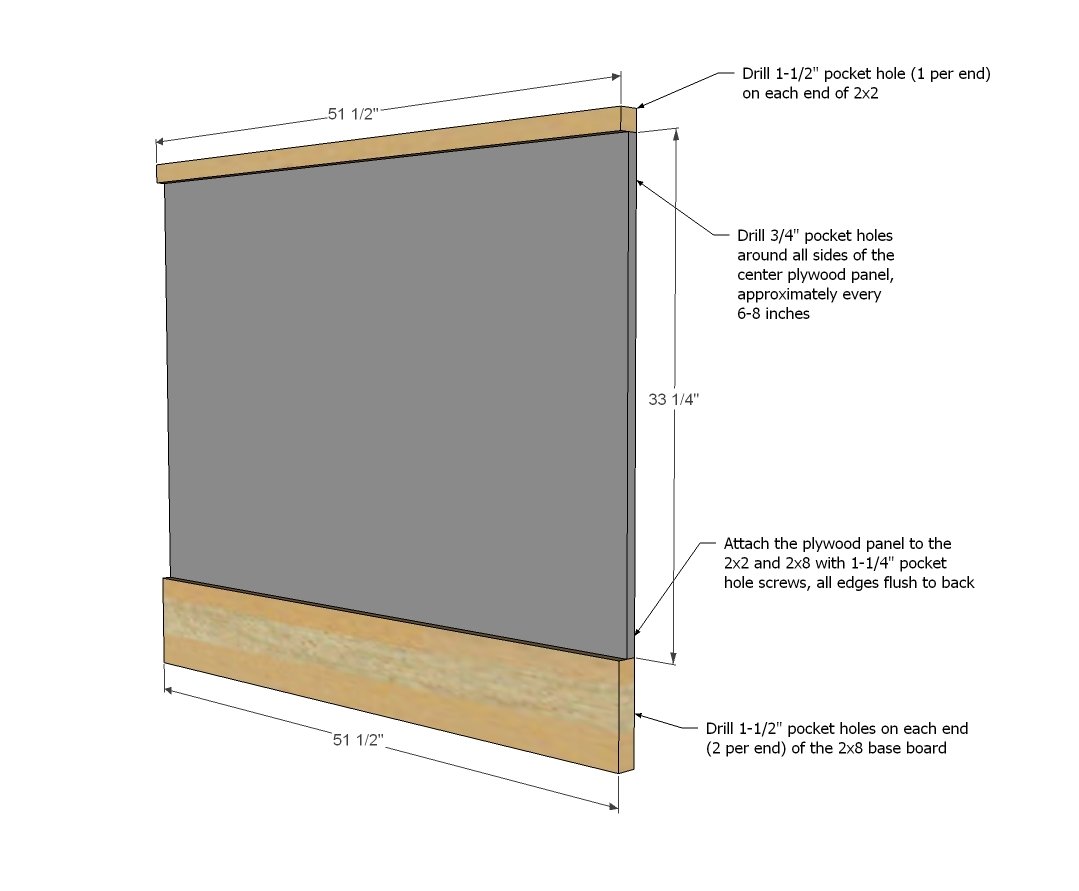
Now for the headboard panel. First, drill 3/4" pocket holes around all sides of the panel, about every 6-8 inches. Then drill 1-1/2" pocket holes on each end of the 2x2 and 2x8 boards. Then attach panel to the 2x2 and 2x8 boards, using 1-1/4" pocket hole screws. Back and outside edges are flush.
Step 3
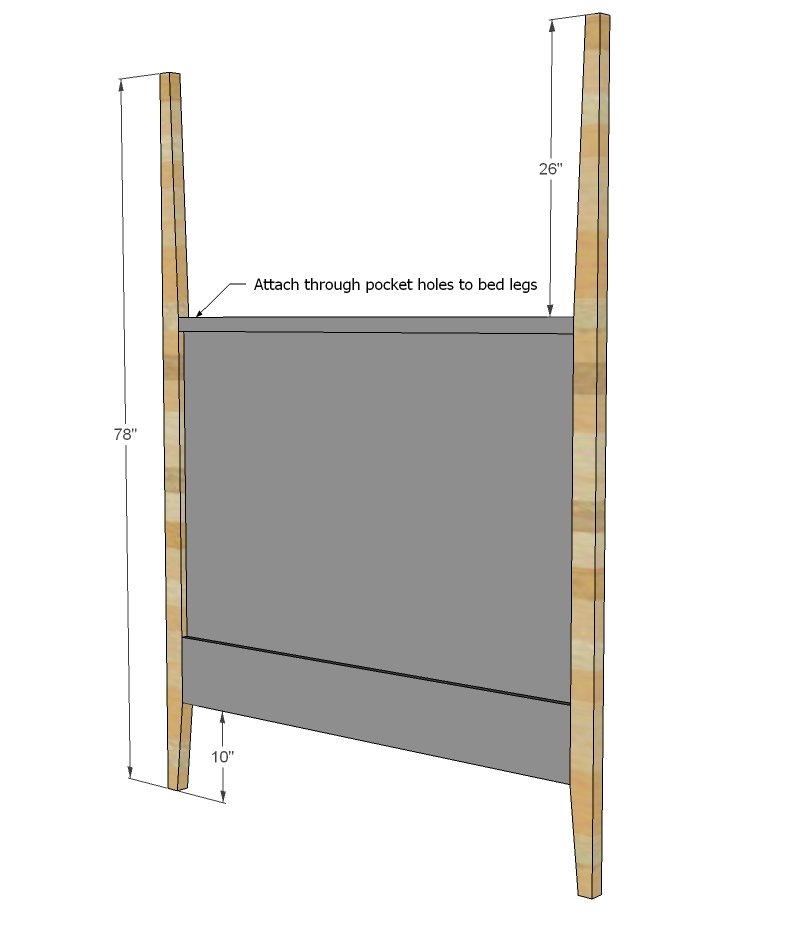
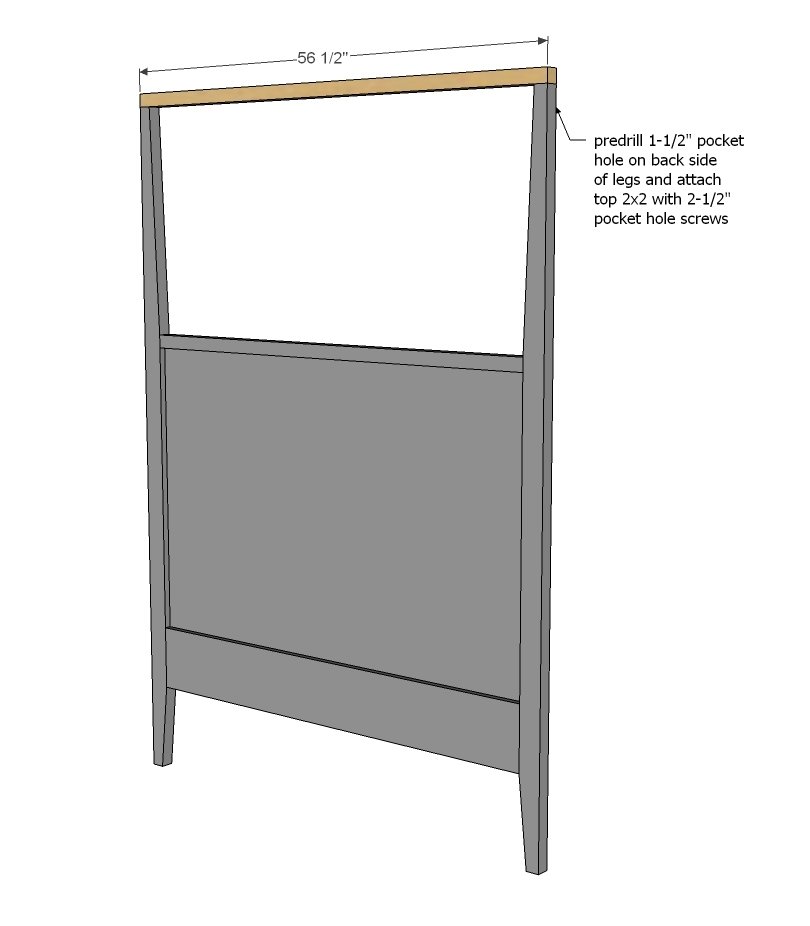
Drill a pocket hole on the top of each leg, on th back side (for attaching header in next step). Then attach legs to center panel. Use 1-1/4" pocket hole screws for 3/4" pocket holes, and 2-1/2" pocket hole screws for 1-1/2" pocket holes.
Step 4
Attach top header board - use glue to secure as well.
Step 5
Step 6
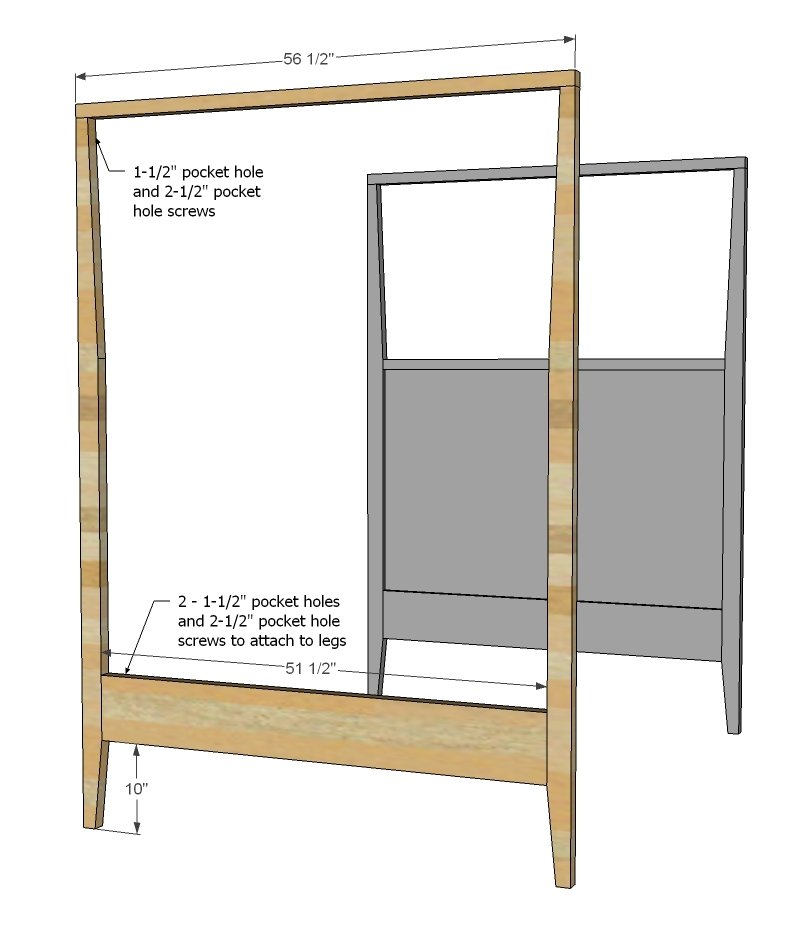
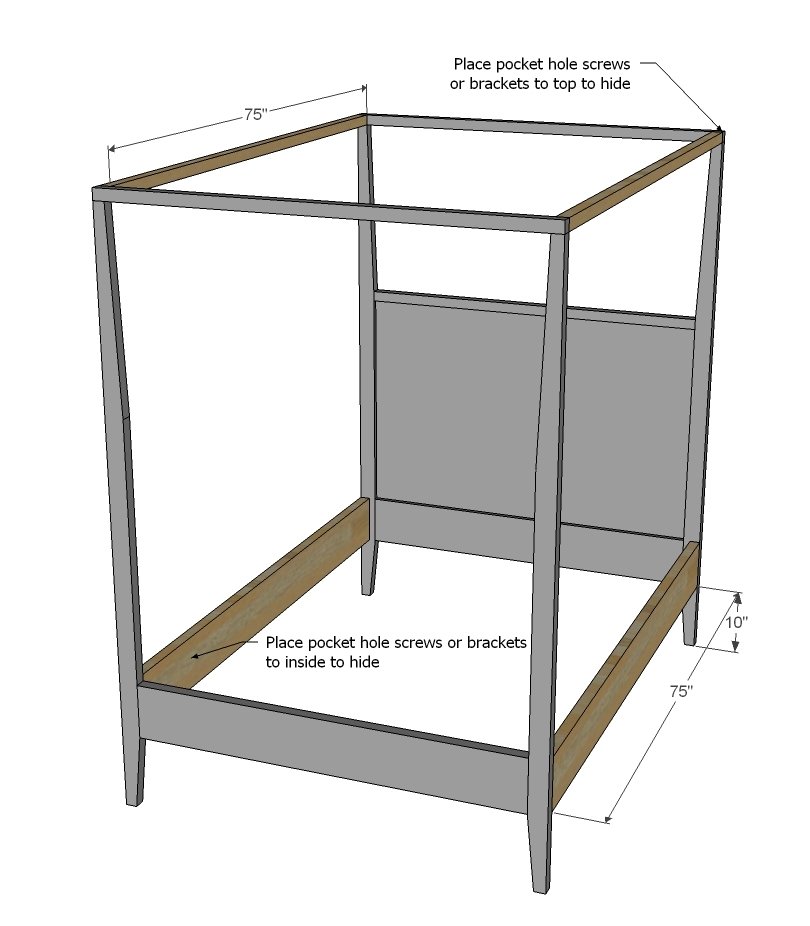
To assemble the bed, attach the siderails and canopy sides to the headboard and footboard panels. Since these are all 2x boards, use 1-1/2" pocket holes and 2-1/2" pocket hole screws.
Step 7
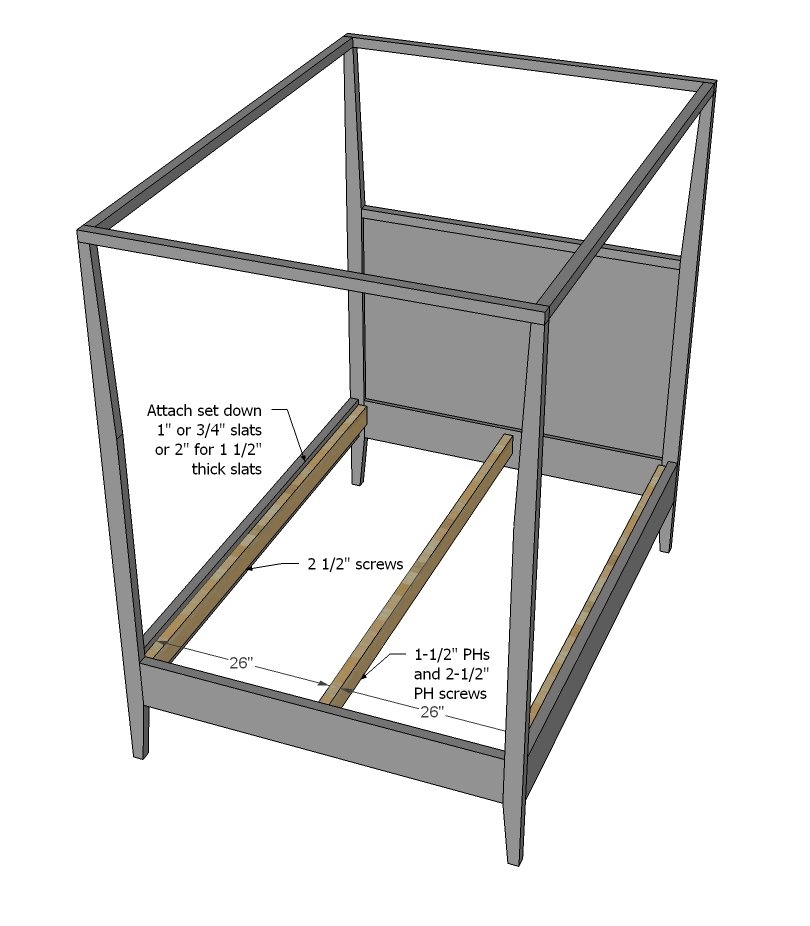
The cleats to support the mattress need to be attached as well - but don't need to be finished. Attach outer cleats to the siderail, center cleat to the headboard/footboard. For additional support to the mattress, you can also add center "legs" to the center cleat - just a 2x4 board that extends from the cleat to the floor. This will add a ton of support to the bed.
Step 8
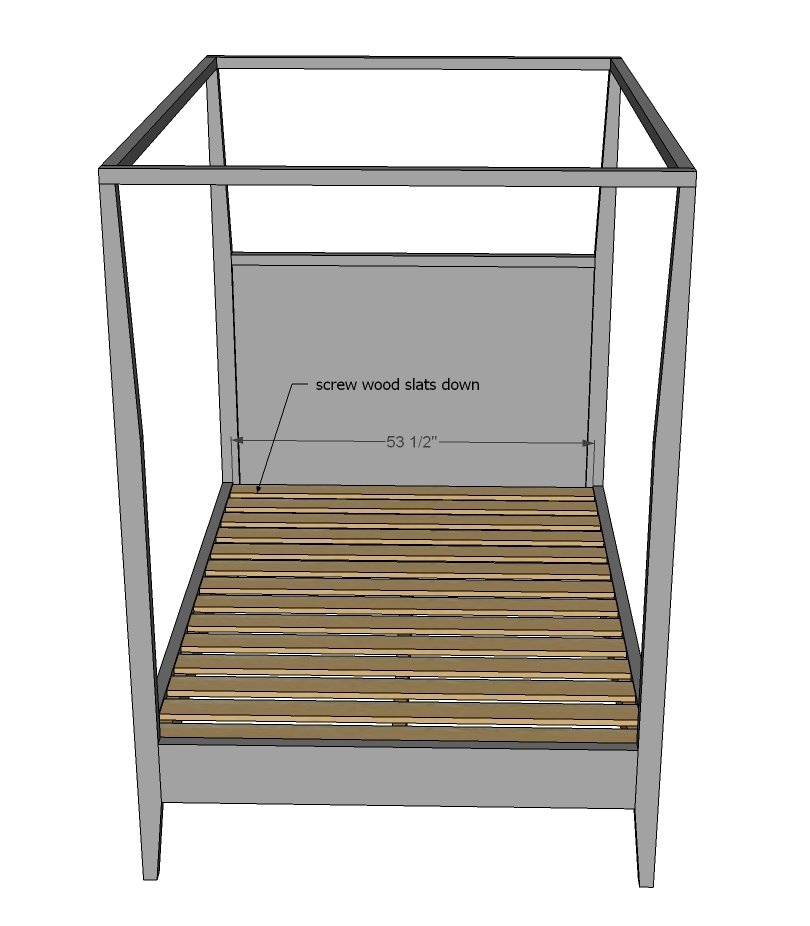
Finally, attach slats to the cleats. Slat spacing is determined by mattress recommendations. If you have a box spring, you won't need them at all.
Finishing
Sand all surfaces, starting with a medium grit and finishing with fine. Wipe off the dust, fill any holes or gaps with wood filler, and sand smooth once dry. Apply primer if you're painting, then finish with your choice of paint or stain and seal with a durable clear topcoat. For outdoor projects, use exterior-rated primer, paint or stain, and sealer so the piece stands up to the weather.
Source (temporary): https://www.ana-white.com/woodworking-projects/hannah-canopy-bed-full-size