Hannah Canopy Bed
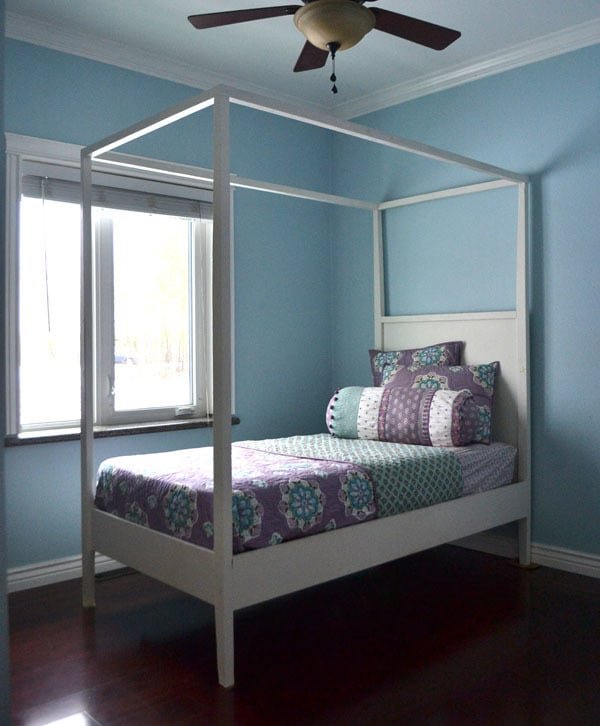
Easy canopy bed plans from Ana - Make this bed!
Specifications
| Project type | Twin Beds and Twin Bed Frames |
|---|---|
| Room | Bedroom |
| Style | Children's and Kid's Room Furniture and Toy Plans |
| Difficulty | Intermediate |
| Estimated cost | $50 - $100 |
Dimensions
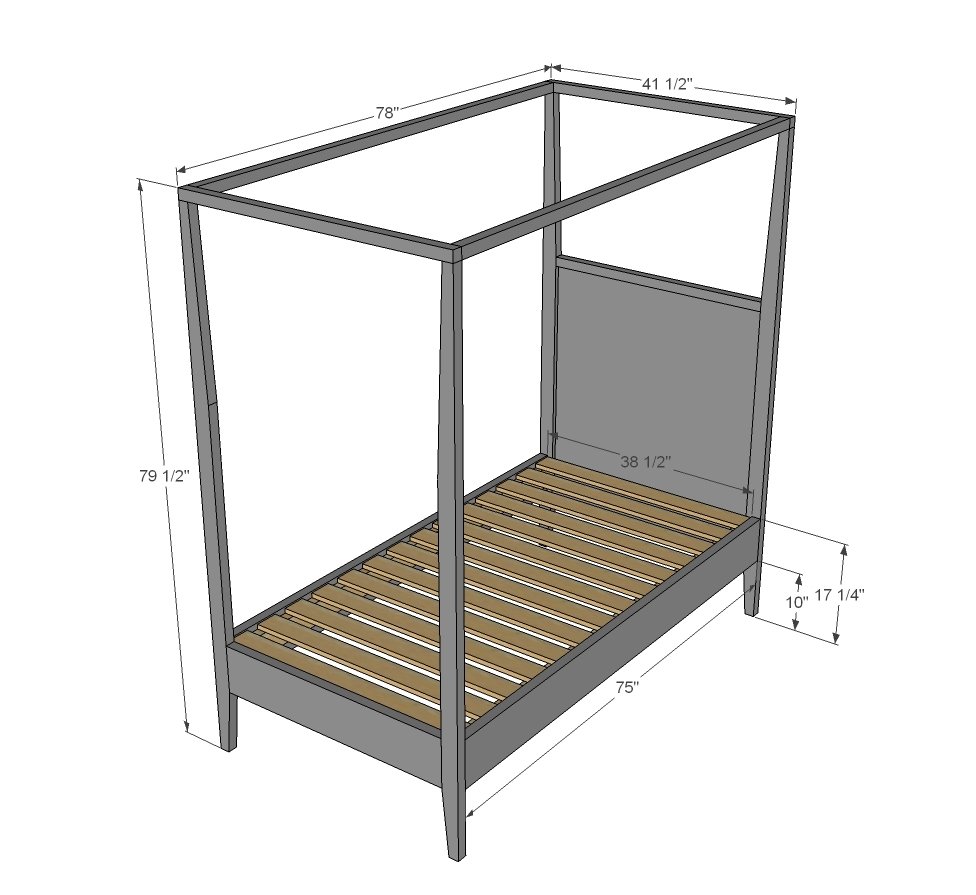
Use the size-specific shopping and cut lists below.
Shopping List
4 - 2x3 @ 8 feet or stud length (if you can't get 2x3s, you can also rip 2x6s into 2 1/2" widths to make your own - you'll need 2 - 2x6s @ 8 feet or stud length if you do this)
2 - 2x2 @ 8 feet long
1 - 1/2 sheet of hardwood plywood (I used PureBond Birch)
1 - 2x8 @ 10 feet long
1 - 2x8 @ 8 feet long
2 - 2x4 @ 8 feet or stud length
slats - you can get two out of one 8 foot board - we used 2x4s
1 1/4" and 2 1/2" pocket hole screws are highly recommended
2 1/2" wood screws for attaching the cleats to the siderails
Cut List
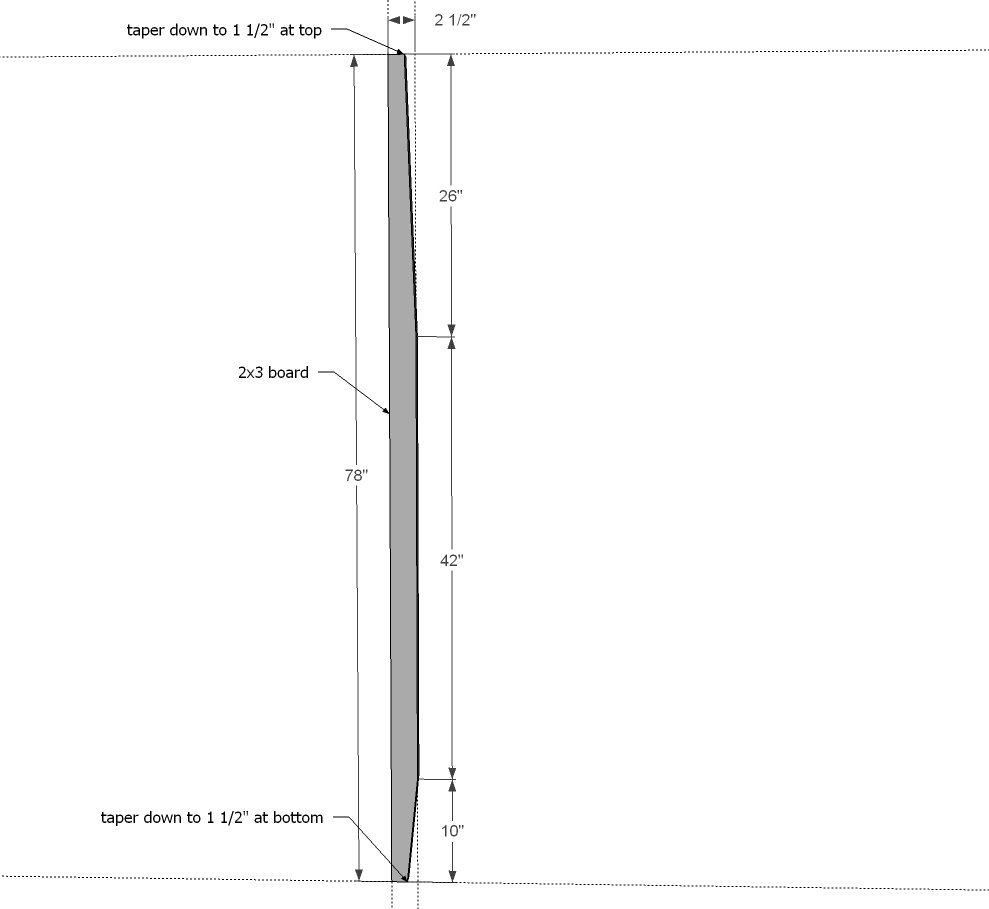
4 - 2x3 @ 78" (legs - taper in step 1)
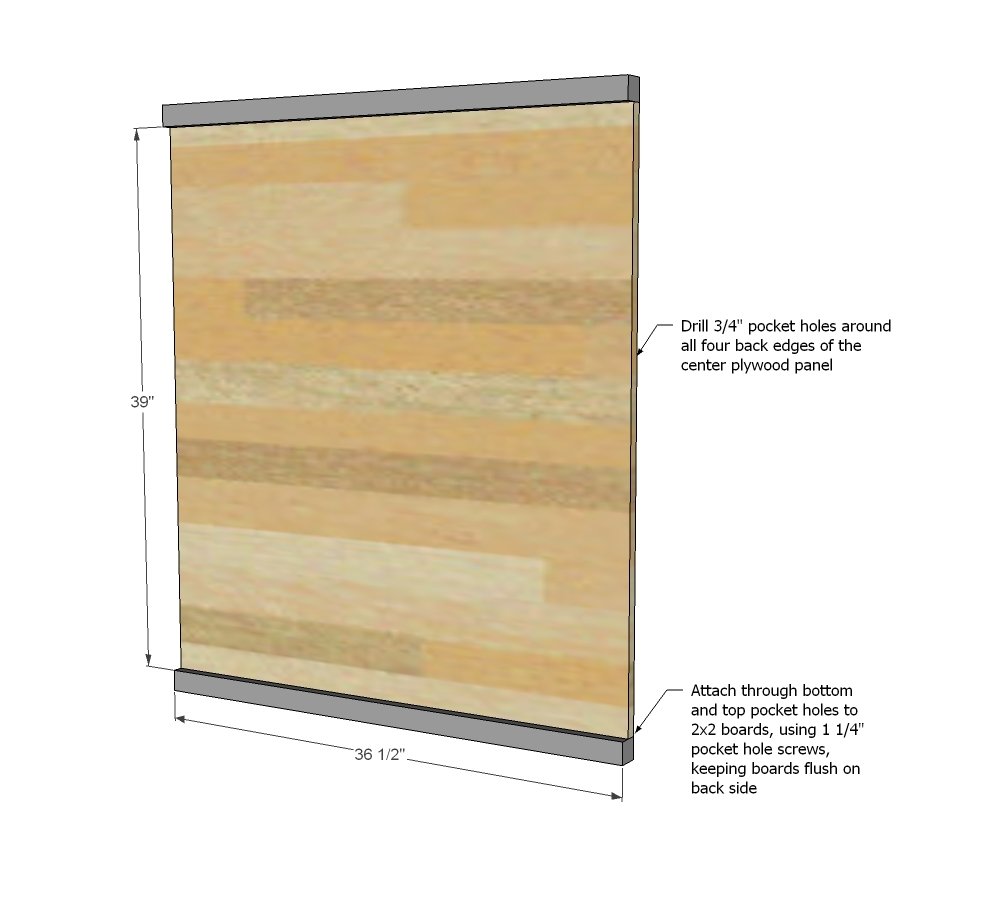
2 - 2x2 @ 36 1/2" (headboard top/bottom)
1 - 3/4" hardwood plywood @ 39" x 36 1/2" (I used PureBond Birch)
Tools
- measuring tape
- square
- pencil
- safety glasses
- hearing protection
- kreg-jig
- drill
- circular saw
- sander
Step-by-step Instructions
Step 1
This was definitely the most difficult part of the bed build - tapering the legs with a circular saw. But the bed just is so much cuter with the tapered legs - so very worth the effort! Start the taper from the end cut of the board. We sanded the finished cut with a belt sander as well to smooth it out. You'll need to cut four legs total.
Step 2
From your plywood panel, drill 3/4" pocket holes (about every 8") around all sides. Also drill a single 1 1/2" pocket hole on each end of the 2x2s. Then attach the plywood panel to the 2x2s, flush to the back side.
Step 3
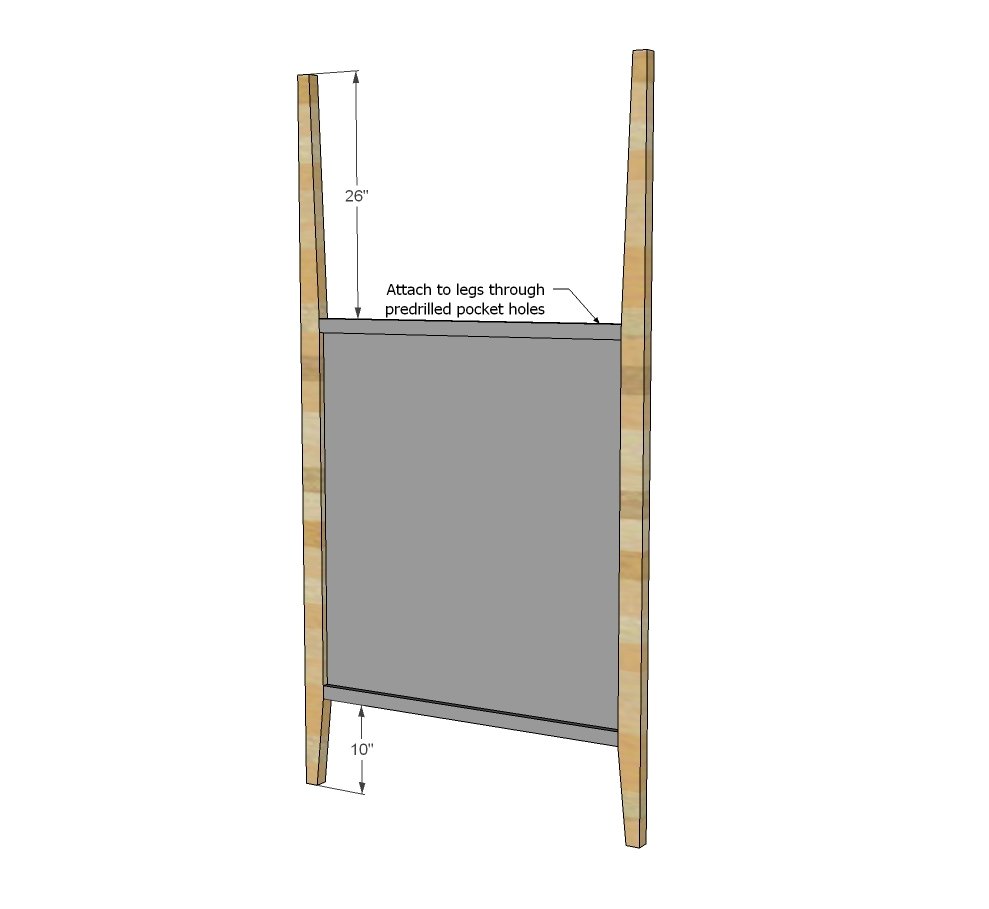
Next, attach the panel to the legs with 1 1/4" pocket hole screws. Then use 2 1/2" pocket hole scews to attach the 2x2s to the legs, all edges flush to back side. TIP: Drill a single 1 1/2" pocket hole on the top back side of the legs before attaching for attaching the top 2x2 in the next step.
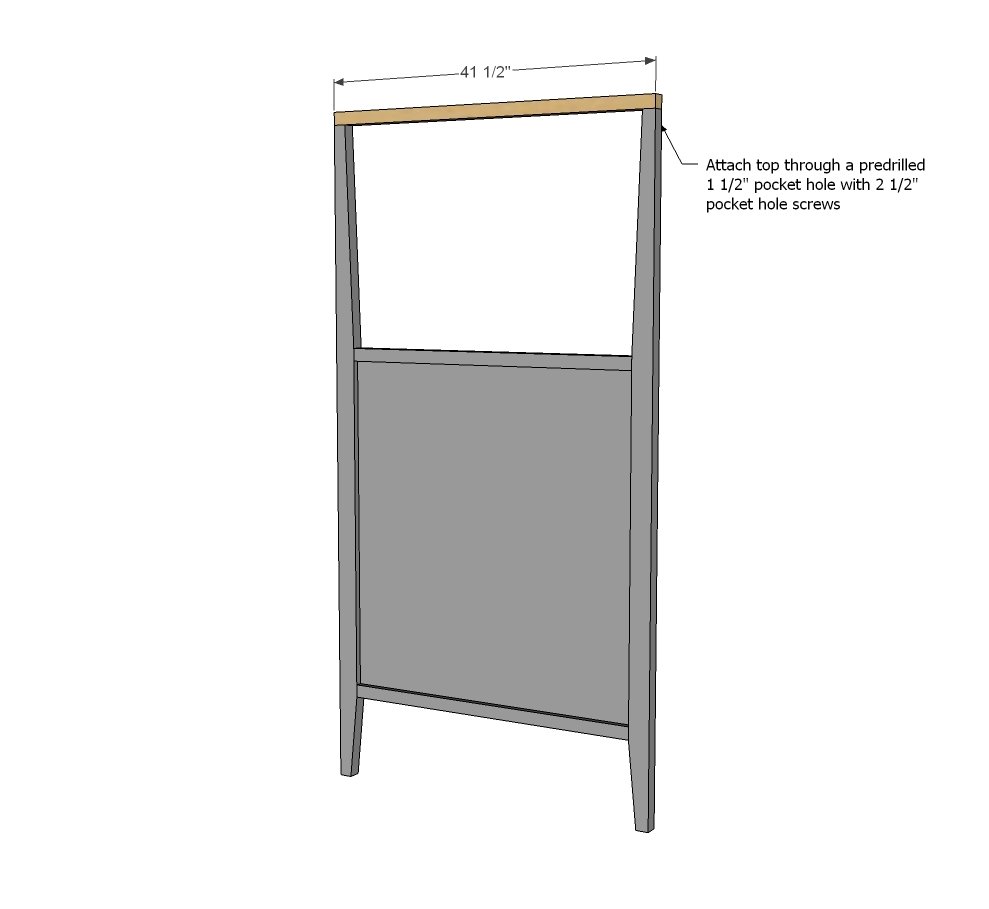
Next, add the top through the predrilled 1 1/2" pocket holes with 2 1/2" pocket hole screws.
This entire panel can now be finished (pocket holes filled, sanded and painted). The bed itself will be too big to move into a room, so you'll need to bring the headboard panel, footboard panel, and siderails in seperately, then assemble in the room.
Step 5
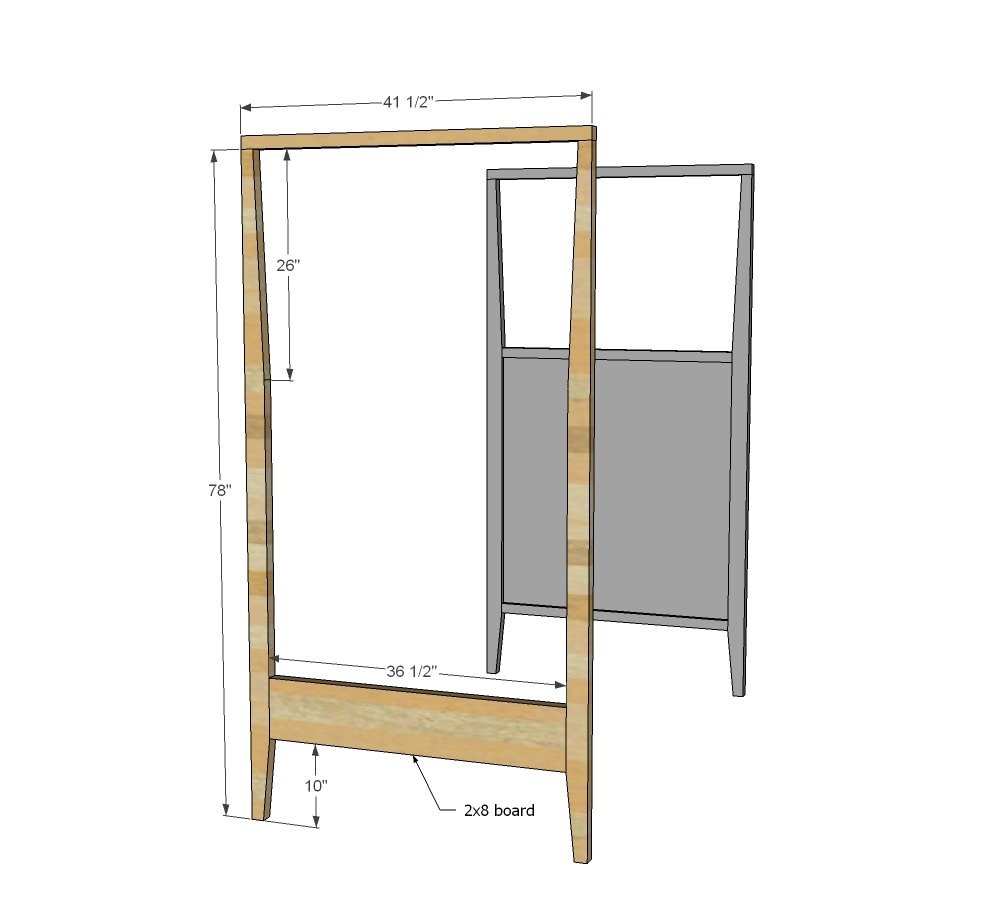
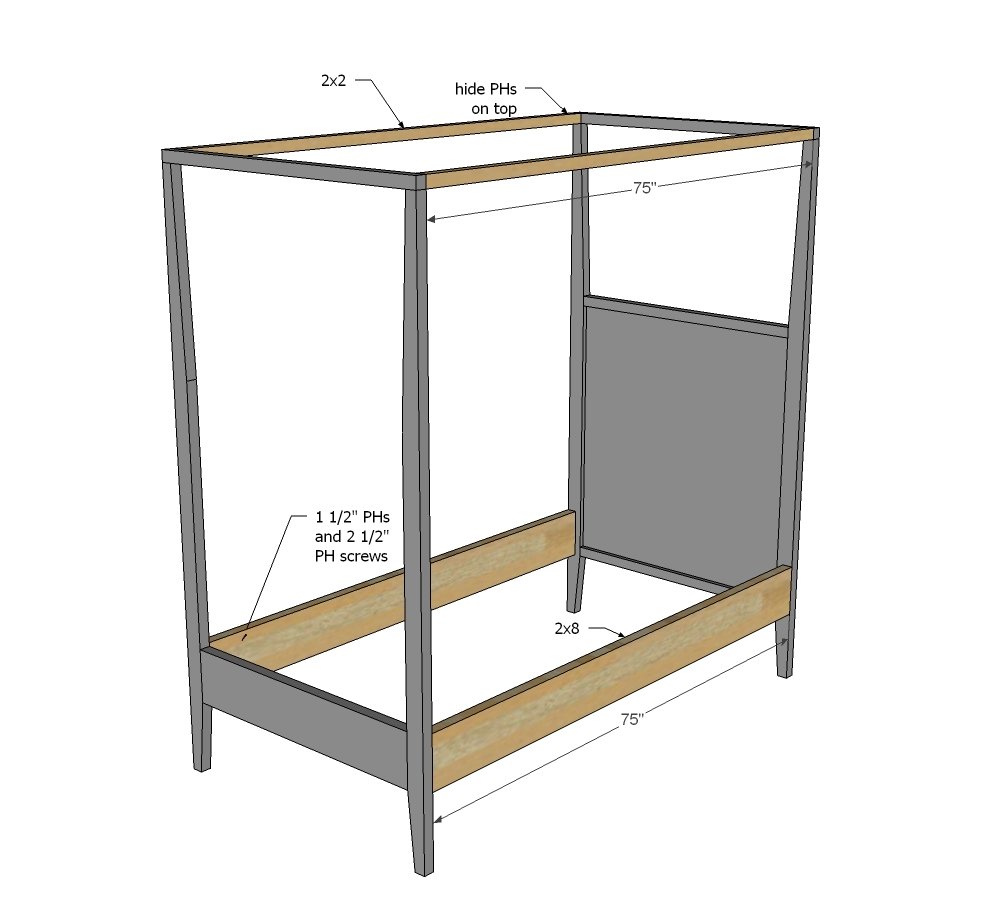
The canopy sides are attached on top with pocket holes - hidden where you can't see them.
The siderails are attached from inside with 1 1/2" pocket holes and 2 1/2" pocket hole screws.
Step 7
Cleats are attached to inside of siderails with 2 1/2" screws - you may wish to do this in the room. The cleats do not need to be finished.
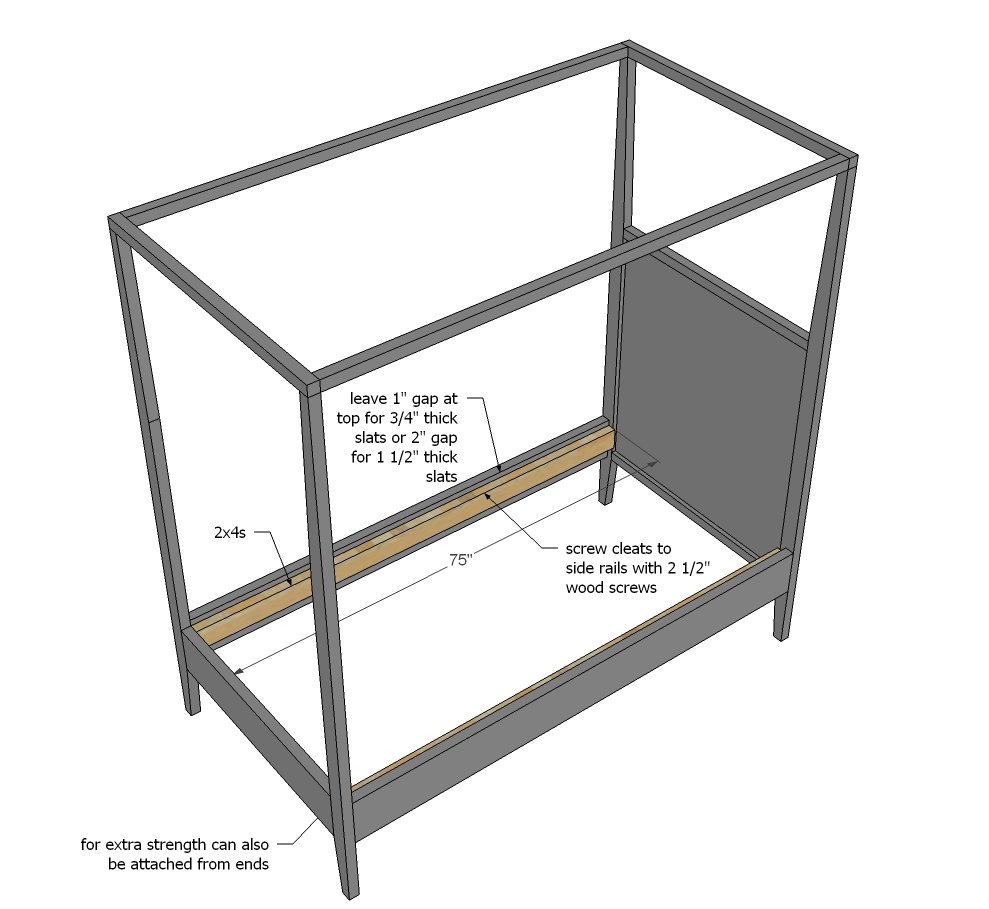
Step 8
Slats are layed on top of cleats and screwed down following assembly.
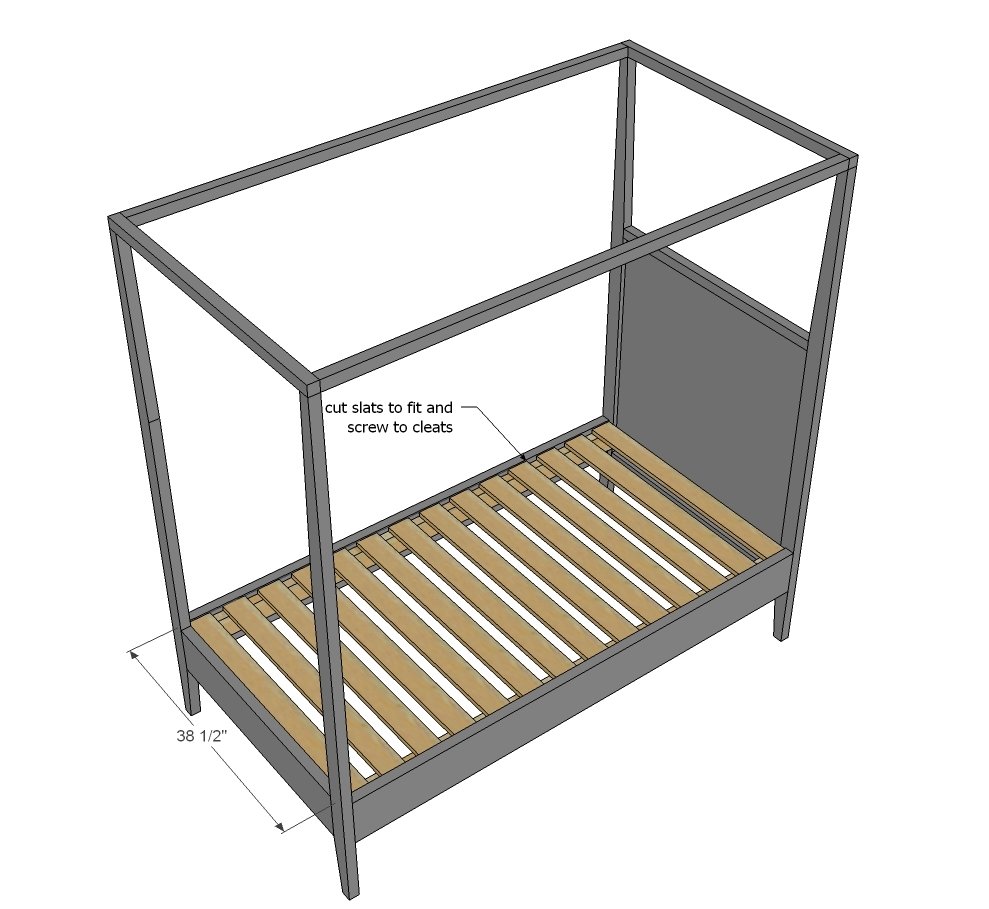
Finishing
Sand all surfaces, starting with a medium grit and finishing with fine. Wipe off the dust, fill any holes or gaps with wood filler, and sand smooth once dry. Apply primer if you're painting, then finish with your choice of paint or stain and seal with a durable clear topcoat. For outdoor projects, use exterior-rated primer, paint or stain, and sealer so the piece stands up to the weather.
Source (temporary): https://www.ana-white.com/woodworking-projects/hannah-canopy-bed