High Rise Shelf
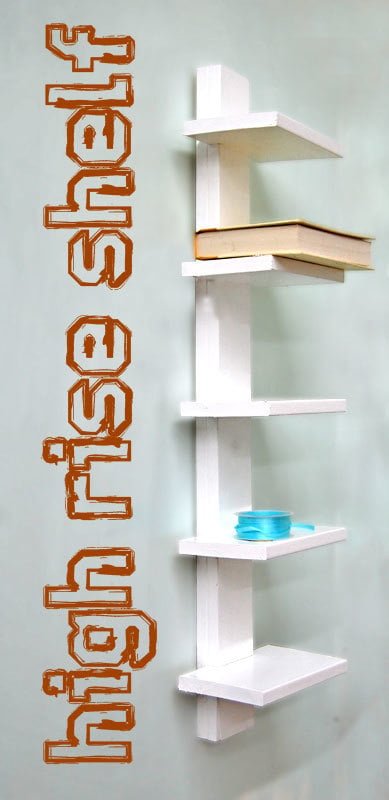
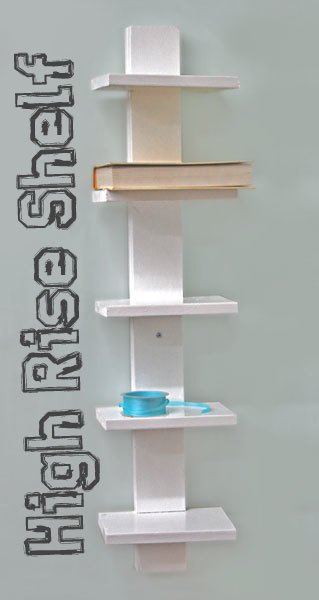
A simple wall shelf that works great for storing CDs and DVDs, towels, or even books.
Specifications
| Project type | shelves |
|---|---|
| Room | Bathroom |
| Style | Modern Style Furniture Plans |
| Difficulty | Beginner Projects |
| Estimated cost | Under $20 |
Dimensions
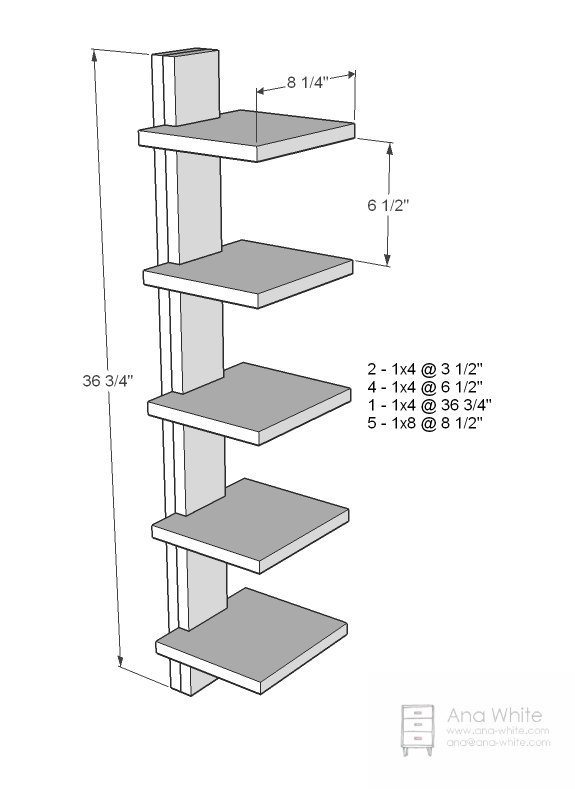
Use the size-specific shopping and cut lists below.
Shopping List
1 – 6 foot long 1×8
1 – 6 foot long 1×4
1 1/4″ screws
2″ screws
Cut List
1 – 1×4 @ 36 3/4″
2 – 1×4 @ 3 1/2″
4 – 1×4 @ 6 1/2″
5 – 1×8 @ 8 1/2″ (you can use a 1×6 or 1×12 and go a little longer)
Tools
- measuring tape
- square
- pencil
- safety glasses
- hearing protection
- drill
- circular saw
- level
- countersink drill bit
Step-by-step Instructions
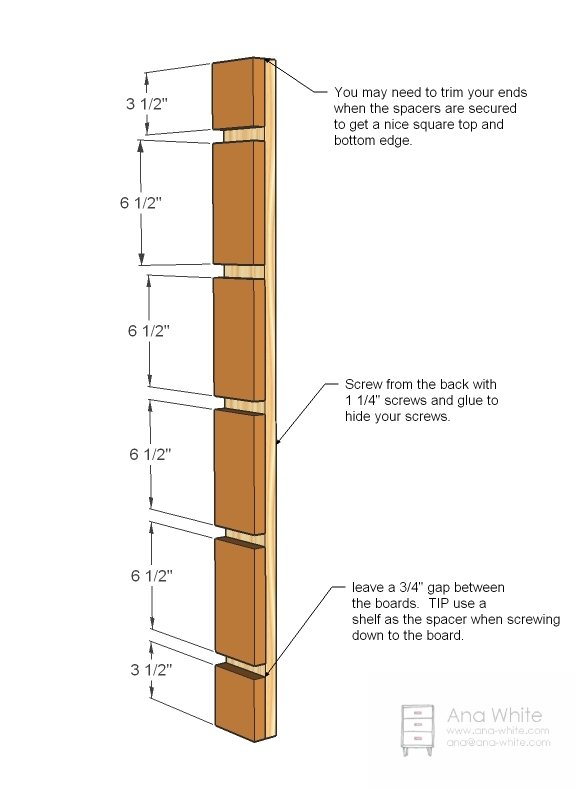
Add Spacers
Layout spacers and mark. Then apply glue to the uglier side of the spacers and screw to the back board. I screwed from the back to hide all of my holes. Predrill holes. Yes, you can use a nailer here.
Shelves
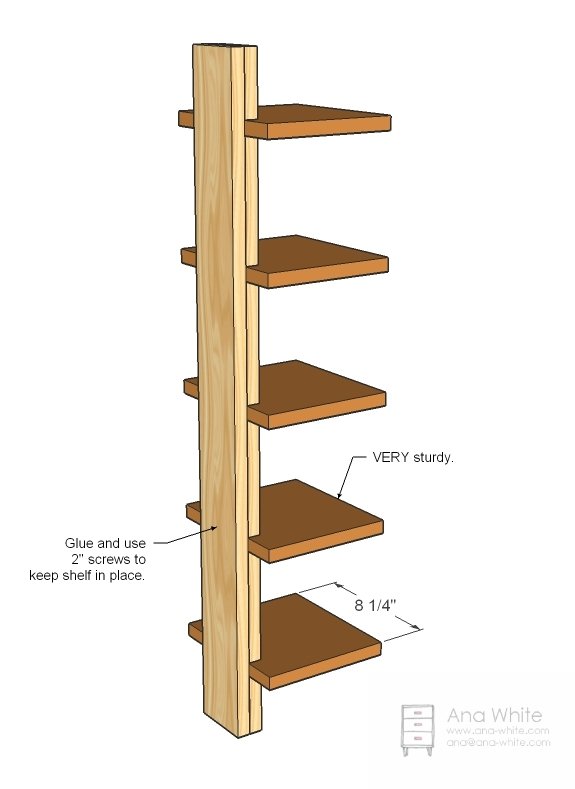
Now add the shelves, center (or not) and screw in place.
Hanging
I screwed directly through the front of the shelf right into a stud in the wall. No stud? Just use a drywall anchoring system. The shelves are very sturdy, makes a nice, interesting display piece.
Finishing
Sand all surfaces, starting with a medium grit and finishing with fine. Wipe off the dust, fill any holes or gaps with wood filler, and sand smooth once dry. Apply primer if you're painting, then finish with your choice of paint or stain and seal with a durable clear topcoat. For outdoor projects, use exterior-rated primer, paint or stain, and sealer so the piece stands up to the weather.
Source (temporary): https://www.ana-white.com/woodworking-projects/high-rise-shelf