Hillary's Locker Cabinet with Charging Cubbies
Build a locker cabinet with cubbies to use as a charging station. Free simple plans with step by step diagrams, cut list and shopping list.
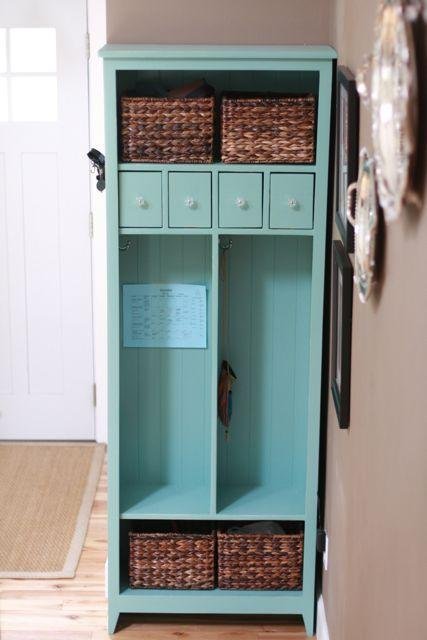
Specifications
| Project type | Lockers |
|---|---|
| Room | Entryway and Mudroom |
| Style | Cottage Style Furniture Plans |
| Difficulty | Intermediate |
| Estimated cost | $50 - $100 |
Dimensions
Use the size-specific shopping and cut lists below.
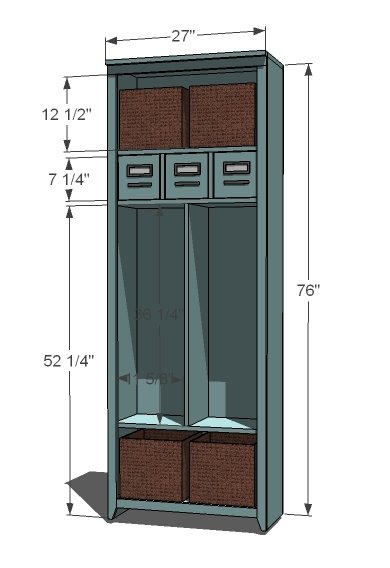
Shopping List
- 3 - 1x12 @ 8 feet long
- 1 - 1x12 @ 10 feet long
- 1 - 1x8 @ 2 feet long
- 1 - 1x6 @ 8 feet long
- 1 - 1/4" plywood full sheet
- 3 - 1x2 @ 8 feet long 3 knobs
Cut List
- 4 - 1x12 @ 25 1/2"
- 4 - 1x12 @ 7 1/2" (Measure your 1x8 board widths and cut the cubby sides to 1/4" more for drawer allowance - more info in plan)
- 1 - 1x12 @ 36 1/4"
- 1 - 1x12 @ 27"
- 2 - 1x12 @ 75 1/4"
- 1 - 1/4" plywood @ 27" x 76"
FRAME
- 2 - 1x2 @ 73 3/4"
- 2 - 1x2 @ 27"
- 1 - 1x2 @ 24"
DRAWERS - CUT TO FIT!!!
- 6 - 1x6 @ 10 1/2"
- 3 - 1x6 @ 5 3/4"
- 3 - 1x8 @ 7 1/4"
- 3 - 1/4" plywood @ 10 1/2" x 7 1/4"
Tools
- measuring tape
- square
- pencil
- safety glasses
- hearing protection
- kreg-jig
- drill
- circular saw
- nailer
- sander
Step-by-step Instructions
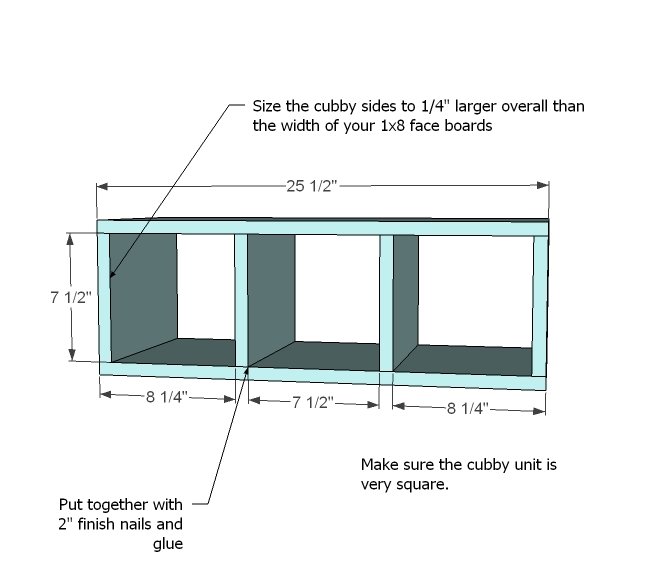
Step 1
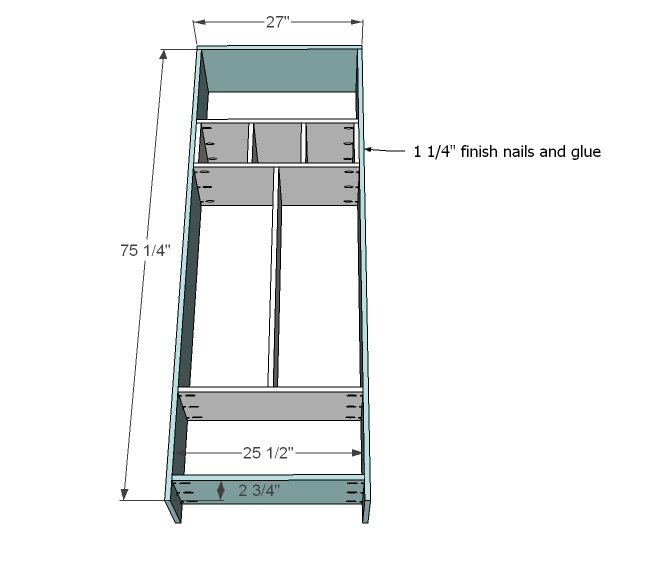
If you get this box built square and right, then your drawers will slide great - so take your time here, mark all joints, check twice for square and you should be good to go. TIP: Measure the width of your 1x8 boards to get your drawer face heights. Then add 1/4" to this measurement and cut your cubby sides to this number for perfect fitting drawers. NOTE: If you do not have a pocket hole jig, do step 2 - adding the main divider - before this step because you won't be able to squeeze your drill in there.
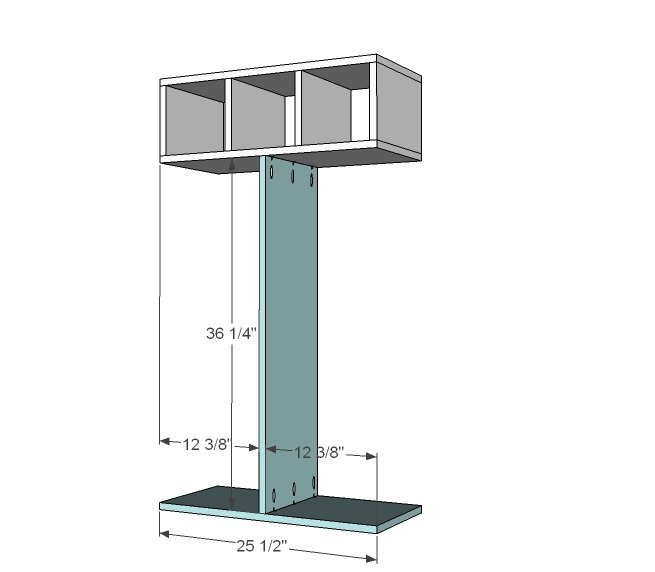
Step 2
Add main locker divider with 1 1/4" pocket hole screws and glue or using countersunk screws or nails and glue.
Step 3
Now add the sides, top and bottom shelf. You can use the Kreg Jig or just screws or nails and glue - it's fully face framed, so the joints are all reinforced.
Step 4
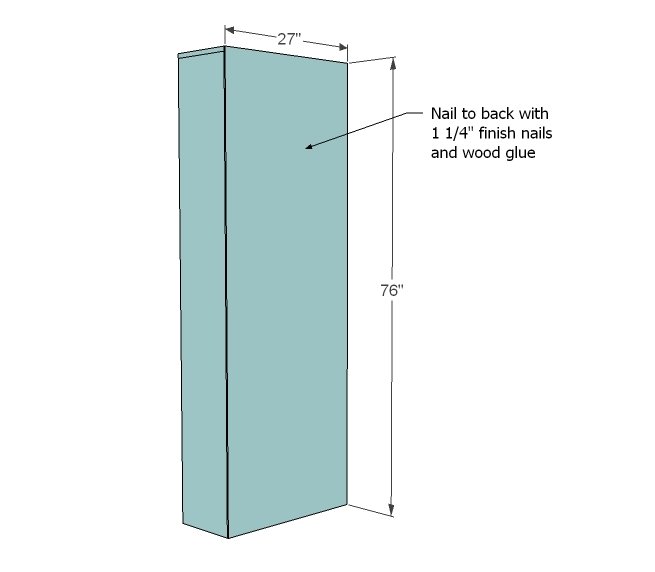
Attach back to all fixed shelves with glue and 1 1/4" finish nails.
Step 5
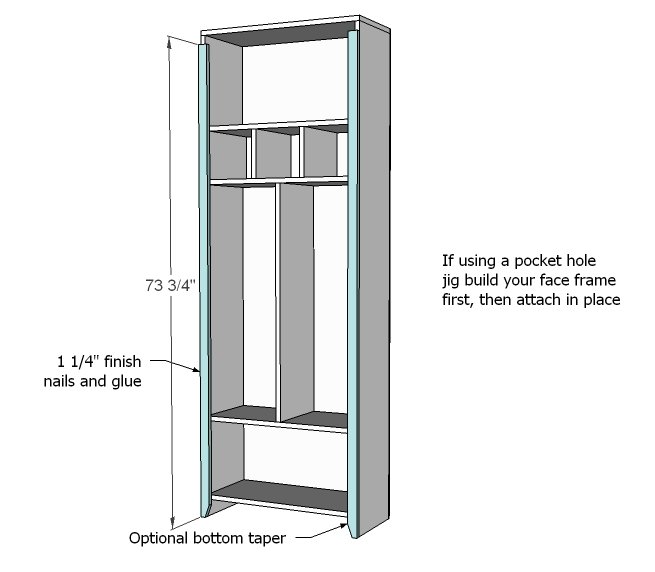
Step 6
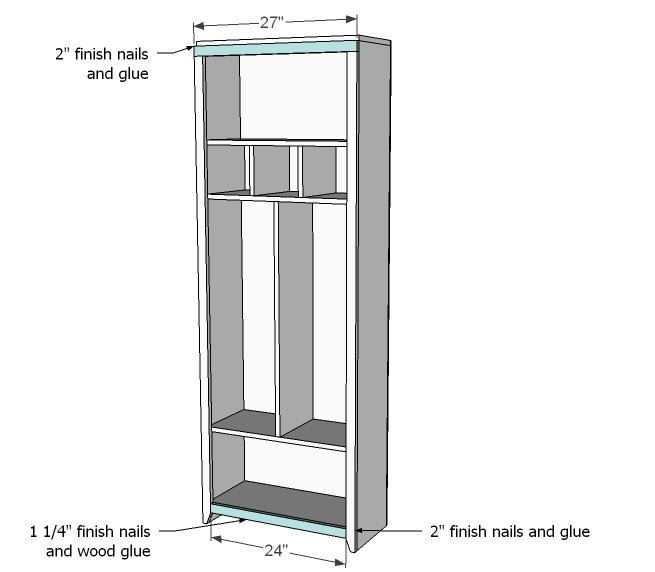
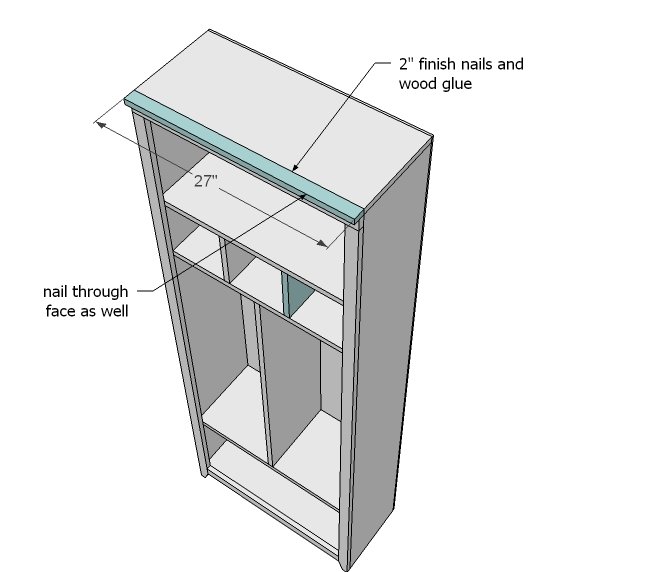
Then add top and bottom trim.
Step 7
And finally the crown.
Step 8
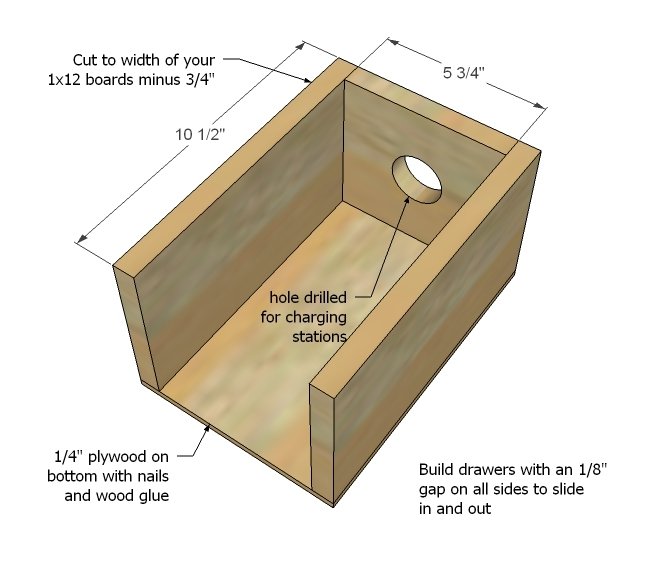
The trick with drawers is building to fit your openings. For beginners, give about 1/8" on each side. If you feel your drawers are really good - leave a 1/16th. Tack the plywood on to the bottom. Drill hole in back if using as a charging station. TIP: Each drawer could be slightly different, so build each drawer to the cubby measurements, and mark drawers for best fit. Apply candle wax to bottom after finishing for the smoothest slide.
Step 9
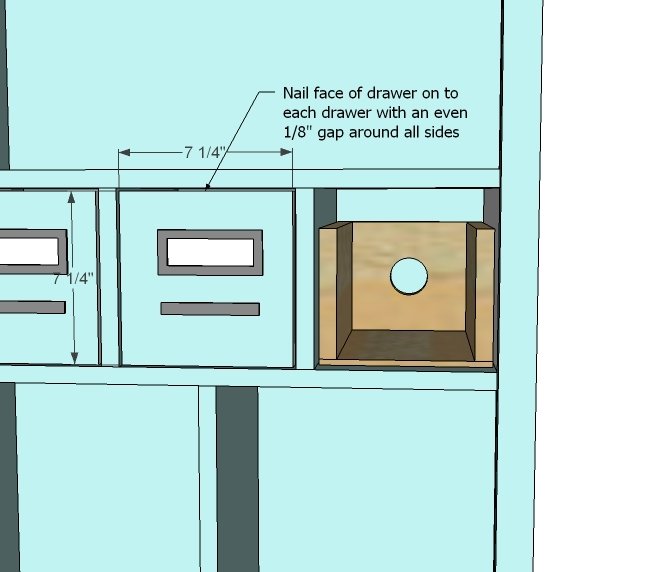
Slide drawer boxes into cubbies. Cut faces to fit and position over the drawer box. Nail on.
Step 10
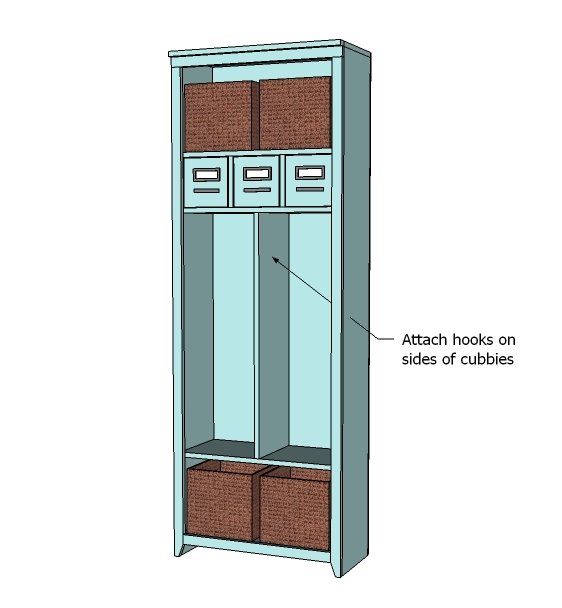
Add hooks. Secure to wall behind to prevent tipping.
Finishing
Sand all surfaces, starting with a medium grit and finishing with fine. Wipe off the dust, fill any holes or gaps with wood filler, and sand smooth once dry. Apply primer if you're painting, then finish with your choice of paint or stain and seal with a durable clear topcoat. For outdoor projects, use exterior-rated primer, paint or stain, and sealer so the piece stands up to the weather.
Source (temporary): https://www.ana-white.com/woodworking-projects/hillarys-locker-cabinet-charging-cubbies