Hockey Drying Rack
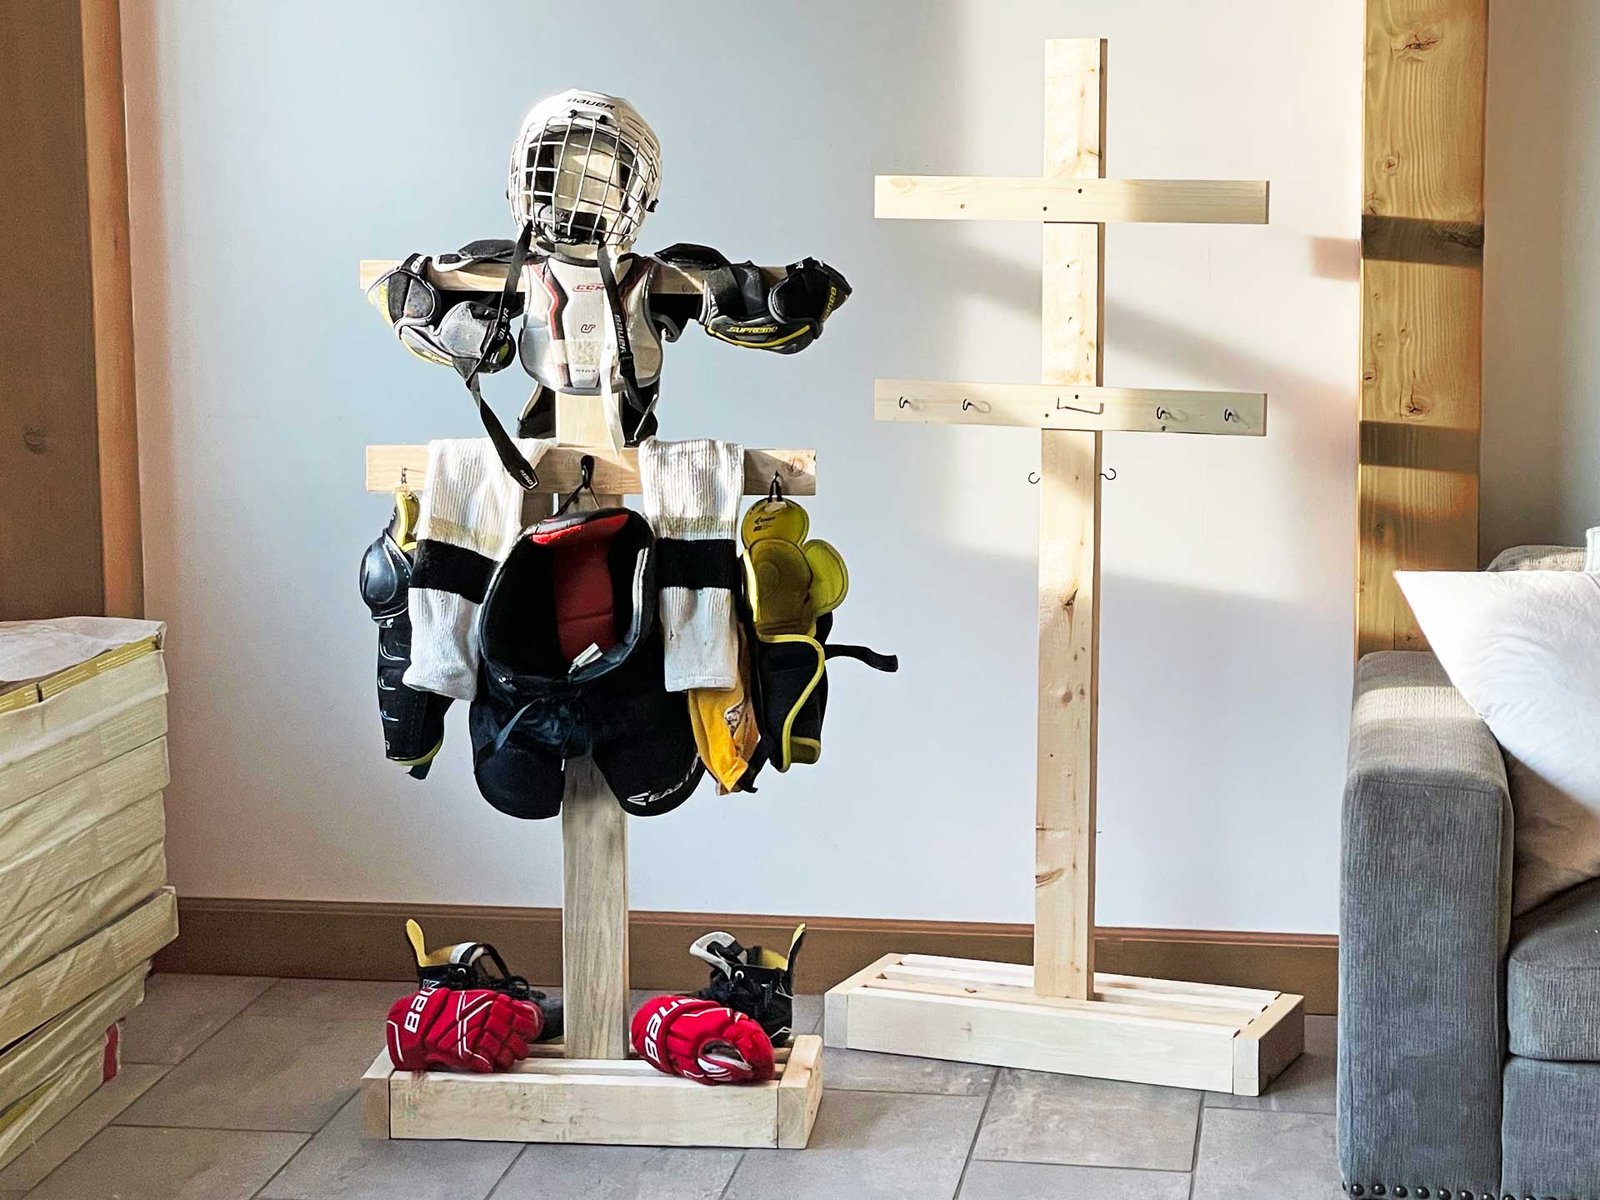
Build your own hockey drying rack! You'll just need two 2x4s and some leftover wood hockey sticks or 1x3s and some screws. This is a quick and easy project perfect for beginners.
Specifications
| Project type | Other Projects |
|---|---|
| Room | Garage and Workshop |
| Difficulty | Beginner Projects |
Dimensions
Use the size-specific shopping and cut lists below.
Shopping List
- 2 - 2x4 @ 8 feet long
- 1 - 1x3 @ 4 feet long or wood hockey sticks
- Cup hooks or other hooks or clips
- 20 - 3" self tapping star bit wood construction screws
- 4 - 2" self tapping star bit wood construction screws
Cut List
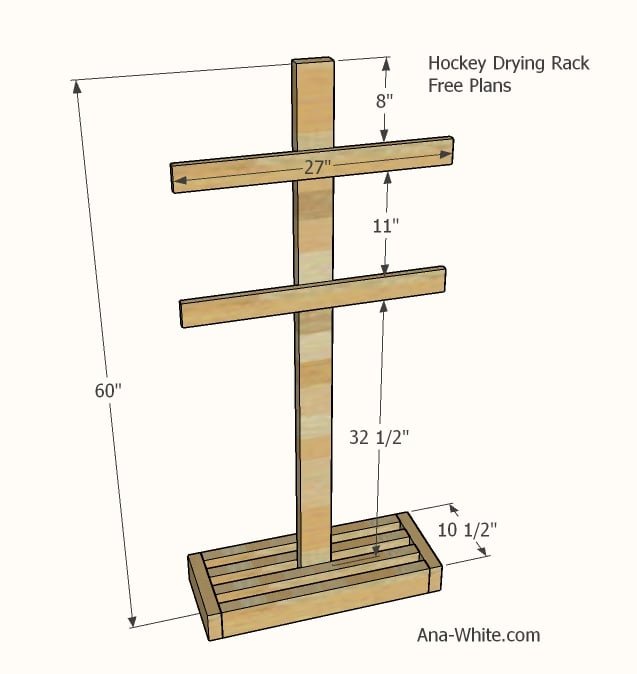
4 - 2x4 @ 24"
2 - 2x4 @ 10-1/2"
1 - 2x4 @ 60" (main post, should be cut to about the height of the user)
2 - 1x3 @ 27" or use hockey sticks here
Tools
- measuring tape
- square
- pencil
- safety glasses
- drill
- circular saw
- sander
Step-by-step Instructions
Cut the main post to desired height.
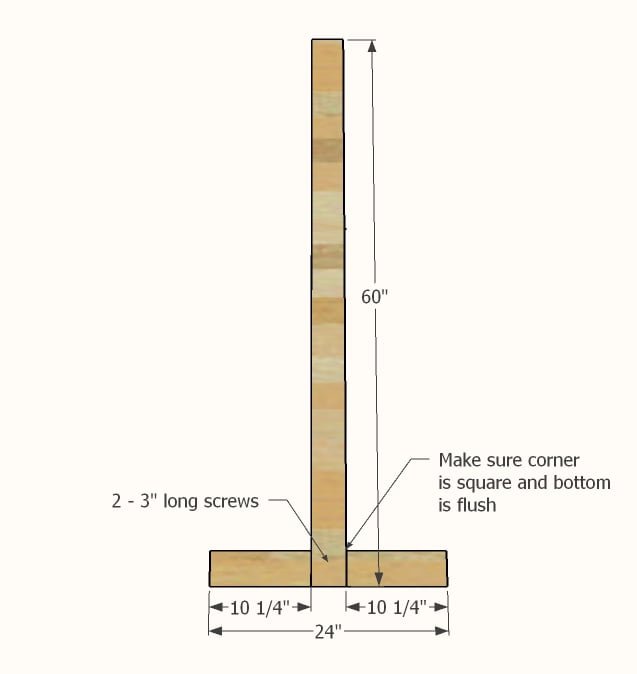
The smaller youth size is about 56" - this gives room to grow into. For my daughter, I cut the post to 60" - this gave her a little more room to hang jerseys on the back. For a taller adult with longer gear, 66" is recommended. Carefully attach the main post to one of the 24" long 2x4s with two screws. Make sure the post the square (90 degrees) to the base, and is flush to the bottom.
Step 2
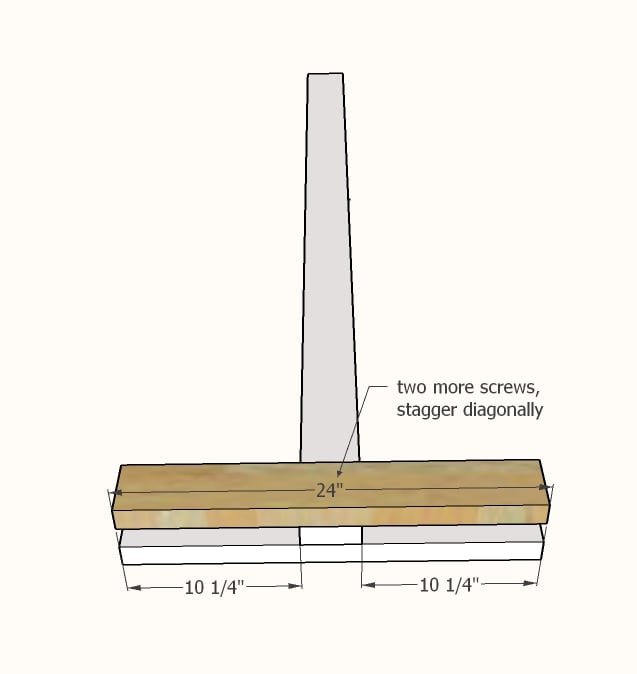
Repeat for other side of post. Make sure the two 2x4s @ 24" are lined up.
Step 3
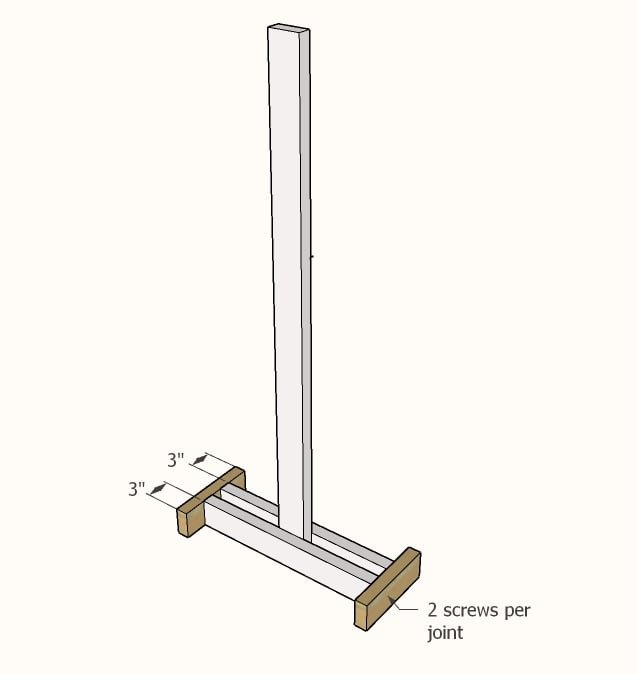
Add the end pieces, with 3" on each side as shown. 2 screws per joint.
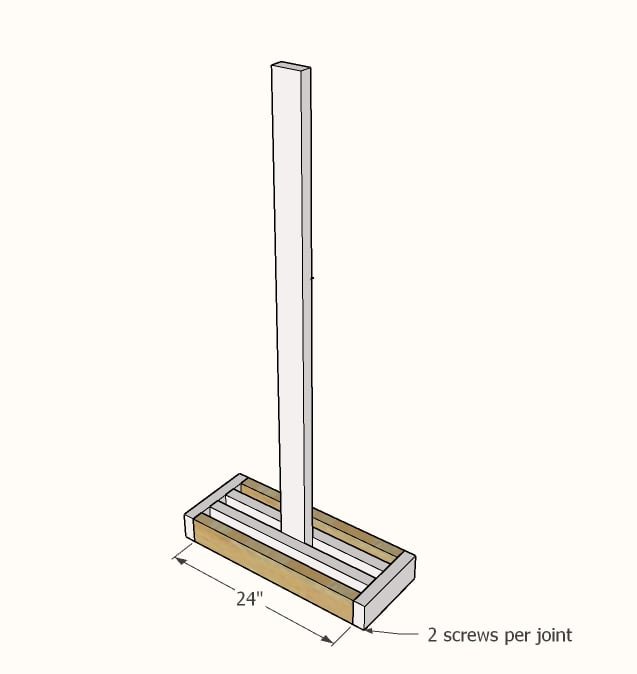
Add the remaining 24" long 2x4s.
Make sure it sits flat to the ground and does not rock.
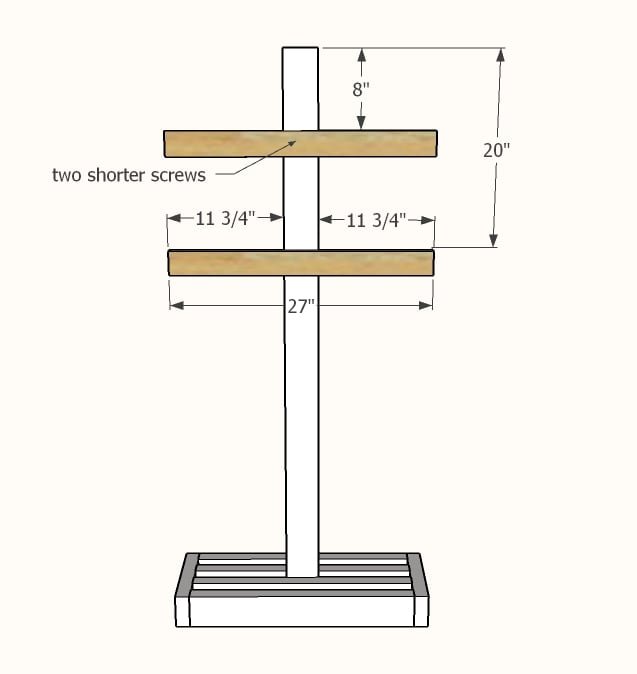
Add the 1x3s or hockey sticks.
Customize with hooks. I did hooks on front and back.
Finishing
Sand all surfaces, starting with a medium grit and finishing with fine. Wipe off the dust, fill any holes or gaps with wood filler, and sand smooth once dry. Apply primer if you're painting, then finish with your choice of paint or stain and seal with a durable clear topcoat. For outdoor projects, use exterior-rated primer, paint or stain, and sealer so the piece stands up to the weather.
Source (temporary): https://www.ana-white.com/woodworking-projects/hockey-drying-rack