House Play Table with Angled Desktop
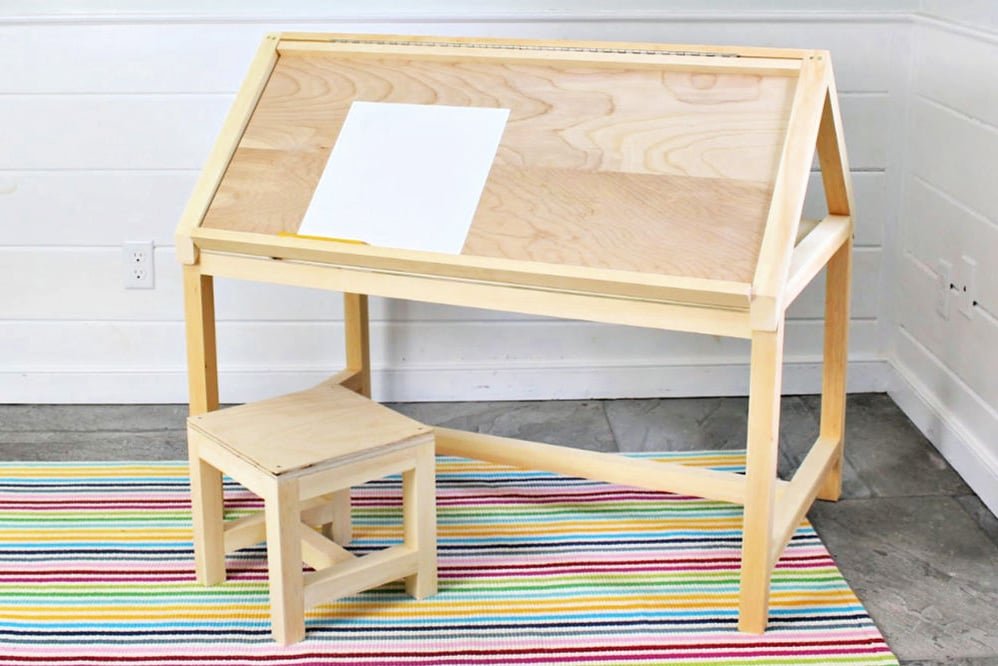
This little house shaped play table features and angled desktop perfect for coloring or drawing. Flip it around for storage and a flat work surface. make it easy to build - step by step plans with diagrams and shopping list from
Specifications
| Project type | Kids Tables and Chairs |
|---|---|
| Room | Kids and Toys |
| Style | Children's and Kid's Room Furniture and Toy Plans |
| Difficulty | Intermediate |
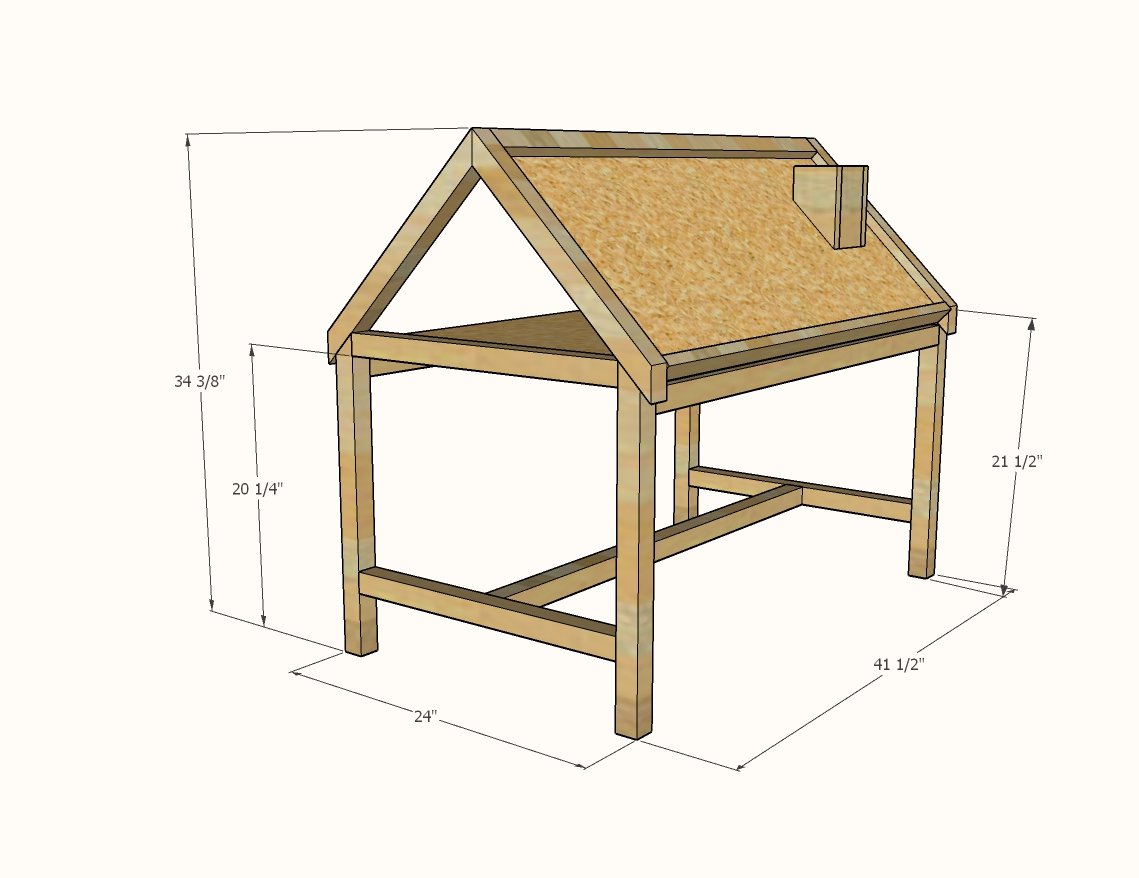
Dimensions
Use the size-specific shopping and cut lists below.
Shopping List
- 5 - 2x2 @ 8 feet long
- 1 - 1x2 @ 4 feet long
- 1 - 3/4" plywood @ 4' x 4'
Cut List
- 4 - 2x2 @ 18" - long point to short point measurement, both ends cut at 45 degrees, ends ARE parallel
- 4 - 2x2 @ 21-3/4" - longest point measurement, one end cut at 45 degrees
- 4 - 2x2 @ 21"
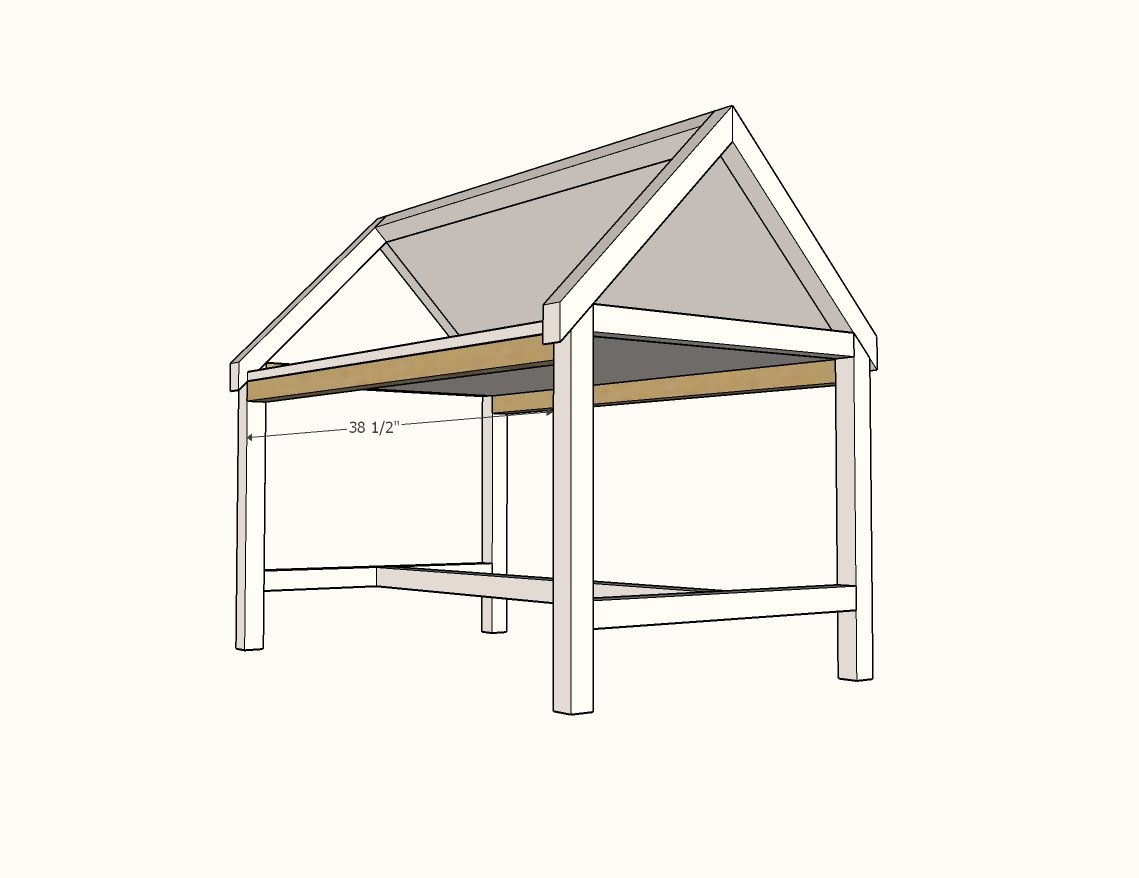
- 4 - 2x2 @ 38-1/2"
- 1 - 3/4" plywood @ 38-1/2" x 16"
- 1 - 1x2 @ 38-1/2"
- 1 - 3/4" plywood @ 38-1/2" x 23-1/4"
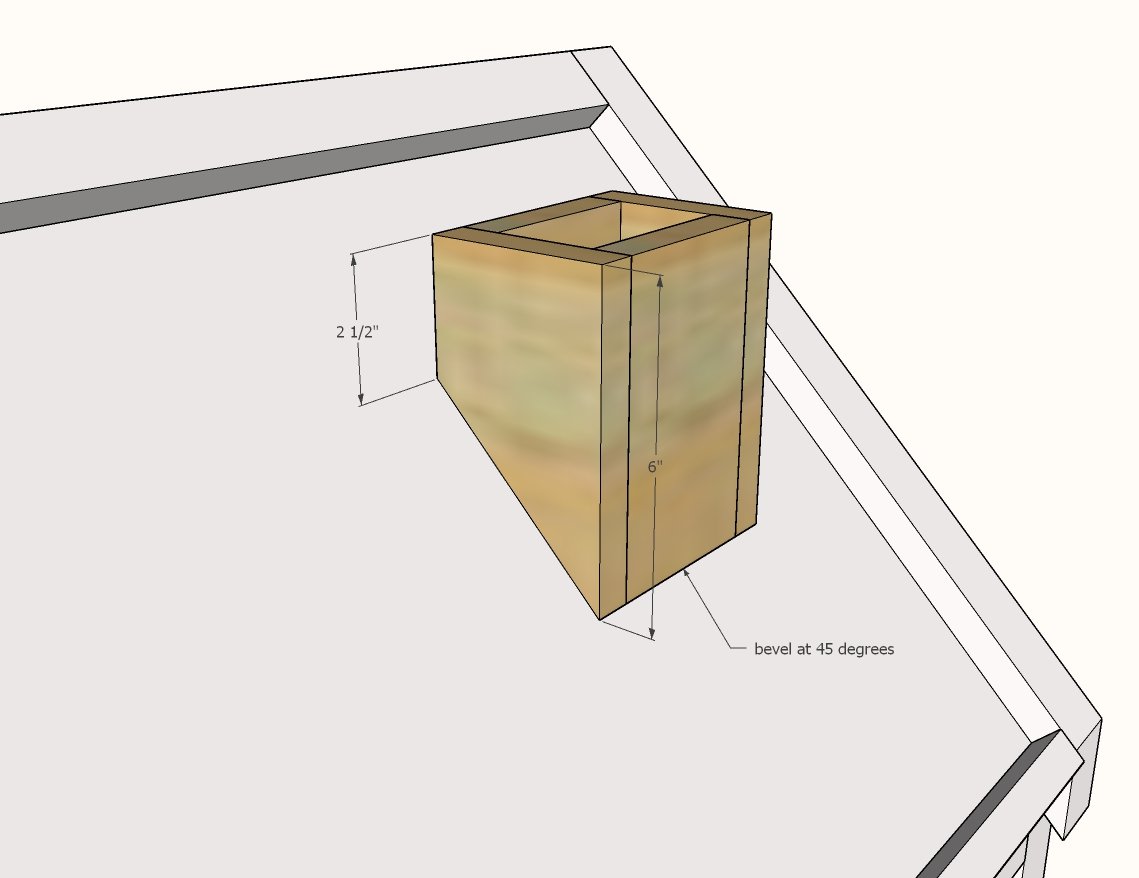
Pencil Holder
- 2 - 1x4 @ 6" - longest point measurement, one end cut at 45 degree angle
- 1 - 1x4 @ 2-1/2"
- 1 - 1x4 @ 6" - longest point measurement, one end cut at 45 degree bevel
Tools
- measuring tape
- square
- pencil
- safety glasses
- hearing protection
- kreg-jig
- drill
- circular saw
- compound miter saw
- nailer
- sander
Step-by-step Instructions
Step 1
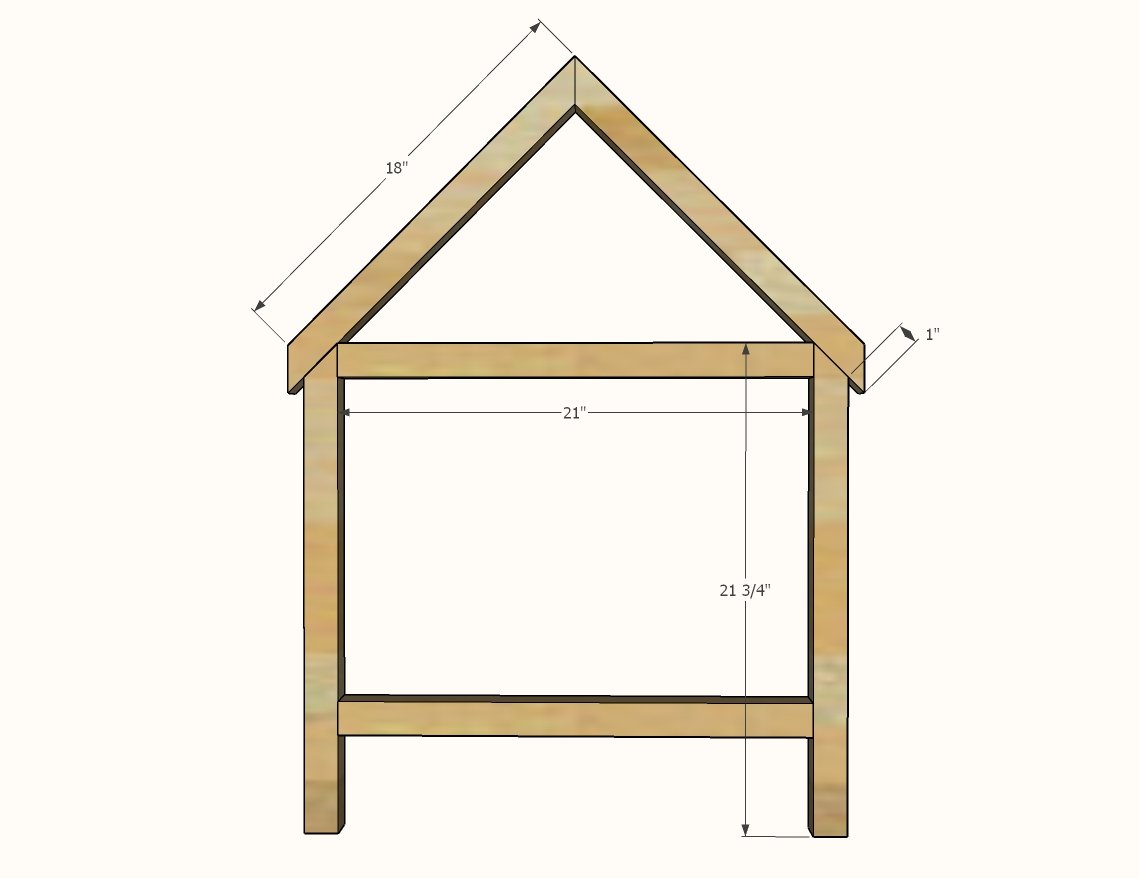
Build two of the house ends as shown, using 1-1/2" pocket holes and 2-1/2" pocket hole screws and glue.
Step 2
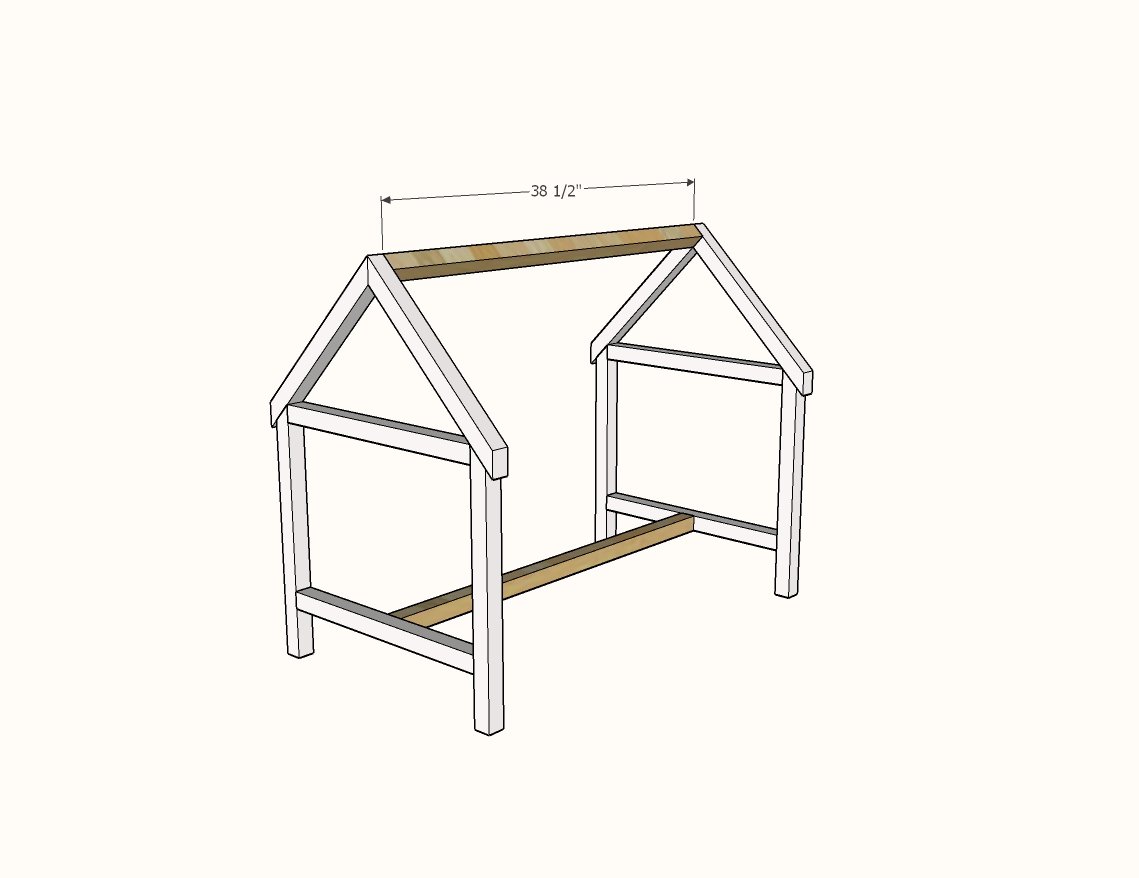
Attach the two ends together with 2x2s using 1-1/2" pocket holes and 2-1/2" pocket hole screws.
Step 3
Drill 3/4" pocket hole about every 6" along all four edges of the smaller plywood panel and attach to the 2x2s with 1-1/4" pocket hole screws.
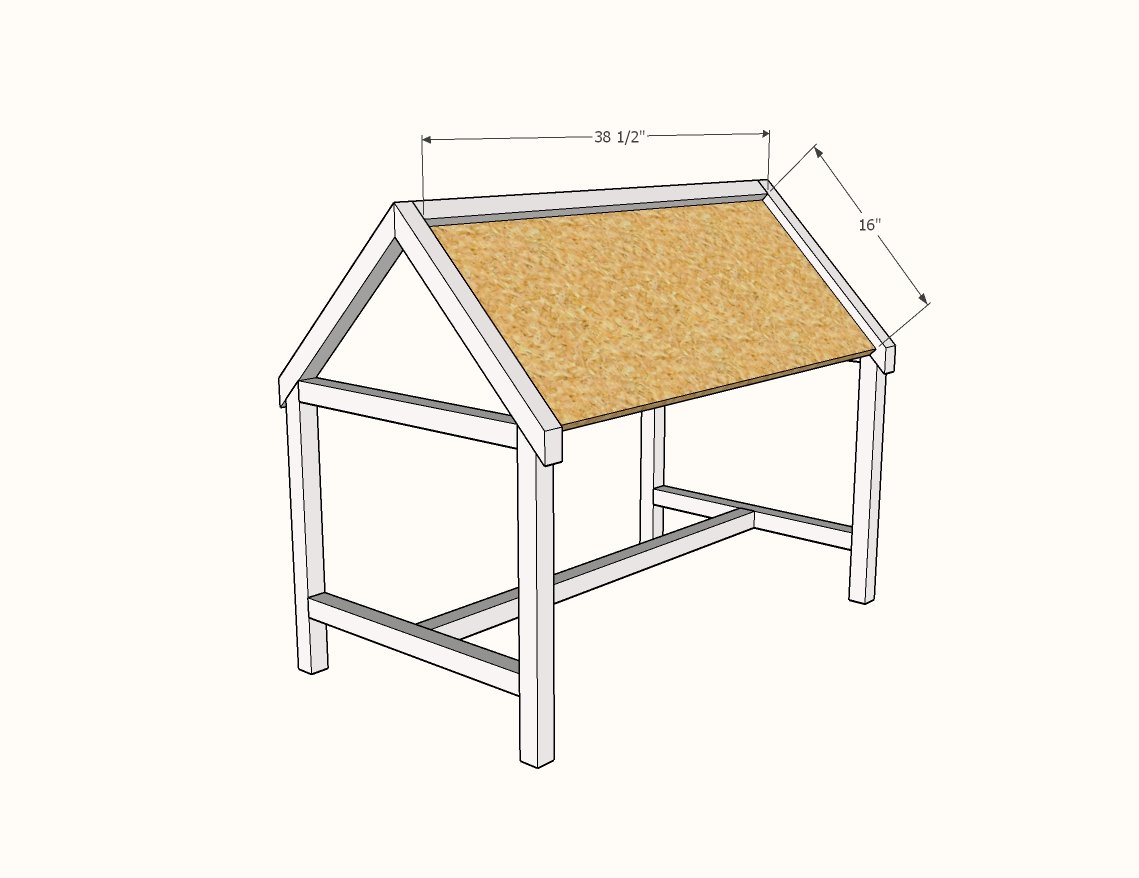
Step 4
Attach 1x2 trim with 1-1/4" pocket hole screws through the holes drilled in step 3.
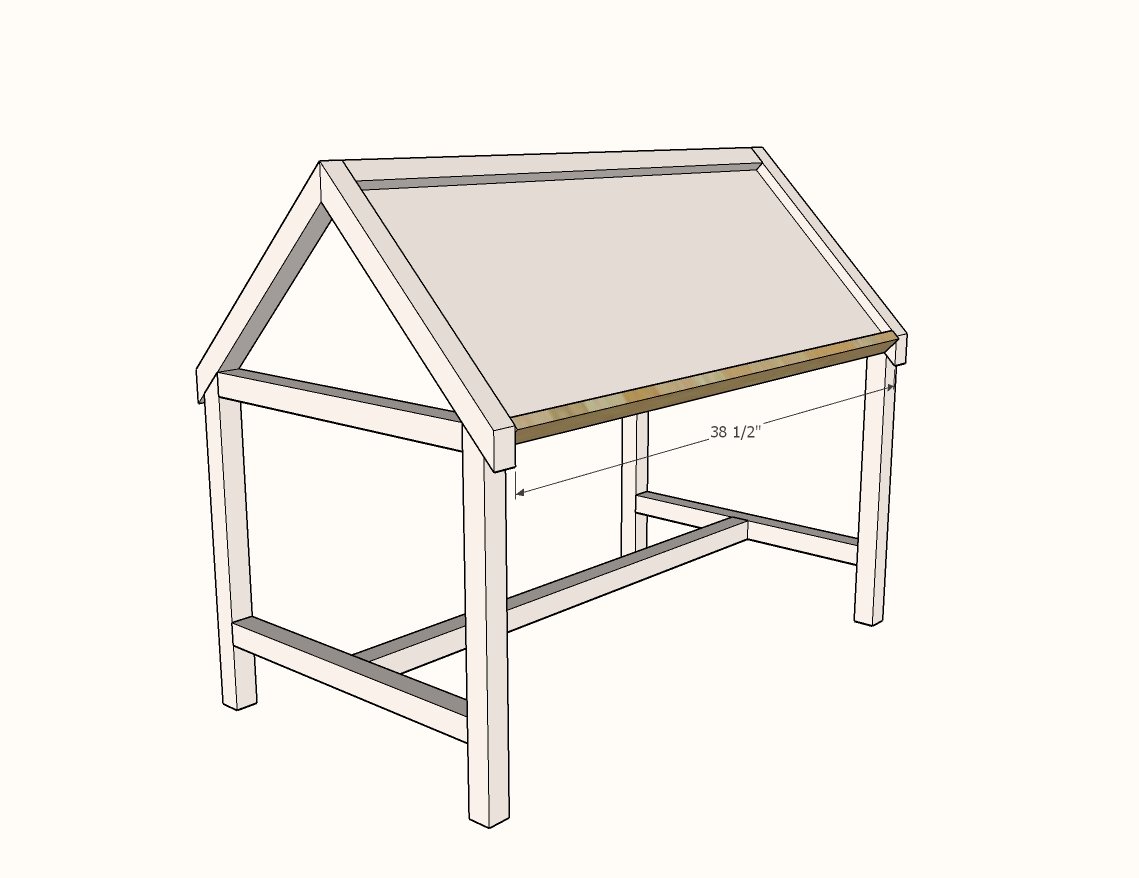
Build the roof pencil holder out of 1x4 boards first, and glue and 1-1/4" brad nails.
Attach to the desktop from underneath with 1-1/4" brad nails or screws (yes, you can use pocket hole screws). You only need a couple of fasteners to attach.
Drill 3/4" pocket holes about every 6" on both shorter ends of the larger plywood panel.
Attach with 1-1/4" pocket hole screws to the ends.
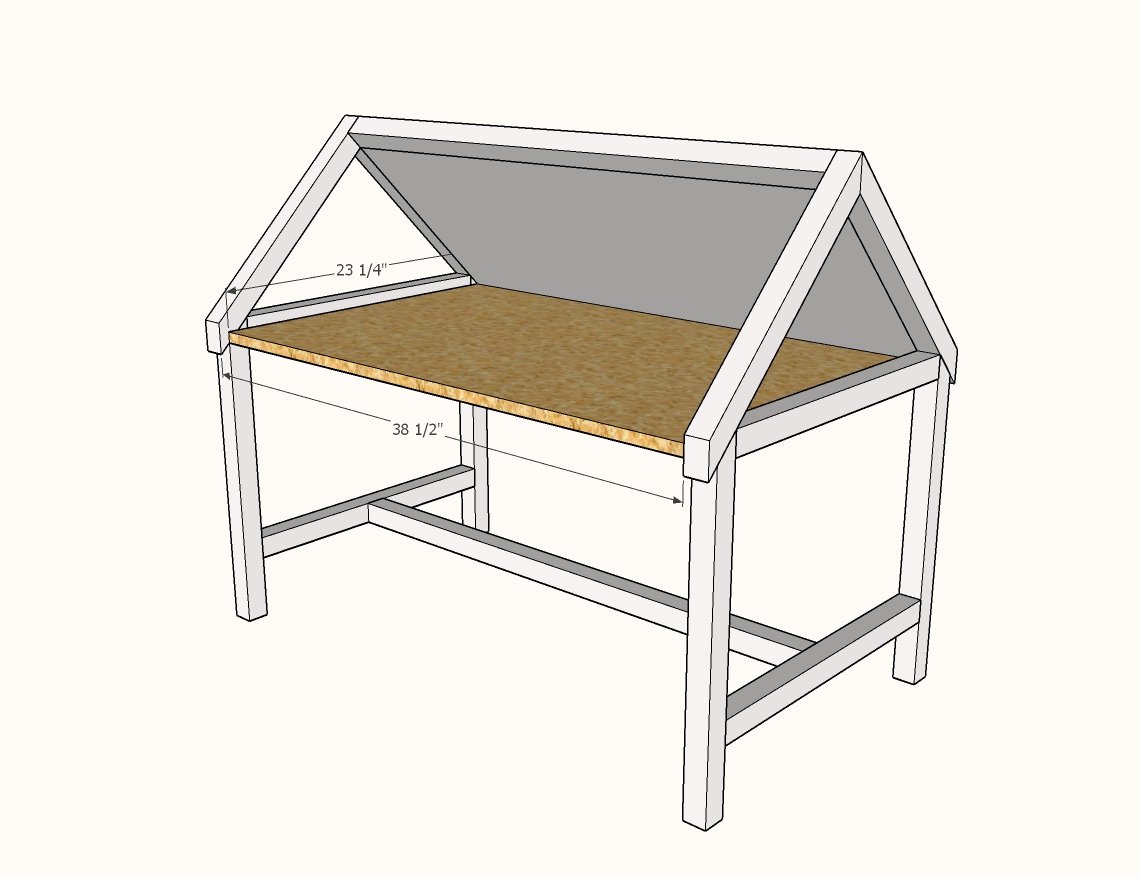
Attach 2x2 underneath the plywood with 1-1/2" pocket holes and 2-1/2" pocket hole screws.
Also recommended is to attach the plywood panel with glue and 1-1/4" nails to the 2x2 underneath.
Finishing
Sand all surfaces, starting with a medium grit and finishing with fine. Wipe off the dust, fill any holes or gaps with wood filler, and sand smooth once dry. Apply primer if you're painting, then finish with your choice of paint or stain and seal with a durable clear topcoat. For outdoor projects, use exterior-rated primer, paint or stain, and sealer so the piece stands up to the weather.
Source (temporary): https://www.ana-white.com/woodworking-projects/house-play-table-angled-desktop