How to Build a Floating Table with a Door
If you are looking for a fast simple modern table to build, this just could be it. Using an inexpensive hollow core door and simple legs, you can build this table. Cut list has been updated to reflect reader comments (thank you readers!).
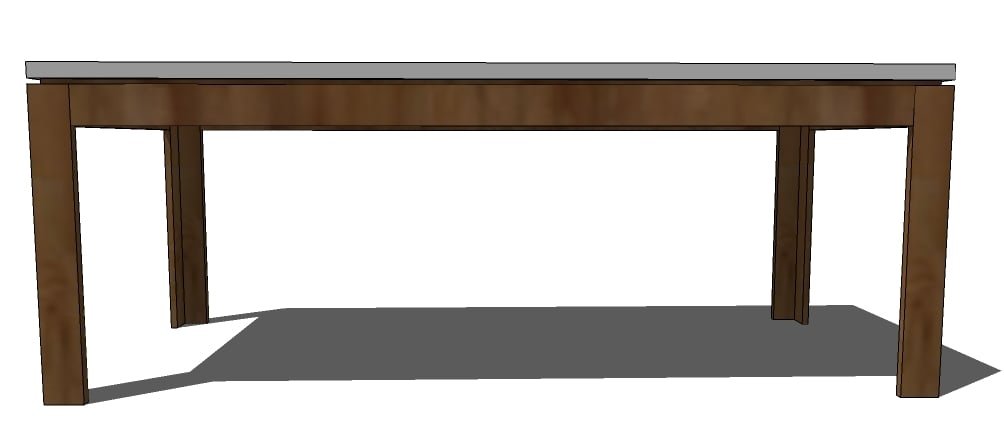
Specifications
| Project type | Dining Table Plans |
|---|---|
| Room | dining room |
| Style | Modern Style Furniture Plans |
| Difficulty | Beginner Projects |
| Estimated cost | $50 - $100 |
Dimensions
Use the size-specific shopping and cut lists below.
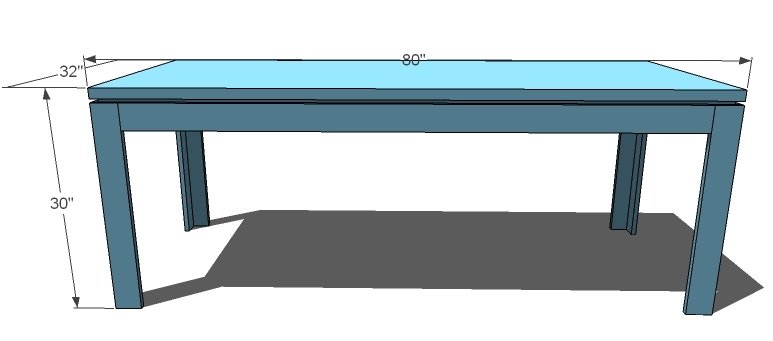
Shopping List
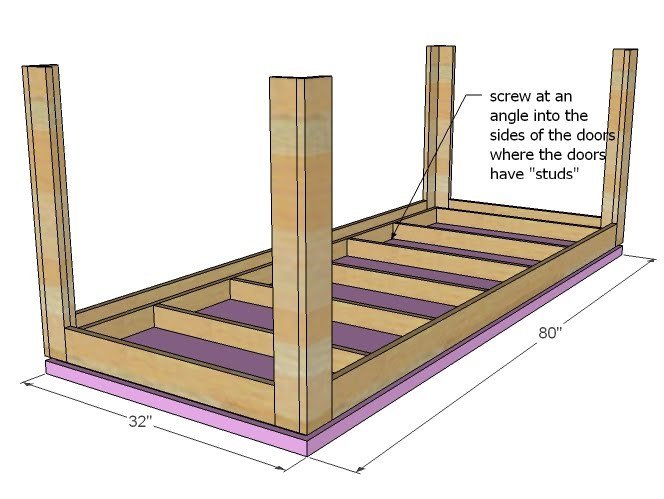
Flush Hollow Core Door (no holes cut out of it or hinges) measuring 32″ x 80″ 4 – 1×3, 8′ Long 4 – 1×4, 8′ Long 1 1/4″ Screws 2″ Screws Wood Glue Finishing Supplies
Cut List
7 – 1×3 @ 29″ (Under Table Supports) 2 – 1×3 @ 78 1/2″ (Inner Apron) 4 – 1×3 @ 28 1/8″ (End Legs) 4 – 1×4 @ 28 1/8″ (Side of Legs) 2 – 1×4 @ 73″ (Side Aprons) 2 – 1×4 @ 25 1/2″ (End Aprons)
Tools
- measuring tape
- square
- pencil
- safety glasses
- hearing protection
- drill
- circular saw
- sander
Step-by-step Instructions
TABLE FRAME
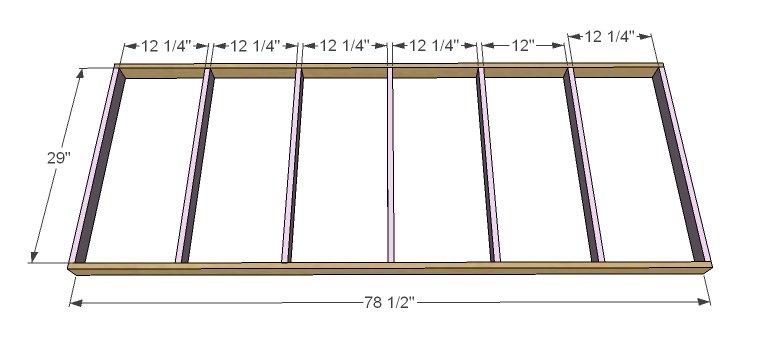
Construct the table frame as shown above from 1x3s using 2″ screws and glue. Screw through the inner aprons into the under table supports. Leave about 12″ space between the supports.
END LEGS
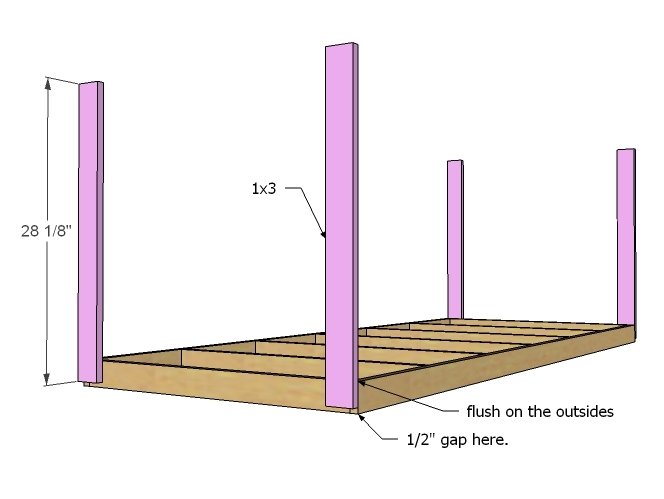
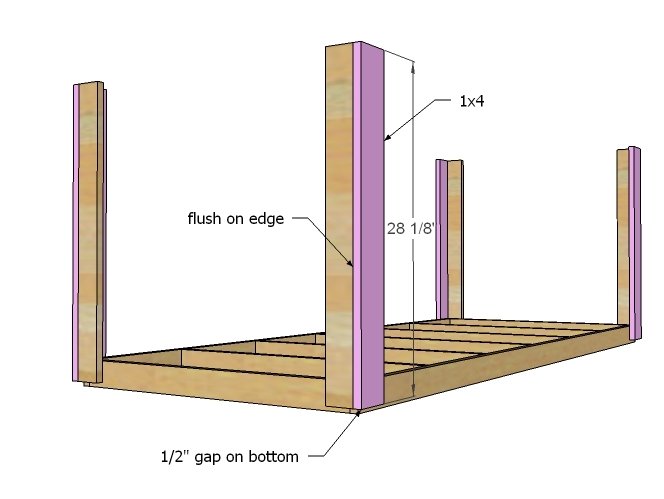
Use 1 1/4″ screws and glue to attach the end legs as shown above. Leave the 1/2″ gap on the tops (shown above as the bottom). Check the legs for square. These are the 1×3 boards.
SIDE LEGS
Attach the side legs to the table frame using 1 1/4″ screws and glue. Then attach to the end legs down the side, keep outside edges flush.
Step 4
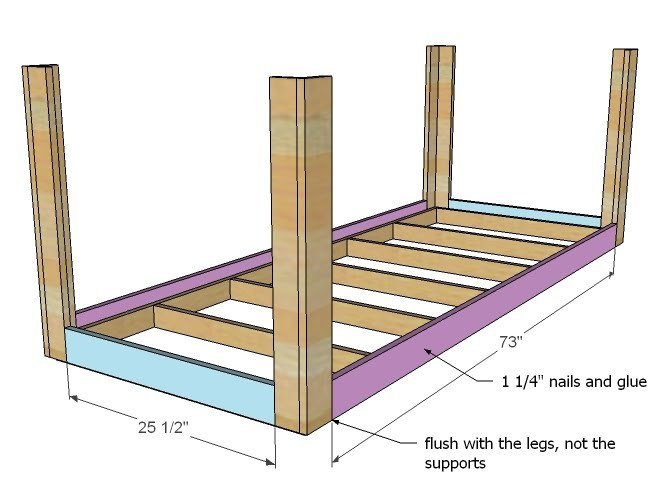
Keeping the top edge (shown above as the bottom edge) of the aprons flush with the legs, leaving a 1/2″ gap from the top of the table frame and fasten in place with 1 1/4″ nails and glue (you can also use screws, but it’s not a support issue, so nails would be quicker and easier to hide).
Step 5
Finishing
Sand all surfaces, starting with a medium grit and finishing with fine. Wipe off the dust, fill any holes or gaps with wood filler, and sand smooth once dry. Apply primer if you're painting, then finish with your choice of paint or stain and seal with a durable clear topcoat. For outdoor projects, use exterior-rated primer, paint or stain, and sealer so the piece stands up to the weather.
Source (temporary): https://www.ana-white.com/woodworking-projects/how-build-floating-table-door