How to Build a Fort Bed
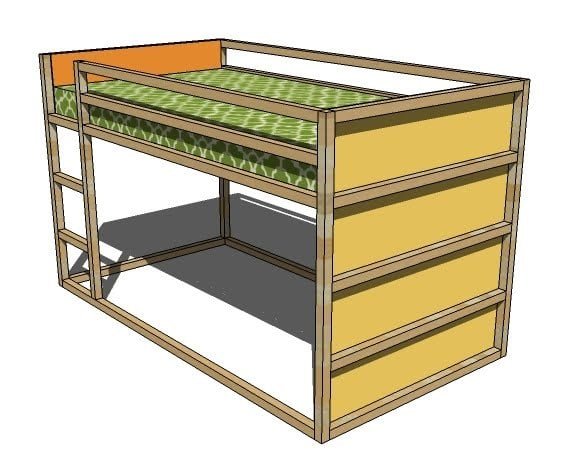
A simple fort bed for creating an elevated children's sleeping space. Can be used upside down.
Specifications
| Project type | Beds and Bed Frames |
|---|---|
| Room | Bedroom |
| Style | Children's and Kid's Room Furniture and Toy Plans |
| Difficulty | Intermediate |
| Estimated cost | $50 - $100 |
Dimensions
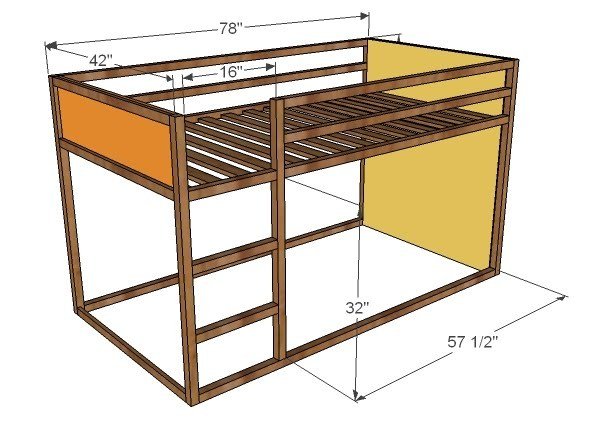
Use the size-specific shopping and cut lists below.
Shopping List
1- 4×8 Sheet of 3/4″ Particle Board 4 – 1×2 Boards, 8′ Long 7 – 1×3 Boards, 8′ Long 11 – 2×2 Boards, 8′ Long 3″ Screws 1 1/4″ Screws Wood Glue Finishing Supplies
Cut List
1 – 3/4″ Particle Board @ 39″ x 11 1/2″ (Open End Panel Board) 1 – 2/4″ Particle Board @ 39″ x 46″ (Closed End Panel) 7 – 1×2 @ 39″ (Panel Trim Pieces) 1 – 2×2 @ 39″ (Bottom of Open Panel End) 4 – 2×2 @ 46″ (Legs) 3 – 2×2 @ 16″ (Ladder Rungs) 5 – 2×2 @ 75″ (Side Panel Full Length Boards) 3 – 2×2 @ 57 1/2″ (Ladder Panel Guardrail Boards) 14 – 1×3 @ 39″ (Slats)
Tools
- measuring tape
- square
- pencil
- safety glasses
- hearing protection
- drill
- circular saw
- sander
Step-by-step Instructions
Open End Panel { Part 1 }
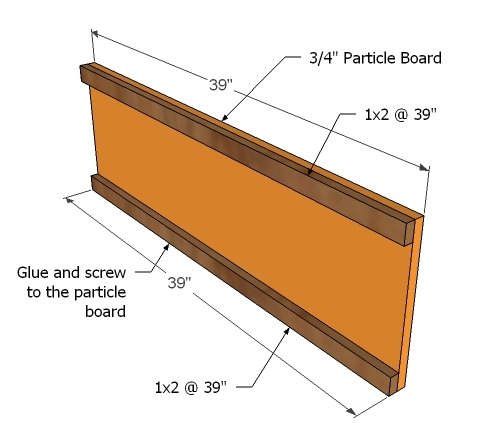
Fasten with glue and screws the 1x2s to the particle board. This can be a permanent joint.
Open End Panel { Part 2 }
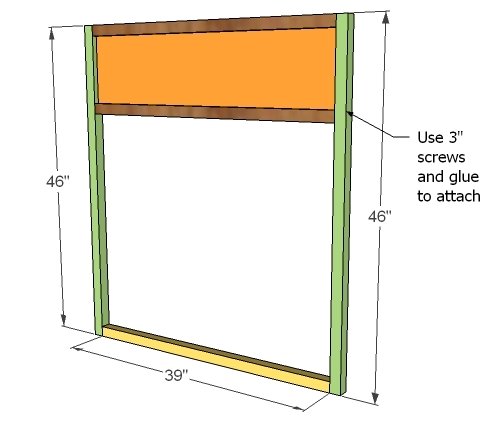
Fasten the legs and the bottom end panel piece to the legs as shown above. Use 3″ screws. Predrill your screw holes. Use glue, as this can also be a permanent joint
Closed End Panel { Part 1 }
Build your closed end just like your open end, first by gluing and screwing with 1 1/4″ screws the trim boards to the particle board pieces.
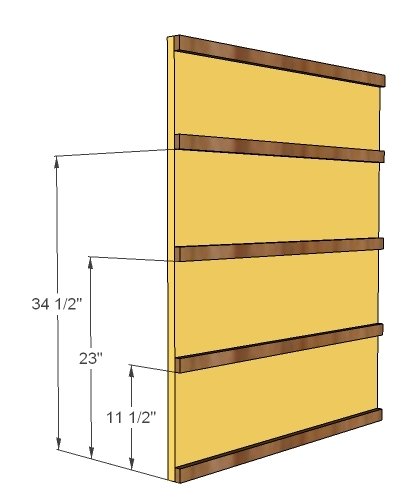
Closed End Panel { Part 2 }
Add the legs with 3″ screws and glue. Keep outside edges flush.
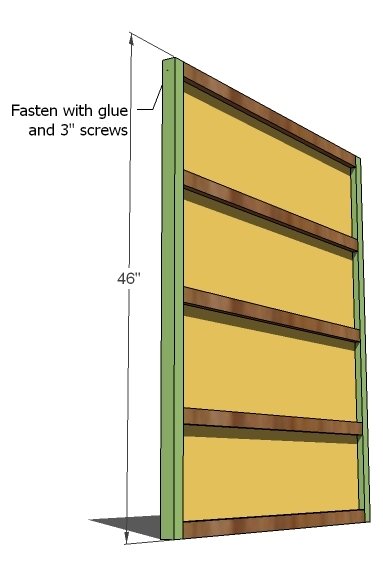
Step 5
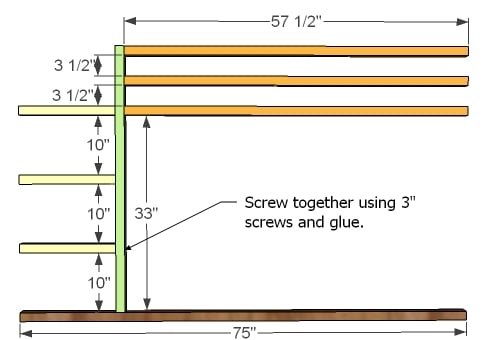
Back Rail Boards & Bottom
Using 3″ screws, attach the back boards as shown above.
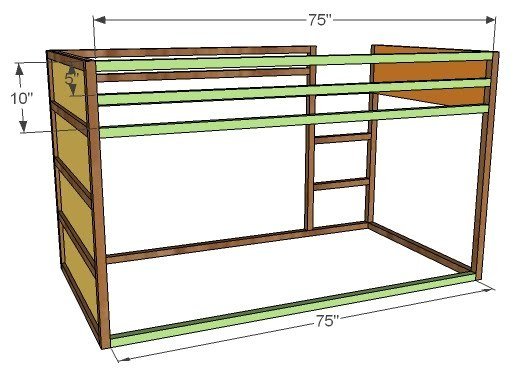
Slats
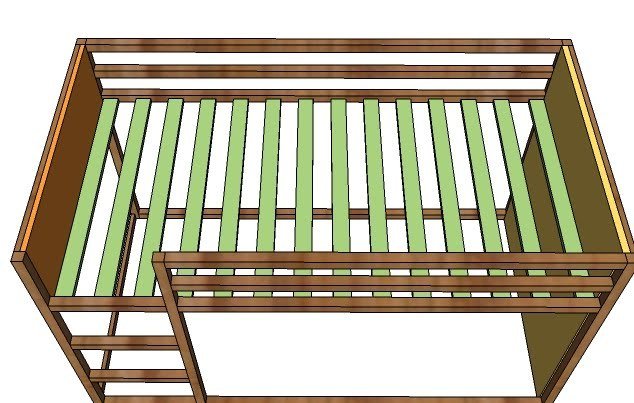
With every plan, there is a tricky part. And putting these slats on is going to be your tricky part. OPTION #1: You could screw from the outsides of the sides of the bed into the ends of the slats, but then you have lots of screw heads showin
Step 8
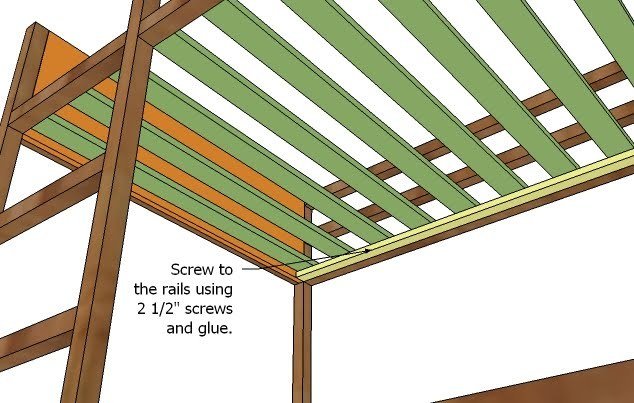
OPTION #2 You could also glue and screw a 1×2 on edge to the rails.
Step 9
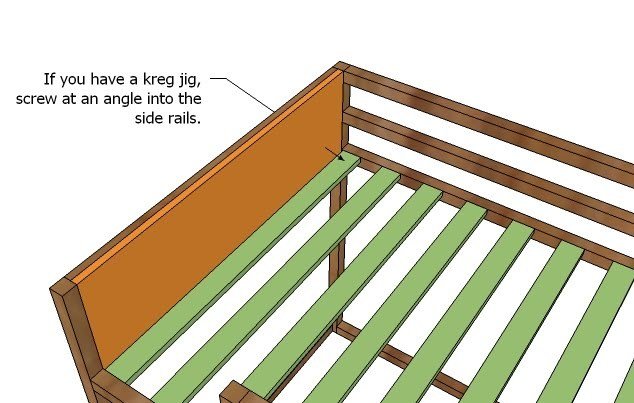
OPTION #3 If you have a Kreg Jig™, you could drill pocket holes and fasten to the rails in this manner
Step 10
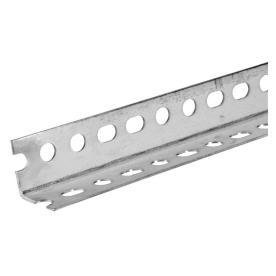
OPTION #4 If you’ve got teenagers using the bed, steel angle like this piece would both strengthen your rails and fasten your slats to your rails. Simply screw with 1 1/4″ screws to the inside of the rails and rest your slats on top. From underneath, use a couple of screws to fasten your slats down.
Notes
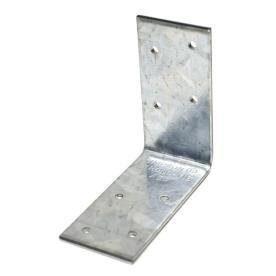
To make your bed even stronger or to take an “wiggle” out, you can use Simpson Strong tie like the one below at the corners of the legs.
Finishing
Sand all surfaces, starting with a medium grit and finishing with fine. Wipe off the dust, fill any holes or gaps with wood filler, and sand smooth once dry. Apply primer if you're painting, then finish with your choice of paint or stain and seal with a durable clear topcoat. For outdoor projects, use exterior-rated primer, paint or stain, and sealer so the piece stands up to the weather.
Source (temporary): https://www.ana-white.com/woodworking-projects/how-build-fort-bed