How to Build Kitchen Cabinet with a 2x4 Base
Diy your own kitchen cabinets for a tiny house to save money and get exactly what you need. Free
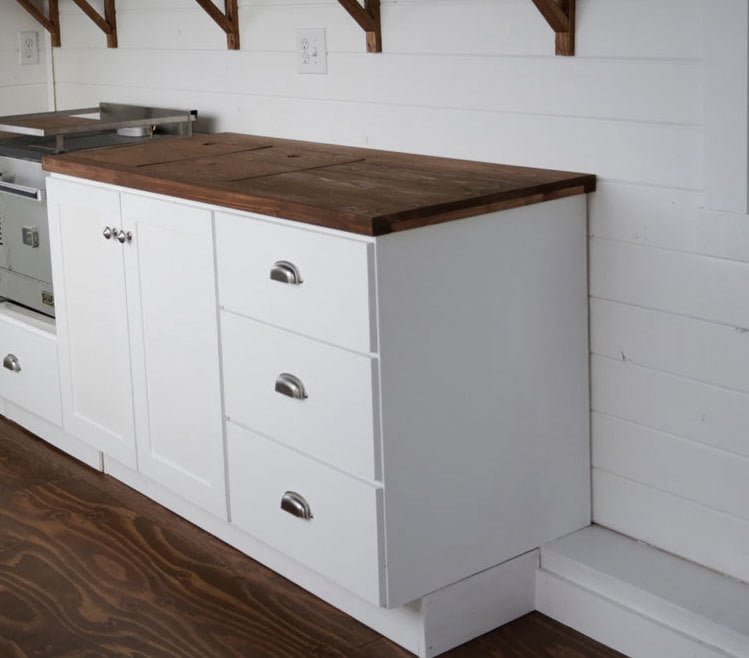
Specifications
| Project type | Kitchen Cabinet Plan, Accessories and Serving |
|---|---|
| Room | kitchen |
| Style | Tradditional Style Furniture Plans |
| Difficulty | Intermediate |
Dimensions
Use the size-specific shopping and cut lists below.
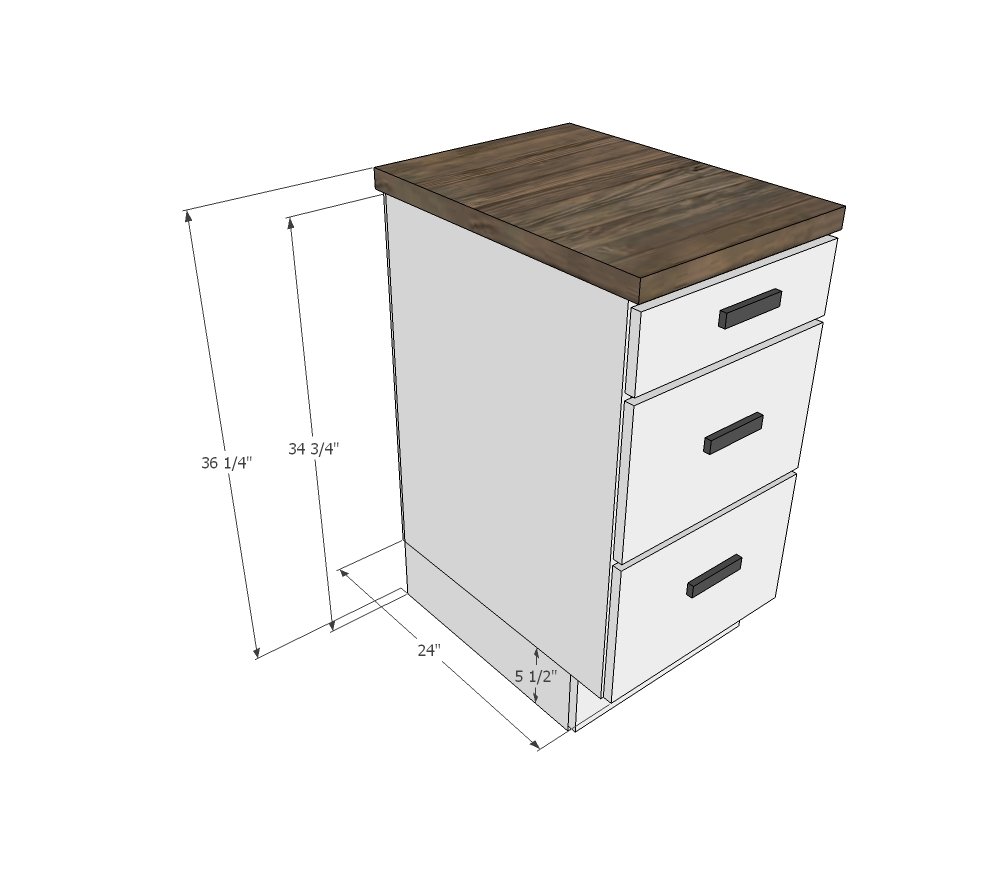
Shopping List
- 3/4" cabinet grade or hardwood plywood, ripped into strips 23-1/4" wide by 8 feet long (very important rip width is EXACTLY the same), prefinished PureBond is the best option
- 1x4 boards or scrap wood plywood for supports
- 1x2s in matching wood species as doors if staining or paint grade 1x2s for paint
- 2x6s for toekick build up
- 1/2" or 3/4" plywood scraps for drawer bottoms
- 3 - Drawer Slides with integrated sides (we used these)
- 1/4" plywood for backs of cabinets
- 1x12 and 1x6 boards for drawer faces
Cut List
Cut list is for 18" Drawer Base - Adjust width to customize
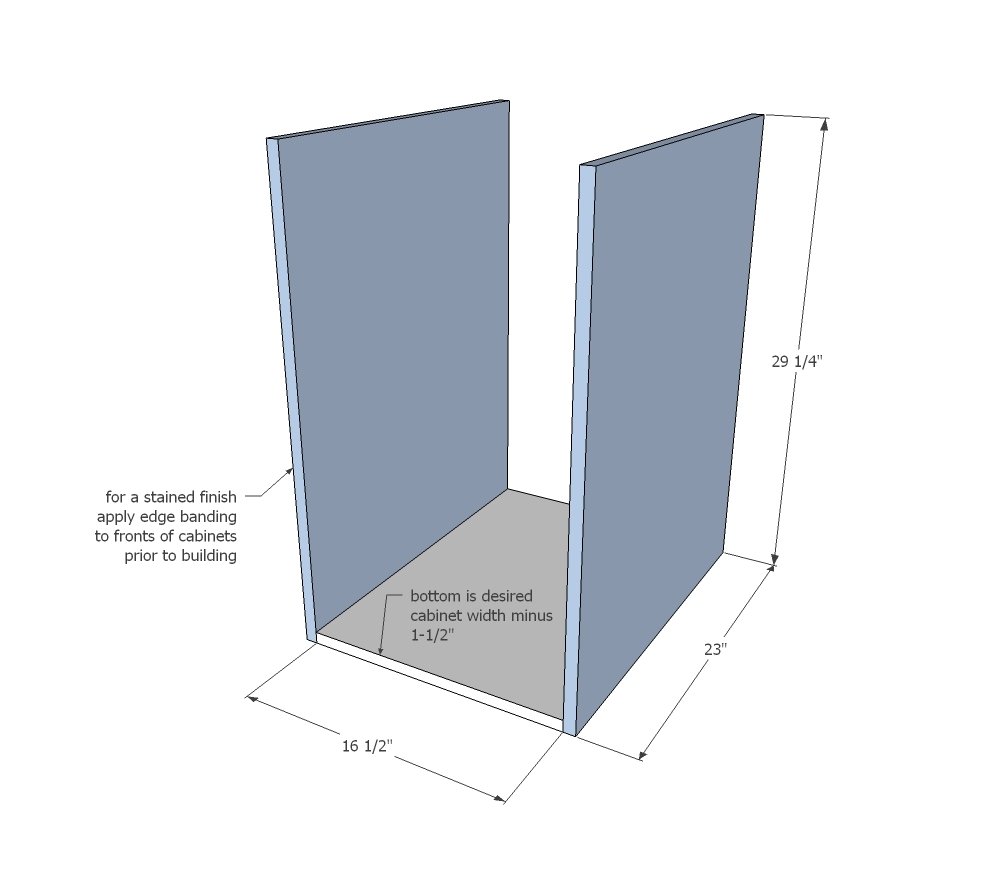
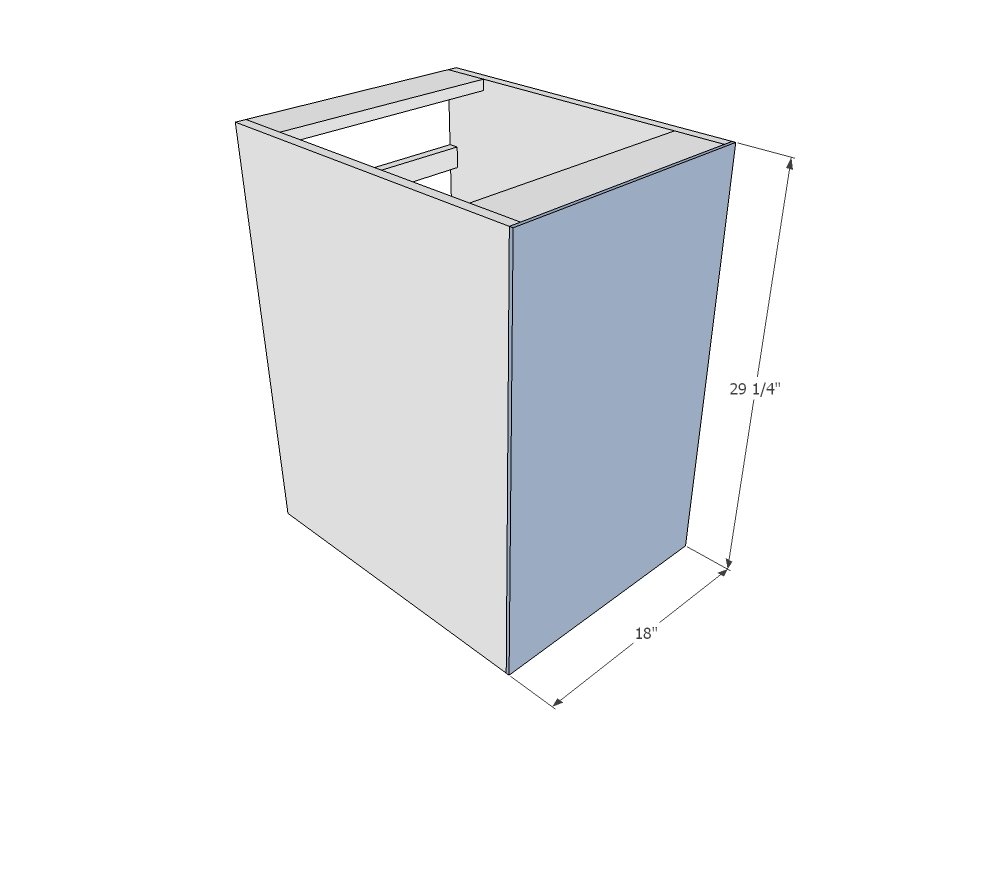
- 2 - 3/4" plywood @ 23" x 29-1/4" (sides)
- 1 - 3/4" plywood @ 23" x 16-1/2" (bottom)
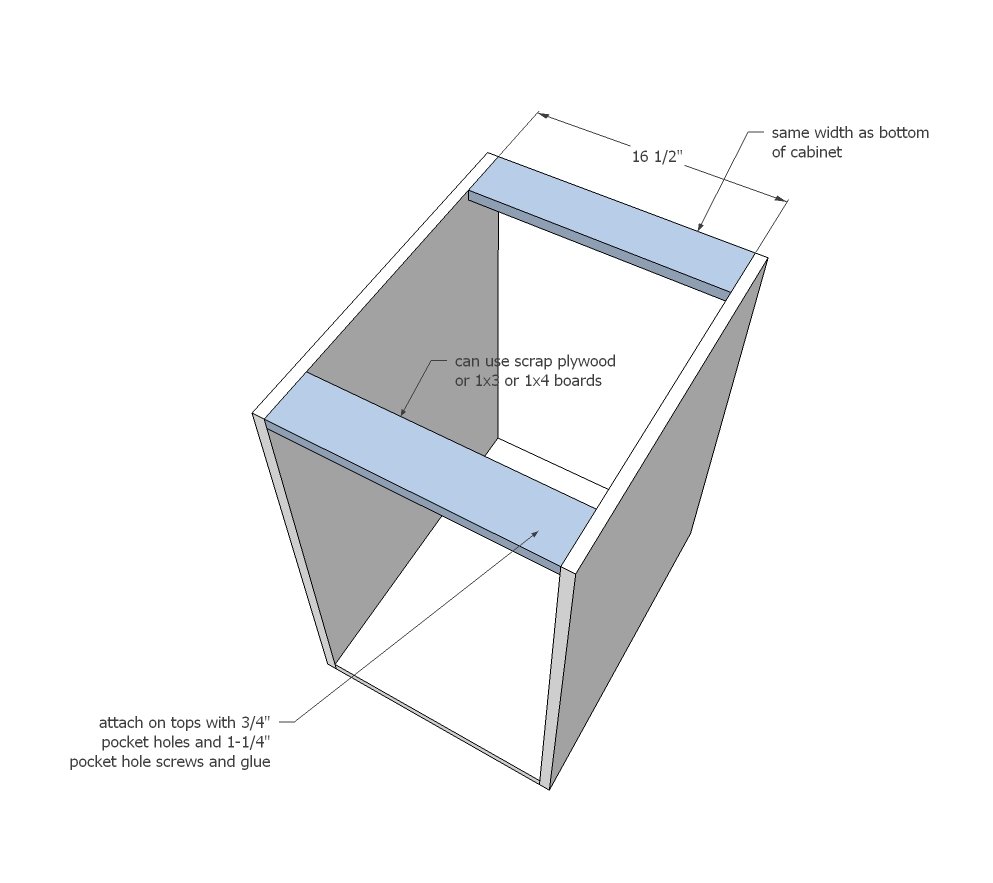
- 3 - 1x4 or similar @ 16-1/2" (top and back supports)
- 2 - 1x2 @ 16-1/2" (trim between drawers)
- 1 - 1/4" plywood @ 29-1/4" x 18" (back)
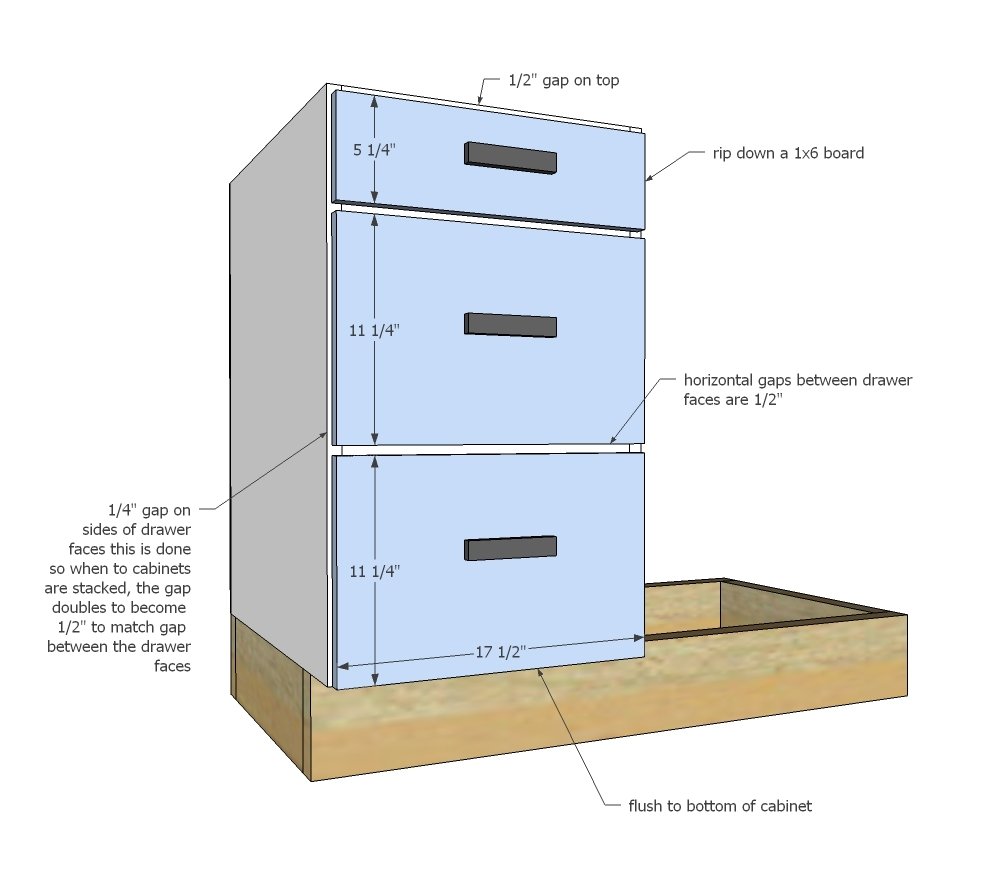
- 1 - 1x6 ripped down to 5-1/4" x 17-1/2" (drawer face)
- 2 - 1x12 @ 17-1/2" (drawer faces)
Build toekick to fit all cabinets in a row
Tools
- measuring tape
- square
- pencil
- safety glasses
- hearing protection
- kreg-jig
- drill
- compound miter saw
- table saw
- nailer
- sander
- level
- Iron
Step-by-step Instructions
Step 1
Apply edge banding if using to front edges of bottom and sides. Drill 3/4" pocket holes along bottom side edges of bottom and attach to sides, with pocket holes on underside using 1-1/4" pocket hole screws and glue.
Step 2
Attach top support pieces as you did the bottom.
Step 3
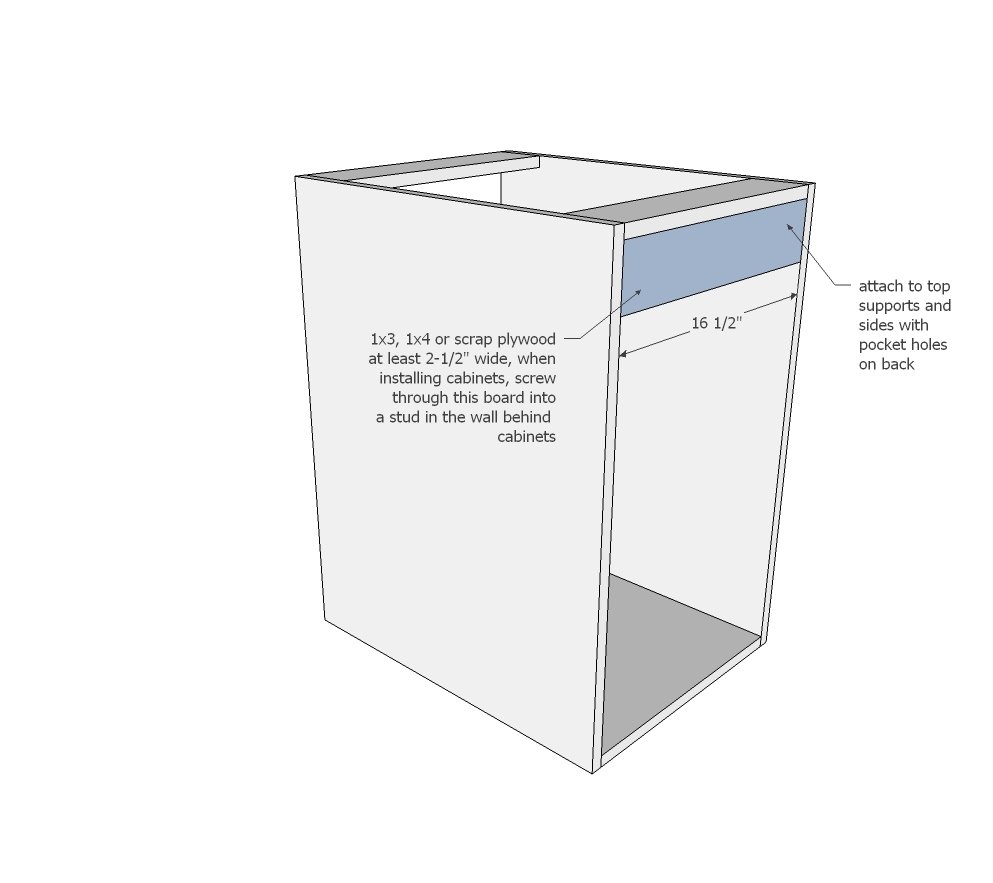
Attach back support piece to sides and top support piece.
Step 4
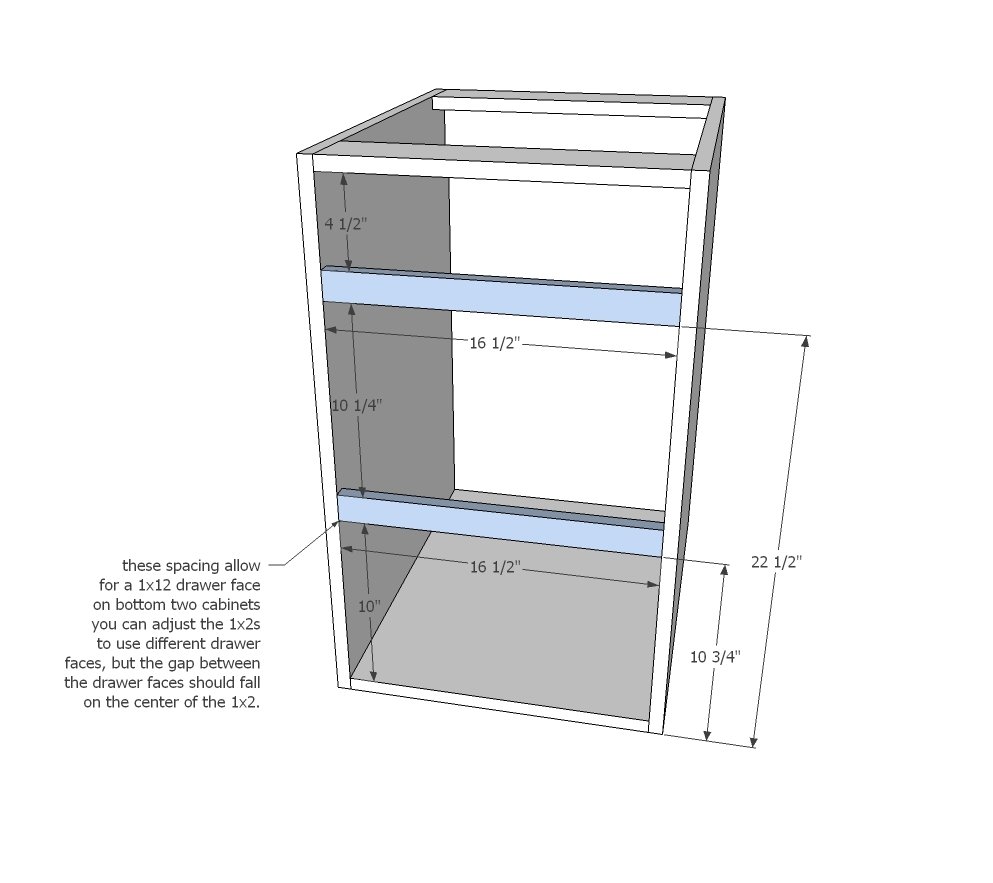
Drill 3/4" pocket holes on back side of 1x2s and attach inside cabinet, flush to the front, positioned in the middle of drawer faces. If using different drawer face sizes, place drawer faces on top of cabinet with 1/2" gaps in between, mark positions, and then attach the 1x2s centered on these gaps.
Step 5
Step 6
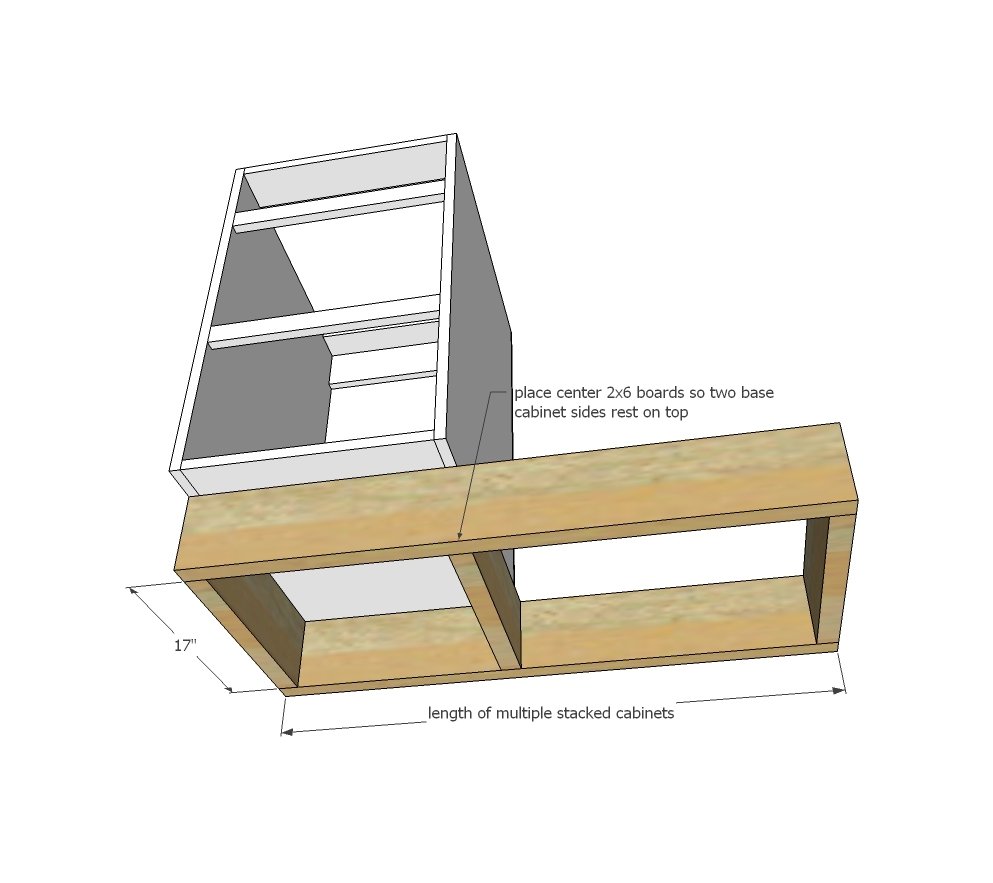
Build a toekick out of 2x6s the entire length of a run of cabinets, positioning supports so cabinet sides rest on top. You can use pocket holes (1-1/2" setting and 2-1/2" pocket hole screws) or self tapping wood screws, 2-1/2" or longer. We also drilled pocket holes facing downward for attaching the cabinets to the subfloor on installation. The cabinets are attached to the toekick on the inside, on installation in the room, by screwing through bottom of cabinet into toekick front and back.
Step 7
For the drawers we used these drawer slides (as shown in video, please watch for more drawer detail). Follow instructions with the slides for cutting the drawer bottoms. For the taller 1x12 drawers, we used a taller back (1x8) and then tied a 1x2 board in from the back to the drawer face for additional support. This also acts as a rail, keeping things in the drawers.
Finishing
Sand all surfaces, starting with a medium grit and finishing with fine. Wipe off the dust, fill any holes or gaps with wood filler, and sand smooth once dry. Apply primer if you're painting, then finish with your choice of paint or stain and seal with a durable clear topcoat. For outdoor projects, use exterior-rated primer, paint or stain, and sealer so the piece stands up to the weather.
Source (temporary): https://www.ana-white.com/woodworking-projects/how-build-kitchen-cabinet-2x4-base-plan