HOW TO: Build a Vintage Gas Pump Cabinet with Side Bookshelves
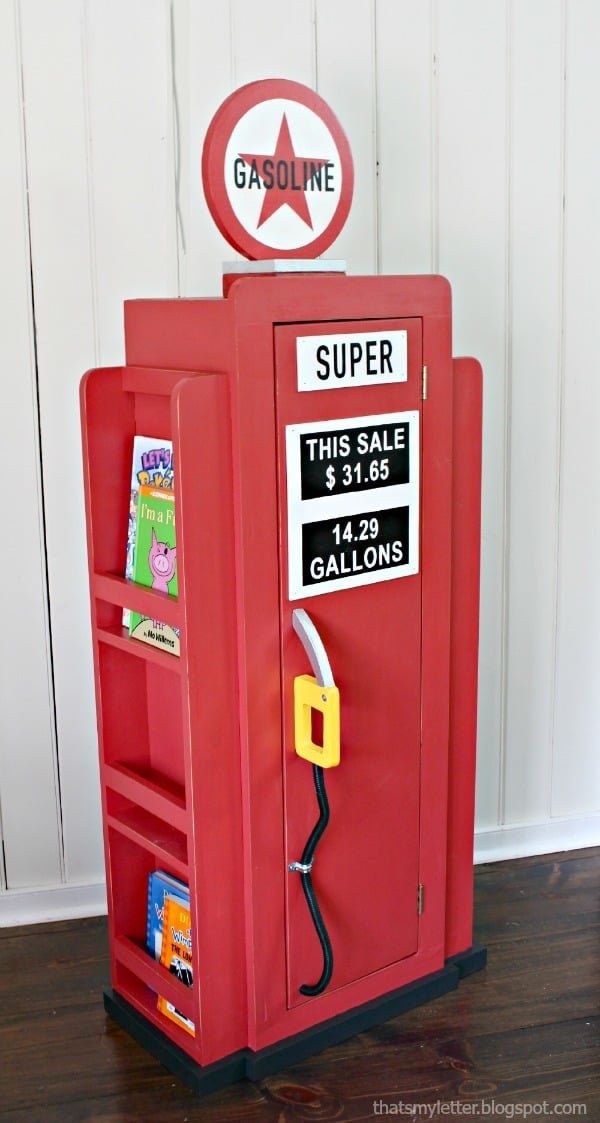
For the cutest boy car room ever! DIY plans for a vintage wood gas pump bookshelf!
Specifications
| Project type | Toys |
|---|---|
| Room | Kids and Toys |
| Style | Children's and Kid's Room Furniture and Toy Plans |
| Difficulty | Intermediate |
| Estimated cost | $50 - $100 |
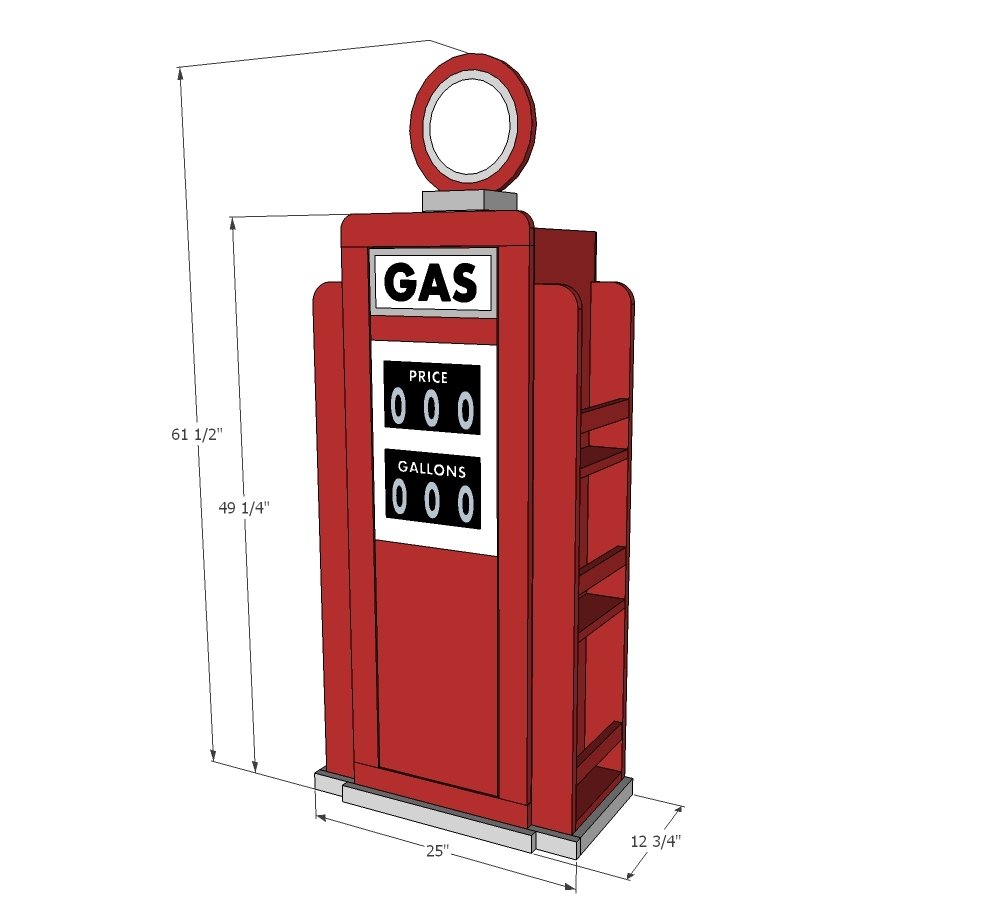
Dimensions
Use the size-specific shopping and cut lists below.
Shopping List
2 – 1x12 @ 8 feet long*
1 – 1x12 @ 4 feet long*
1 – ¼” plywood @ 24” x 48”
1 – 1x3 @ 10 feet long
3 – 1x4 @ 8 feet long
2 – 1x2 @ 8 feet long
2x6 or 2x4 scrap wood
1 set of hinges and magnetic clasp
Wood filler
1 - 2 hole strap (1/2”)
3’ - 1/2” black flex tubing ( Gardner-Bender-Flex-Tubing-1- 2-FLX-5007T/202905454 )
*1x12s MUST be 11-1/4” wide
Cut List
Main Bookshelf
2 – 1x12 @ 48”
5 – 1x12 @ 15”
1 – ¼” plywood @ 16-1/2” x 48”
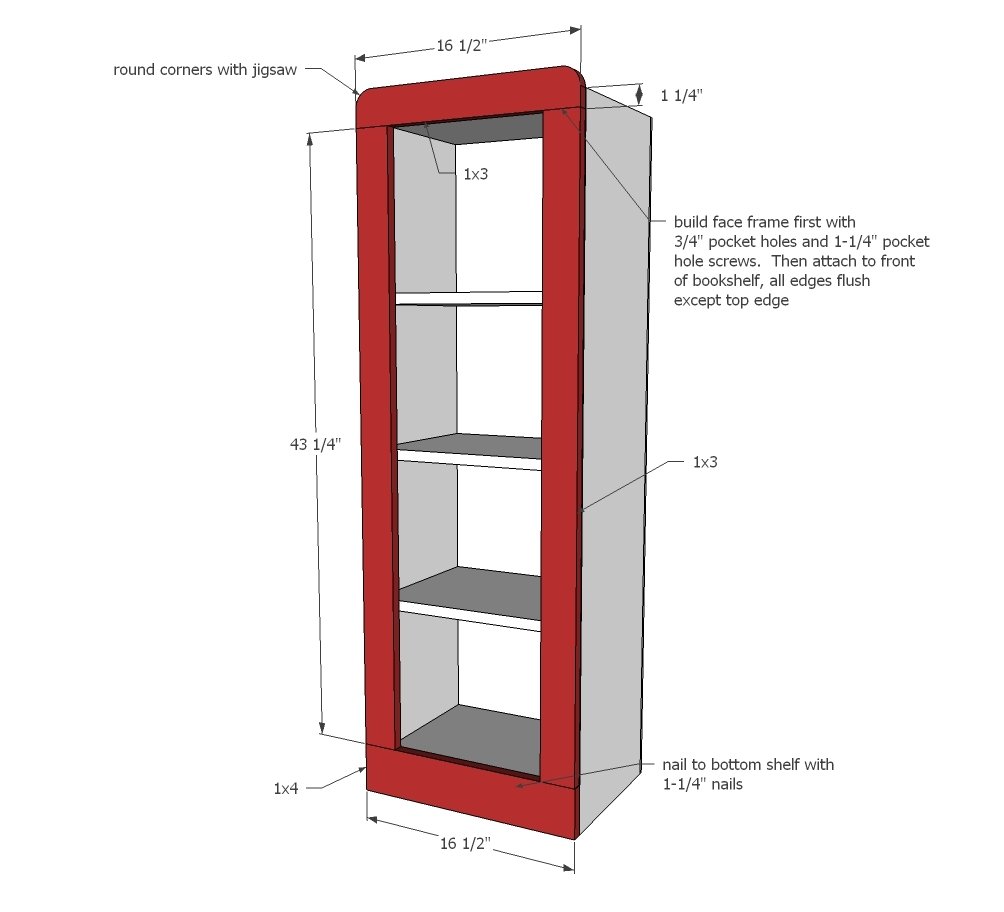
1 – 1x3 @ 16-1/2”
1 – 1x4 @ 16-1/2”
2 – 1x3 @ 43-1/4”
Side Bookshelves (build 2)
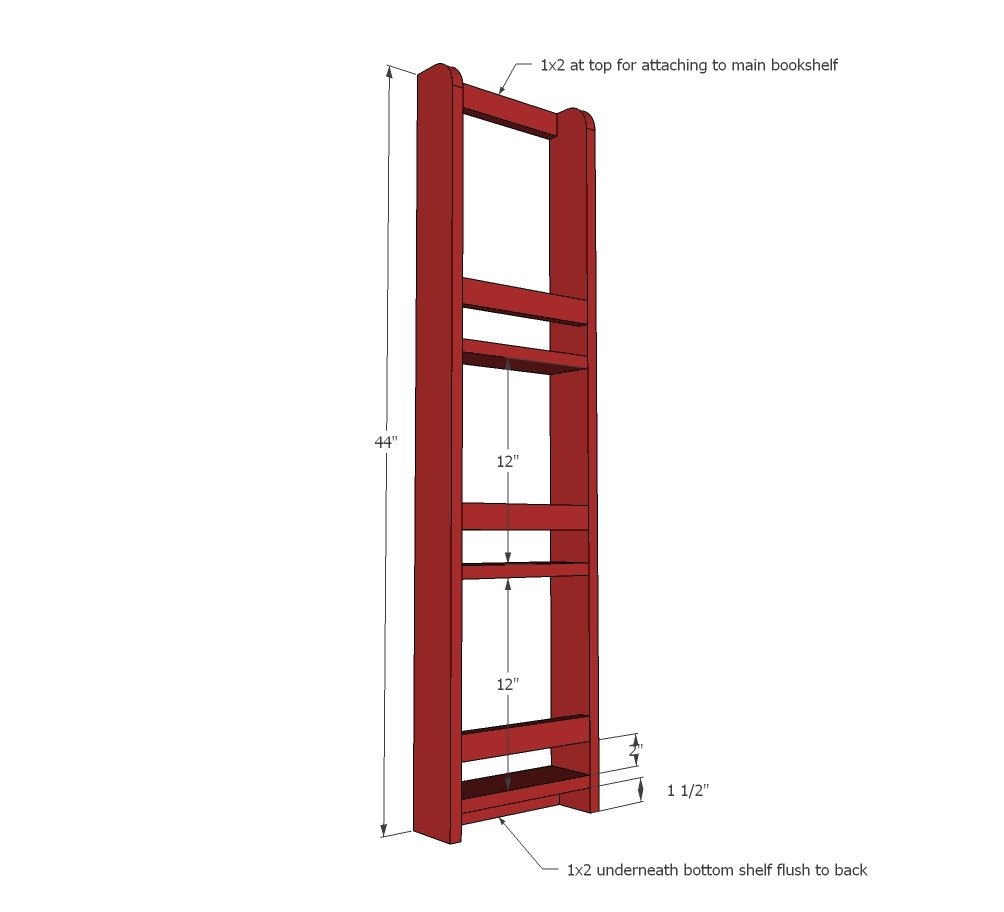
4 – 1x4 @ 44”
6 – 1x4 @ 9 – 3/4"
10 – 1x2 @ 9-3/4”
Trim (cut to fit)
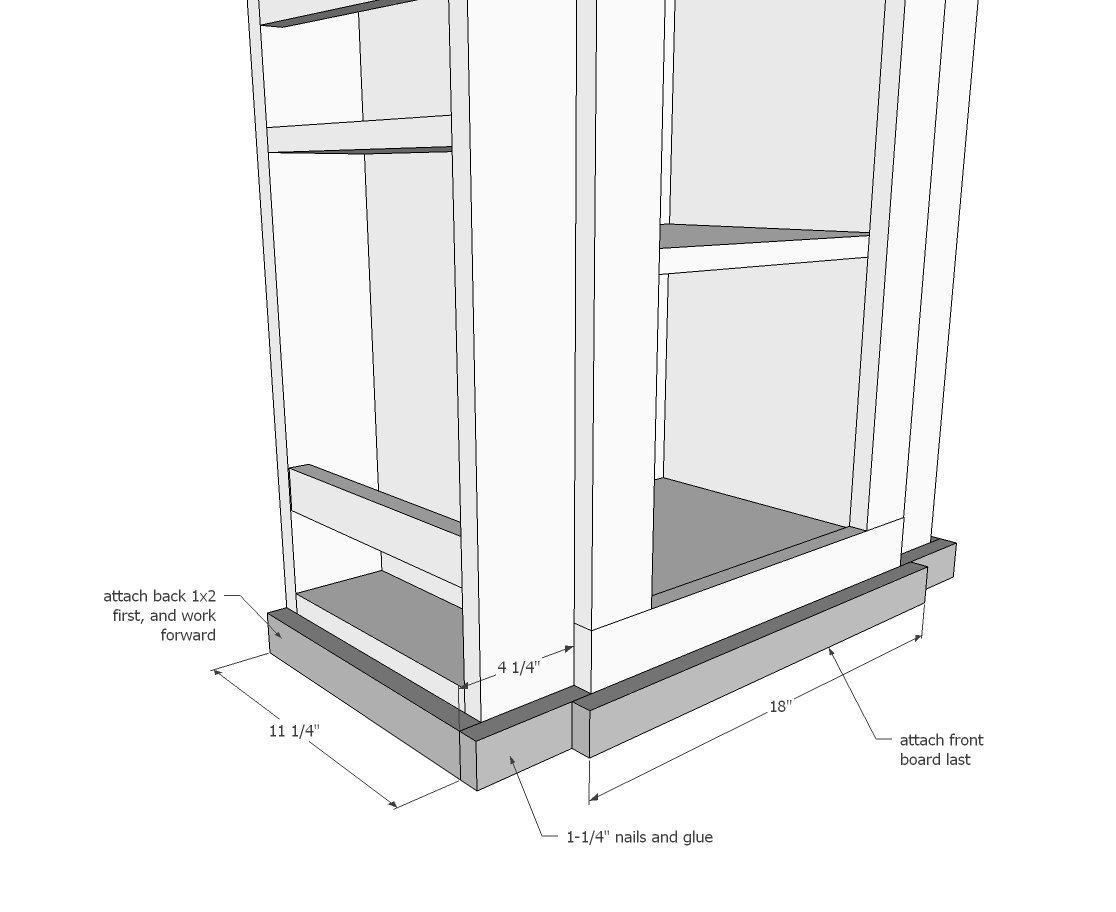
2 – 1x2 @ 11-1/4”
2 – 1x2 @ 4-1/4”
1 – 1x2 @ 18”
2 – 2x6 @ 5-1/2” (can use other scrap wood here)
1 – 1x12 @ 11” cut into circle
Door
1 – 1x12 @ 43”
Tools
- measuring tape
- square
- pencil
- safety glasses
- hearing protection
- kreg-jig
- drill
- jigsaw
- compound miter saw
- nailer
- sander
Step-by-step Instructions
Step 1
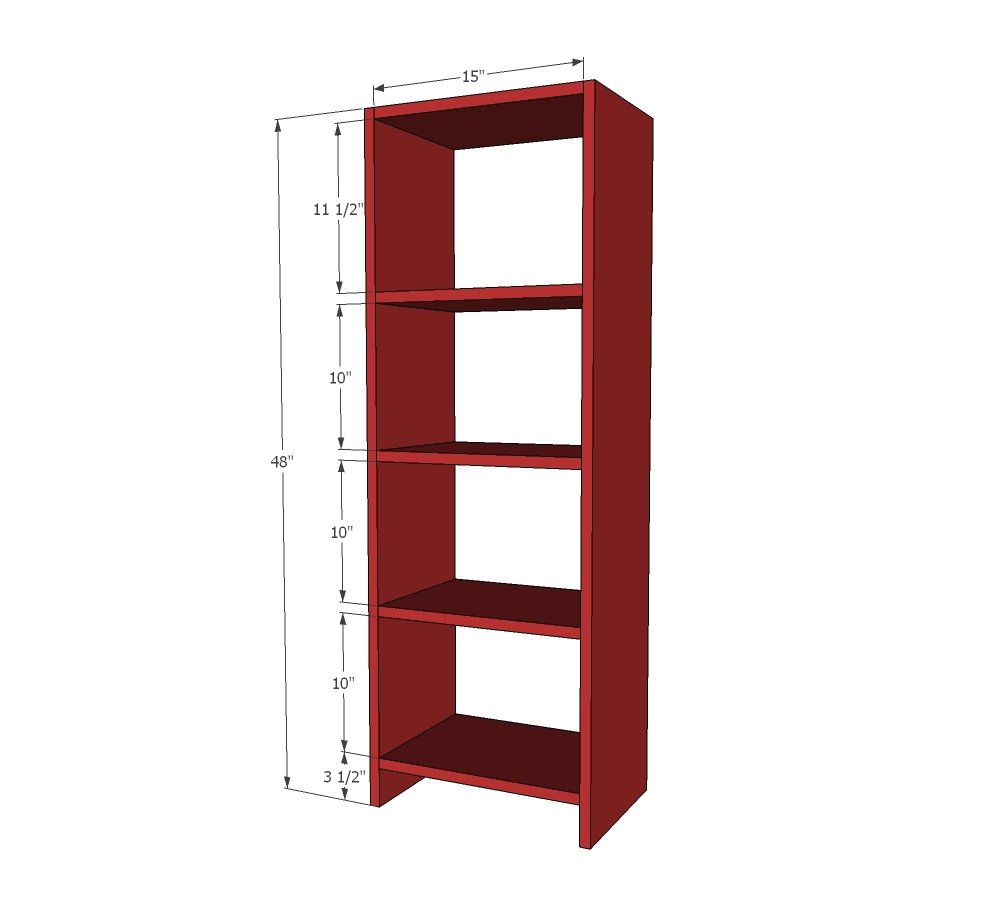
Bookshelf can be built with pocket holes or nails with glue since both front and back joints will be reinforced.
Step 2
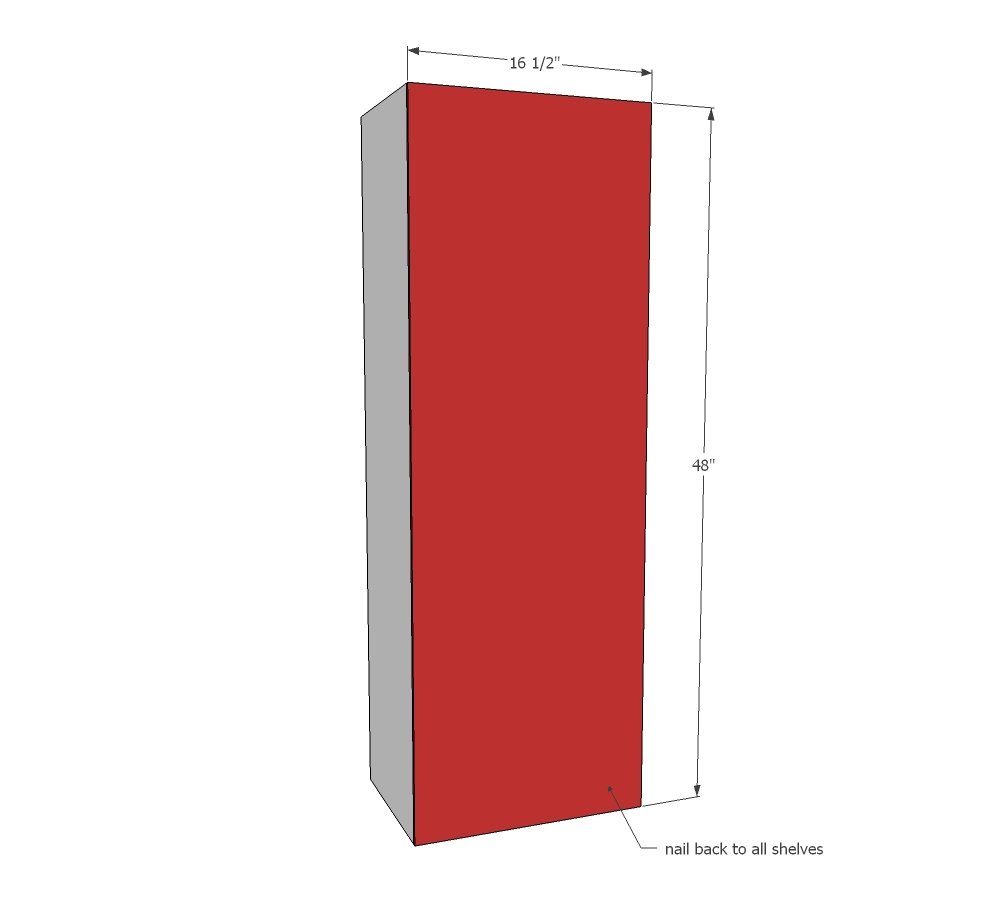
Attach back with ¾” nails and wood glue, nail to all shelves as well.
Step 3
Build face frame separately, then attach completed face frame to front of cabinet. Nail on with 1-1/4" brad nails with glue.
Step 4
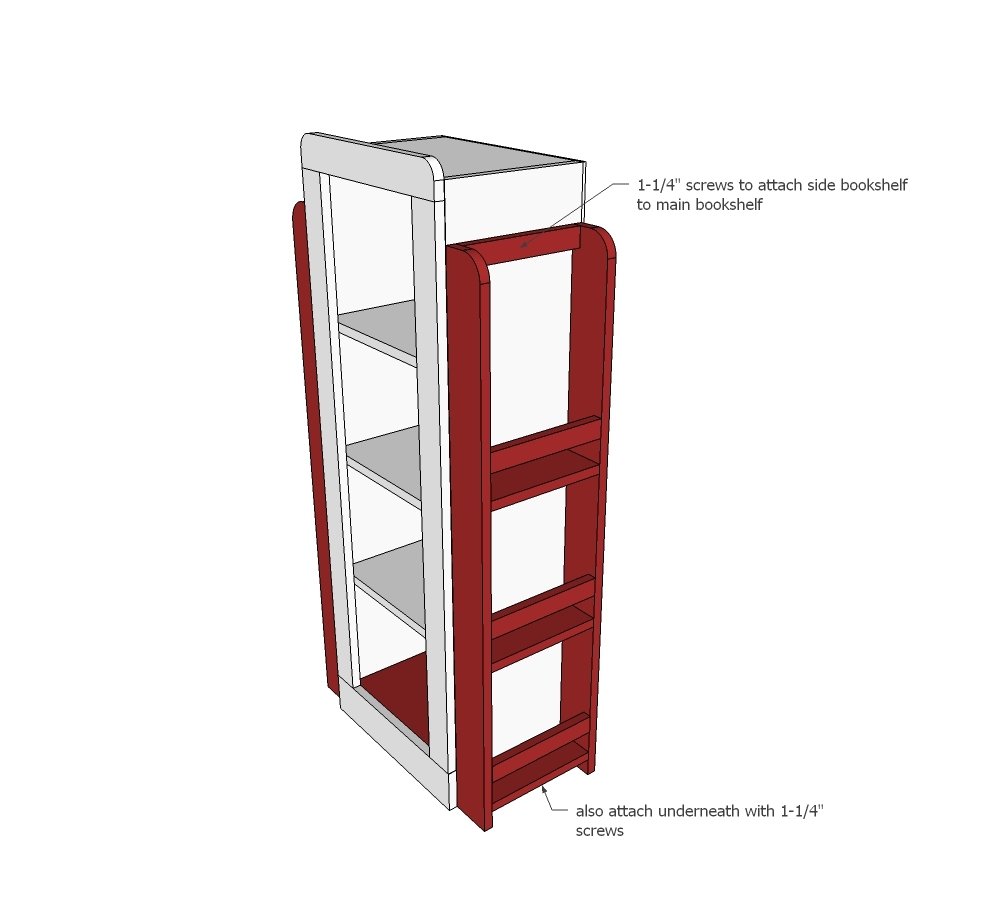
Build side bookshelves separately – can be nailed and glued since will be reinforced by main bookshelf but some pocket holes are preferred (ie on top and bottom 1x2 back).
Step 5
Step 6
Start at back, cut as you go and work forward. Nail on with 1-1/4" nails and glue.
Step 7
Jaime provides a really good tutorial on how she did the sign on top. Would love to see it lit up with lights too!
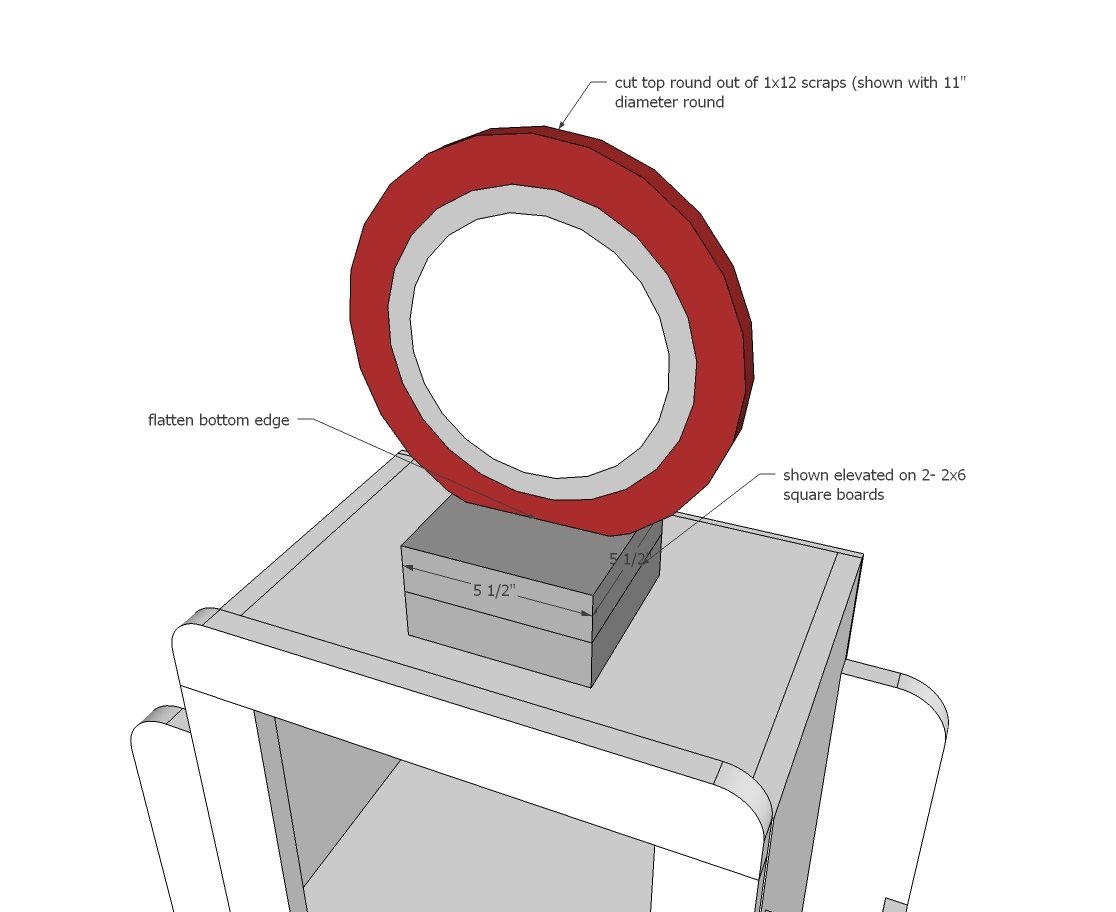
Step 8
The door is just a 1x12 board. Decorate and hinge on! Jaime provides a good tutorial on how she decorated her door here.
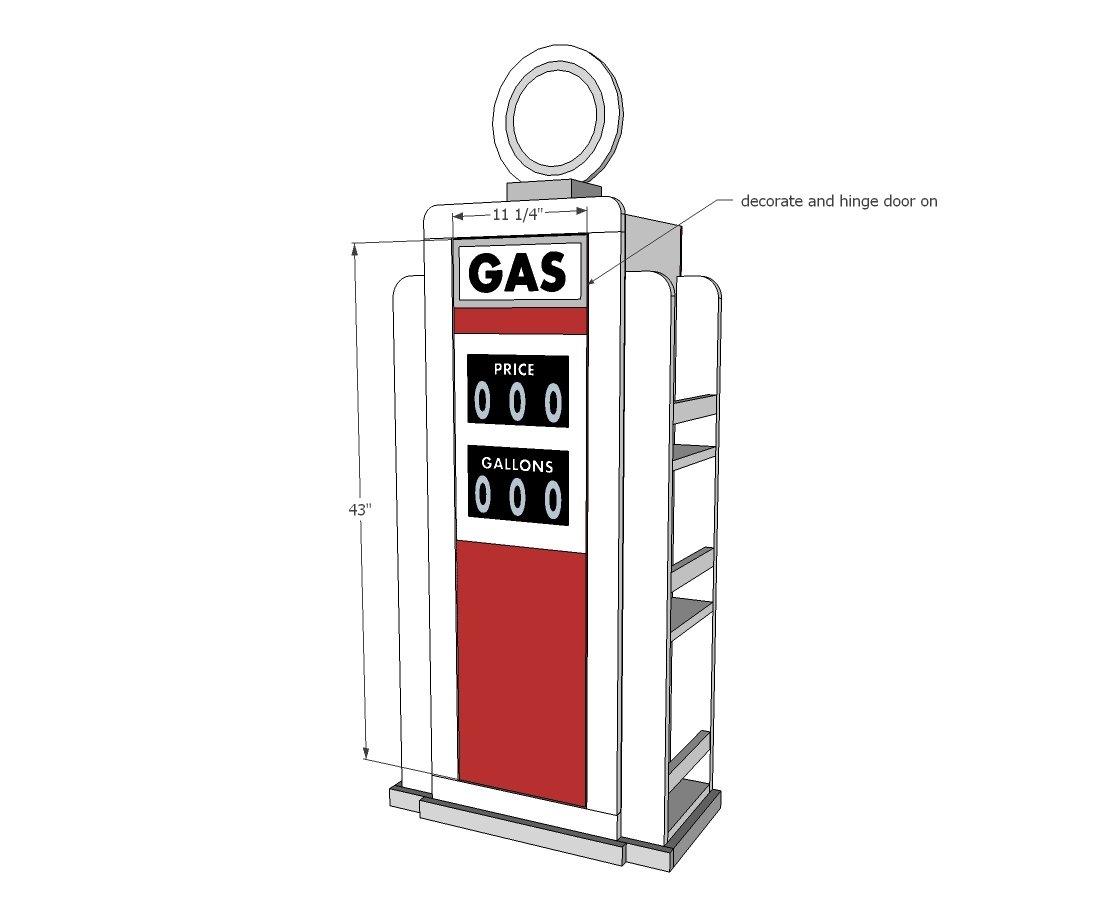
Step 9
Use a 1x4 scrap to cut out the handle. Paint and attach to door. Thank you Jaime for designing the handle, it really took this project over the top!
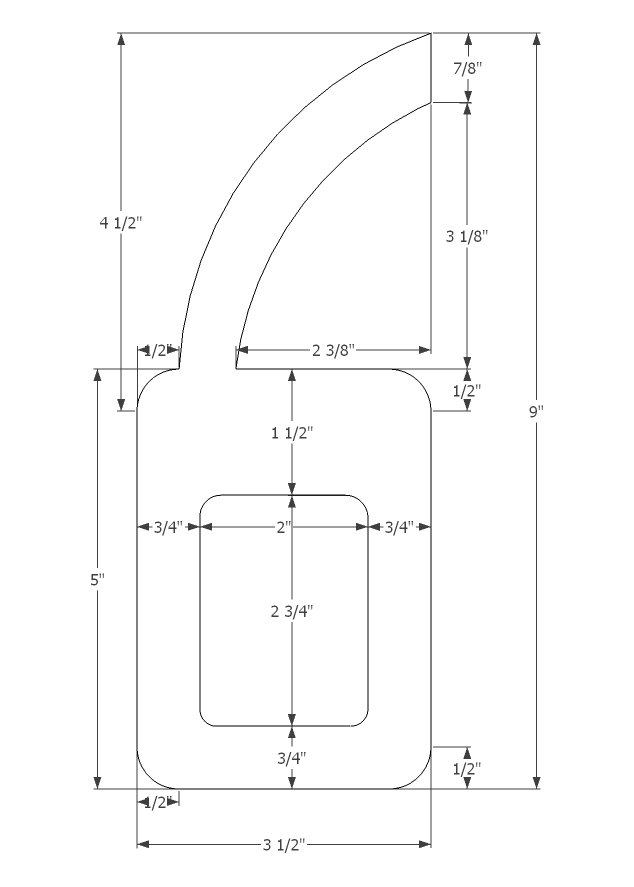
Finishing
Sand all surfaces, starting with a medium grit and finishing with fine. Wipe off the dust, fill any holes or gaps with wood filler, and sand smooth once dry. Apply primer if you're painting, then finish with your choice of paint or stain and seal with a durable clear topcoat. For outdoor projects, use exterior-rated primer, paint or stain, and sealer so the piece stands up to the weather.
Source (temporary): https://www.ana-white.com/woodworking-projects/how-build-vintage-gas-pump-cabinet-side-bookshelves