How To Make A Wooden Snowflake
Wooden Snowflake Tutorial I’m a sucker for snowflakes. There, I said it. To me, they are a perfect example of artistic use of symmetry, and the only version of mathematics that doesn’t make my head start hurting. (Typing the word “mathematics” just made my head start hurting.) Last winter, I shared a tutorial on how to build large, Reclaimed Wood Snowflake. This time around, I came up with a slightly modified version. For this tutorial, I used wood with a lower sliver potential rating,
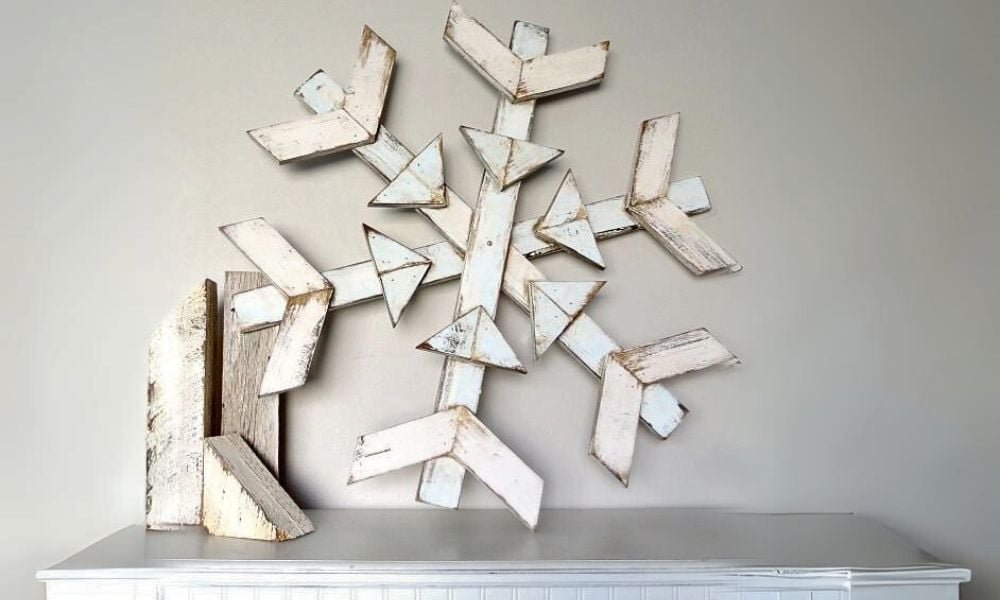
Specifications
| Project type | Wall Projects |
|---|---|
| Room | living room |
| Difficulty | Beginner Projects |
| Estimated cost | Under $20 |
Dimensions
Use the size-specific shopping and cut lists below.
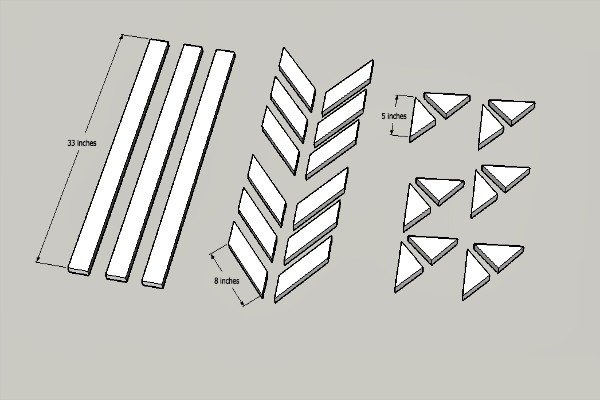
Step-by-step Instructions
Step 1
Attach the Vs with screws or nails on the 3 arms
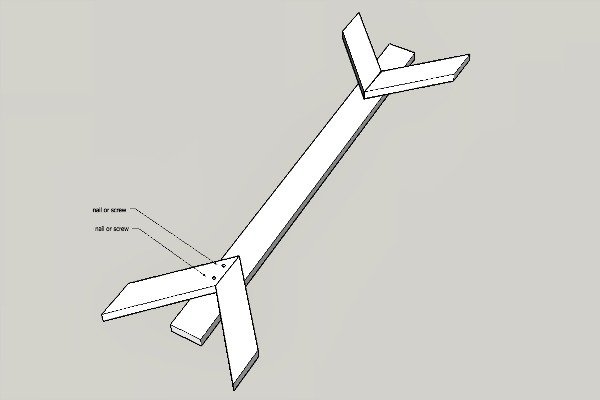
Step 2
Attach the triangles with screws or nails on the 3 arms

Step 3
Stack the assembled arms as shown in the diagram.

Drill the center hole and secure with a bolt to keep the arms from twisting.
Add some hardware to the back of one of the arms to hang. The completed snowflake should look like this. Watch the video of the snowflake tutorial.

Finishing
Sand all surfaces, starting with a medium grit and finishing with fine. Wipe off the dust, fill any holes or gaps with wood filler, and sand smooth once dry. Apply primer if you're painting, then finish with your choice of paint or stain and seal with a durable clear topcoat. For outdoor projects, use exterior-rated primer, paint or stain, and sealer so the piece stands up to the weather.
Source (temporary): https://www.ana-white.com/woodworking-projects/how-make-wooden-snowflake