Husky Farmhouse Table
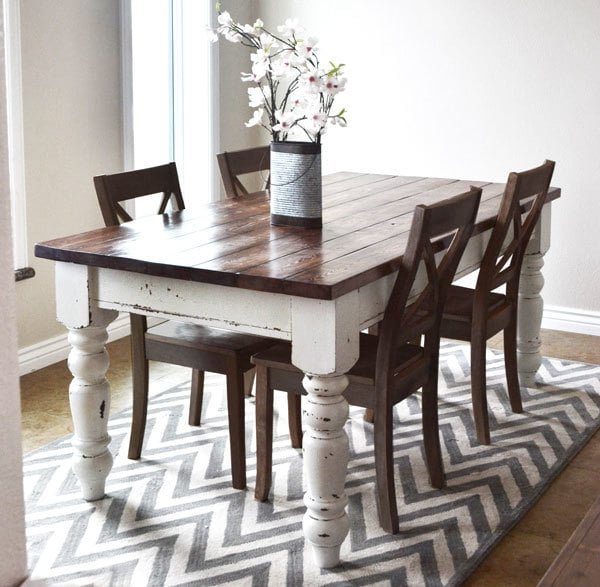
to DIY a farmhouse table with beautiful turned legs. This country style dining table is substantial and beautiful. Step by step plans from
Specifications
| Project type | Dining Table Plans |
|---|---|
| Room | dining room |
| Style | Farmhouse Furniture |
| Difficulty | Intermediate |
Dimensions
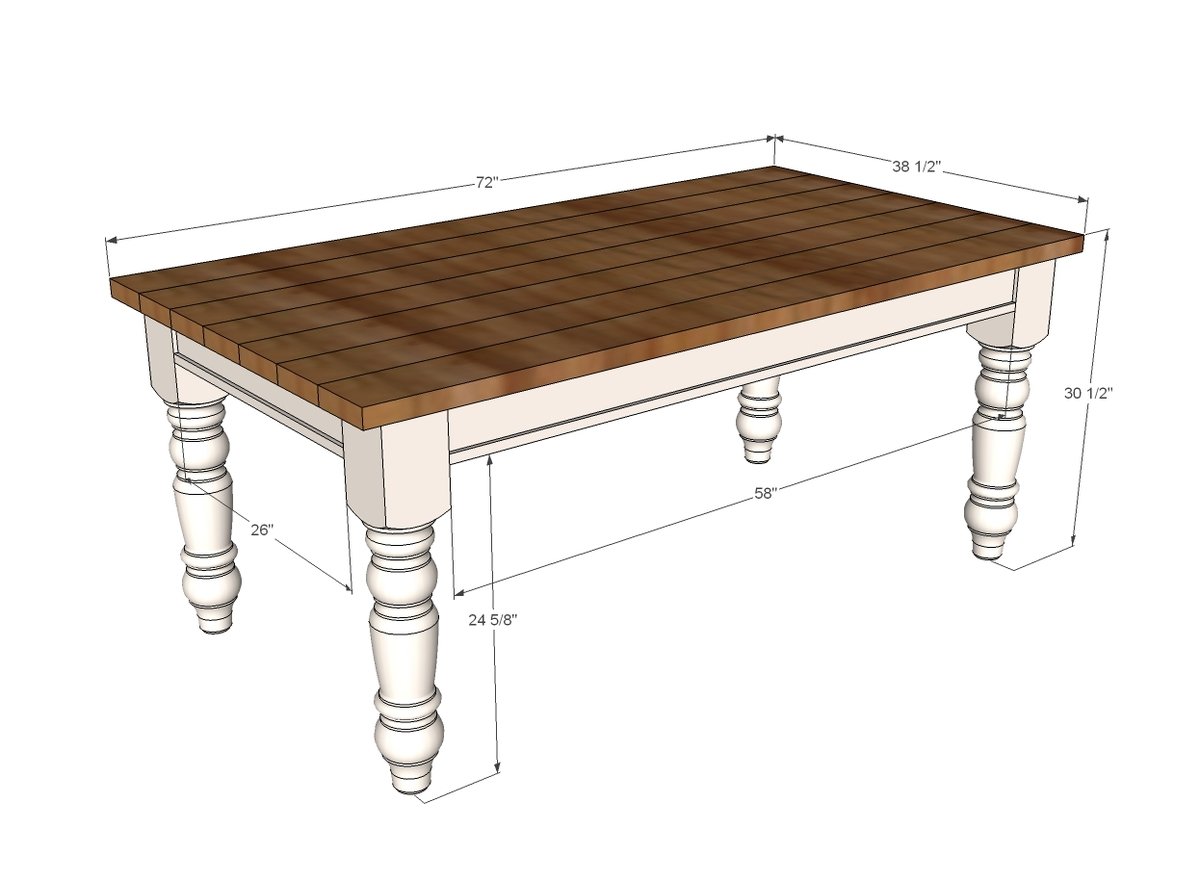
Use the size-specific shopping and cut lists below.
Shopping List
- 4 - Osborne Wood Husky Dining Table Legs
- 2 - 2x4 @ 8 feet long
- 2 - 1x2 @ 8 feet long
- 7 - 2x6 @ 72" long (you may consider using 2x6 tongue and groove for a easier finishing option but as shown in photos, I used 2x6s kreg jigged together and then sanded flat on top with a belt sander)
- 2 1/2" pocket hole screws
- 2" finish nails
- wood glue
Cut List
- 2 - 2x4 @ 58" (side aprons)
- 2 - 2x4 @ 26" (end aprons)
- 2 - 1x2 @ 26" (end apron trim)
- 2 - 1x2 @ 58" (side apron trim)
- 7 - 2x6 @ 72" (tabletop boards)
Tools
- measuring tape
- square
- pencil
- safety glasses
- hearing protection
- kreg-jig
- drill
- circular saw
- nailer
- sander
Step-by-step Instructions
Step 1
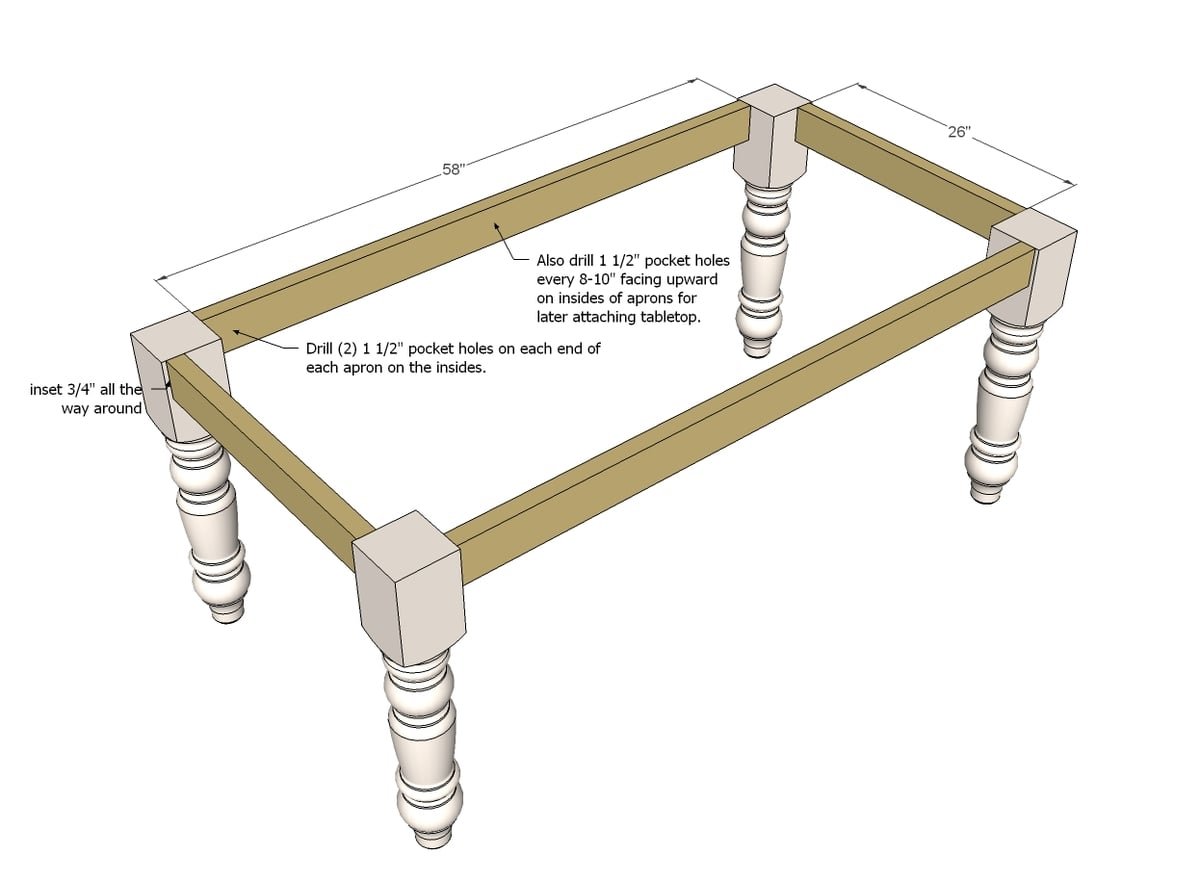
First things first, drill all the pocket holes in the aprons. You'll need two per apron end, and then ever 8" or so, a 1 1/2" pocket hole facing upward for attaching the tabletop later on. When you go to attach the legs to the aprons, make sure you have the pocket holes pointing upward - I make this mistake all the time - doh! - but you are probably way smarter than me!
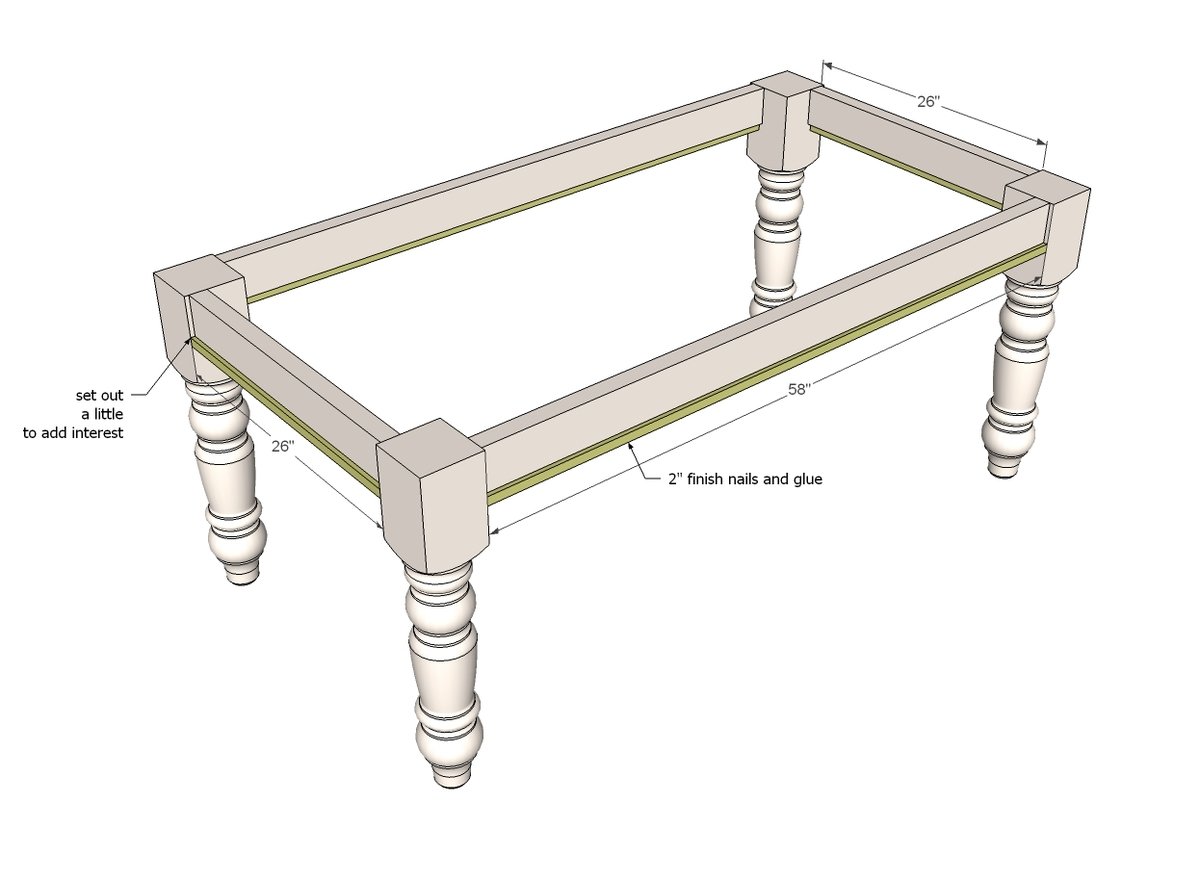
This is really just to add that decorative touch to the underside.
Another option for those of you with a table saw is to use 2x6s for the aprons and then cut a small groove with the tablesaw at the base of the aprons to give the look of multiple boards. NOTE: You can also add corner cross supports, but we found the table really didn't need it. It's up to you!
Step 3
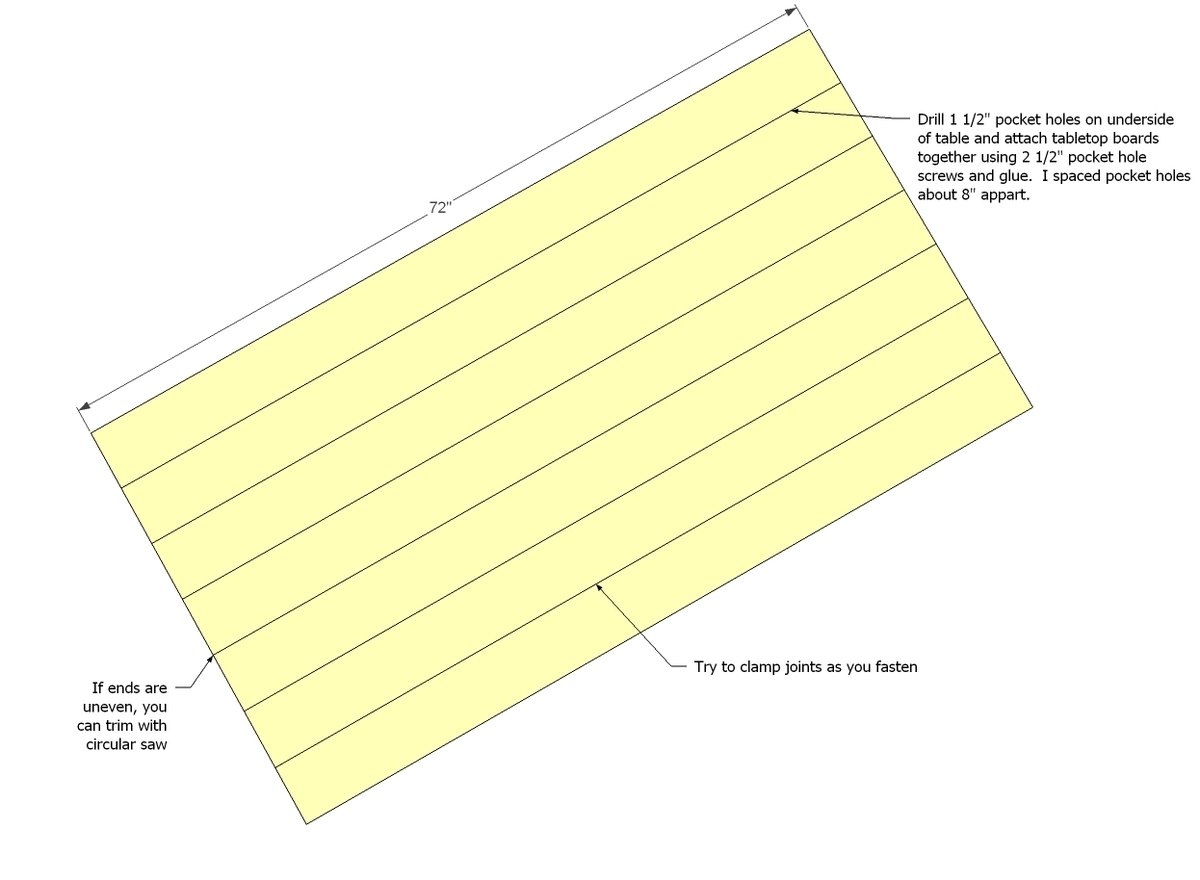
Now build the top. If I can say anything about this top it's this: GET STRAIGHT BOARDS. Mine were a little crooked and so I ended up having to use long bar clamps to pull everything together tight as I attached pocket holes. Clamp, clamp and clamp! If your ends end up a little off, no bigge there, just run a circular saw down the ends to clean them up. I think part of this table's charm is the planked top, but to make it more functional, we belt sanded the top flat, and then silicone any gaps to prevent food from sticking in cracks. Not trying to scare you - this wasn't hard - it's just my sister's got kids between 6 months and 9, and we are preparing this table for real life use and abuse.
Step 4
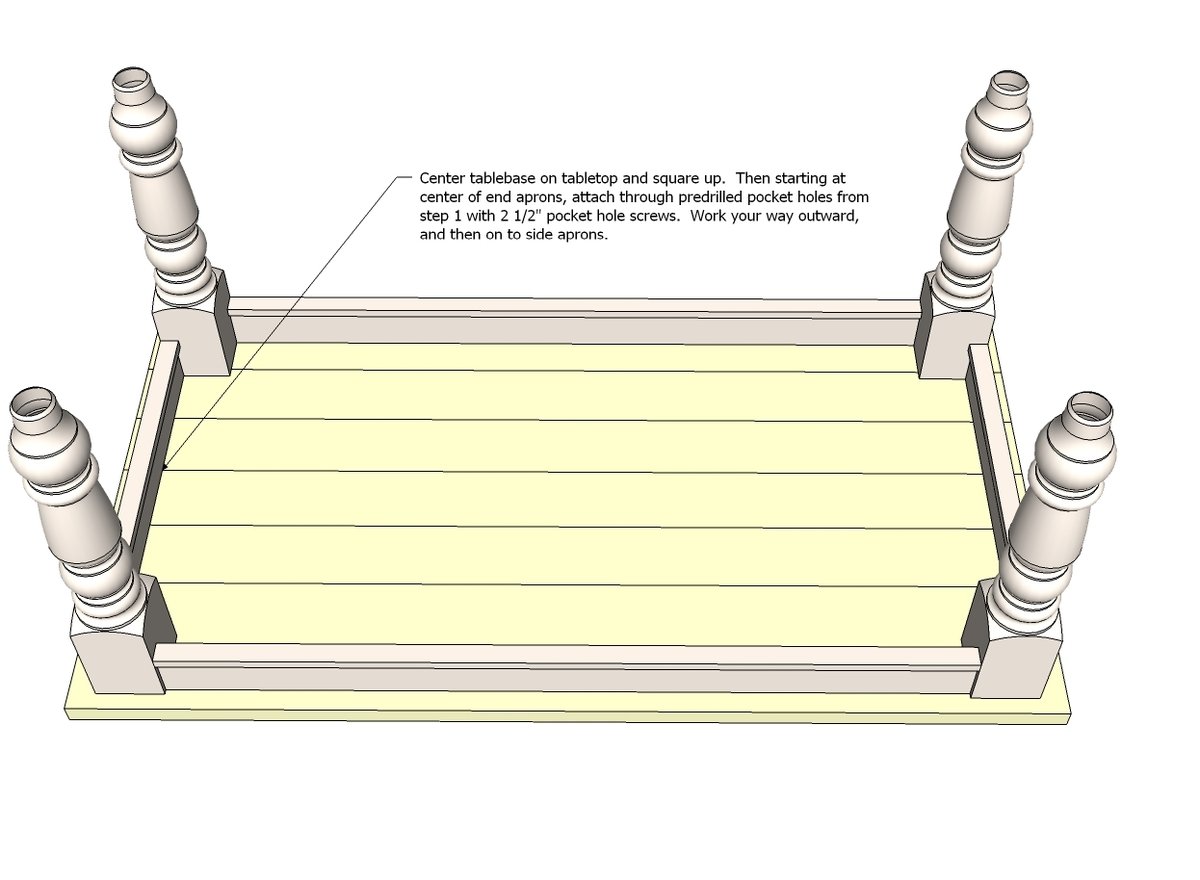
Now flip the tabletop over so all the pocket holes are facing up and place the base on it. Then just start attaching through those predrilled pocket holes into the tabletop. Flip it over (it's gonna be heavy!) and the building part is done!
Finishing
Sand all surfaces, starting with a medium grit and finishing with fine. Wipe off the dust, fill any holes or gaps with wood filler, and sand smooth once dry. Apply primer if you're painting, then finish with your choice of paint or stain and seal with a durable clear topcoat. For outdoor projects, use exterior-rated primer, paint or stain, and sealer so the piece stands up to the weather.
Source (temporary): https://www.ana-white.com/woodworking-projects/husky-farmhouse-table