Hutch for the Cube Drawer Bench
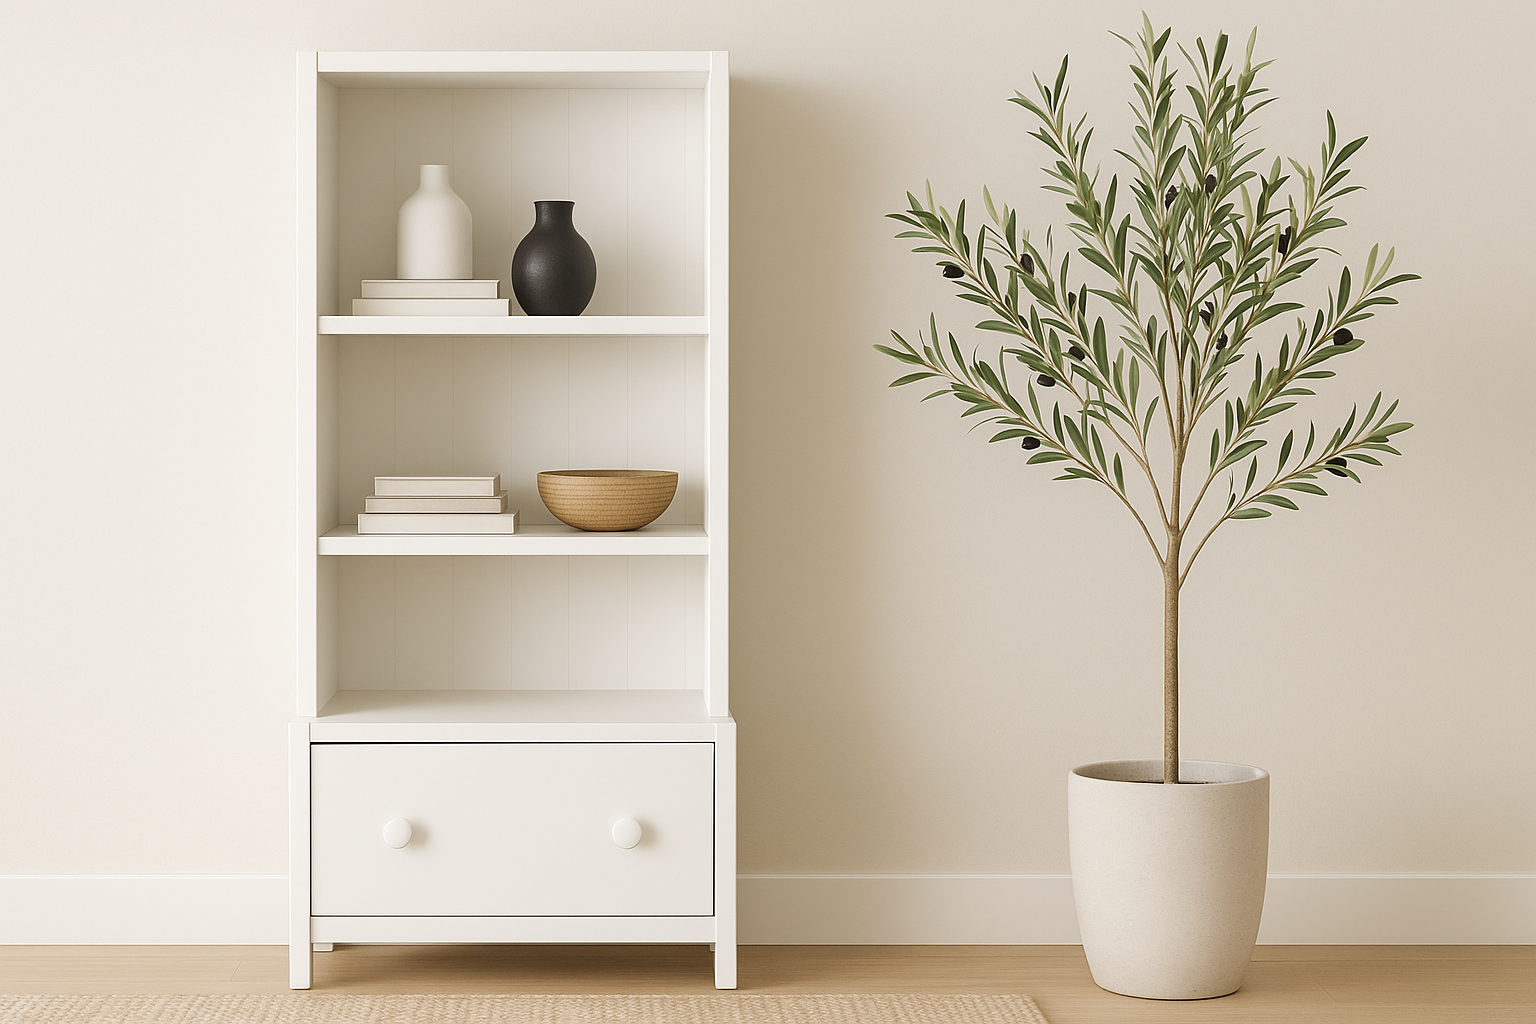
DIY Drawer Bench Hutch Take your basic drawer bench to the next level with this DIY hutch add-on. Designed to sit neatly on top of a drawer bench or desk, this hutch provides extra storage and display space without taking up any additional floor area. With open shelving and room for baskets or bins, it’s the perfect way to keep books, office supplies, or décor within reach. This project is simple to build with standard lumber and beginner-friendly steps. Pair it with your existing desk, or build it alongside one of our desk plans for a complete workstation. Why Build This Project? • – Detailed instructions make it easy to follow • Beginner-Friendly – Straight cuts and simple joinery • Smart Storage – Extra shelves for baskets, books, or décor • Space-Saving Design – Adds vertical storage without taking up more floor space • Customizable Look – Paint, stain, or finish to match your desk and home décor Perfect for toy stations, bathroom, or anywhere you need stylish storage, this DIY hutch adds both function and style to any workspace. Matching Drawer Bench Plans: Available here
Specifications
| Project type | Bookshelf and Bookcase Plans |
|---|---|
| Room | Kids and Toys |
| Style | Children's and Kid's Room Furniture and Toy Plans |
| Difficulty | Beginner Projects |
| Estimated cost | $50 - $100 |
Dimensions
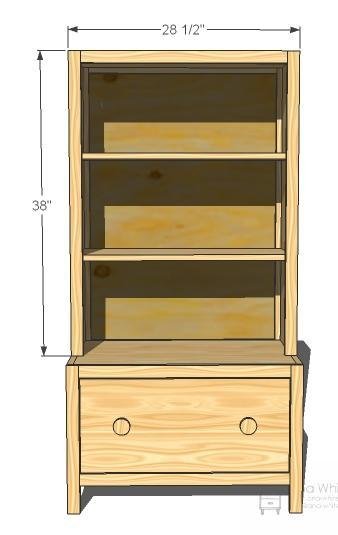
Use the size-specific shopping and cut lists below.
Shopping List
- 2 – 8′ 1x12s or 1 – 14′ 1×12
- 3 – 8′ 1×2 Boards
- 1/4″ Plywood
- 2″ Screws or 1 1/4″ pocket hole screws
- 2″, 1-1/4" and 3/4" brad nails
- Wood glue
- wood filler
- sand paper (medium grit)
- finishing supplies
Cut List
- 2 – 1×12 @ 38″ (Sides)
- 3 – 1×12 @ 27″ (Shelves)
- 4 – 1×2 @ 38″ (Side Trim)
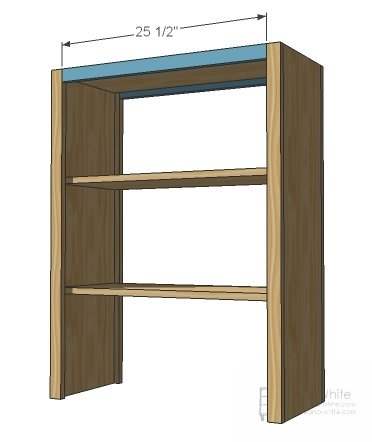
- 2 – 1×2 @ 25 1/2″ (Top Trim)
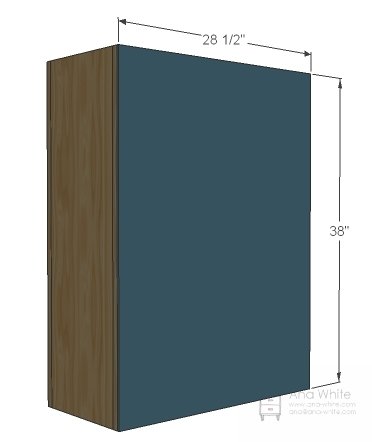
- 1 – 1/4″ Plywood @ 38″ x 28 1/2″ (Back)
Tools
- measuring tape
- square
- pencil
- safety glasses
- hearing protection
- kreg-jig
- drill
- circular saw
- sander
- level
- countersink drill bit
Step-by-step Instructions
Step 1
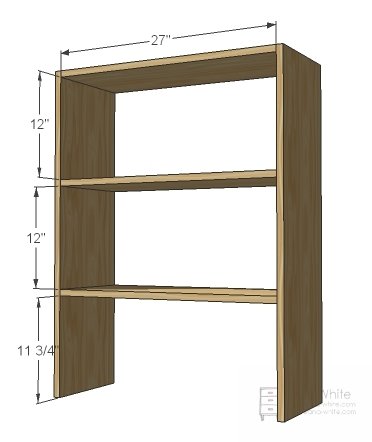
This is how easy it is to build. Build the box with 2″ screws and glue or use 1 1/4″ pocket hole screws.
Step 2
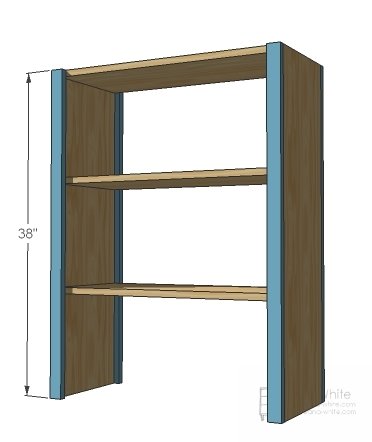
Trim out the sides. Keep outside edges flush. Nail into shelves too. Use 2″ finish nails and glue.
Step 3
Now the top trim. Same thing, 2″ nails and glue. If you are using a Kreg Jig™, build the face frame first, then nail on.
Step 4
And tack the back on. It really is that easy. Now for the tough part – time to finish it Make sure you read though our get started section for finishing advice and general build instruction. It’s a beautiful day! Let’s get out and build something.
Finishing
Sand all surfaces, starting with a medium grit and finishing with fine. Wipe off the dust, fill any holes or gaps with wood filler, and sand smooth once dry. Apply primer if you're painting, then finish with your choice of paint or stain and seal with a durable clear topcoat. For outdoor projects, use exterior-rated primer, paint or stain, and sealer so the piece stands up to the weather.
Source (temporary): https://www.ana-white.com/woodworking-projects/hutch-cube-drawer-bench