Ice Cream Cart
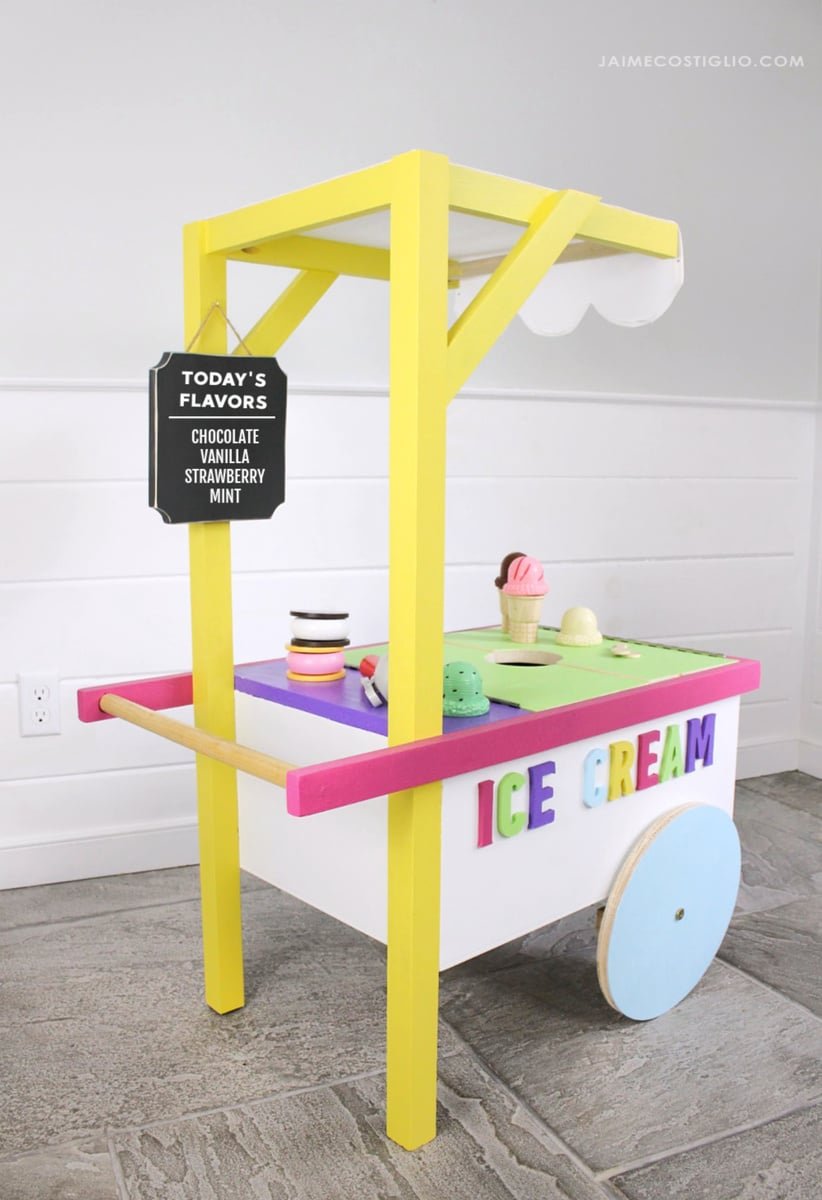
DIY Ice Cream Cart for kids! Free
Specifications
| Project type | Toys |
|---|---|
| Room | Kids and Toys |
| Style | Children's and Kid's Room Furniture and Toy Plans |
| Difficulty | Intermediate |
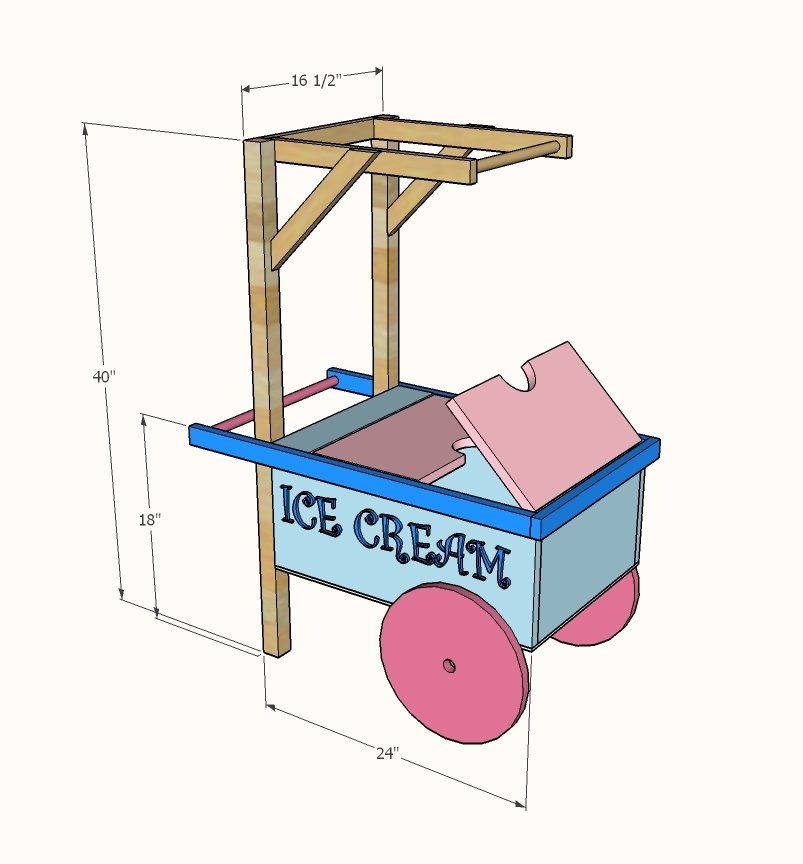
Dimensions
Use the size-specific shopping and cut lists below.
Shopping List
1 - 1/4" plywood 24" x 24"
1 - 1x8 @ 10 feet
2 - 1x2 @ 8 feet
1 - 1-1/4" wood dowel @ 30"
1 - 2x2 @ 8 feet
1 - 1x4 @ 4 feet
2-3/4" self tapping wood screws
Cut List
2 - 1x8 @ 15"
2 - 1x8 @ 22-1/2"
1 - 1/4" plywood @ 22-1/2" x 16-1/2"
2 - 1x2 @ 30"
1 - 1x2 @ 18"
1 - wood dowel @ 16-1/2"
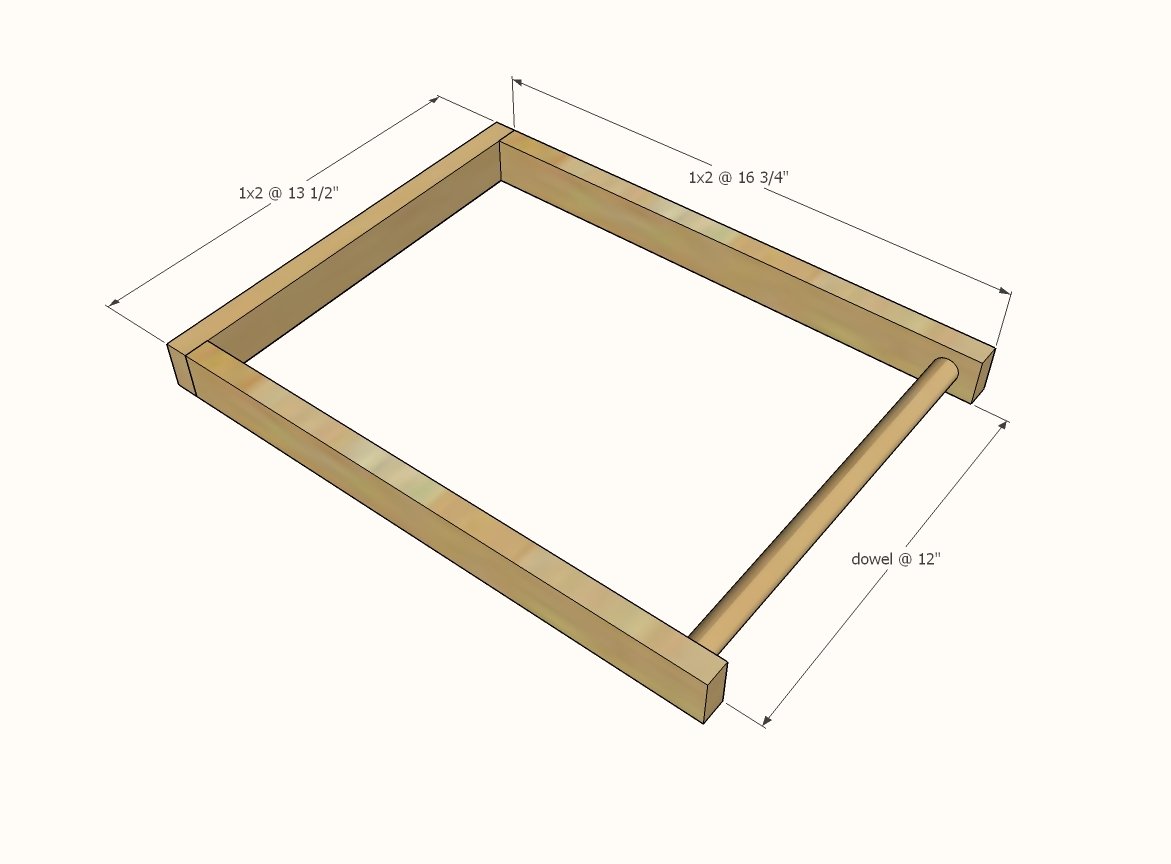
2 - 1x2 @ 16-3/4"
1 - 1x2 @ 13-1/2"
1 - wood dowel @ 12"
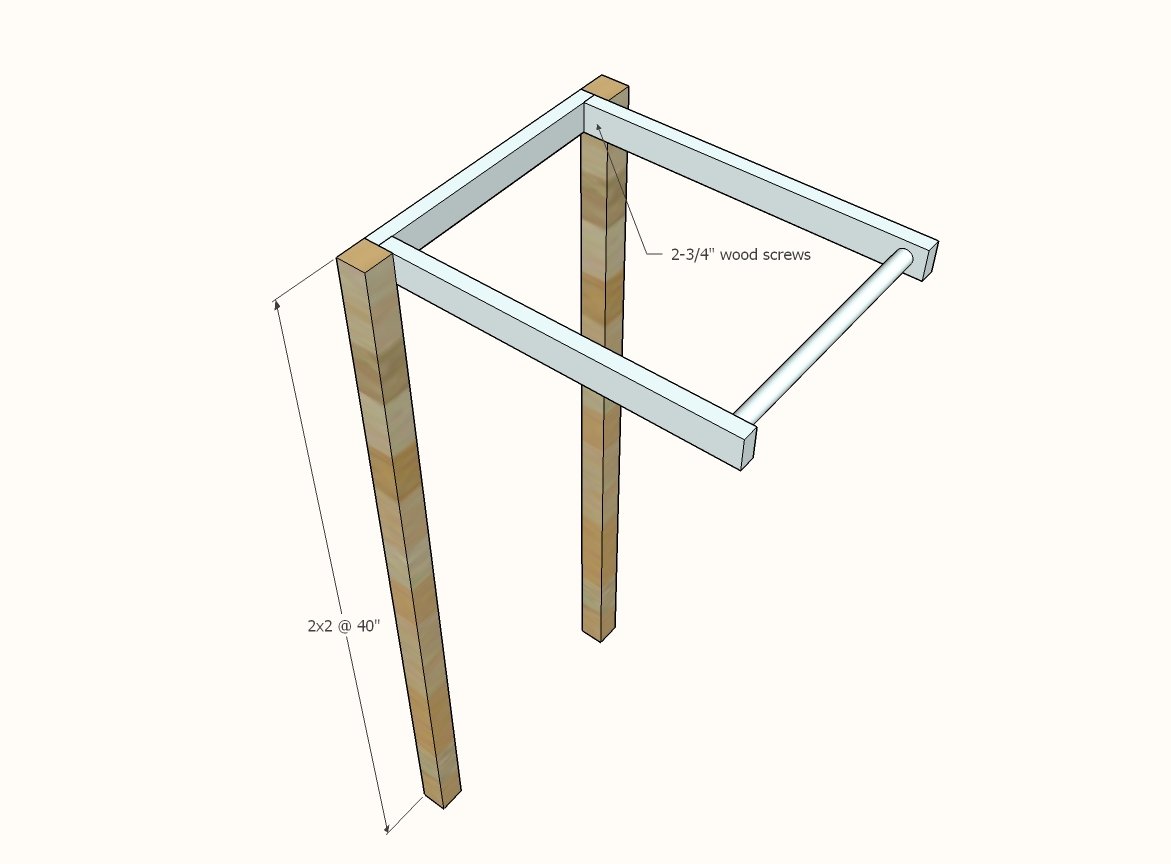
2 - 2x2 @ 40"
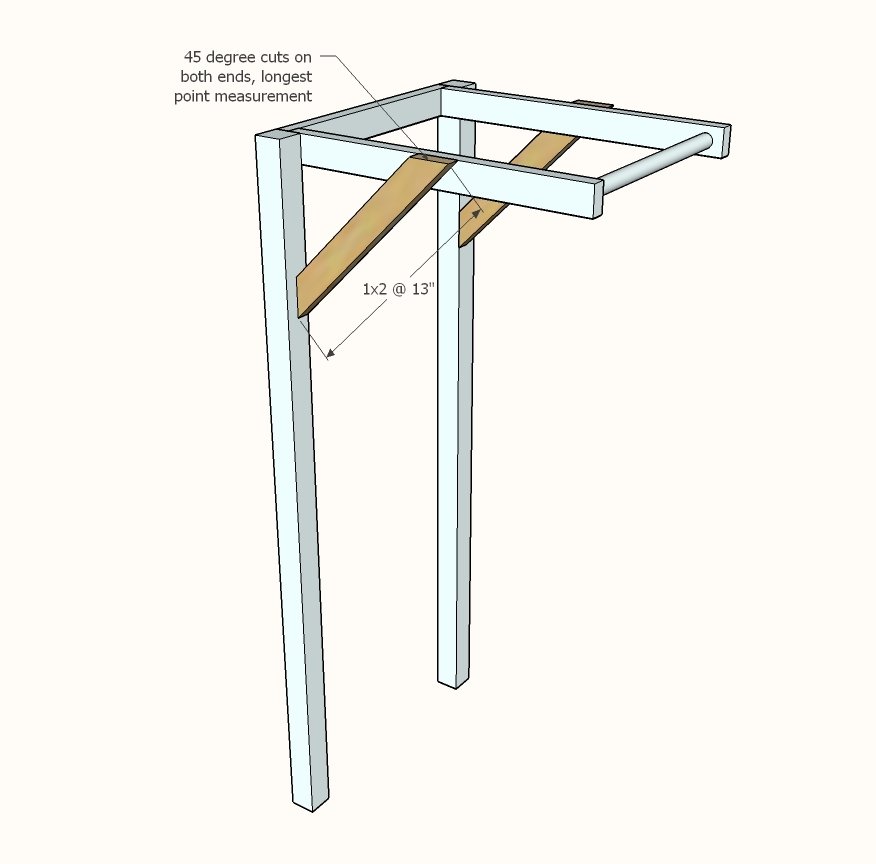
2 - 1x2 @ 13" - long point to long point, both ends cut at 45 degrees off square, ends NOT parallel
1 - 1x4 @ 15"
2 - 1x4 @ 4"
1 - 1x2 @ 15"
2 - 12" rounds
2 - 1x8 @ 16"
1 - 1x4 @ 16-1/2"
Tools
- measuring tape
- square
- pencil
- safety glasses
- hearing protection
- kreg-jig
- drill
- circular saw
- compound miter saw
- nailer
- sander
Step-by-step Instructions
Step 1
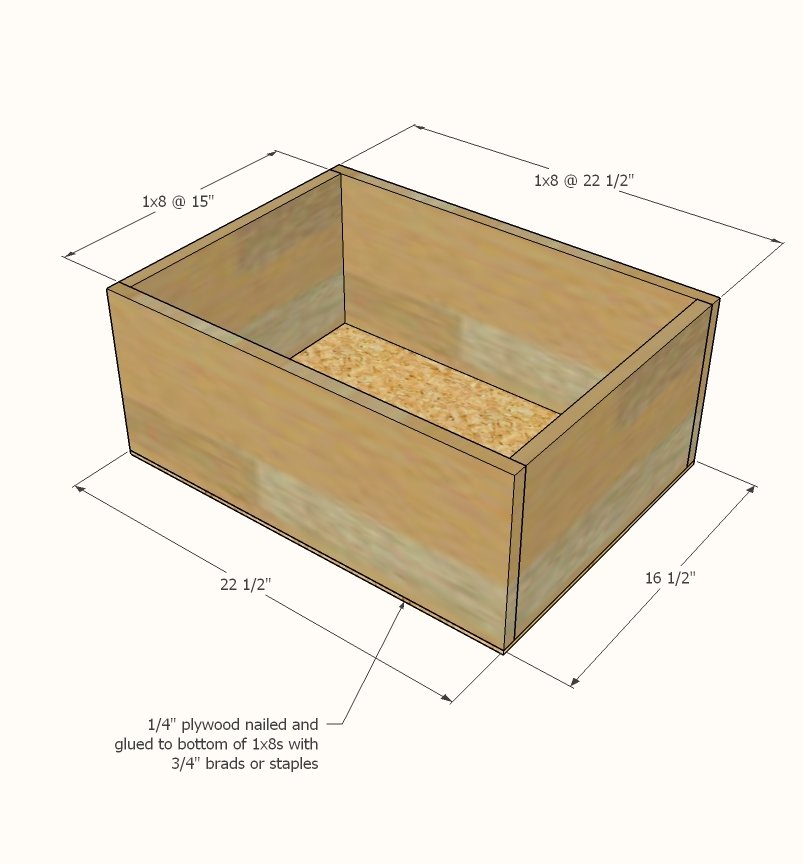
Build the box. I recommend using a Kreg Jig set for 3/4" stock and 1-1/4" pocket hole screws. You can alternatively nail and glue with 1-1/4" nails. Attach bottom with 3/4" brad nails or staples.
Step 2
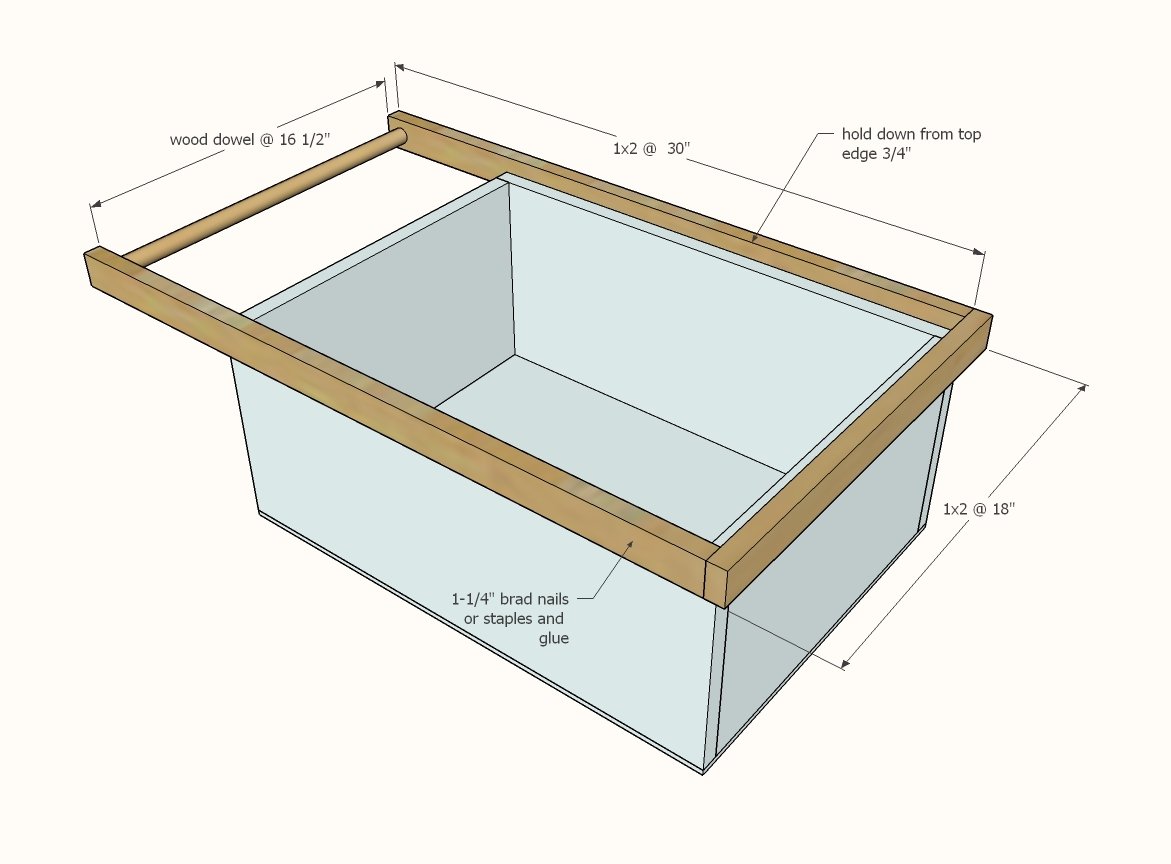
Attach trim with 1-1/4" brad nails and glue. Attach dowel with 1-1/4" screws (you can use Kreg Jig screws or self tapping wood screws). Set aside.
Step 3
Build top awning piece with pocket holes (preferred) or nailed and glue. Attach dowel with screws.
Step 4
Attach to 2x2 legs with 2-3/4" wood screws.
Step 5
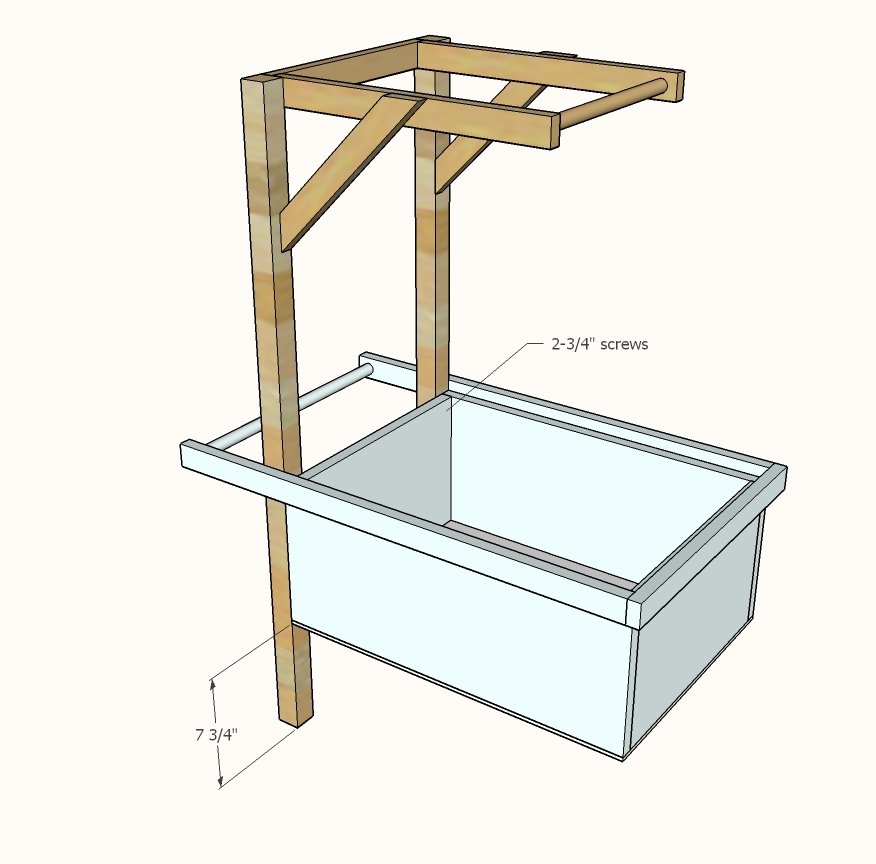
Attach 2x2s to the box with 2-3/4" screws from inside.
Set aside.
Step 7
Build wheel support system as shown above. Pocket holes are preferred, but 1-1/4" brad nails can be used.
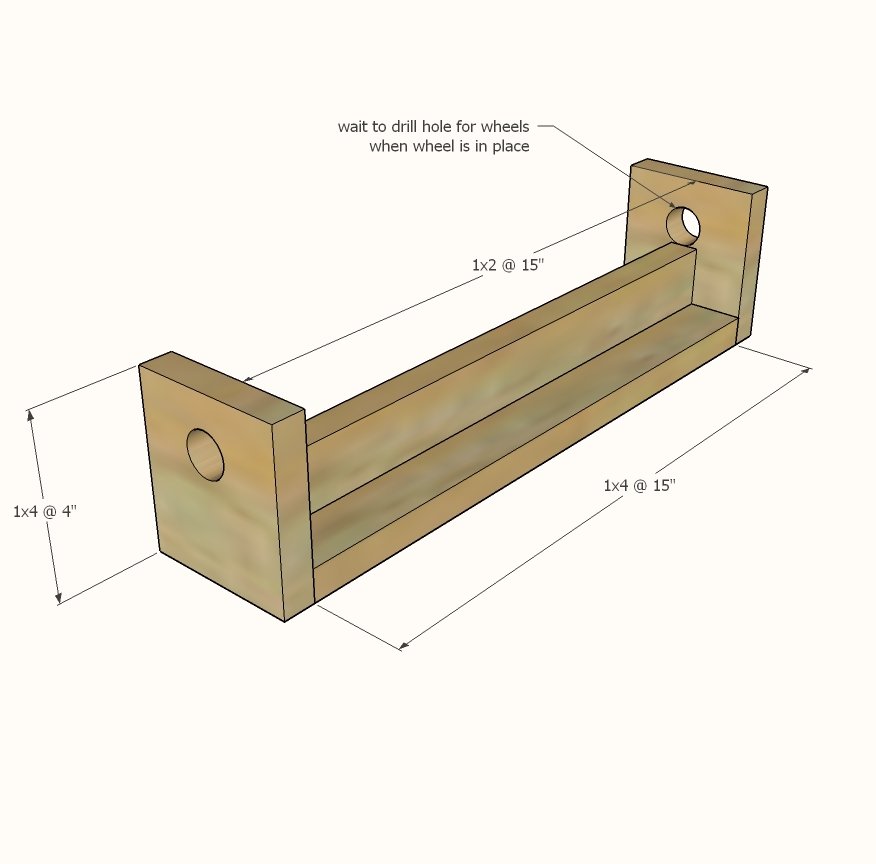
Step 8
Clamp wheels to the wheel support system so the cart sits level. Drill holes through the center of the wheel into the wheel support system. Attach with bolts and washers and nuts.
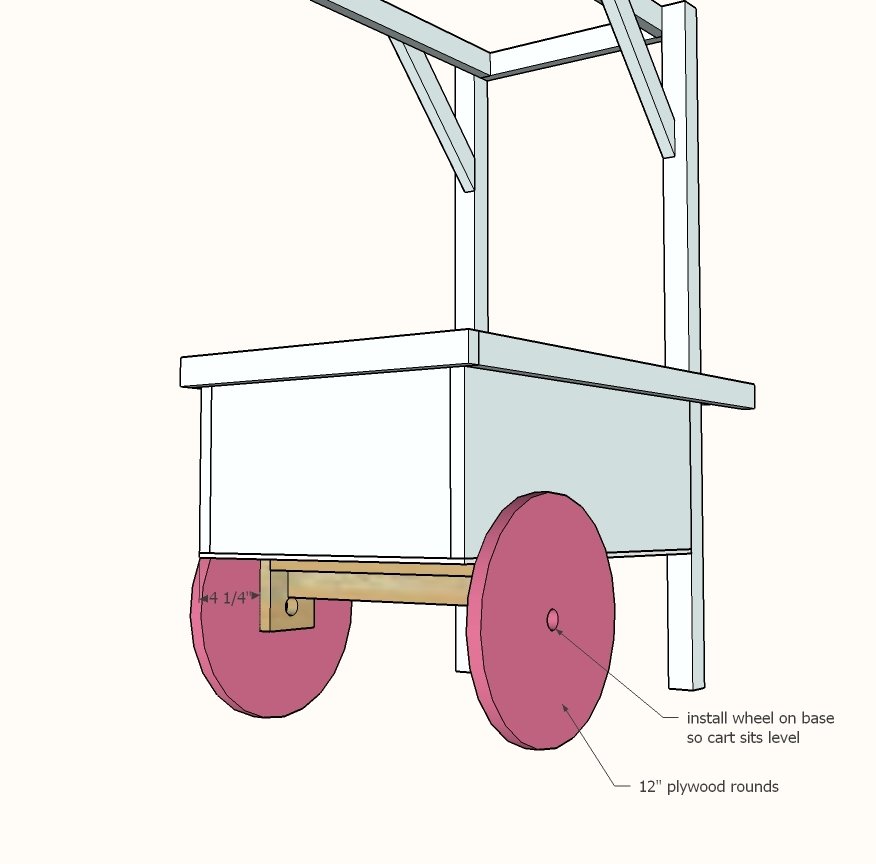
Step 9
Hinge the 1x8s to the 1x2 trim.
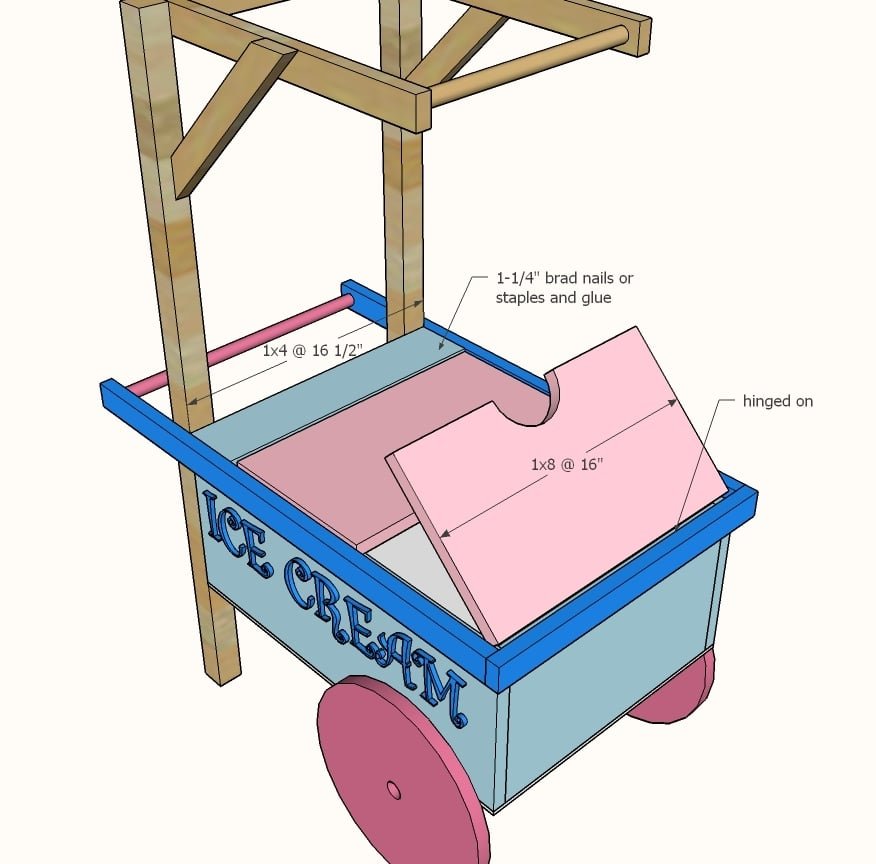
Finishing
Sand all surfaces, starting with a medium grit and finishing with fine. Wipe off the dust, fill any holes or gaps with wood filler, and sand smooth once dry. Apply primer if you're painting, then finish with your choice of paint or stain and seal with a durable clear topcoat. For outdoor projects, use exterior-rated primer, paint or stain, and sealer so the piece stands up to the weather.
Source (temporary): https://www.ana-white.com/woodworking-projects/ice-cream-cart