Ice Cream Truck Play Table or Desk
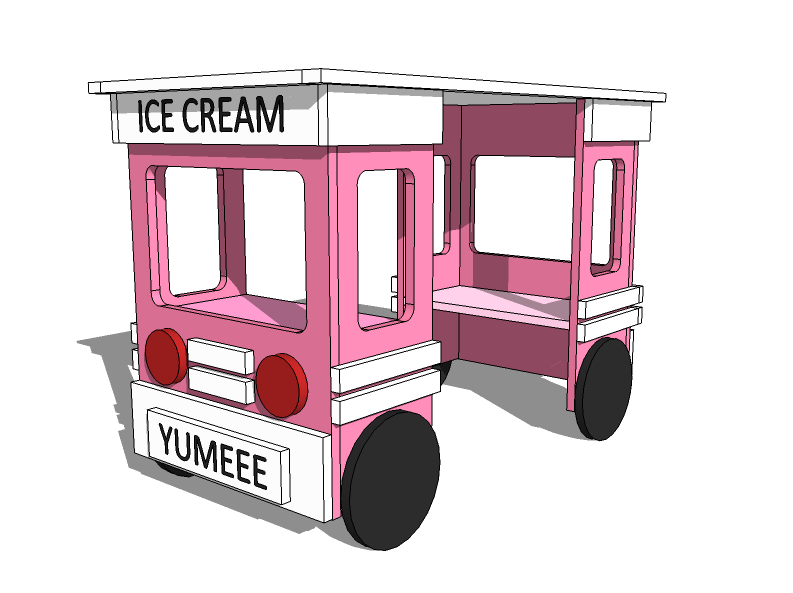
A desk that looks like an ice cream truck (or bus or fire truck!) that you can build with free simple, step by step plans that anyone can follow. Do it yourself and save money on wood furniture.
Specifications
| Project type | Kids Tables and Chairs |
|---|---|
| Room | Kids and Toys |
| Style | Children's and Kid's Room Furniture and Toy Plans |
| Difficulty | Intermediate |
| Estimated cost | $100-$150 |
Dimensions
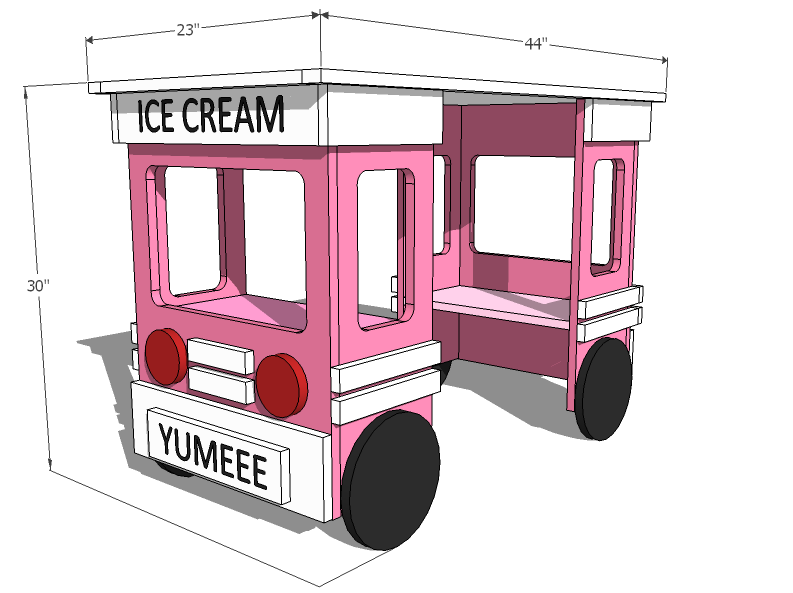
Use the size-specific shopping and cut lists below.
Shopping List
1 - 8 foot long x 20" wide x 3/4" thick project panel or shelf (referred to as a 1x20 in this plan)
2 - 1x10 @ 10 feet long
1 - 1x2 @ 8 feet long
1x6, 1x4 and 1x2 boards for decoration
2" and 4" rounds for decroation
Cut List
2 - 1x20 @ 26 1/2" (Front/Back)
1 - 1x20 @ 44" (Top)
4 - 1x10 @ 26 1/2" (Sides)
4 - 1x10 @ 18 1/2" (Shelves)
2 - 1x2 @ 44" (Side Trim)
4 - 1x10 @ 9 1/4" (Wheels, cut to rounds)
4 - 1x4 @ 9 1/4" (Wheel supports)
Optional trim and accessories
Tools
- measuring tape
- square
- pencil
- safety glasses
- hearing protection
- drill
- circular saw
- jigsaw
- nailer
- sander
- level
- countersink drill bit
Step-by-step Instructions
Step 1
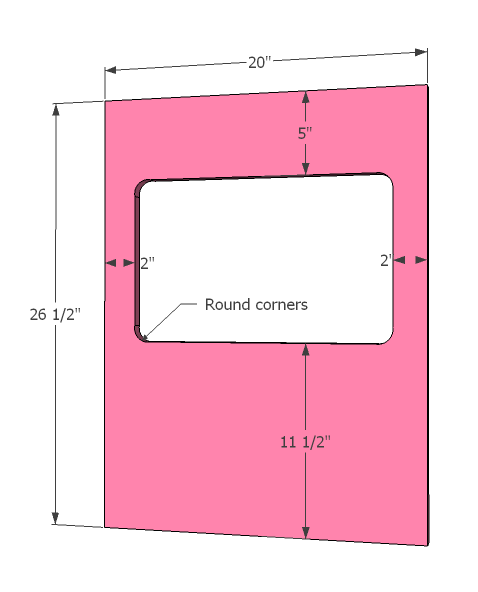
Start by carefully marking and cutting the windshield/back out of the front/back panels as shown above. Round corners gently with a jigsaw.
Step 2
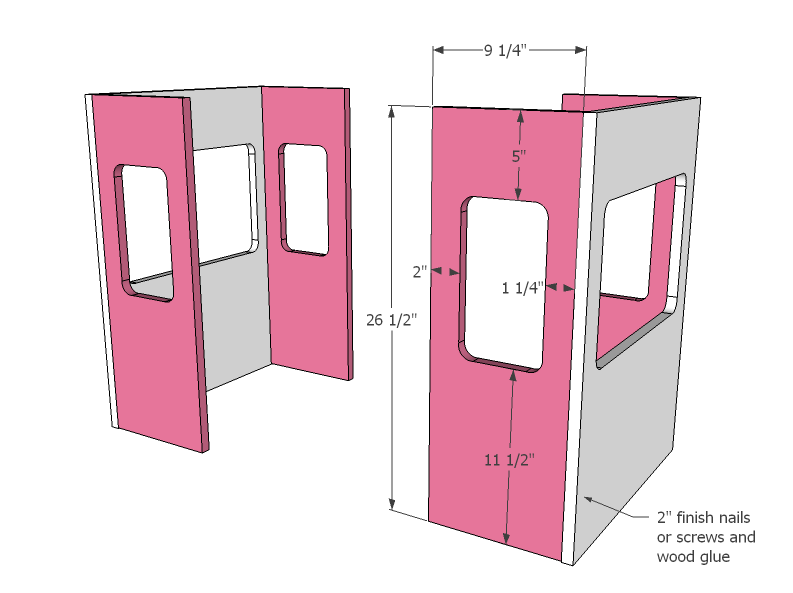
Now do the same for the windows in the sides, and then attach front/back to sides as shown above. Use glue and check for square.
Step 3
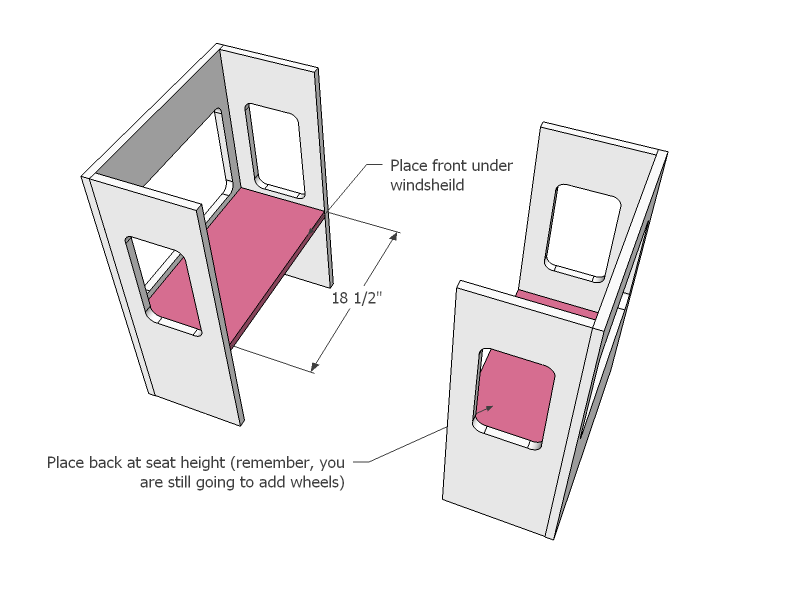
Now add shelves as you see fit. The shelf on the windshield side should be just below the window opening, the other at seat height (don't forget, we'll be adding wheels too!).
Step 4
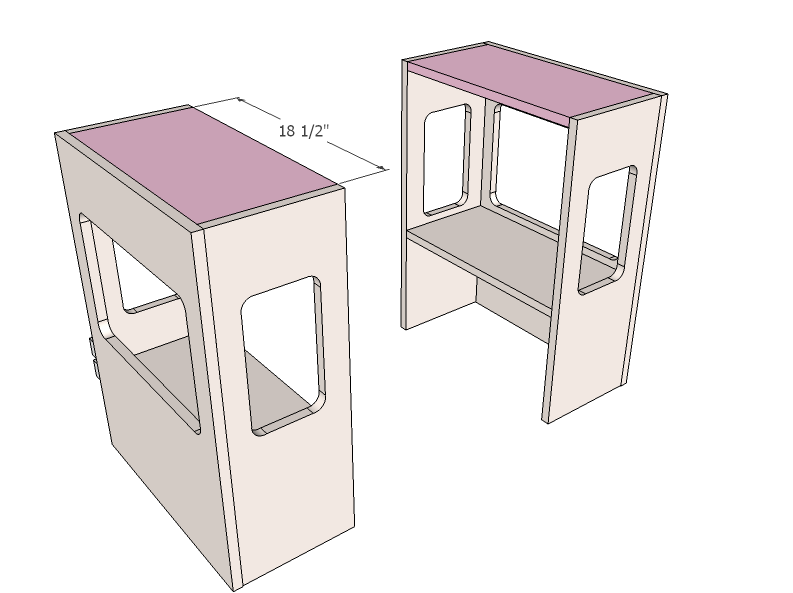
These aren't entirely necessary (you could use some 1x2s here to save money and just buy 8 foot 1x10s) but they give you something stable on the top to screw your top too. Screw or nail in place with glue.
Step 5
Step 6
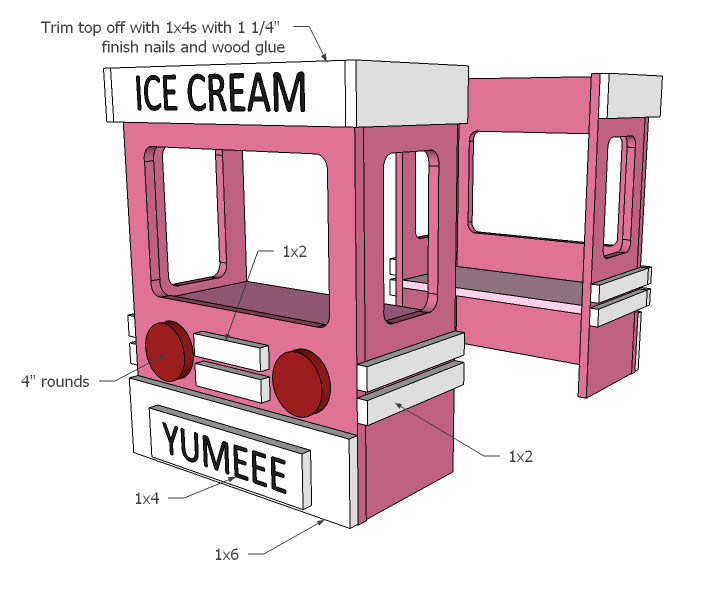
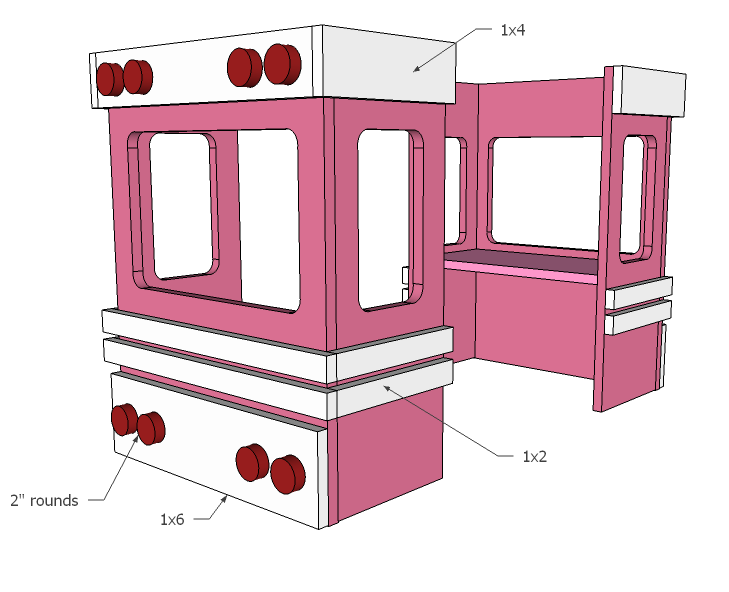
And here's the back. It may make more sense to paint everything separately.
Step 7
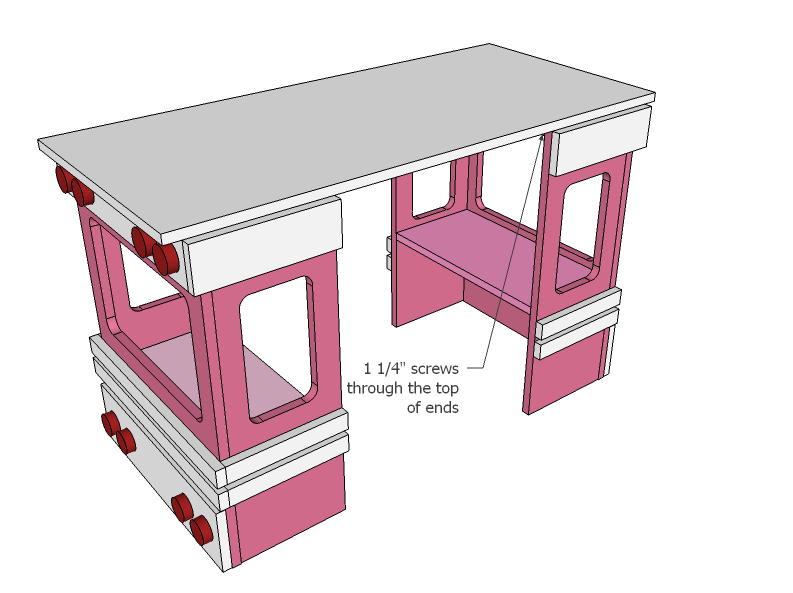
Once the front and back are done (you may wish to move into your room at this point depending on doorways) attach top through underside of front and back with 1 1/4" screws. I left a 2" overhang to fronts and backs in the diagrams.
Step 8
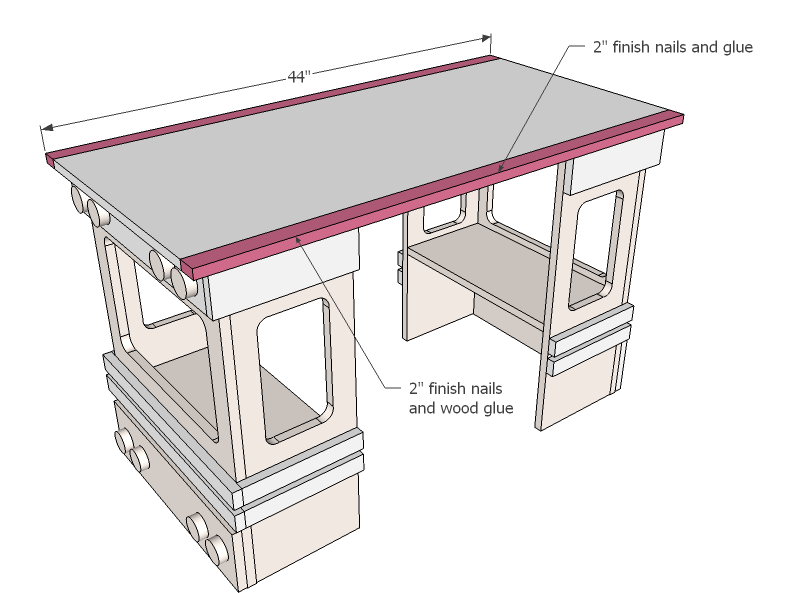
Now trim the edges out with 1x2s as shown above.
Step 9
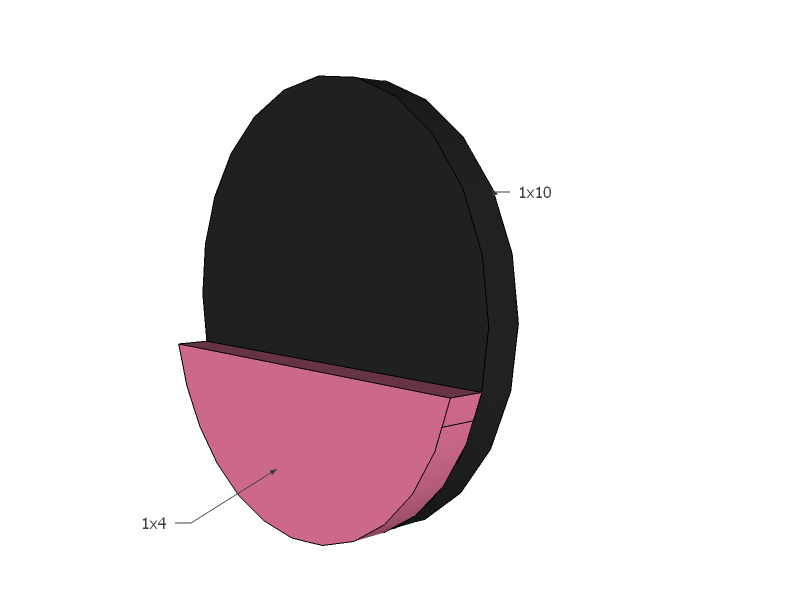
Cut the wheels out from 1x10 squares into a circle with a jigsaw. Then cut a half circle shape to match from the 1x4 as shown above and attach to the wheel. Use 1 1/4" finish nails and wood glue.
Step 10
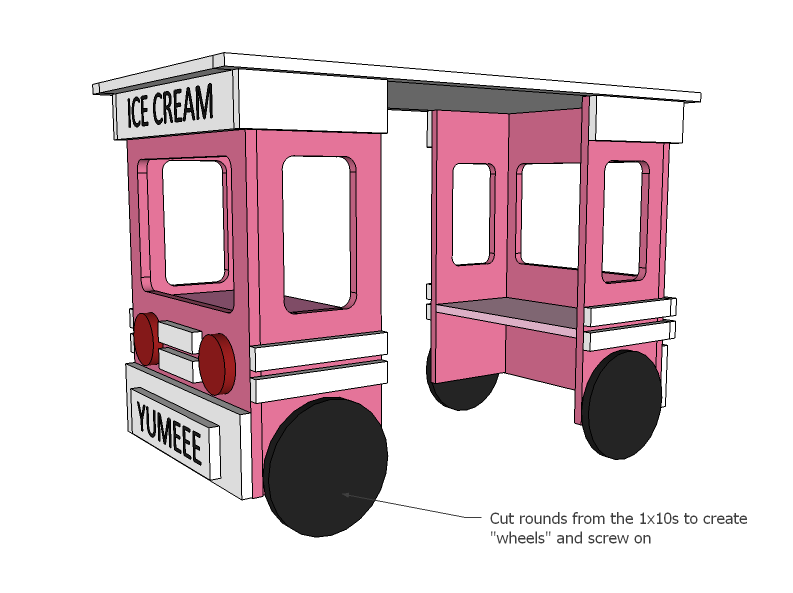
Attach wheels to base of front/back as shown above and screw in place with 1 1/4" screws and glue.
Step 11
It doesn't have to be an ice cream truck!
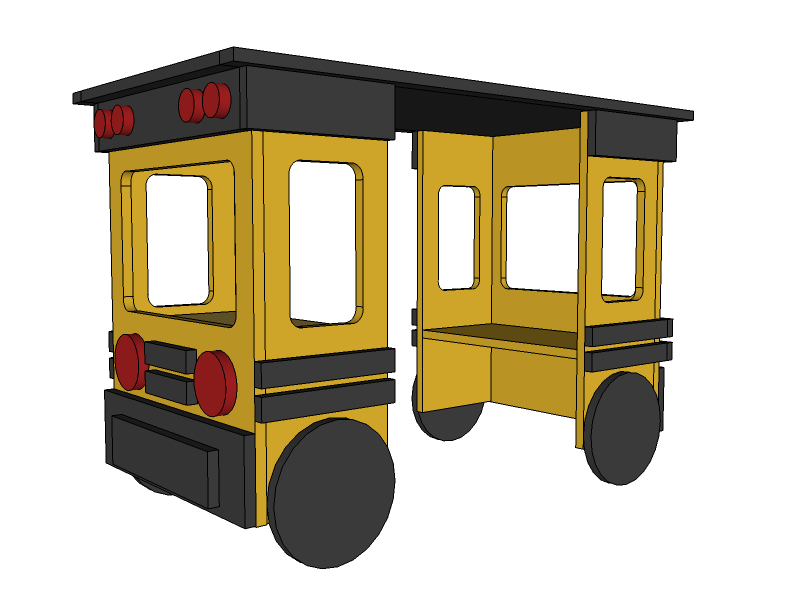
Step 12
And here's a simple 18" high stool, top made from a 1x12 square... fits pretty nice under there!
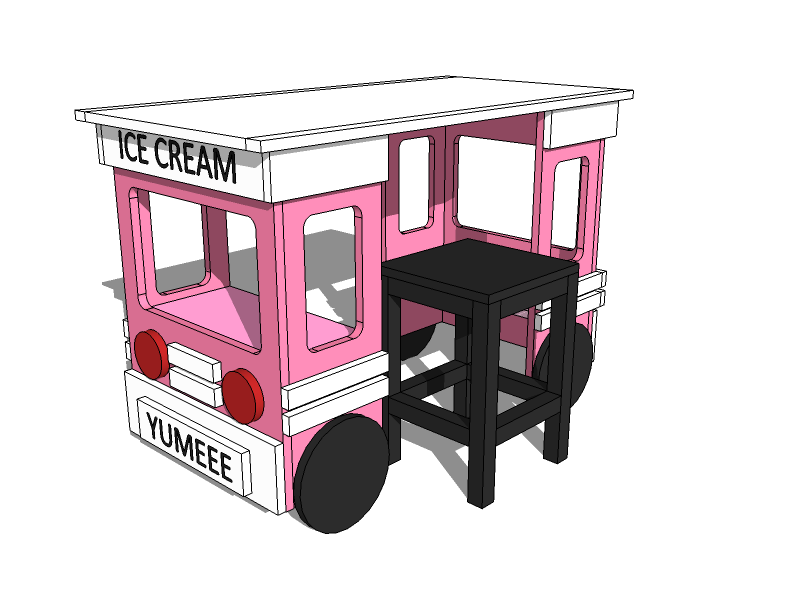
Finishing
Sand all surfaces, starting with a medium grit and finishing with fine. Wipe off the dust, fill any holes or gaps with wood filler, and sand smooth once dry. Apply primer if you're painting, then finish with your choice of paint or stain and seal with a durable clear topcoat. For outdoor projects, use exterior-rated primer, paint or stain, and sealer so the piece stands up to the weather.
Source (temporary): https://www.ana-white.com/woodworking-projects/ice-cream-truck-play-table-or-desk