Jilly and Mia Workbench Console
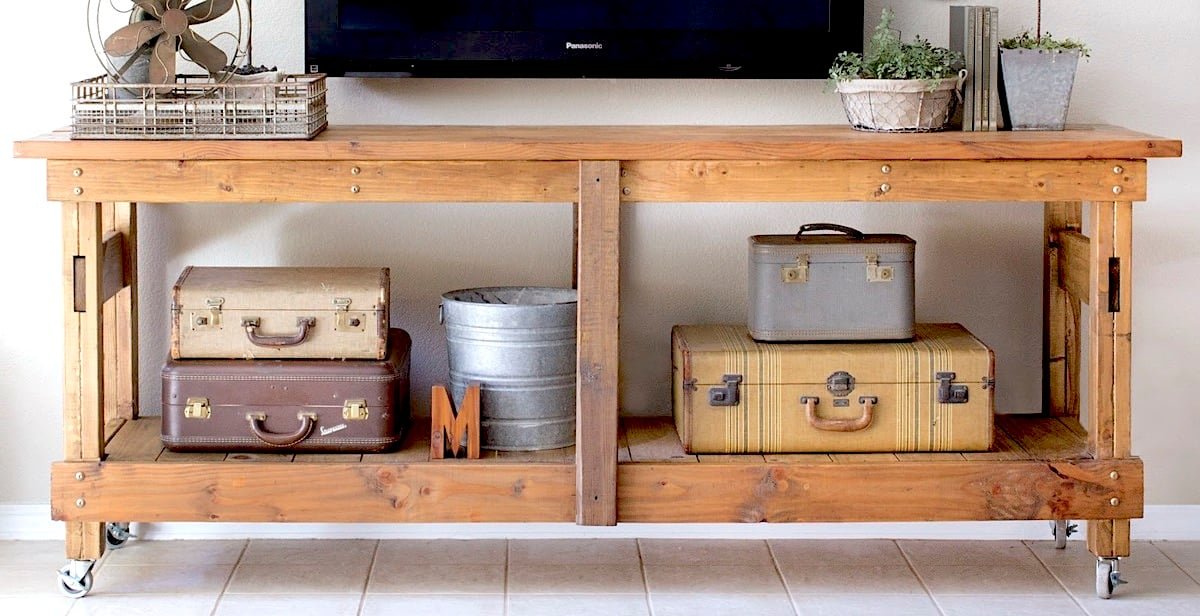
to build this beautiful console table with open shelf and large top. This project is made from 2x framing lumber.
Specifications
| Project type | Media and Entertainment Centers |
|---|---|
| Room | Storage Solutions |
| Difficulty | Intermediate |
Dimensions
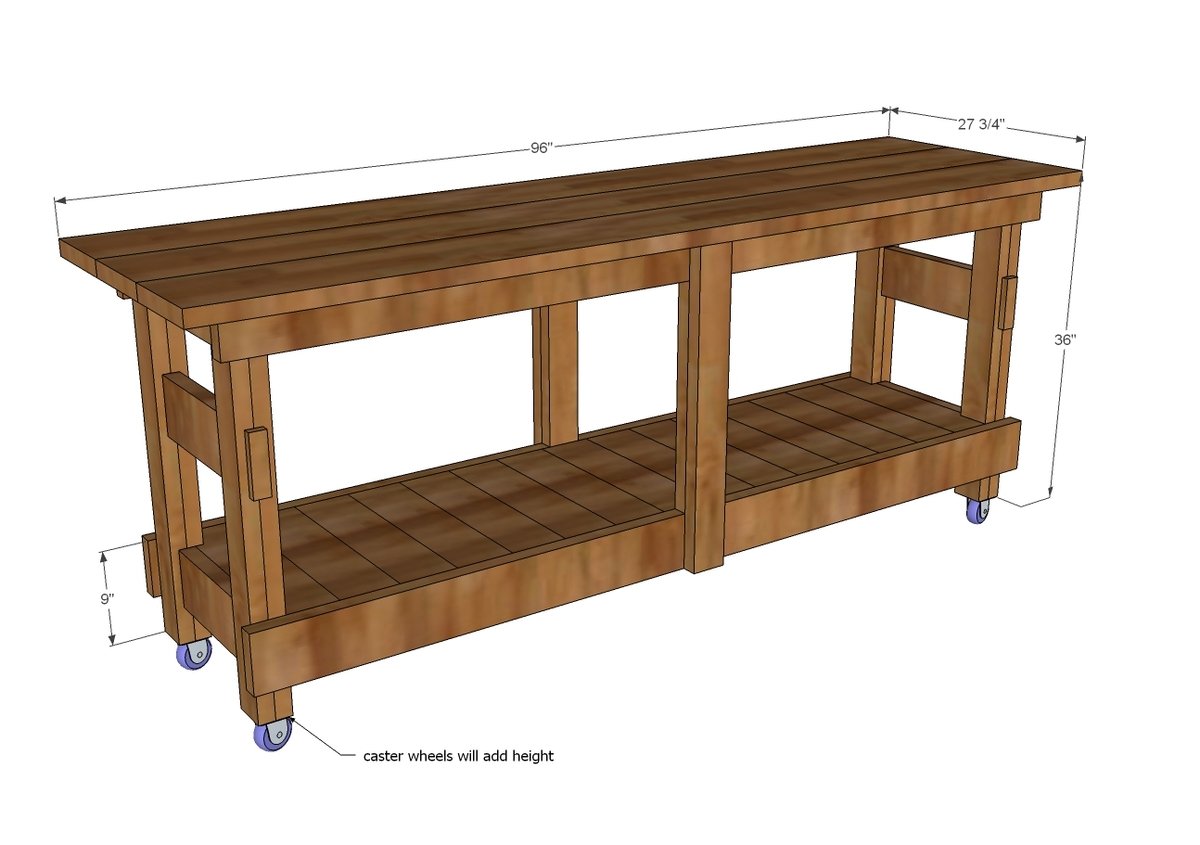
Use the size-specific shopping and cut lists below.
Shopping List
- 8 - 2x4 @ 8 feet long
- 3 - 2x6 @ 8 feet long
- 4 - 1x6 @ 8 feet long
- 3 - 2x10 @ 8 feet long
- 2 - 2x2 @ 8 feet long (could also use 2x4s)
- 4 - caster wheels
- 2-1/2" wood screws (get the self tapping torque head ones)
- 24 3" lag screws (for decorative exposed heads)
- 1-1/4" finish nails (for attaching bottom shelf boards)
- 2-1/2" pocket hole screws (you'll just need 8 for attaching bottom apron)
Cut List
- 4 - 2x4 @ 34-1/2" (longer leg pieces)
- 4 - 2x4 @ 31" (shorter leg pieces)
- 2 - 2x6 @ 22-1/4" (middle leg stretcher - passes through notches)
- 2 - 2x6 @ 13-3/4" (shorter bottom stretcher)
- 5 - 2x4 @ 20-3/4" (top "studs")
- 2 - 2x4 @ 88-1/2" (front/back top aprons)
- 2 - 2x6 @ 88-1/2" (bottom shelf front/back aprons)
- 2 - 2x4 @ 31" (center legs)
- 2 - 2x4 @ 22" (inside center legs)
- 2 - 2x2 @ 81" (could also use 2x4s - for setting shelf boards on top)
- 15 - 1x6 @ 20-3/4" (bottom shelf boards)
- 3 - 2x10 @ 8 feet long (top boards)
Tools
- measuring tape
- square
- pencil
- hammer
- safety glasses
- hearing protection
- kreg-jig
- drill
- circular saw
- nailer
- sander
- countersink drill bit
Step-by-step Instructions
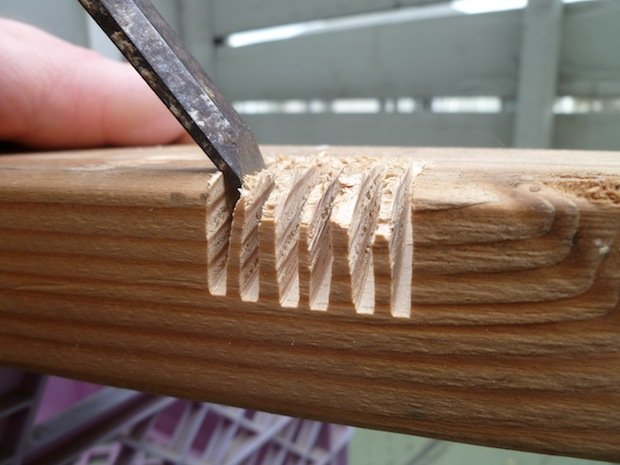
Notch out the 8 leg pieces as shown here.
To notch out, set your circular saw blade to a depth of 3/4". Make cuts in notched area about every 1/4". Use a chisel to remove material from notched out areas after cutting. Image from MakeZine
Step 2
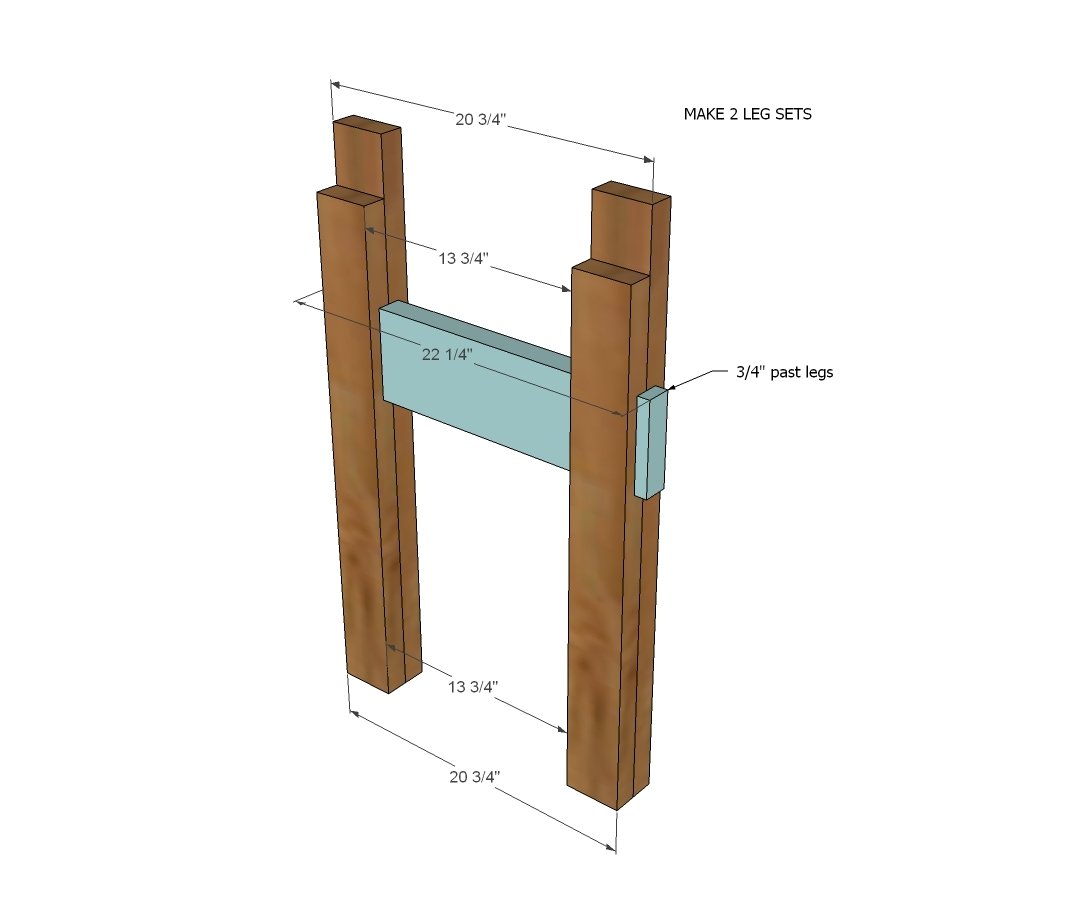
Fit the longer 2x6 inside the leg sets, attach with 2-1/2" screws from inside (starting screws on the longer 2x4) with glue. Take care to make sure you are attaching square - you can use the shorter 2x6 as a spacer on the bottom (see next step) to help you here.
Step 3
Attach bottom 2x6 with 1-1/2" pocket holes and 2-1/2" pocket hole screws. If you don't have a pocket hole jig you can alternatively attach by screwing at an angle with the 2-1/2" screws or you could notch as done with the upper 2x6 piece. UPDATE: One of our readers suggested that when you attach this board with 1-1/2" pocket holes, the screw lands between the two leg boards. I suggest drilling 3/4" pocket holes instead (this will move the pocket hole inward enough) you can still use the 2-1/2" pocket hole screws.
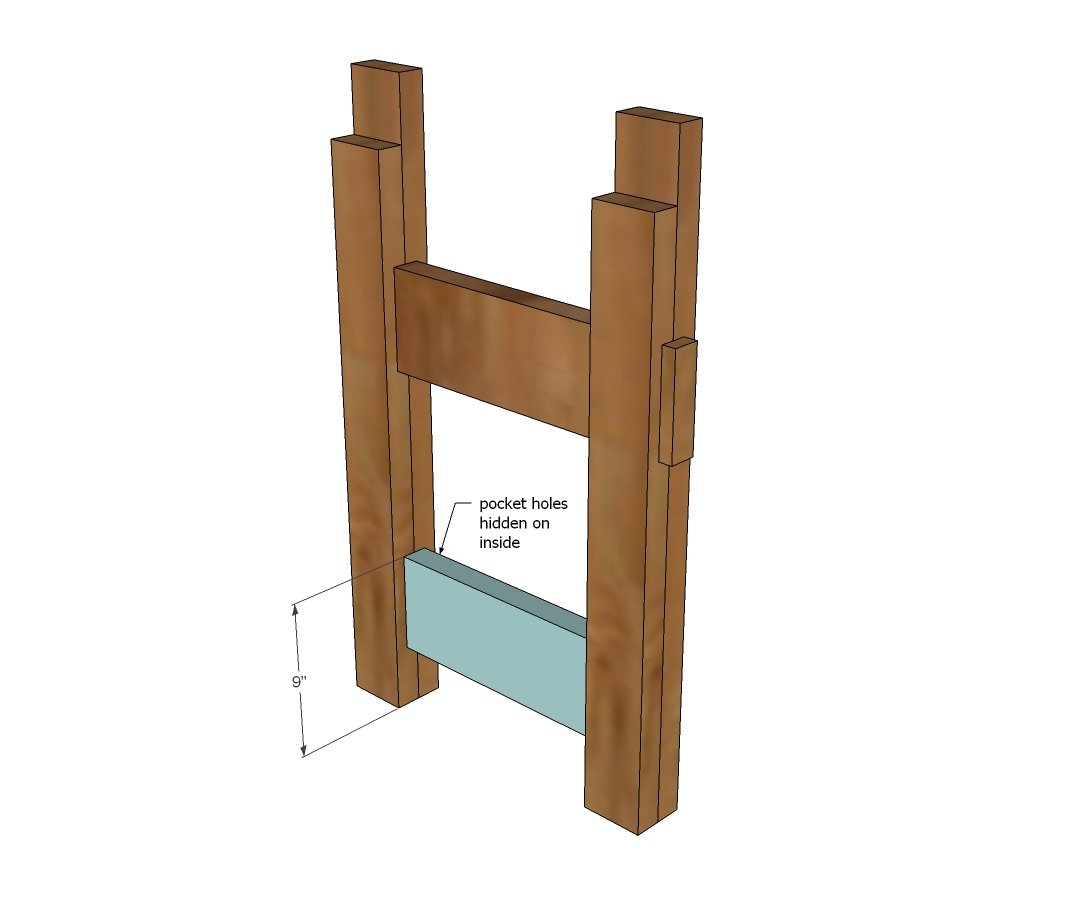
Step 4
Attach top 2x4 in place with 2-1/2" screws and glue. This completes the two leg sets.
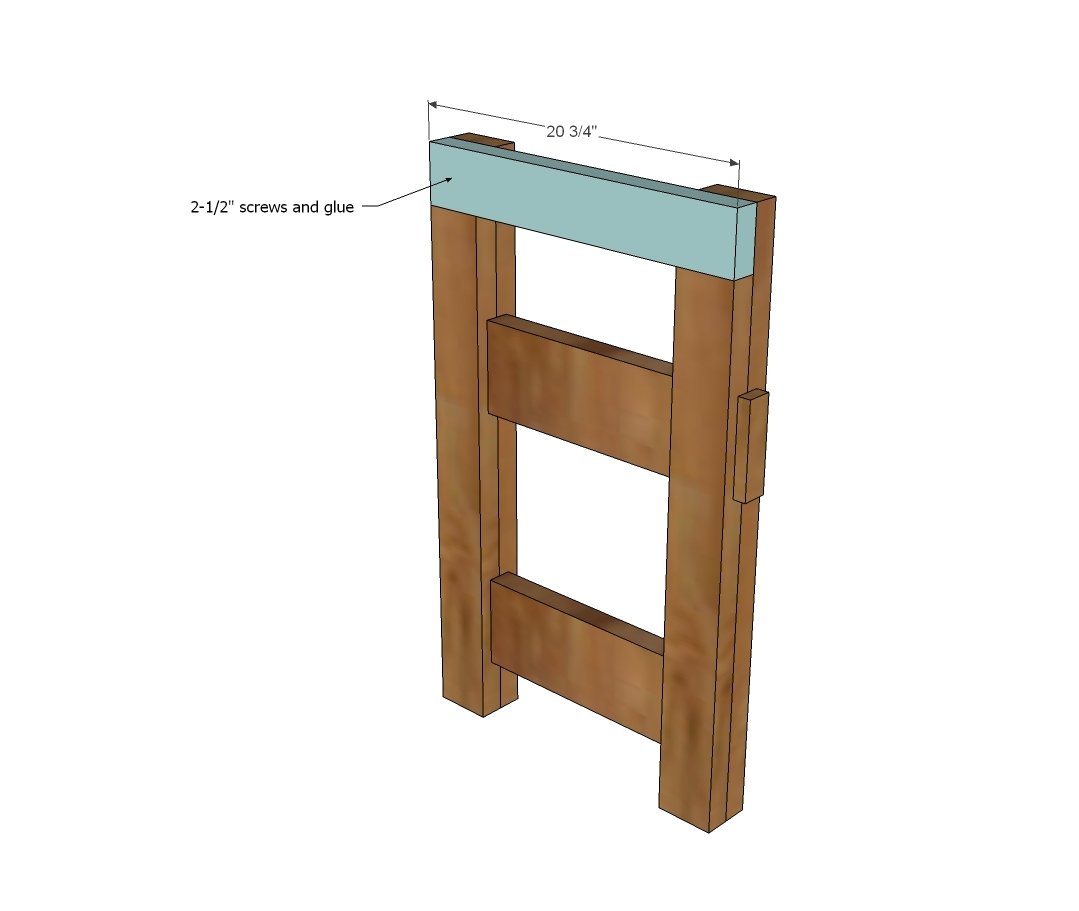
Step 5
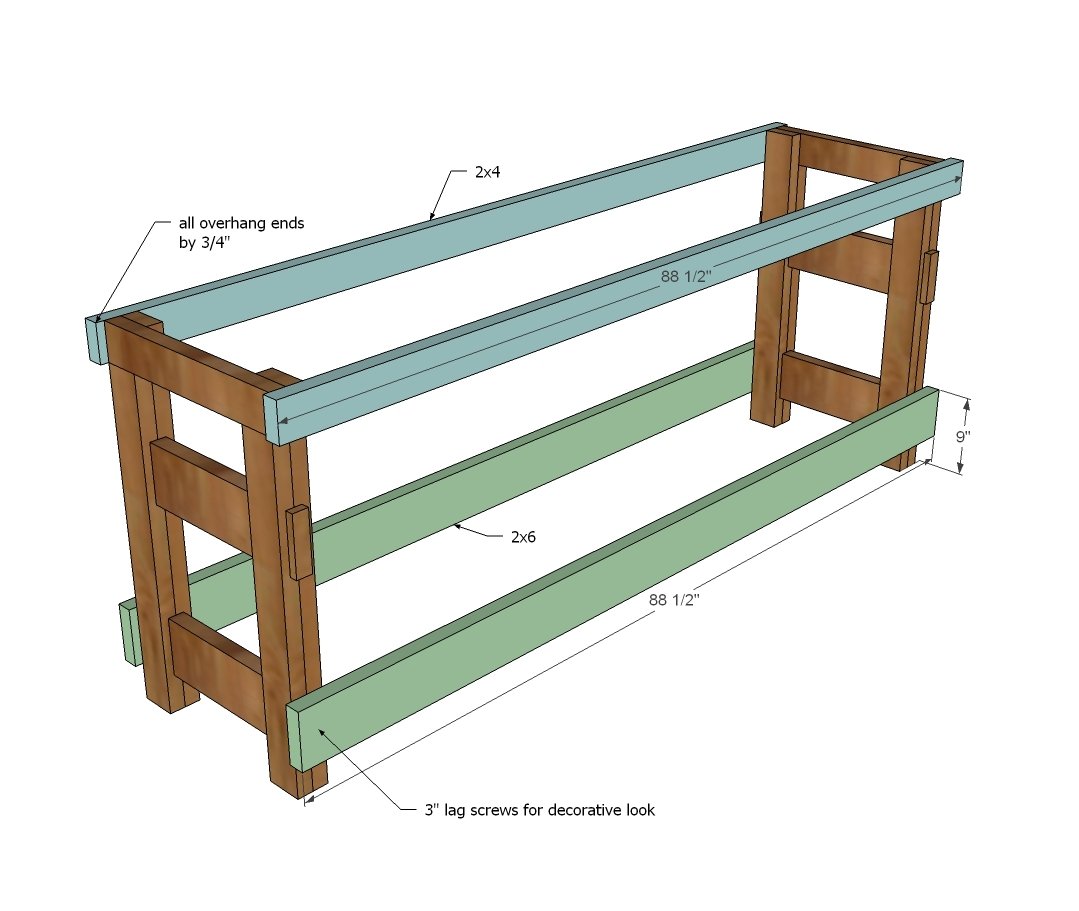
Step 6
Attach 2x4 studs in between top aprons - these guys will support the tabletop in later steps.
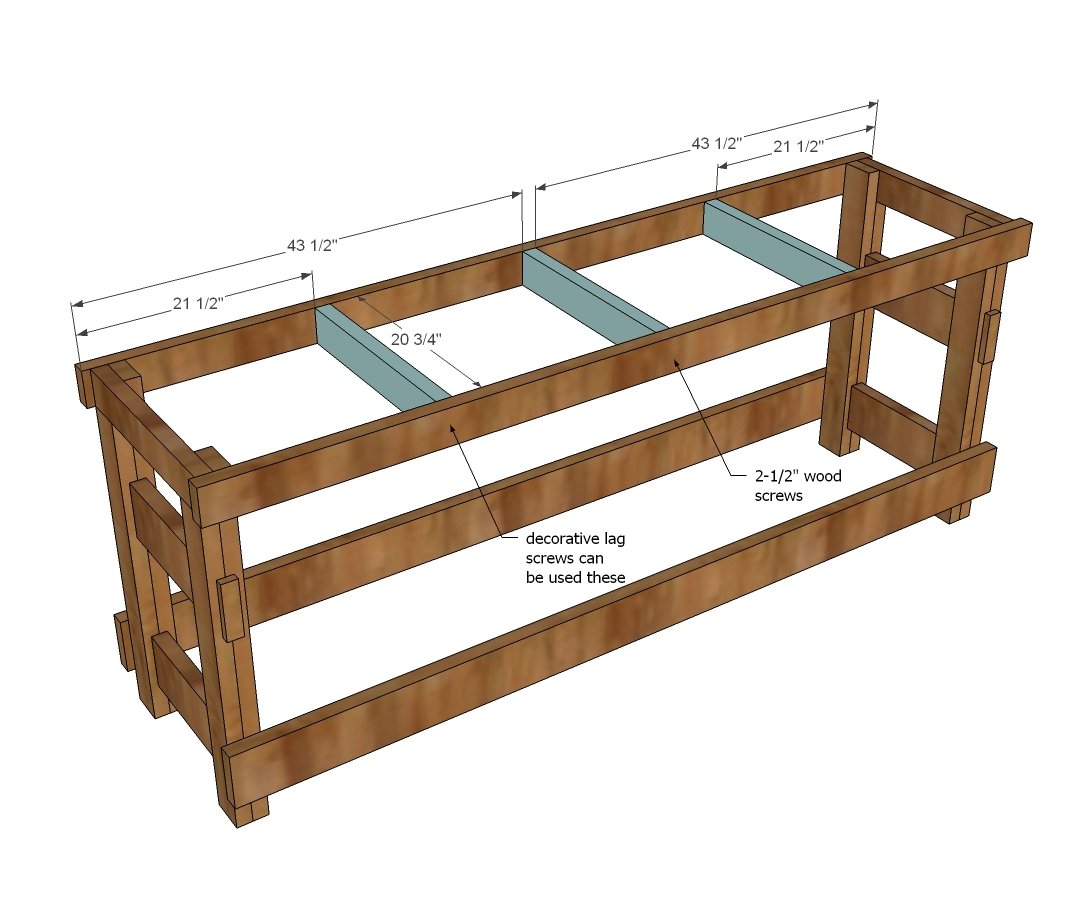
Step 7
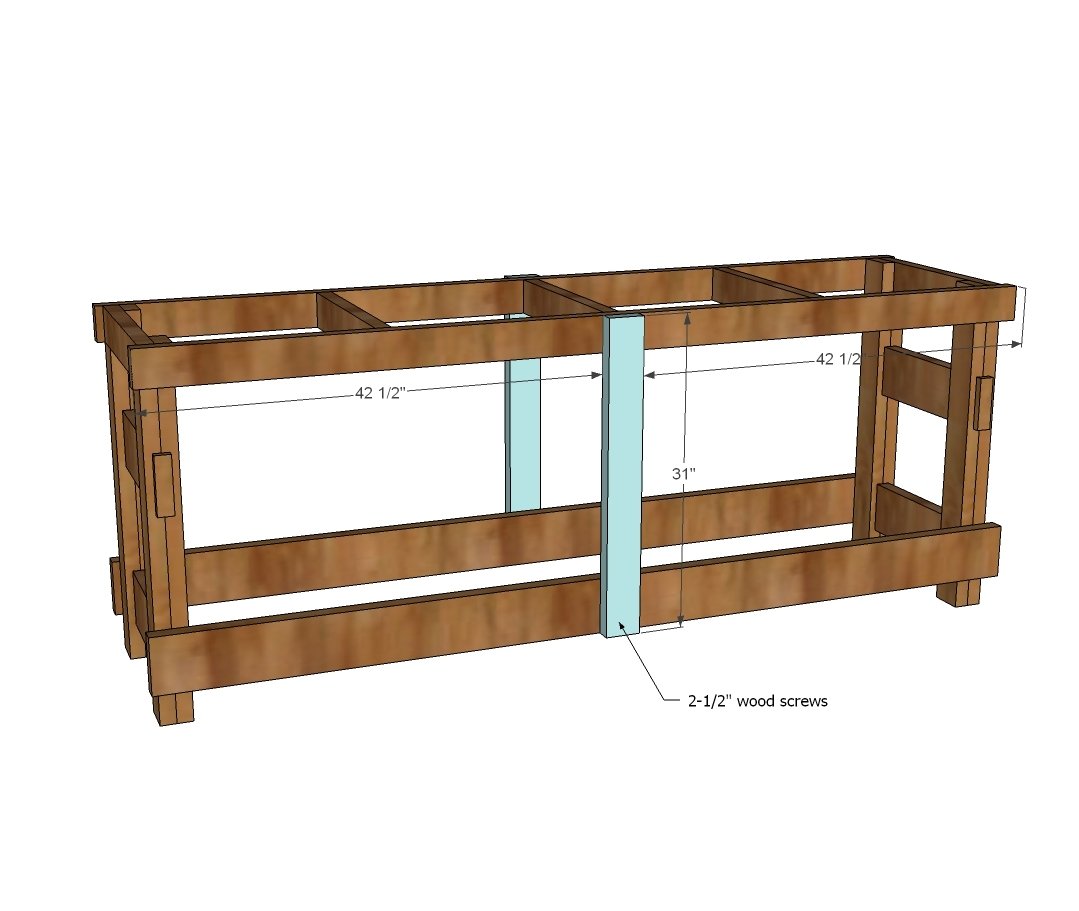
Attach center leg to top and bottom aprons with 2-1/2" wood screws and glue.
Step 8
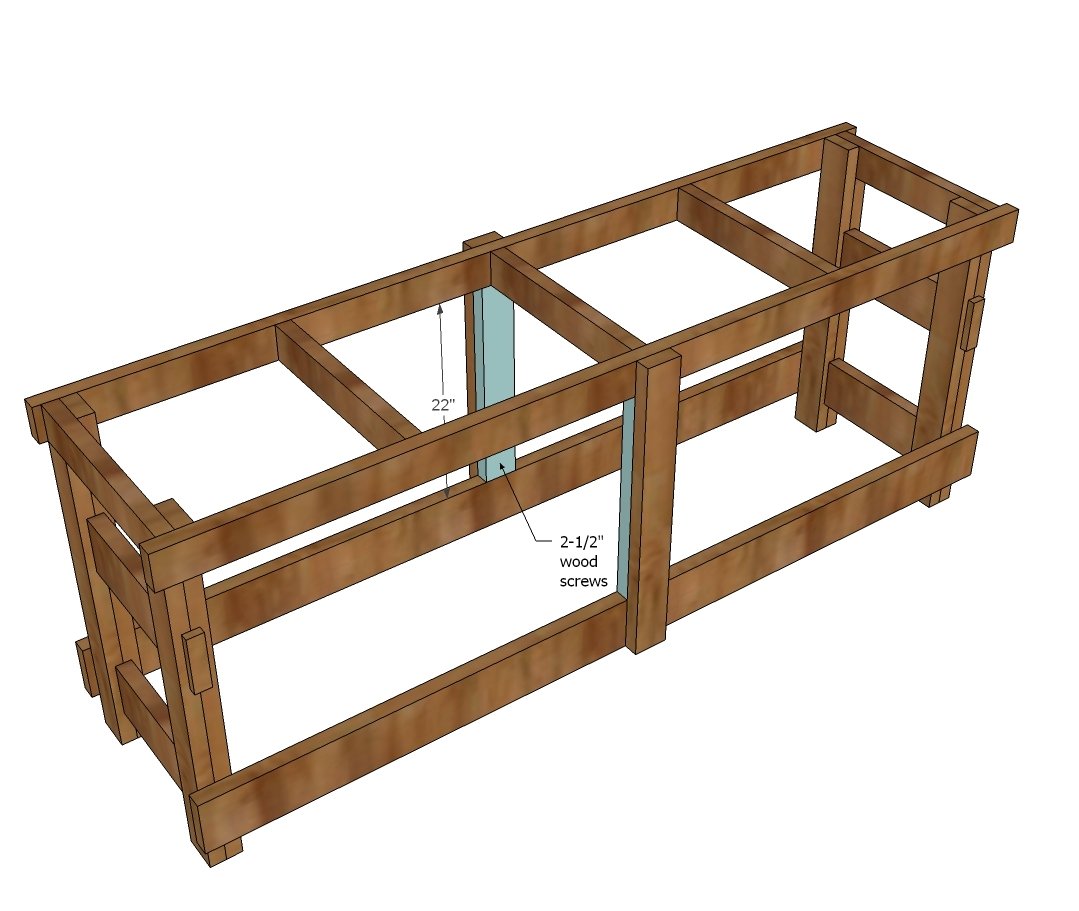
Fill in void behind center leg with smaller 2x4.
Step 9
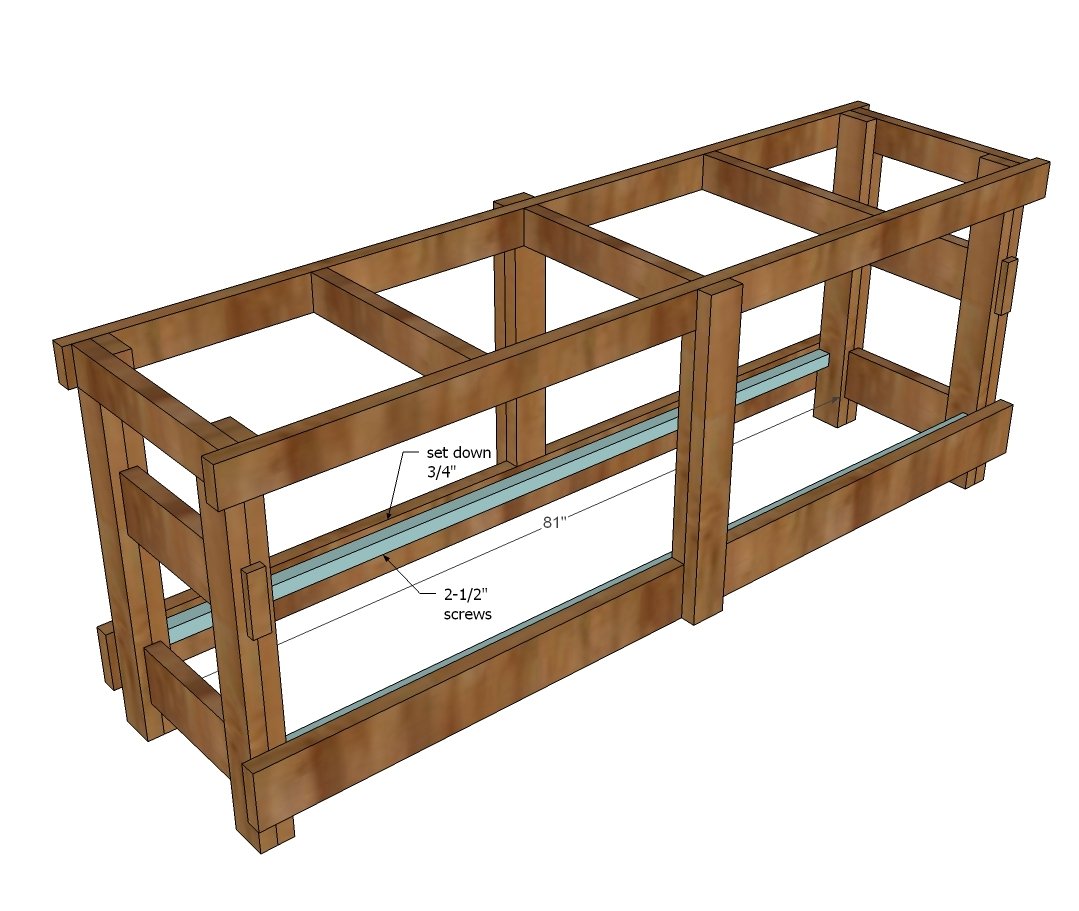
Attach 2x2 cleats to insides of 2x6 aprons, about 3/4" down to allow for shelving boards (see next step).
Step 10
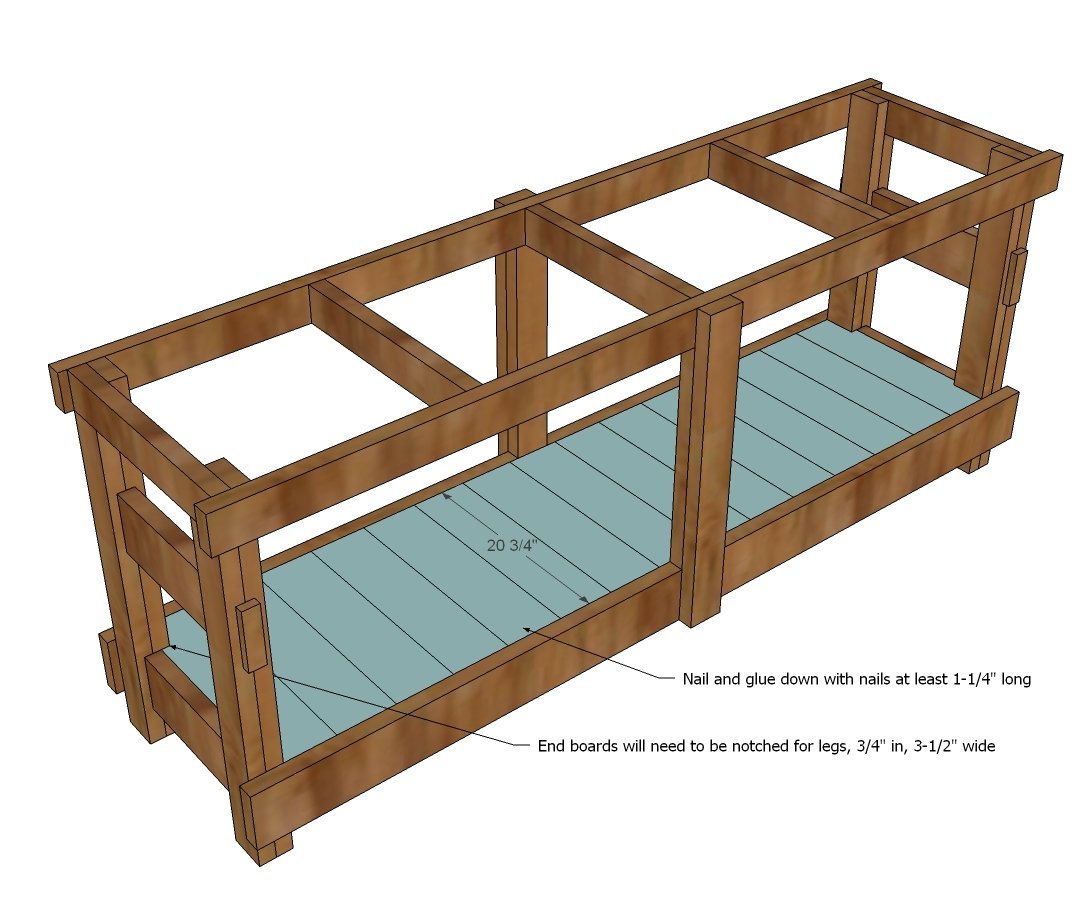
Start in center and work outward, laying the 1x6 shelf boards down. The end 1x6s will need to be notched out with a jigsaw to allow for the legs to set inset. Glue and nail down.
Step 11
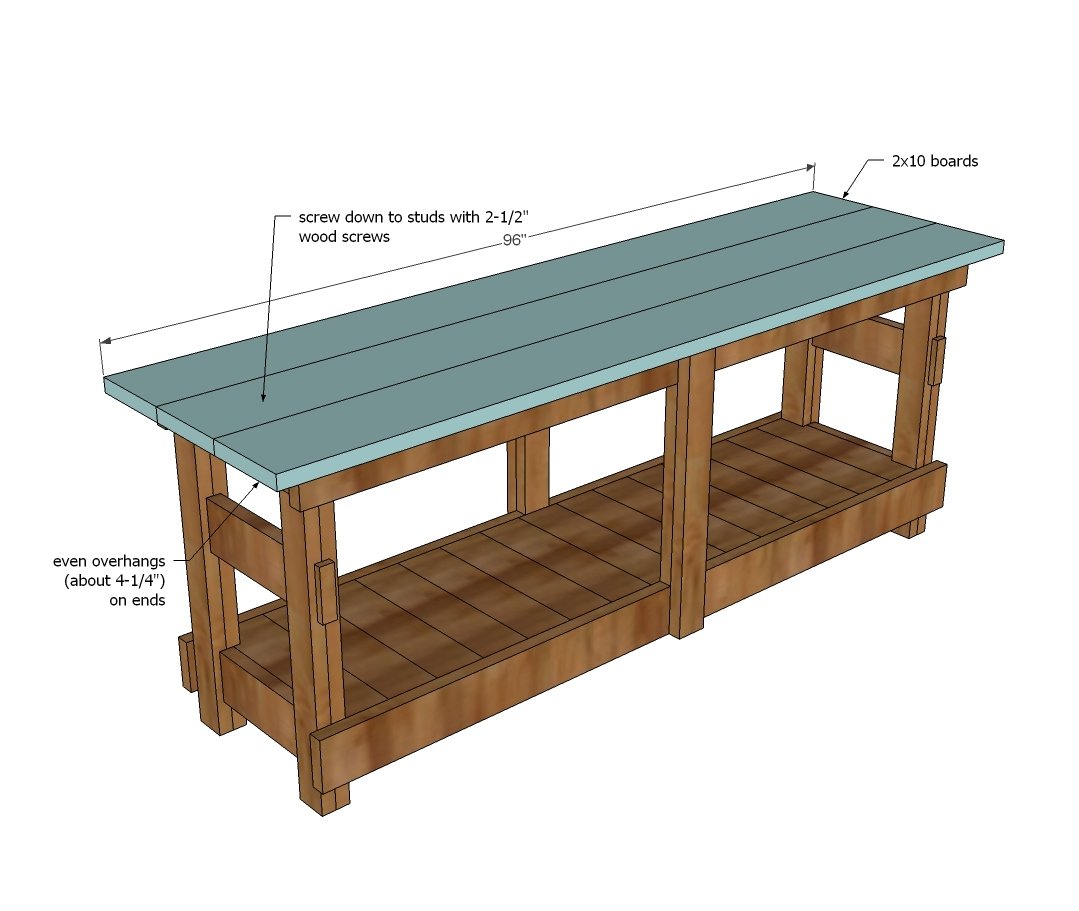
Attach tabletop boards to studs and aprons on top with 2-1/2" screws and glue. Overhangs are even on ends and front/back.
Step 12
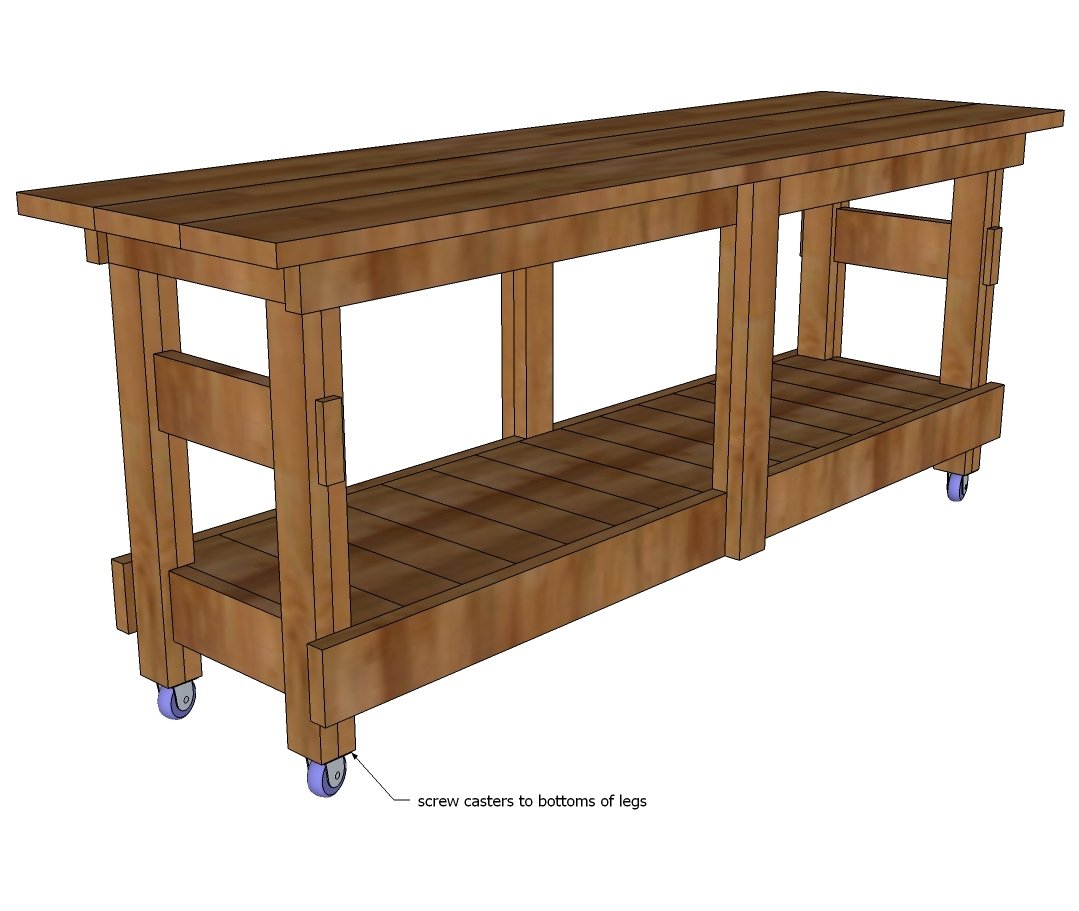
Attach casters to the bottom of legs.
Step 13
For finishing details, please visit Jilly and Mia.
Finishing
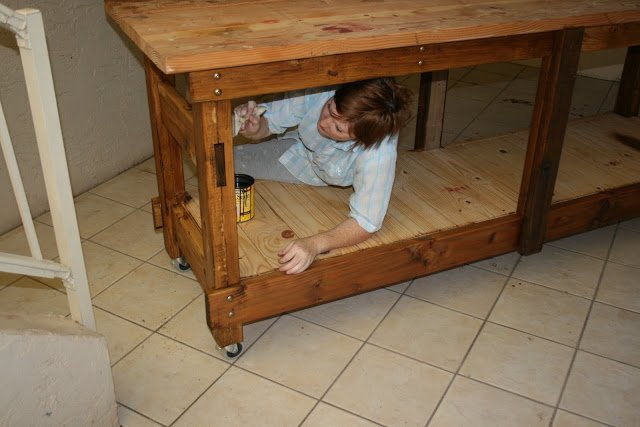
Sand all surfaces, starting with a medium grit and finishing with fine. Wipe off the dust, fill any holes or gaps with wood filler, and sand smooth once dry. Apply primer if you're painting, then finish with your choice of paint or stain and seal with a durable clear topcoat. For outdoor projects, use exterior-rated primer, paint or stain, and sealer so the piece stands up to the weather.
Source (temporary): https://www.ana-white.com/woodworking-projects/jilly-and-mia-workbench-console