Julia Nightstand
But before we get to this amazing plan, something else super amazing is happening today.
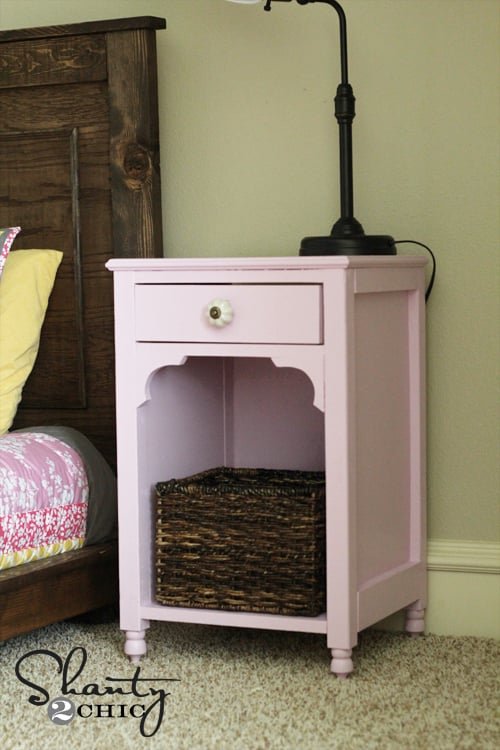
Specifications
| Project type | Nightstands |
|---|---|
| Room | Bedroom |
| Style | Children's and Kid's Room Furniture and Toy Plans |
| Difficulty | Advanced |
| Estimated cost | $20 - $50 |
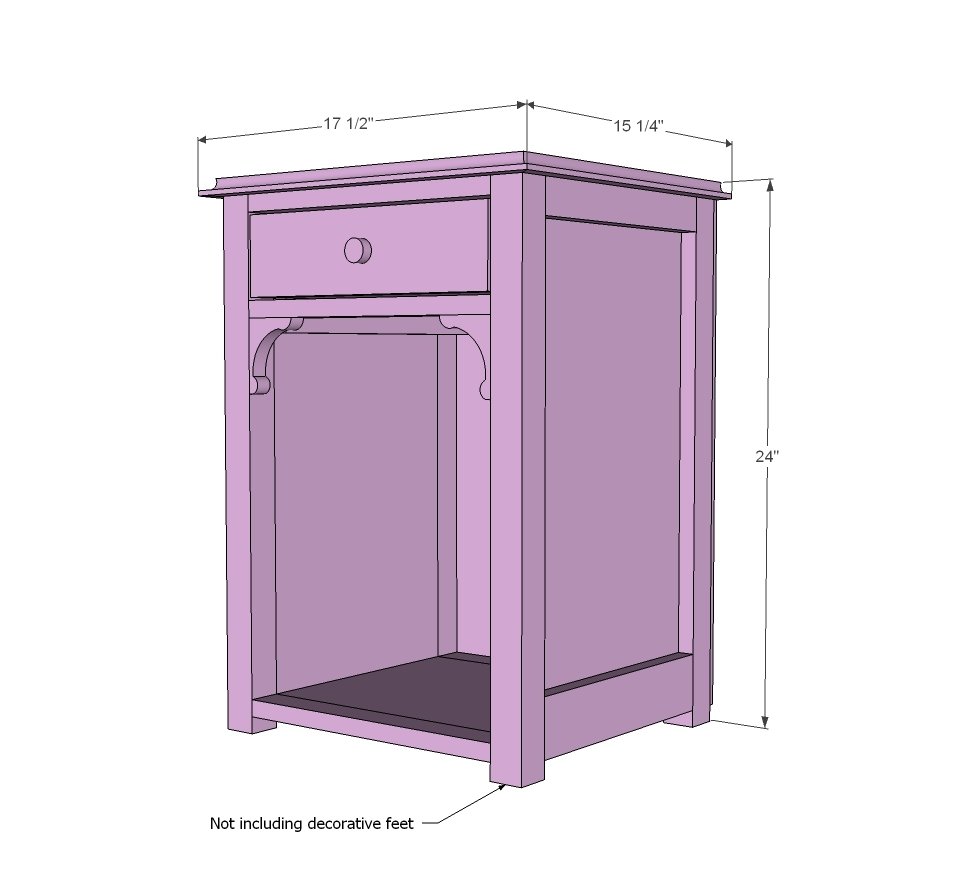
Dimensions
Use the size-specific shopping and cut lists below.
Shopping List
2 – 1x2 @ 8 feet long
1 – 1x12 @ 8 feet long
1 – 1x3 @ 8 feet long
1 – 2x2 @ 8 feet long
1 – 1x4 @ 2 feet long
1 – ¼ sheet ¼” plywood
Cut List
2 – 1x2 @ 11 ¼”
2 – 1x3 @ 11 ¼”
2 – 1x12 @ 22 ½”
4 – 2x2 @ 23 ¼”
1 – 1x12 @ 13”
5 – 1x2 @ 13”
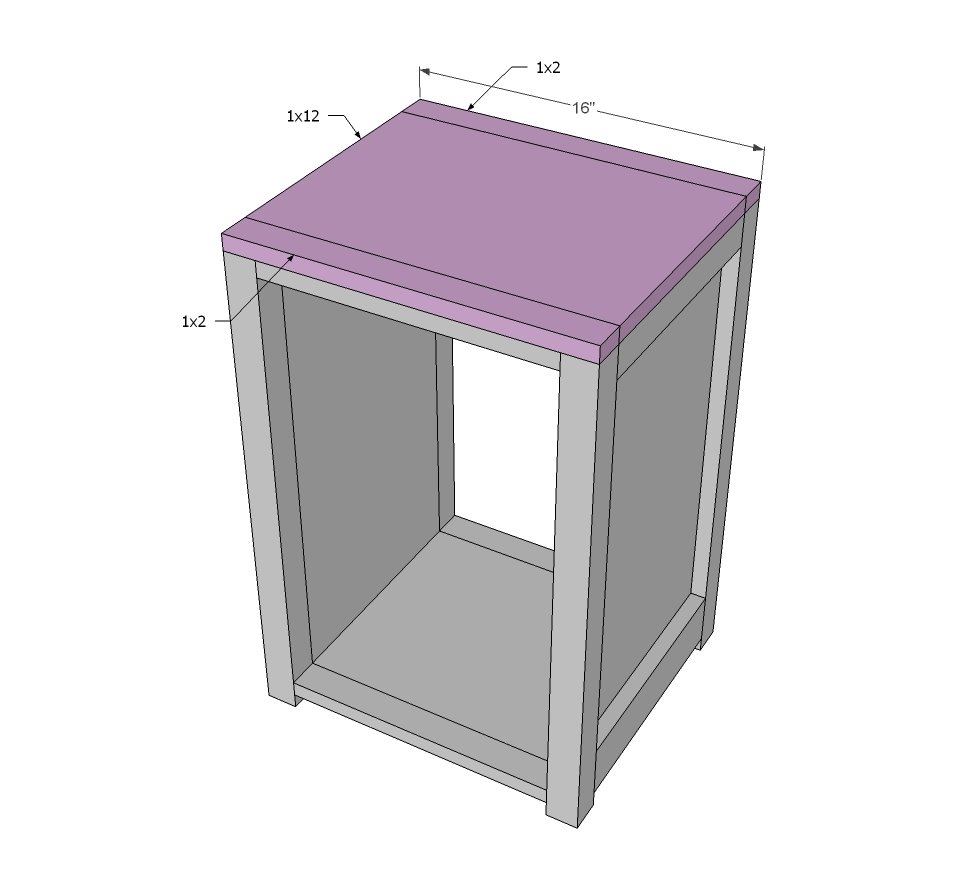
2 – 1x2 @ 16”
1 – 1x12 @ 16”
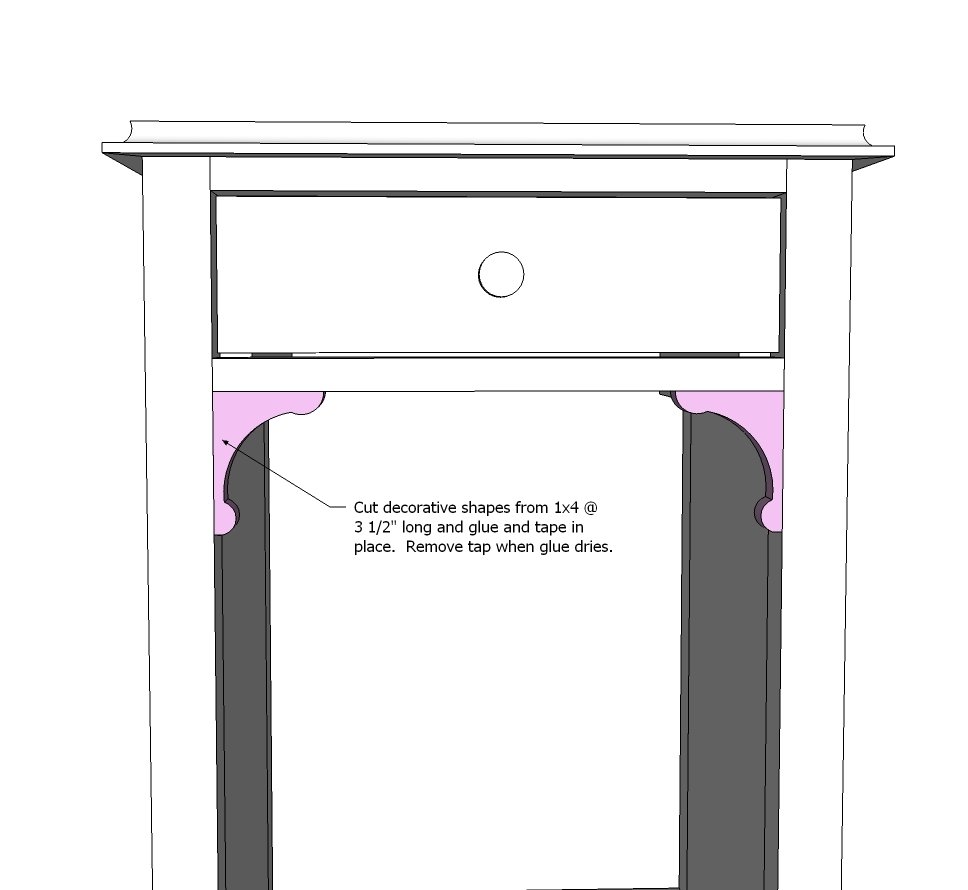
2 – 1x4 @ 3 ½” (decorative moulding)
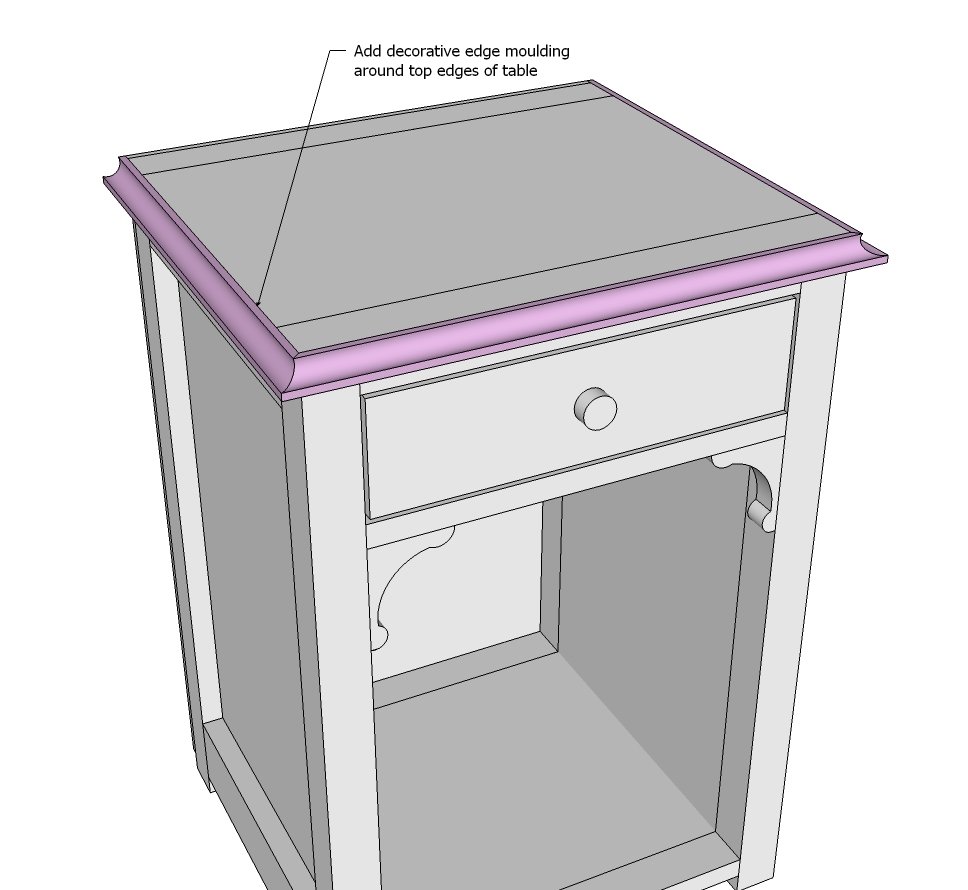
Edge Moulding is cut to fit
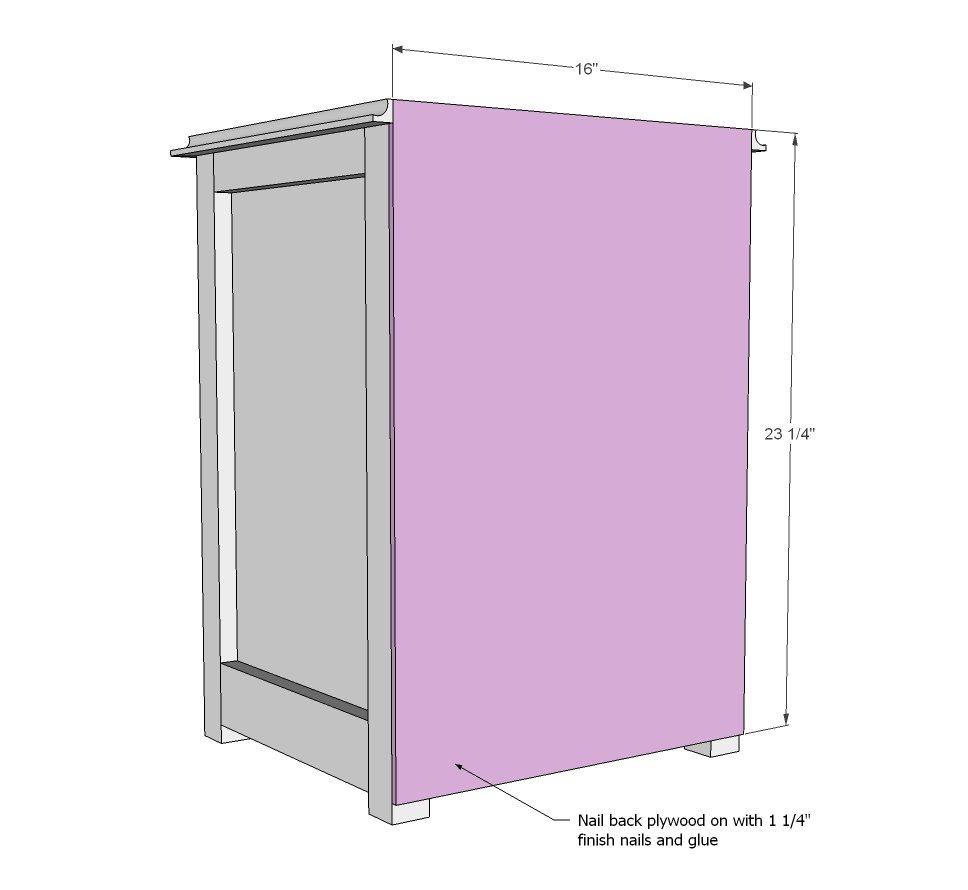
1 – ¼” plywood@ 16” x 23 ¼”
DRAWER
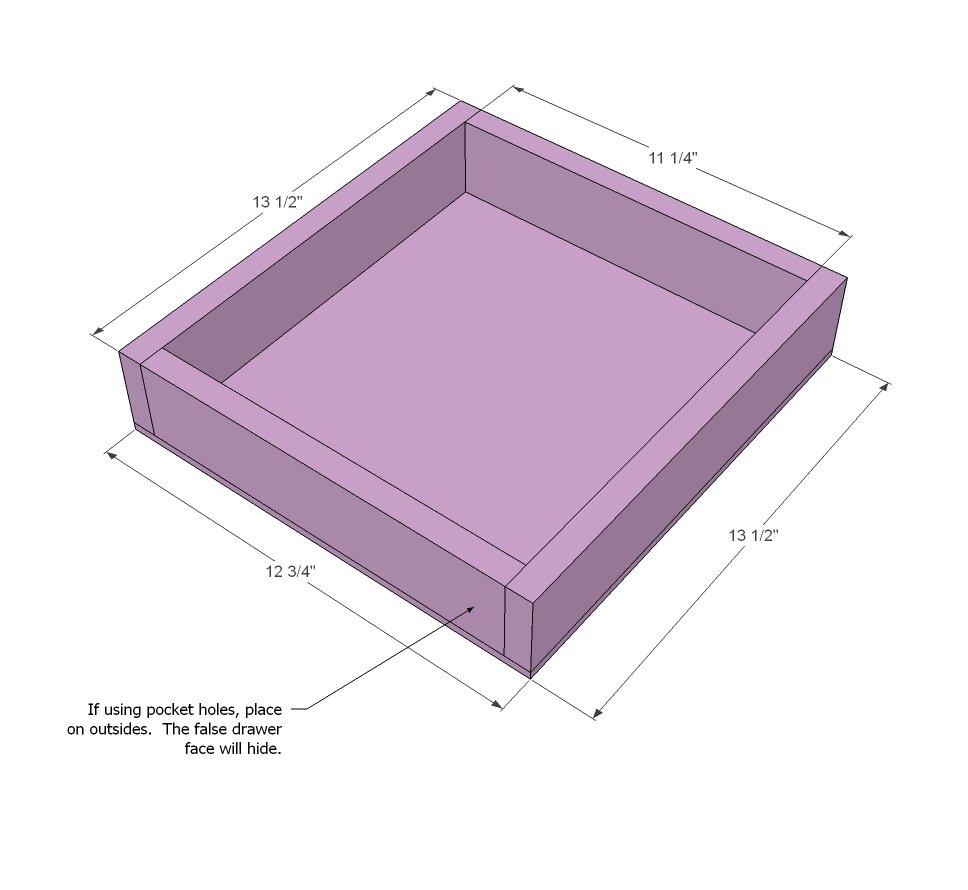
2 – 1x3 @ 11 ¼”
2 – 1x3 @ 13 ½”
1 – ¼” plywood @ 12 ¾” x 13 ½”
1 – 1x4 @ 12 ¾” (false face)
2 – 1x2 @ 13 ½” (drawer slides)
Tools
- measuring tape
- square
- pencil
- safety glasses
- hearing protection
- kreg-jig
- drill
- jigsaw
- nailer
- sander
Step-by-step Instructions
Step 1
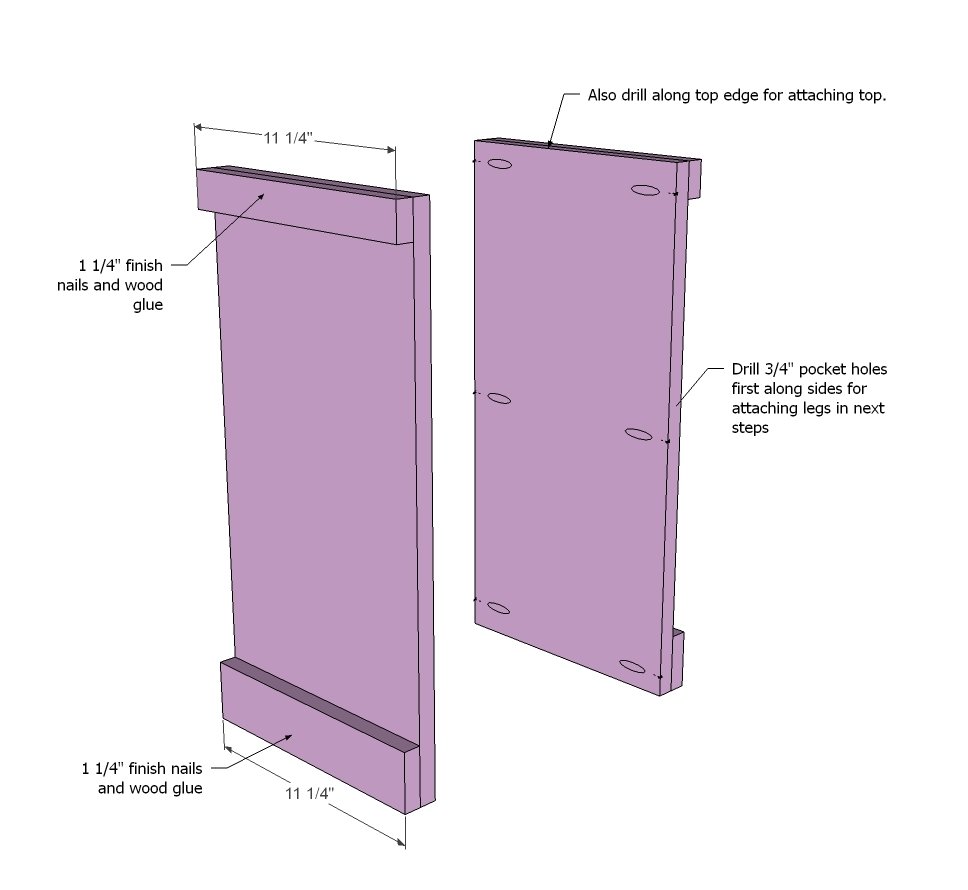
Start by just building the two sides. I recommend PHs for this plan, so drill those first as shown in the diagram above for attaching legs. Use 3/4" PH settings.
Step 2
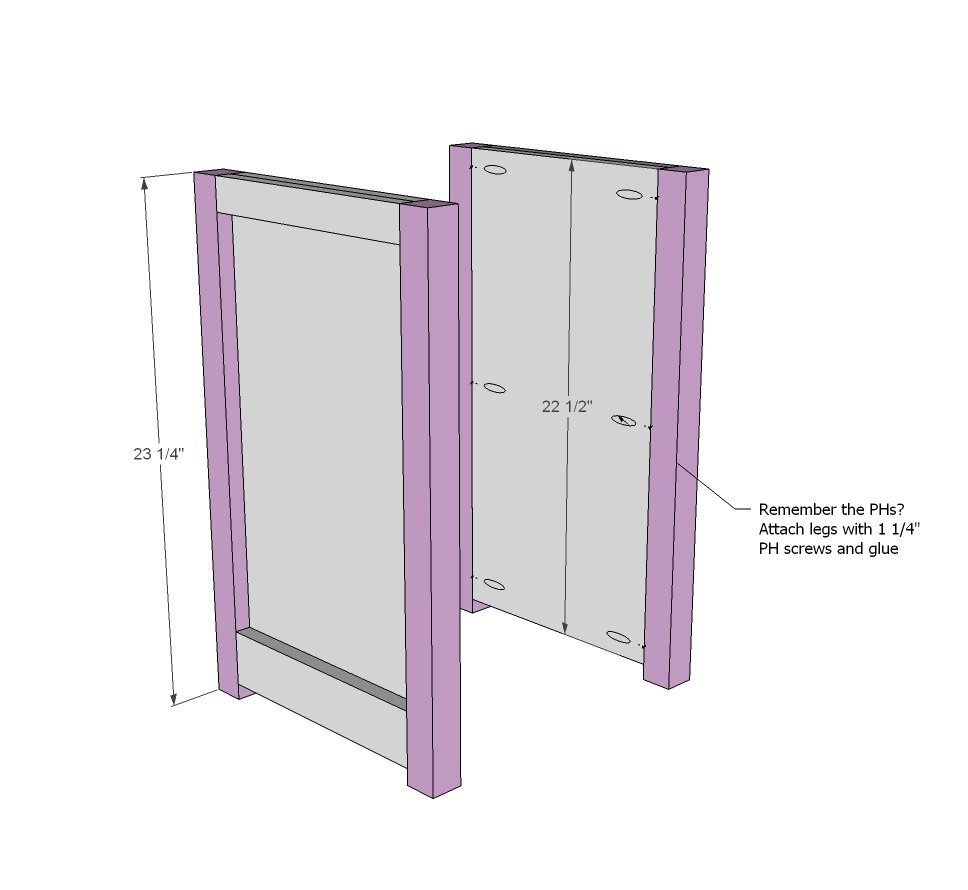
Then attach legs with 1 1/4" PH screws and glue, flush to top. If you are NOT using the decorative legs, then cut your legs another couple of inches longer instead.
Step 3
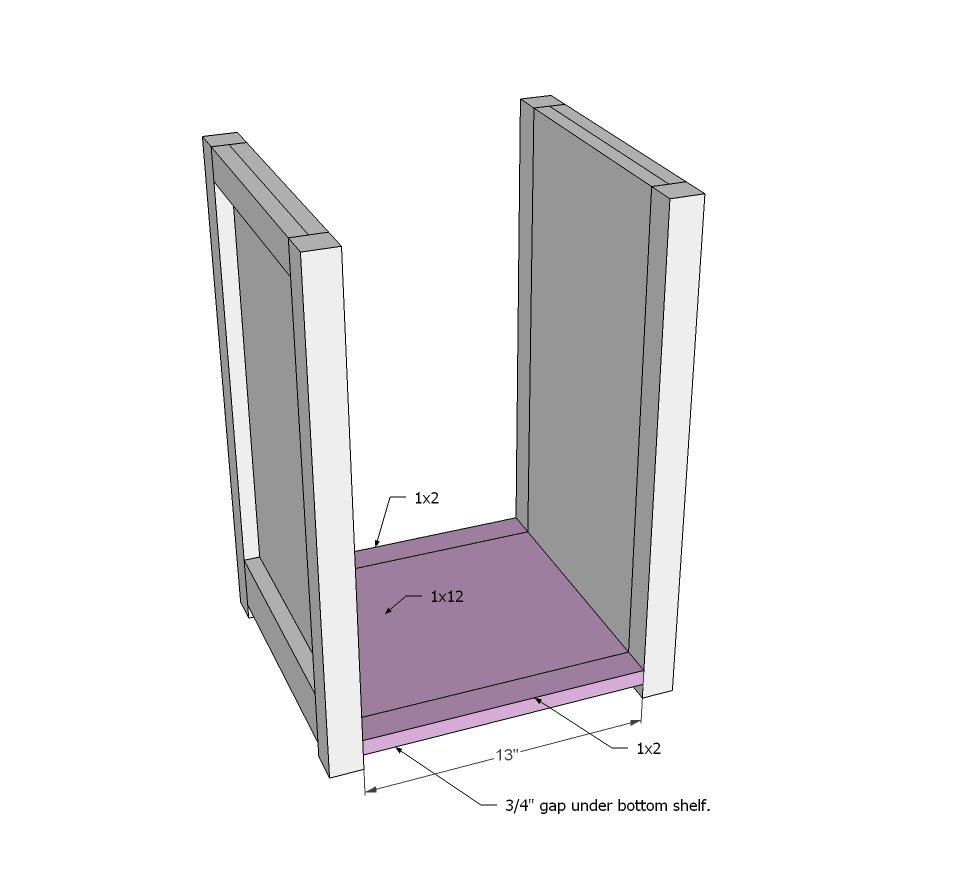
Build your bottom shelf first and then attach to base.
Step 4
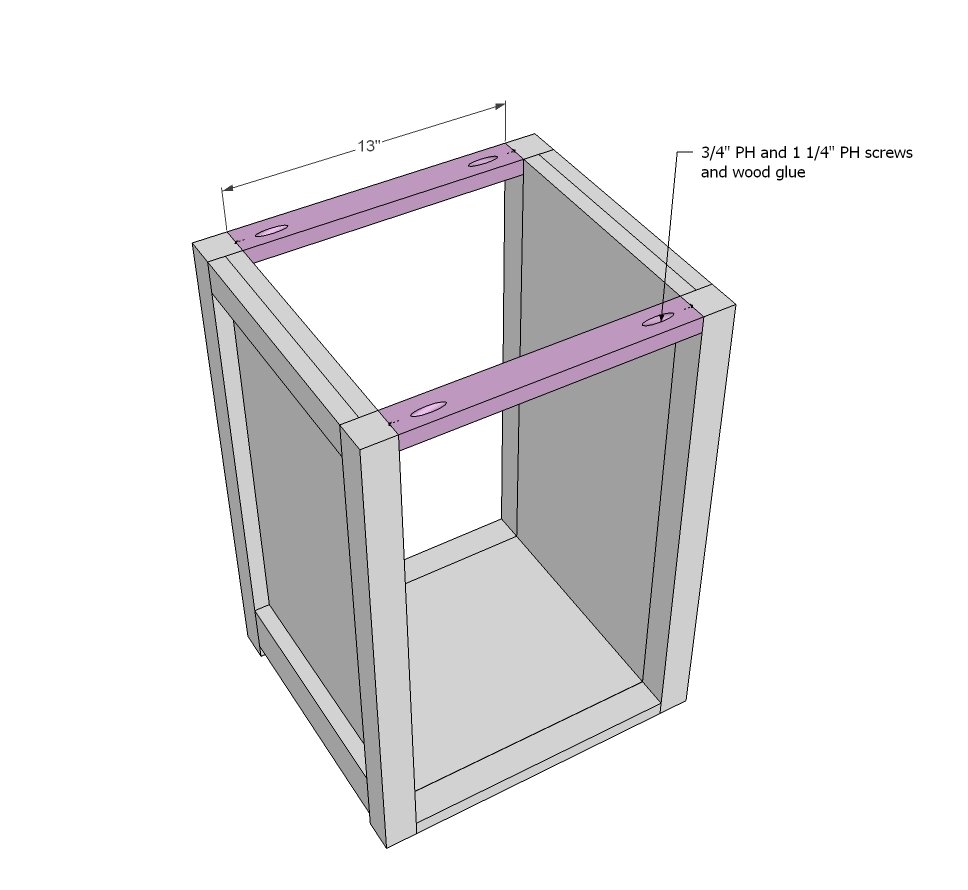
And then add top supports.
Step 5
Step 6
Now your drawer. This drawer just slides on wooden guides, so make 1/8" to 1/4" less in overall width than opening.
Step 7
These are those drawer guides I was talking about. Make sure you nail them in level. TIP - Rub candle wax over the tops so the drawer slides smoothly. Remember to inset drawer guides 3/4".
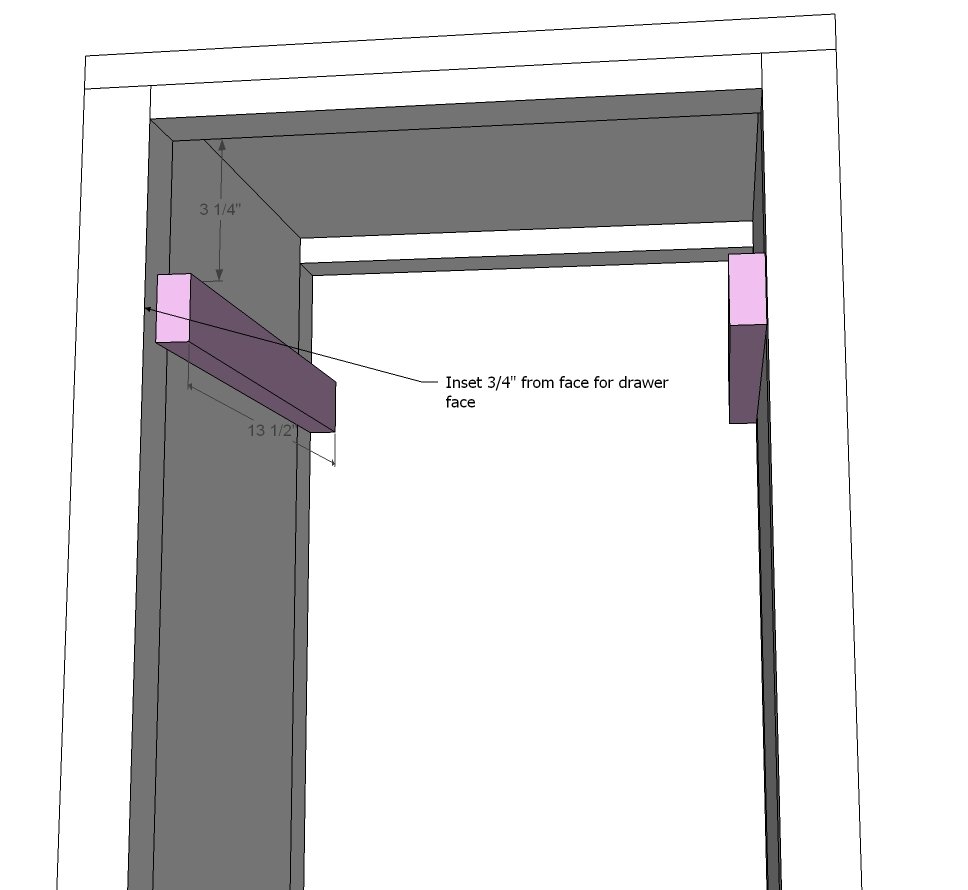
Step 8
Place drawer in cabinet and check to make sure it slides easily.
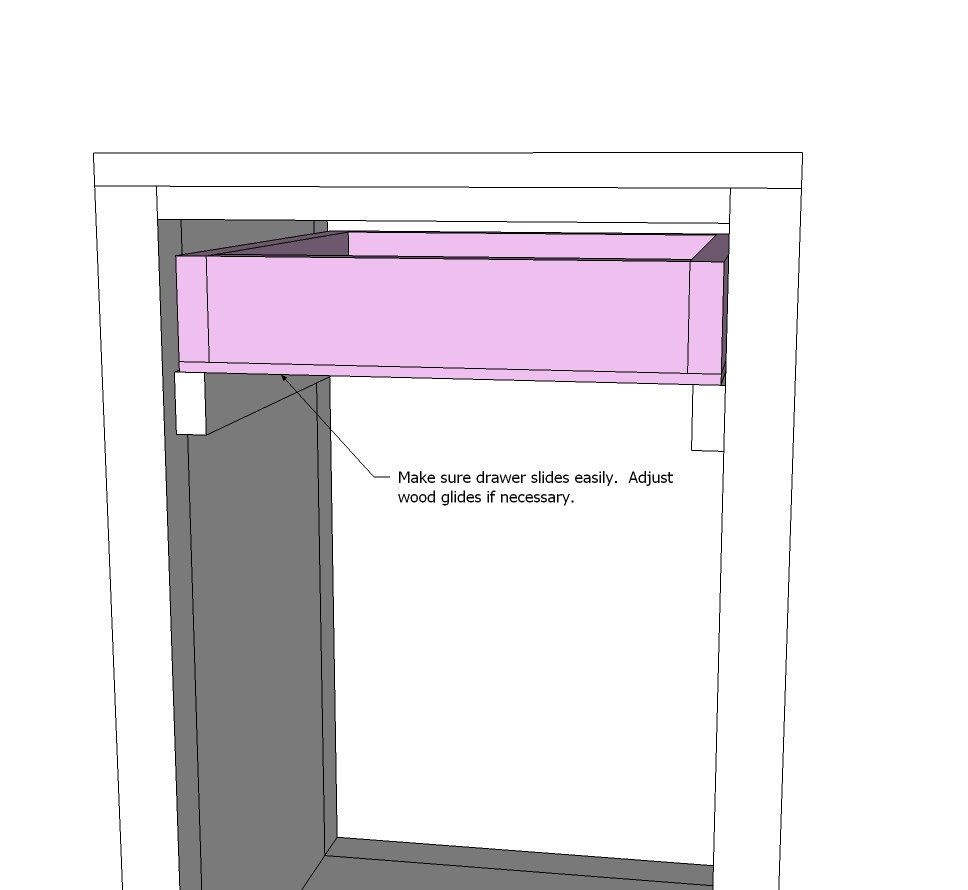
Step 9
Now add your drawer face. It will cover up any problems in the drawer:)
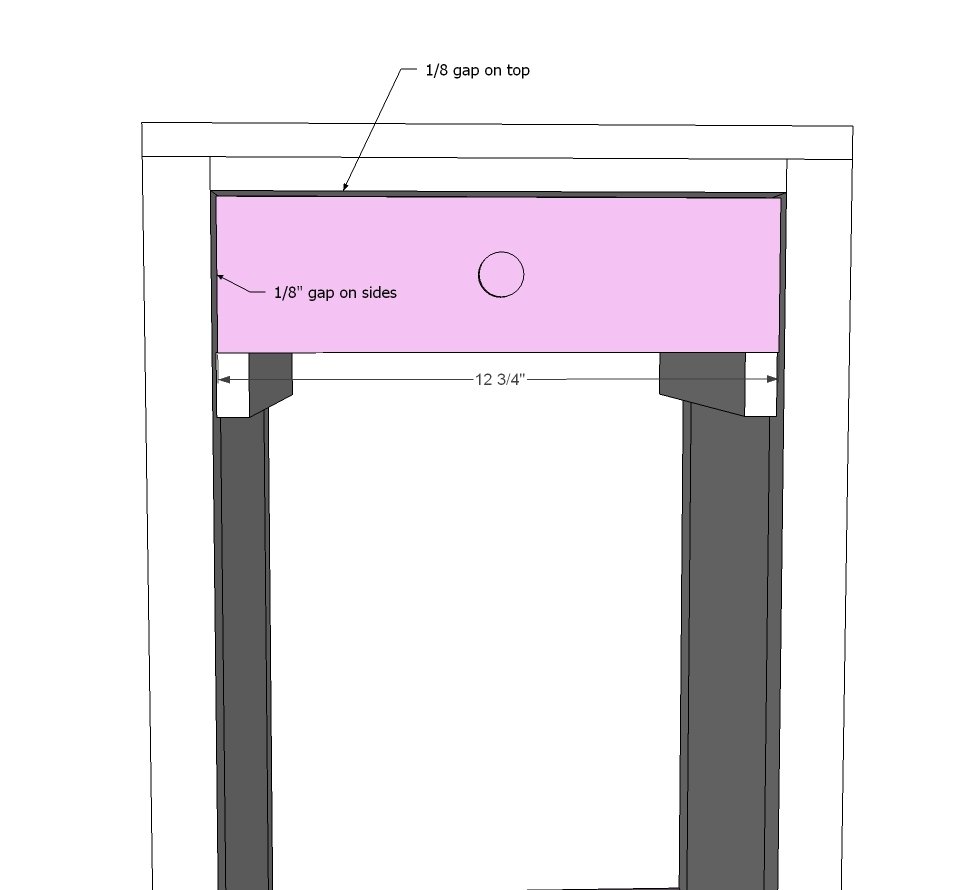
Step 10
And then the bottom trim....
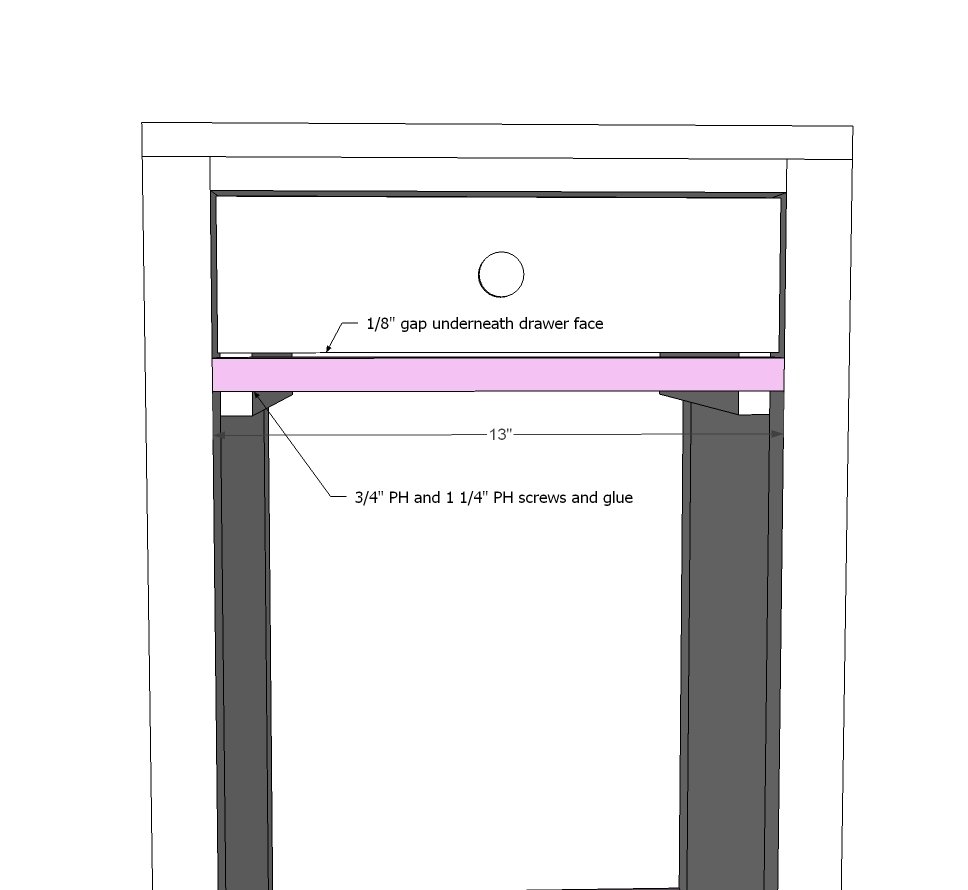
Step 11
And finally the cute little cutouts that really make this nightstand charming.
Step 12
I love adding moulding around the top edges. Really give a finishing touch!
Step 13
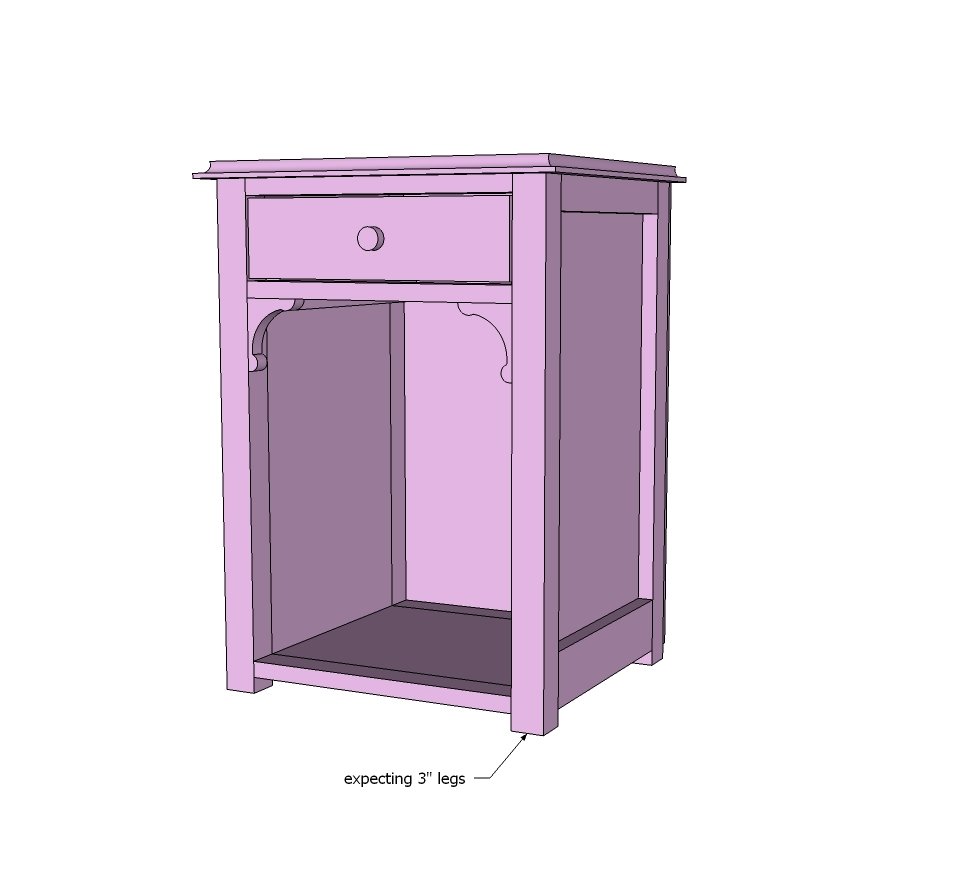
And then add the legs!
Step 14
And finally the back!
Finishing
Sand all surfaces, starting with a medium grit and finishing with fine. Wipe off the dust, fill any holes or gaps with wood filler, and sand smooth once dry. Apply primer if you're painting, then finish with your choice of paint or stain and seal with a durable clear topcoat. For outdoor projects, use exterior-rated primer, paint or stain, and sealer so the piece stands up to the weather.
Source (temporary): https://www.ana-white.com/woodworking-projects/julia-nightstand