Just My Size Closet
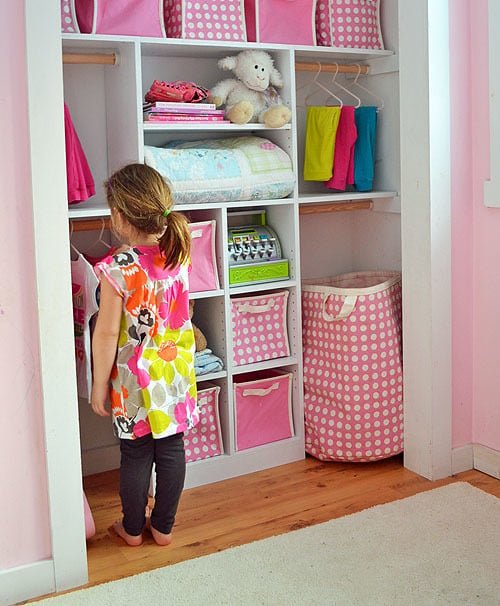
Make this cute closet! from!
Specifications
| Project type | Storage Woodworking Plans |
|---|---|
| Room | Closets |
| Style | Children's and Kid's Room Furniture and Toy Plans |
| Difficulty | Beginner Projects |
| Estimated cost | $20 - $50 |
Dimensions
Use the size-specific shopping and cut lists below.
Shopping List
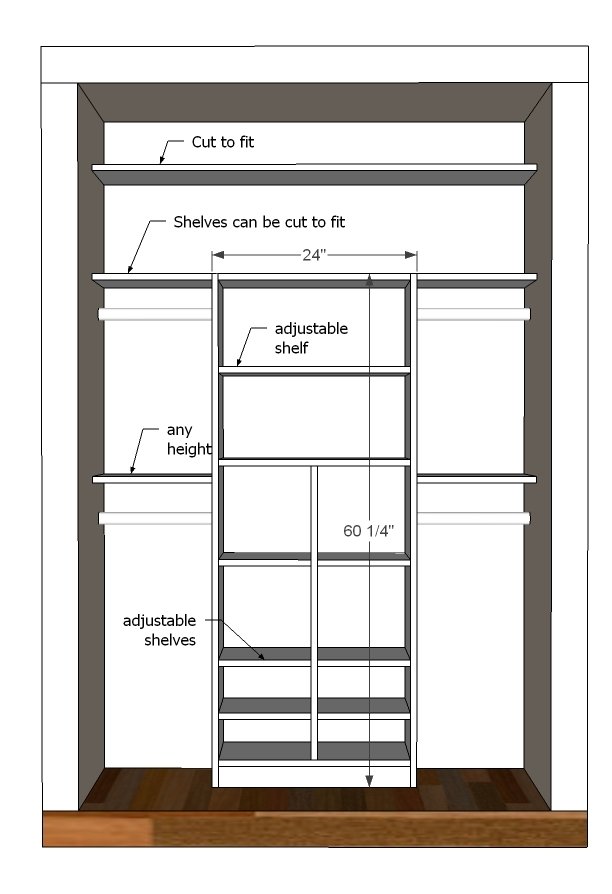
We used 1 sheet of 3/4" PureBond Plywood cut into strips 11 1/2" wide for construction. You can also use 4 - 1x12s 8 feet long You will also need closet rods and 1x3s and 1x4s for supporting shelves, depending on the width of your closet.
Cut List
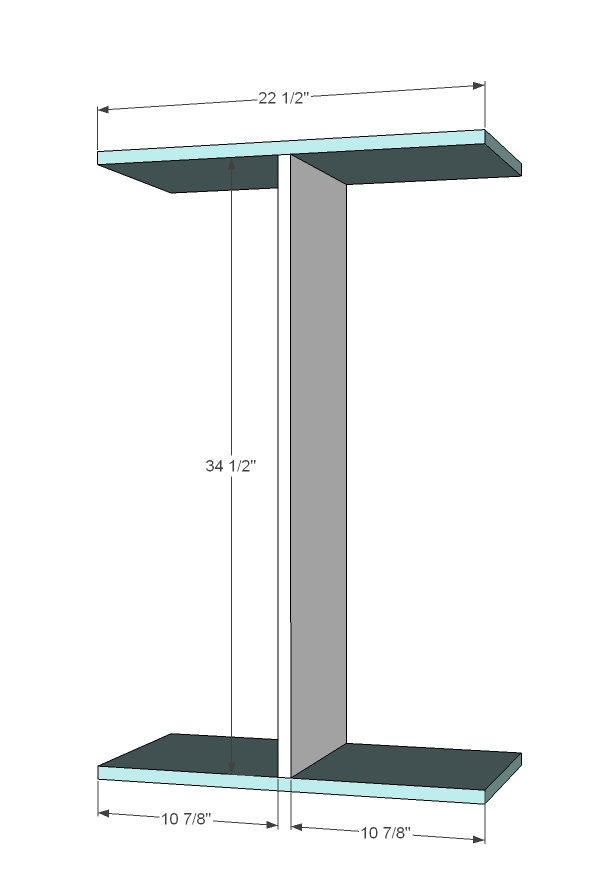
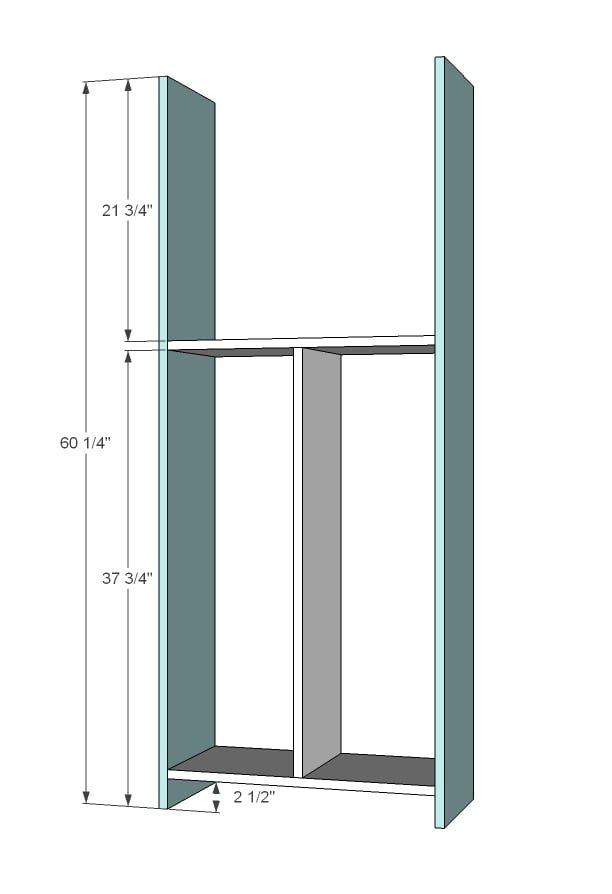
4 - 1x12 @ 22 1/2" 1 - 1x12 @ 34 1/2" 2 - 1x12 @ 60 1/2" 1 - 1x3 @ 22 1/2" 6 - 1x12 @ 10 7/8" (make 10 3/4" for adjustable shelves) NOTE: Using 1x12 width makes this closet only about 12" deep, suitable for children's hangers, but not adult hangers. You can easily make this closet deeper by simply using a wider width board (for example, 1x16). NOTE: This closet does not provide cut list for additional shelving on sides. After your closet is installed, measure and cut and install shelving to fit.
Tools
- measuring tape
- square
- pencil
- safety glasses
- hearing protection
- kreg-jig
- drill
- circular saw
- sander
- level
Step-by-step Instructions
Step 1
NOTE: Before you begin, decide how you are going to work around your baseboard trim in closet. We just installed the closet in front and there is no issues, but you may wish to do something different. Start by making the center divider part. I used 3/4" PHs and 1 1/4" PH screws, but you could also use 2" screws and glue. I don't recommend nails because there's no back or face frame on this piece.
Step 2
Now add the sides... TIP: If you are using shelf pins, would be easier to drill the shelf pins first, but no biggie if you do it afterwards.
Step 3
Add the top.
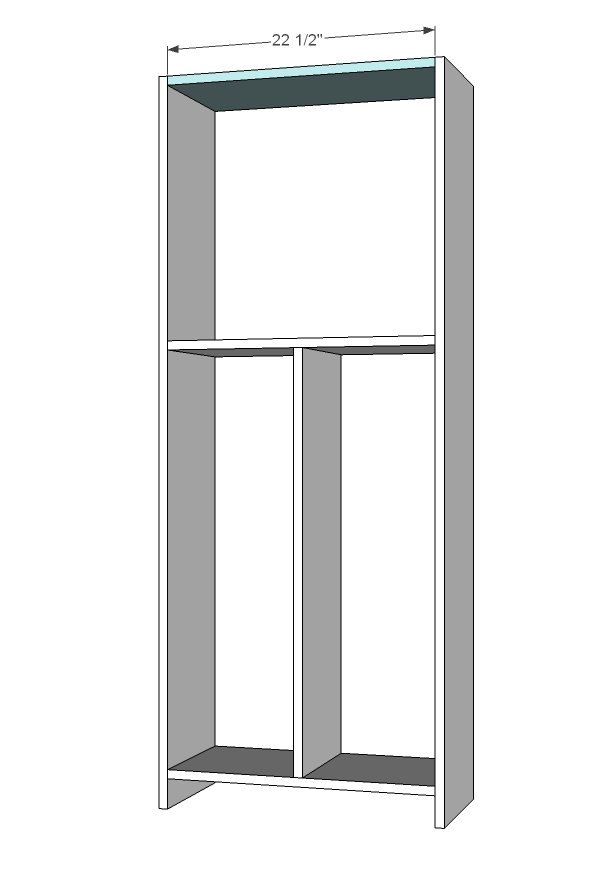
Step 4
And then the footer.
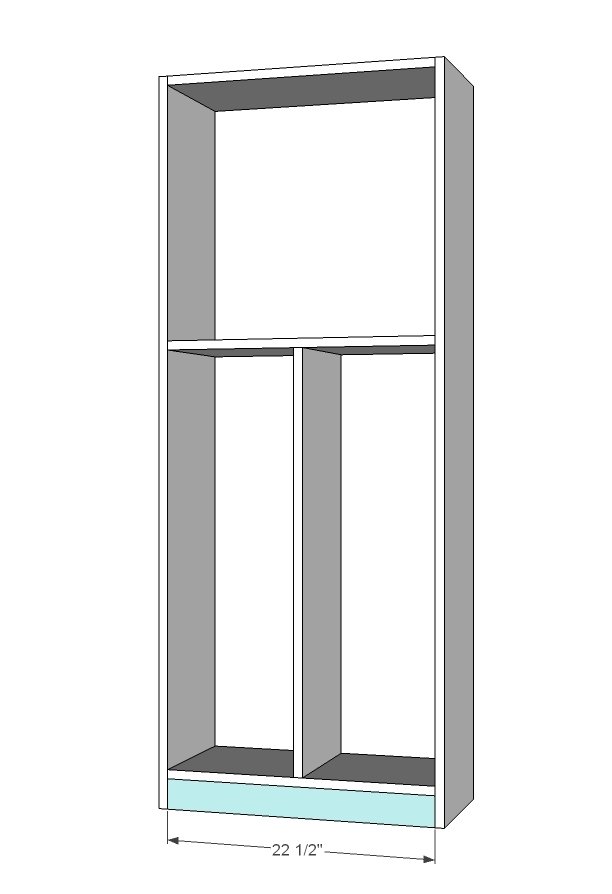
Step 5
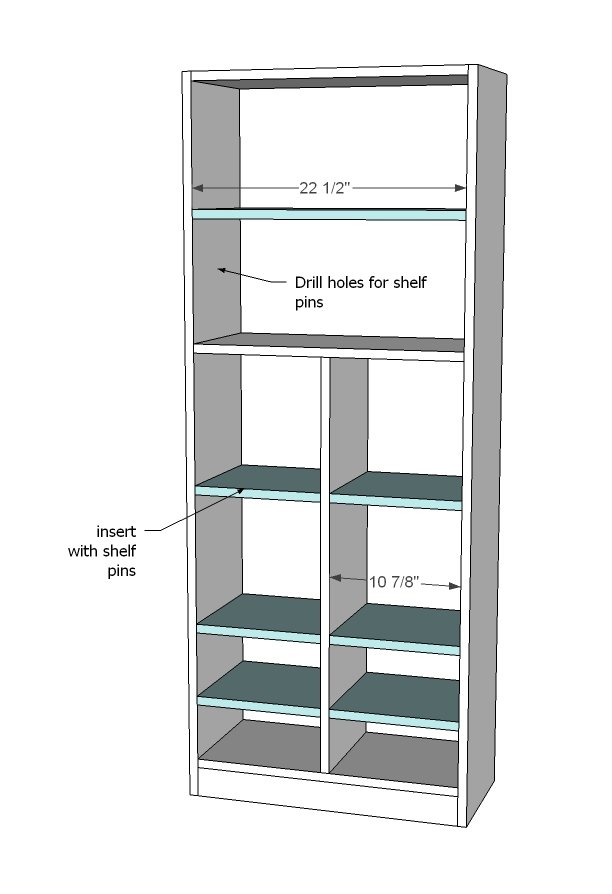
Step 6
Install closet in your closet. For rods, use 1x4 cleats screwed to studs in your wall on the wall side, and attach the rod pocket holder to these 1x4s and the side of the closet system. You can add more shelves or not above the rods.
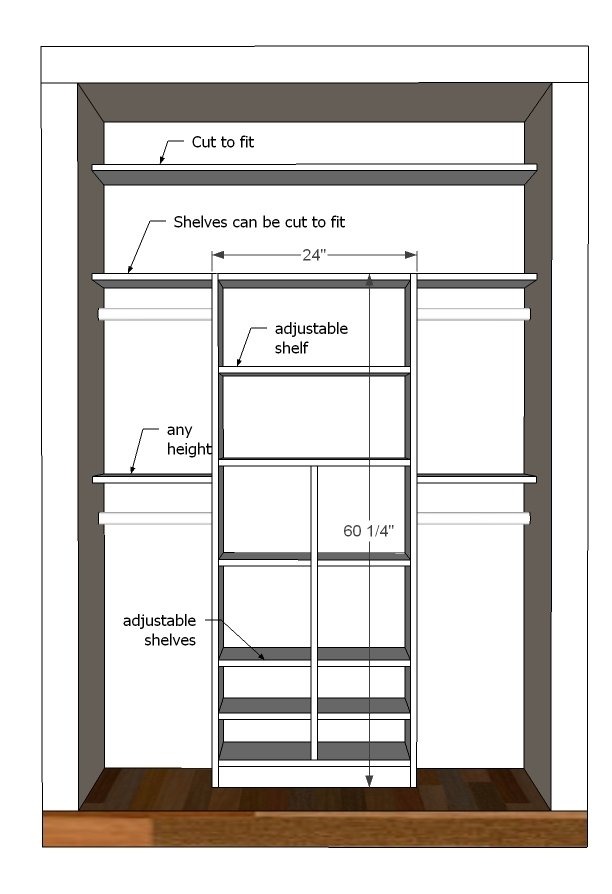
Finishing
Sand all surfaces, starting with a medium grit and finishing with fine. Wipe off the dust, fill any holes or gaps with wood filler, and sand smooth once dry. Apply primer if you're painting, then finish with your choice of paint or stain and seal with a durable clear topcoat. For outdoor projects, use exterior-rated primer, paint or stain, and sealer so the piece stands up to the weather.
Source (temporary): https://www.ana-white.com/woodworking-projects/just-my-size-closet