Kendra Toybin with Shelves
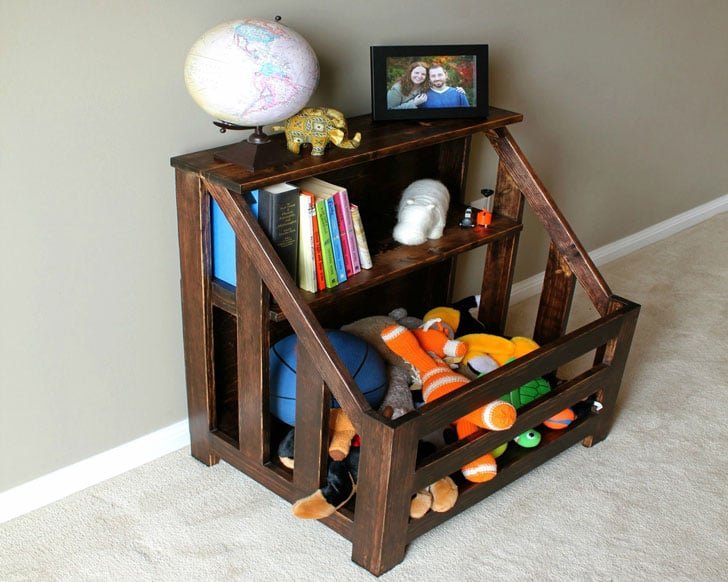
An economical side table or nightstand for a child's room that features a open bin base and two top shelves. Perfect for holding stuffed animals or ball or other toys in the bin, shelves great for books, clocks, art and other toys. Step by step woodworking plans include shopping and cut list, detailed easy to follow diagrams. Reader submitted photo by BDEL
Specifications
| Project type | Bookshelf and Bookcase Plans |
|---|---|
| Room | Bedroom |
| Style | Children's and Kid's Room Furniture and Toy Plans |
| Difficulty | Advanced |
| Estimated cost | $20 - $50 |
Shopping List
- 2 – 1×2 Boards, 8′ Long
- 3 – 1×3 Boards, 8′ Long
- 1×10, 24″ long
- 1×8, 26″ long
- 3/4″ Plywood 23″ x 17 1/2″
- 1/4″ Plywood 21 1/2″ x 24 1/2″
- 1 1/4″ Pocket Hole Screws
- 1 1/4″ Nails
- 2″ Screws
Cut List
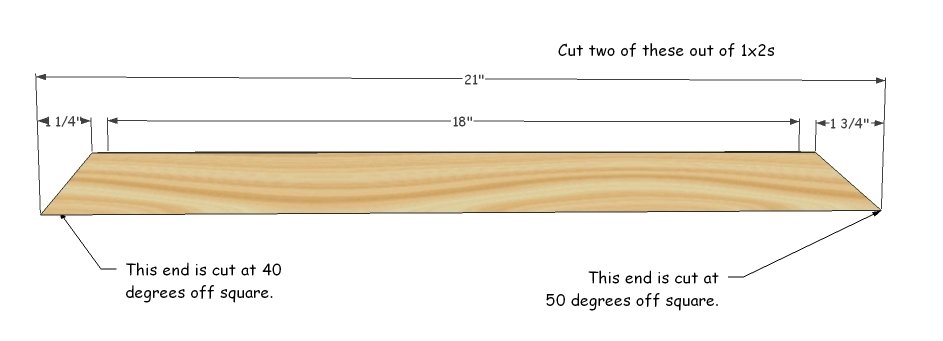
- 2 – 1×2 @ 21″ (Handrails, cut ends at angles as shown in step 1)
- 2 – 1×3 @ 17 /4″ (Longer Rails, see step 2)
- 2 – 1×3 @ 11″ (Shorter Rails, see step 2)
- 2 – 1×3 @ 26 1/4″ (Back Legs)
- 2 – 1×3 @ 13 1/2″ (Bottom Trim, Sides)
- 2 – 1×2 @ 12 1/2″ (Side Legs)
- 2 – 1×2 @ 4 1/2″ (Top Shelf Supports)
- 2 – 1×2 @ 7 7/8″ (Middle Shelf Supports)
- 2 – 1×2 @ 17 1/2″ (Bottom Shelf Supports)
- 2 – 1×3 @ 12 1/2″ (Front Legs)
- 3 – 1×3 @ 19 1/2″ (Front Rails)
- 1 – 3/4″ Plywood @ 17 1/2″ x 23″ (Bottom Shelf)
- 1 – 1×10 @ 23″ (Middle Shelf)
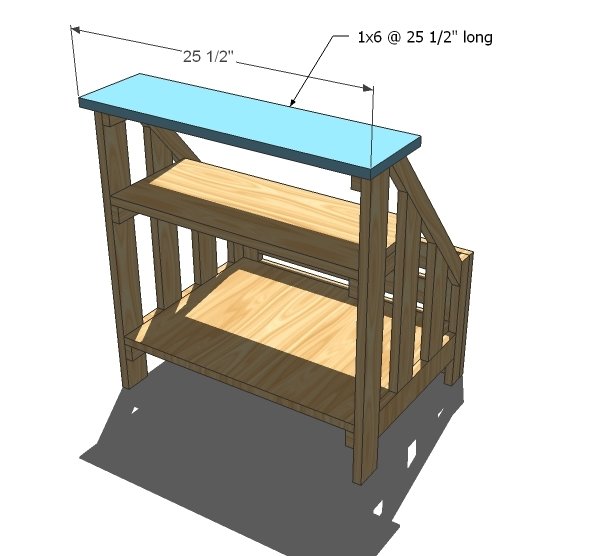
- 1 – 1×8 @ 25 1/2″ (Top Shelf)
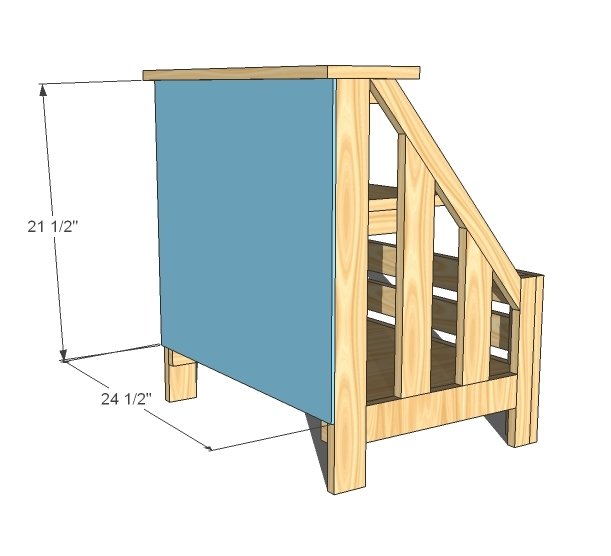
- 1 – 1/4″ Plywood @ 21 1/2″ x 24 1/2″ (Back)
Tools
- measuring tape
- square
- pencil
- safety glasses
- hearing protection
- kreg-jig
- drill
- compound miter saw
- sander
- countersink drill bit
Step-by-step Instructions
Cut the “Handrails”
For lack of a better term, cut the handrails from 1x2s. If you are lucky enough to have a miter saw that will cut a 50 degree angle, I’m envious. For the rest of us, it’s a protractor and a jigsaw. Cut two of these.
Build the Sides
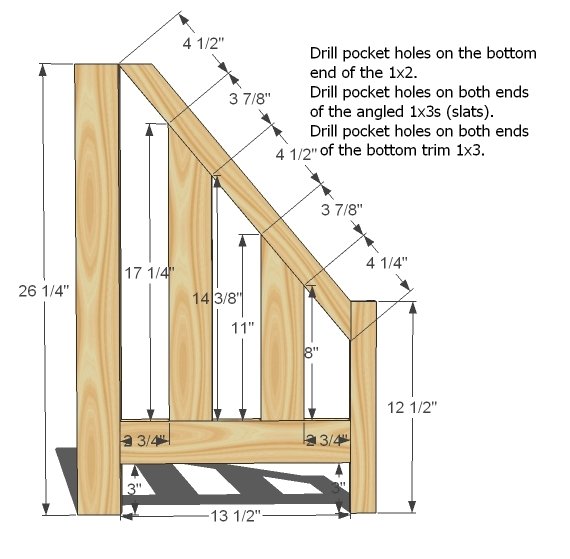
This is the tricky part. First, cut your slats from 1x3s with the top angle. Cut two of these. Then drill pocket holes as noted in the diagram above. Be careful to drill pocket holes on the insides if you are staining – it does matter on the angled boards which side you drill the holes. Lay out the side and clamp and glue, then screw together with 1 1/4″ pocket hole screws.
Shelf Supports
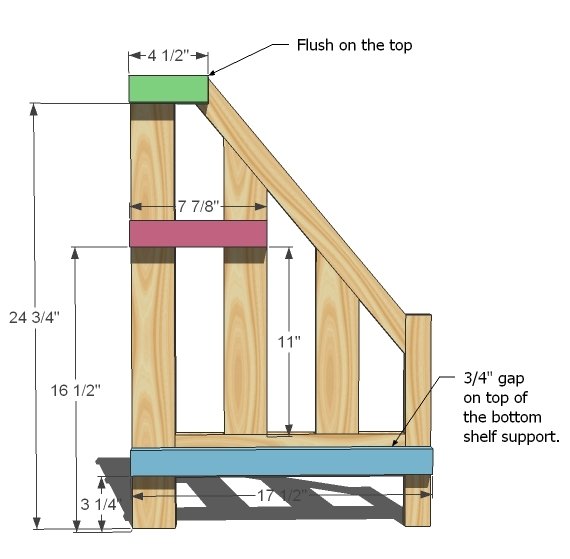
Use 1 1/4″ screws or nails and glue to attach the shelf supports to the insides of the sides.
Build the Front
Drill pocket holes (two per end) on all front rails (the 1×3 @ 19 1/2″). Then mark the front legs, leaving 1″ gap between the rails. Screw the rails to the front legs.
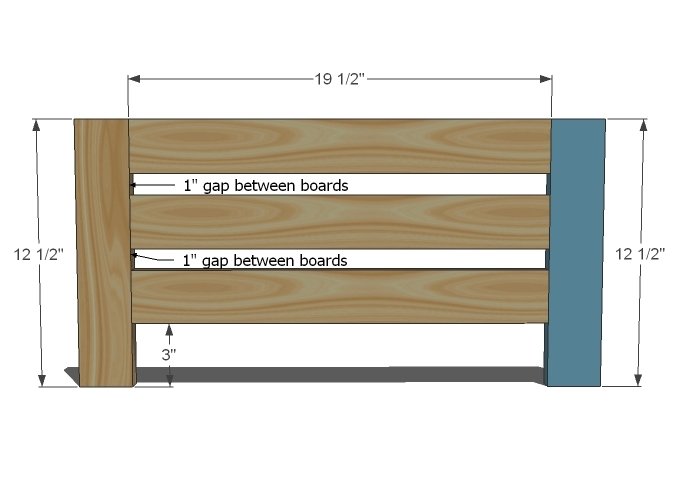
Step 5
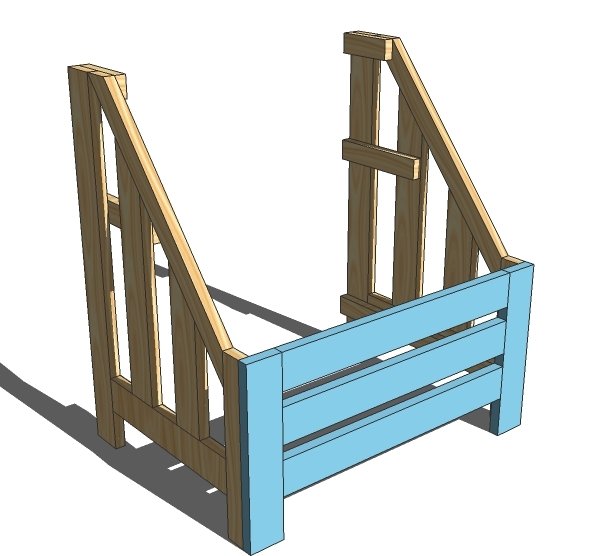
Bottom Shelf
Attach the bottom shelf to the shelf supports. A screw through the front wouldn’t hurt too.
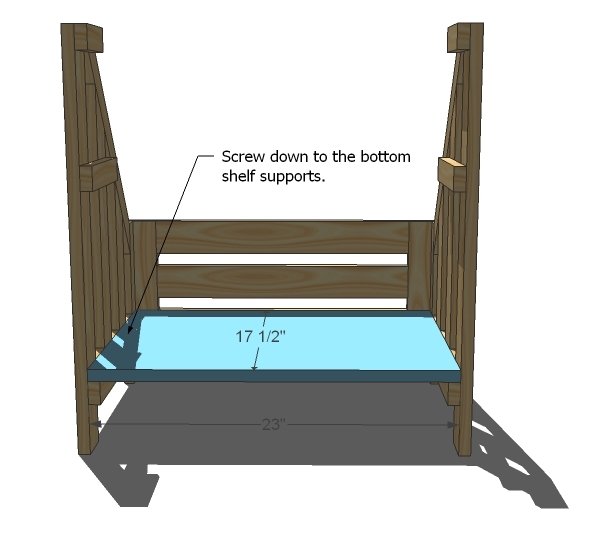
Middle Shelf
Attach the middle shelf as you did the bottom shelf.
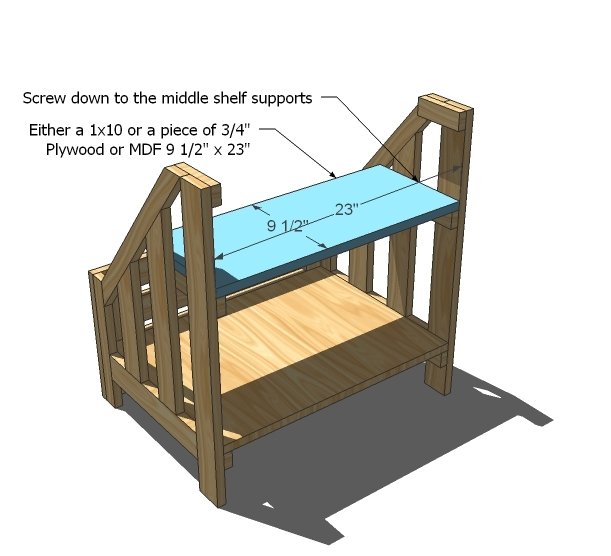
Top Shelf
Attach the top shelf as you did the other shelves.
Back
Tack the back on with 1 1/4″ finish nails and glue.
Finishing
Sand all surfaces, starting with a medium grit and finishing with fine. Wipe off the dust, fill any holes or gaps with wood filler, and sand smooth once dry. Apply primer if you're painting, then finish with your choice of paint or stain and seal with a durable clear topcoat. For outdoor projects, use exterior-rated primer, paint or stain, and sealer so the piece stands up to the weather.
Source (temporary): https://www.ana-white.com/woodworking-projects/kendra-toybin-shelves