Kentwood Nightstands or End Tables
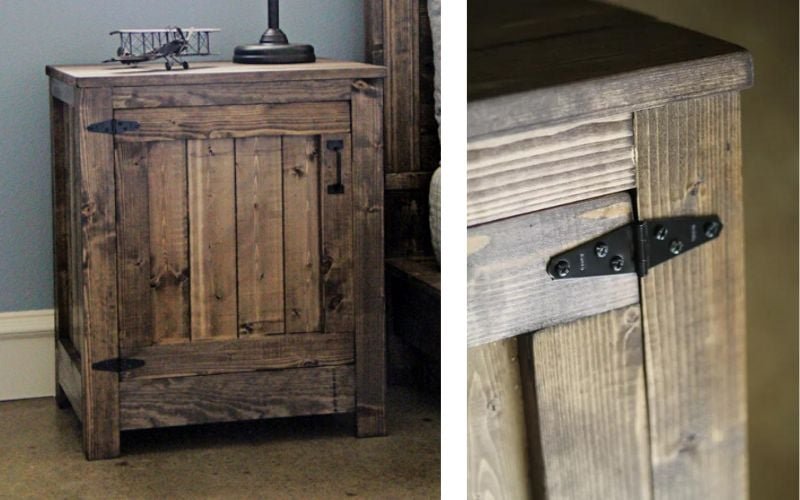
to build a cabinet style nightstand, bedside table or end table. This project features a planked wood rustic look, creating beautiful detailing in either a paint or stained finish. Simple hinges on a door create storage. This plan is popular because it looks beautiful, is sized just right, is easy to build, can be built using scrap wood, and has a good amount of storage. Free step by step tutorial with detailed diagrams, shopping and cut lists from
Specifications
| Project type | Nightstands |
|---|---|
| Room | Teens |
| Style | Farmhouse Furniture |
| Difficulty | Intermediate |
| Estimated cost | $50 - $100 |
Dimensions
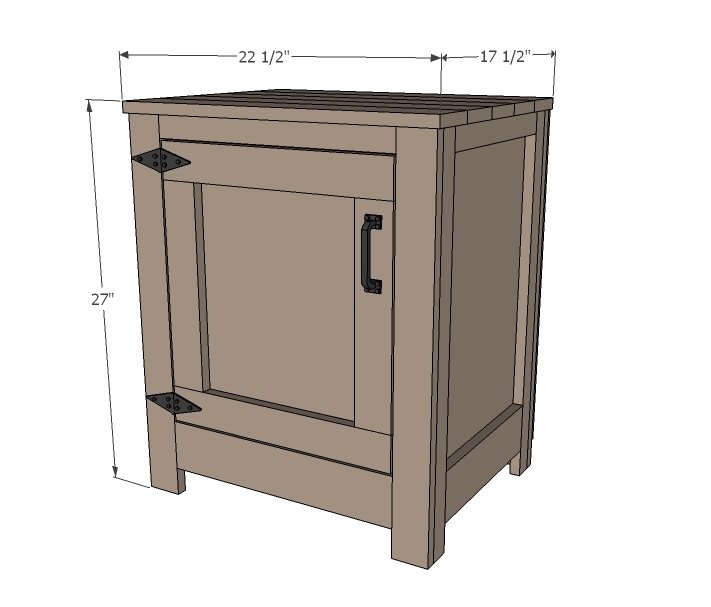
Use the size-specific shopping and cut lists below.
Shopping List
- 2 – 1x2 @ 8 feet long
- 2 – 1x4 @ 8 feet long
- 2 – 1x3 @ 8 feet long
- ¾” plywood cut into 15 ¾” strips x 20 ½” long – one required, additional for shelves optional
- 1 – 48” wide by at least 22” high pine wainscoting panel for sides and door
- Optional ¼” plywood for back
- Set of 2 2” strap hinges
- Knob or handle
- Magnetic clasp
- 1 ¼” pocket hole screws
- 1 ¼” brad nails
- ¾” brad nails
- Wood glue
Cut List
- 2 – 1x2 @ 12 ¾”
- 2 – 1x4 @ 12 ¾”
- 4 – 1x2 @ 26 ¼”
- 2 – ¼” paneling or plywood @ 15 ¾” 21 ¾”
- 1 – ¾” plywood @ 15 ¾” x 20 ½” (additional for shelves)
- 4 – 1x3 @ 26 ¼”
- 2 – 1x2 @ 17”
- 2 – 1x4 @ 17”
- 4 – 1x4 @ 22 ½”
- 2 – 1x3 @ 16 ¾”
- 2 – 1x3 @ 14”
- 1 – ¼” paneling or plywood @ 16” x 19”
Tools
- measuring tape
- square
- pencil
- safety glasses
- hearing protection
- drill
- circular saw
- nailer
- sander
- countersink drill bit
Step-by-step Instructions
Step 1
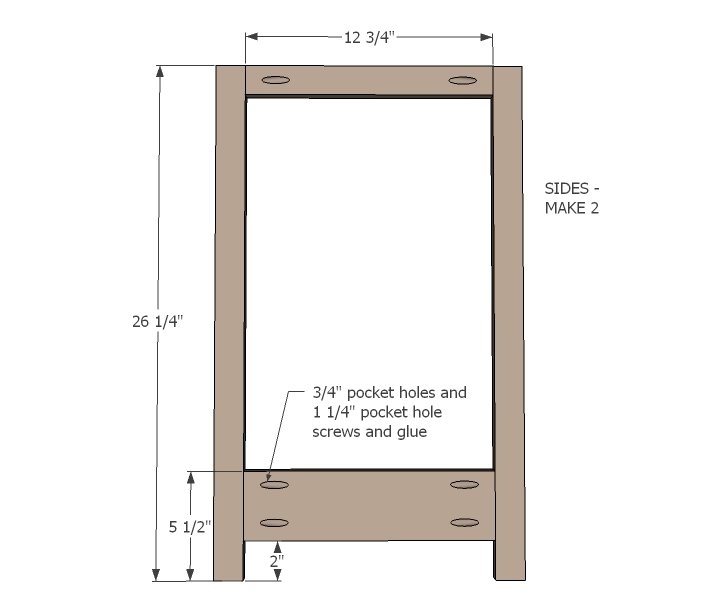
You will need to build two sides. I recommend a Kreg Jig here for the easiest and best edge to edge joint.
Step 2
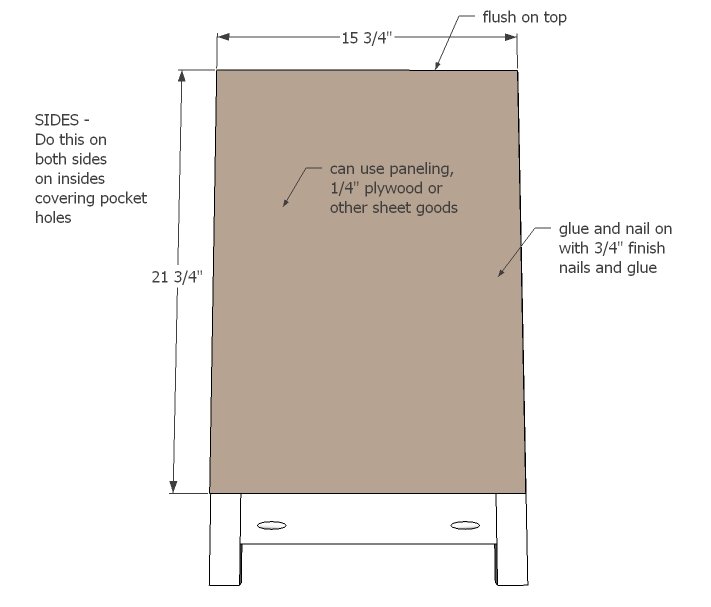
Then just cover the back in plywood or planking of choice. This completes to two sides.
Step 3
Now we add the bottom shelf.
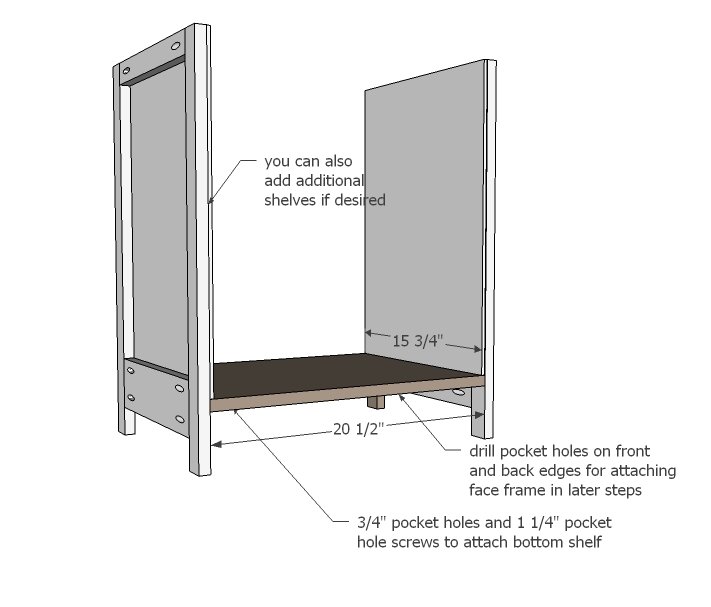
Step 4
Next, build the front and back frames.
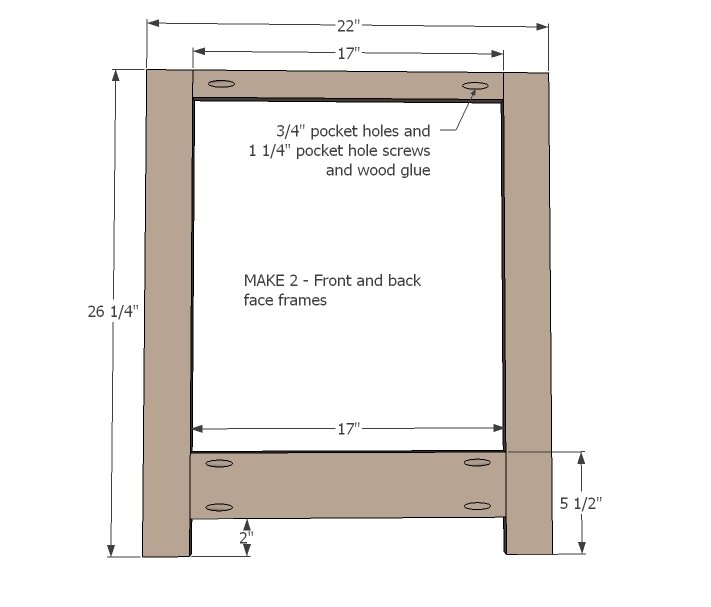
Step 5
Attach the four panels together.
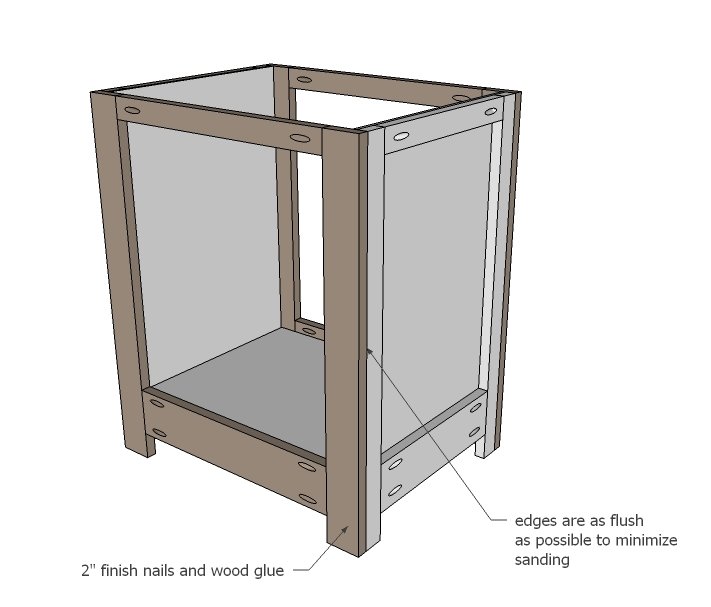
Step 6
Build the top first, then attach to top.
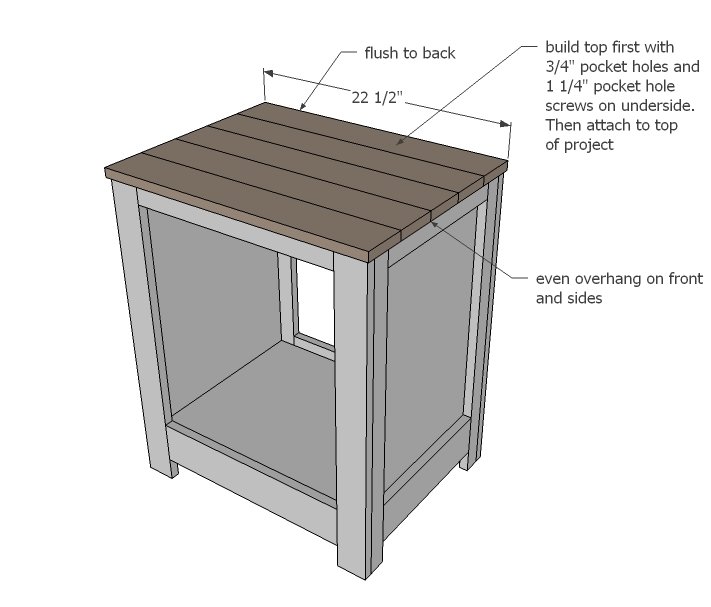
Step 7
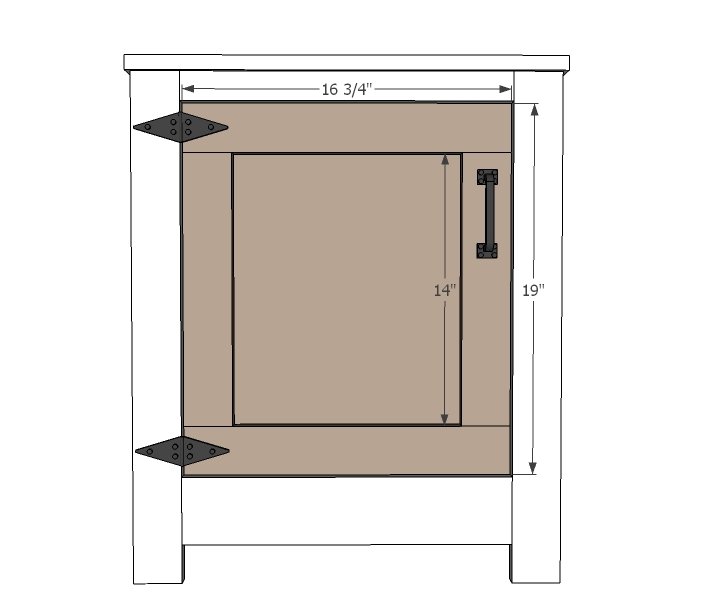
Next, build the door as shown here, and attach with hinges.
Step 8
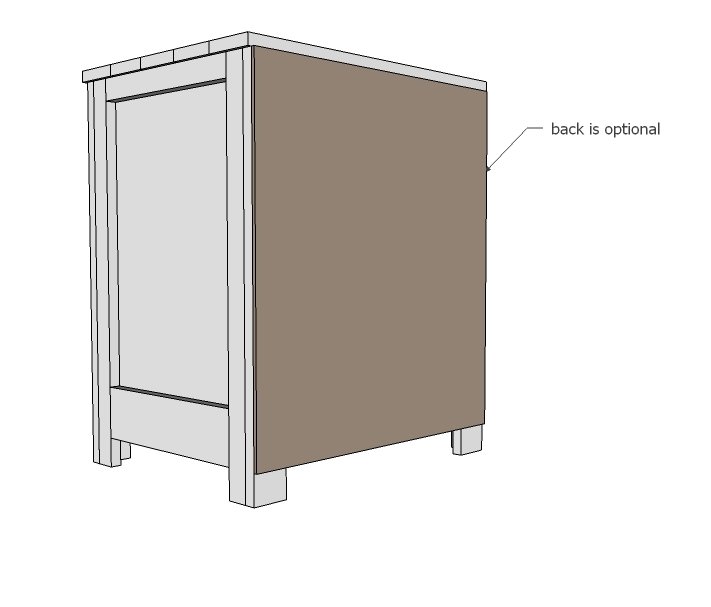
And if you want, you can add a back.
Finishing
Sand all surfaces, starting with a medium grit and finishing with fine. Wipe off the dust, fill any holes or gaps with wood filler, and sand smooth once dry. Apply primer if you're painting, then finish with your choice of paint or stain and seal with a durable clear topcoat. For outdoor projects, use exterior-rated primer, paint or stain, and sealer so the piece stands up to the weather.
Source (temporary): https://www.ana-white.com/woodworking-projects/kentwood-nightstands-or-end-tables