Kid's Adirondack Chair
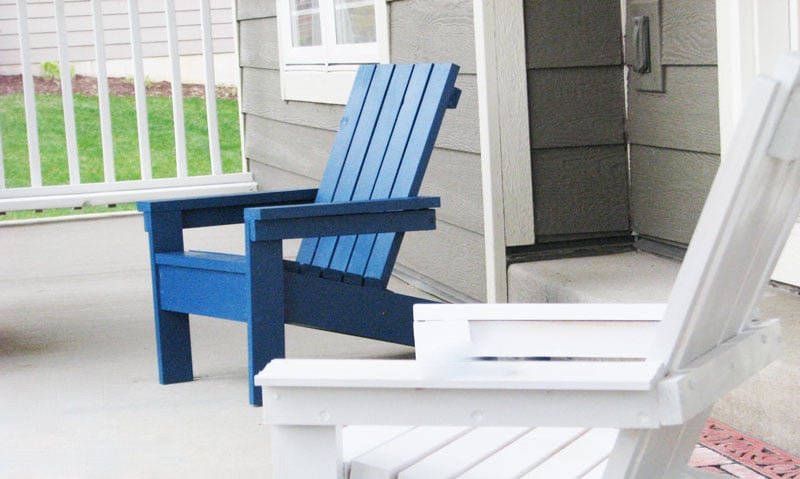
Build your own kids Adirondack chairs! Builders spend about $15 a chair. Step by step plans with diagrams, and dozens of reader submitted photos. Also check out our adult sized Adirondack Chair plans too.
Specifications
| Project type | Kids Tables and Chairs |
|---|---|
| Room | Kids and Toys |
| Style | Children's and Kid's Room Furniture and Toy Plans |
| Difficulty | Beginner Projects |
| Estimated cost | Under $20 |
Dimensions
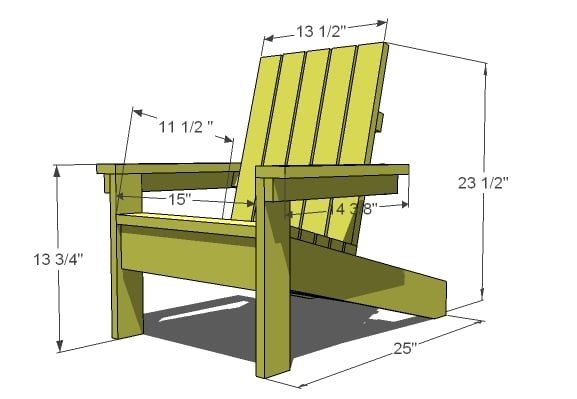
Use the size-specific shopping and cut lists below.
Shopping List
1 – 1×4, 8′ Length
2 – 1×2, 8′ Length
2 – 1×3, 8′ Length
Wood Glue
Wood Filler
1 1/4″ Screws
2″ Screws
Cut List
2 – 1×4 @ 25 1/2″ (Stringers)
1 – 1×4 @ 15″ (Front Apron)
5 – 1×2 @ 15″ (Seat Slat, Main)
1 – 1×3 @ 15″ (Seat Slat, Front)
2 – 1×3 @ 13″ (Front Legs)
2 – 1×2 @ 14 1/2″ (Arm Supports)
2 – 1×3 @ 14 1/2″ (Arm Rests)
5 – 1×3 @ 20 3/4″ (Back Slats)
1 – 1×2 @ 13 1/2″ (Back Trim)
1 – 1×4 @ 13 1/2″ (Back Apron)
1 – 1×2 @ 16 1/2″ (Back Support)
Tools
- measuring tape
- square
- pencil
- safety glasses
- hearing protection
- circular saw
- jigsaw
- level
Step-by-step Instructions
BENCH MODIFICATIONS
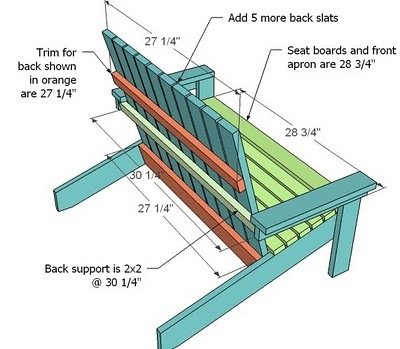
By simply doubling the number of back slats and increasing the seat width, you can get a bench. On the adult version, you can also create a bench, but you should add a couple of supports that run parallel to the stringers. The kids version won’t need these supports.
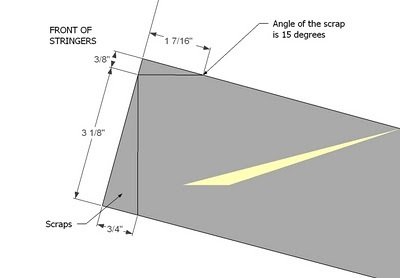
Step 2
Mark the front of your stringers as shown in the diagram.
Step 3
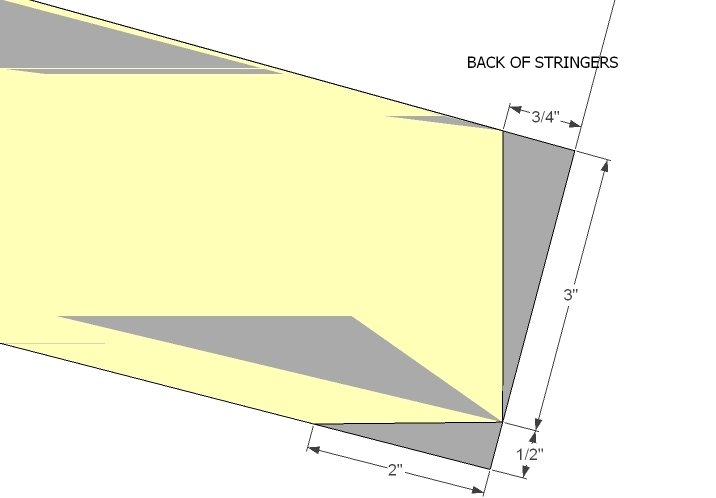
Mark the back of your stringers as shown here. Cut the stringers. Once you get a stringer that you are happy with, use it as a pattern for the rest of your stringers.
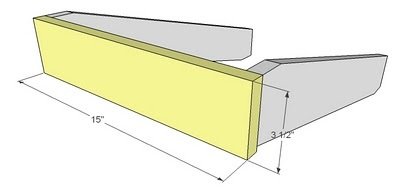
FRONT APRON
After you cut your stringers, attach the front apron as shown above with 2″ screws and glue. Keep the top edges flush
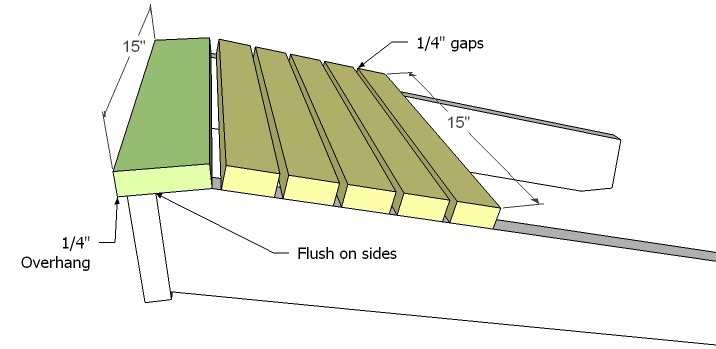
Step 5
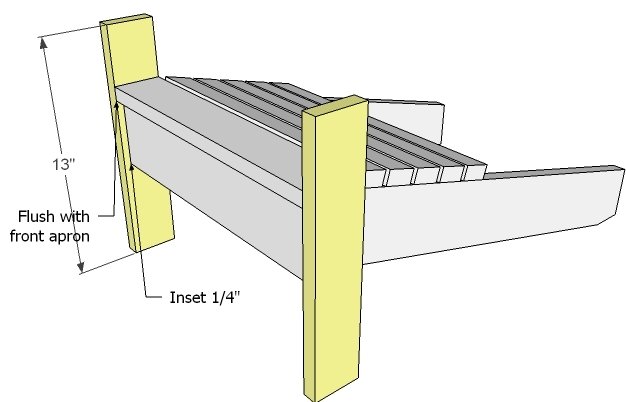
LEGS
Attach the front legs as shown above with 1 1/4″ screws and glue. The front seat board top will be at a height of 10″.
ARMS
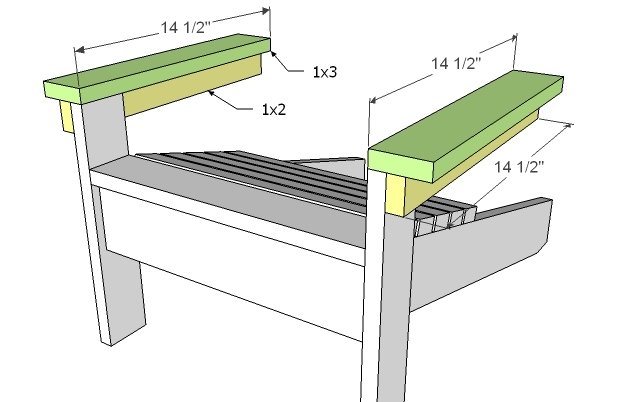
First attach your arm supports (the 1x2s in yellow above) to the leg tops using a level and 1 1/4″ screws. Then attach the arm rests as shown above.
BACK
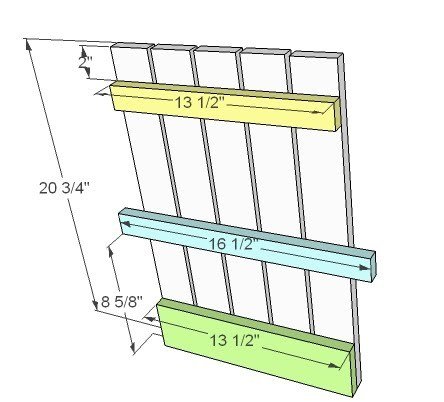
Build the back as shown above, using 1 1/4″ screws and glue. Leave a 1/4″ gap between the back slats. The middle support board (shown in blue above) will overhang the sides by 1 1/2″ on each side.
ASSEMBLY
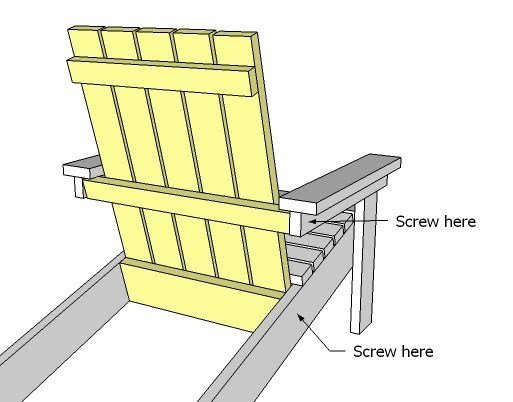
Position your back into the chair, as shown above. An extra hand would be super helpful at this point. When you are happy with the back’s position, screw with 2″ screws as shown above.
Finishing
Sand all surfaces, starting with a medium grit and finishing with fine. Wipe off the dust, fill any holes or gaps with wood filler, and sand smooth once dry. Apply primer if you're painting, then finish with your choice of paint or stain and seal with a durable clear topcoat. For outdoor projects, use exterior-rated primer, paint or stain, and sealer so the piece stands up to the weather.
Source (temporary): https://www.ana-white.com/woodworking-projects/kids-adirondack-chair