Kids Chair with Storage Base
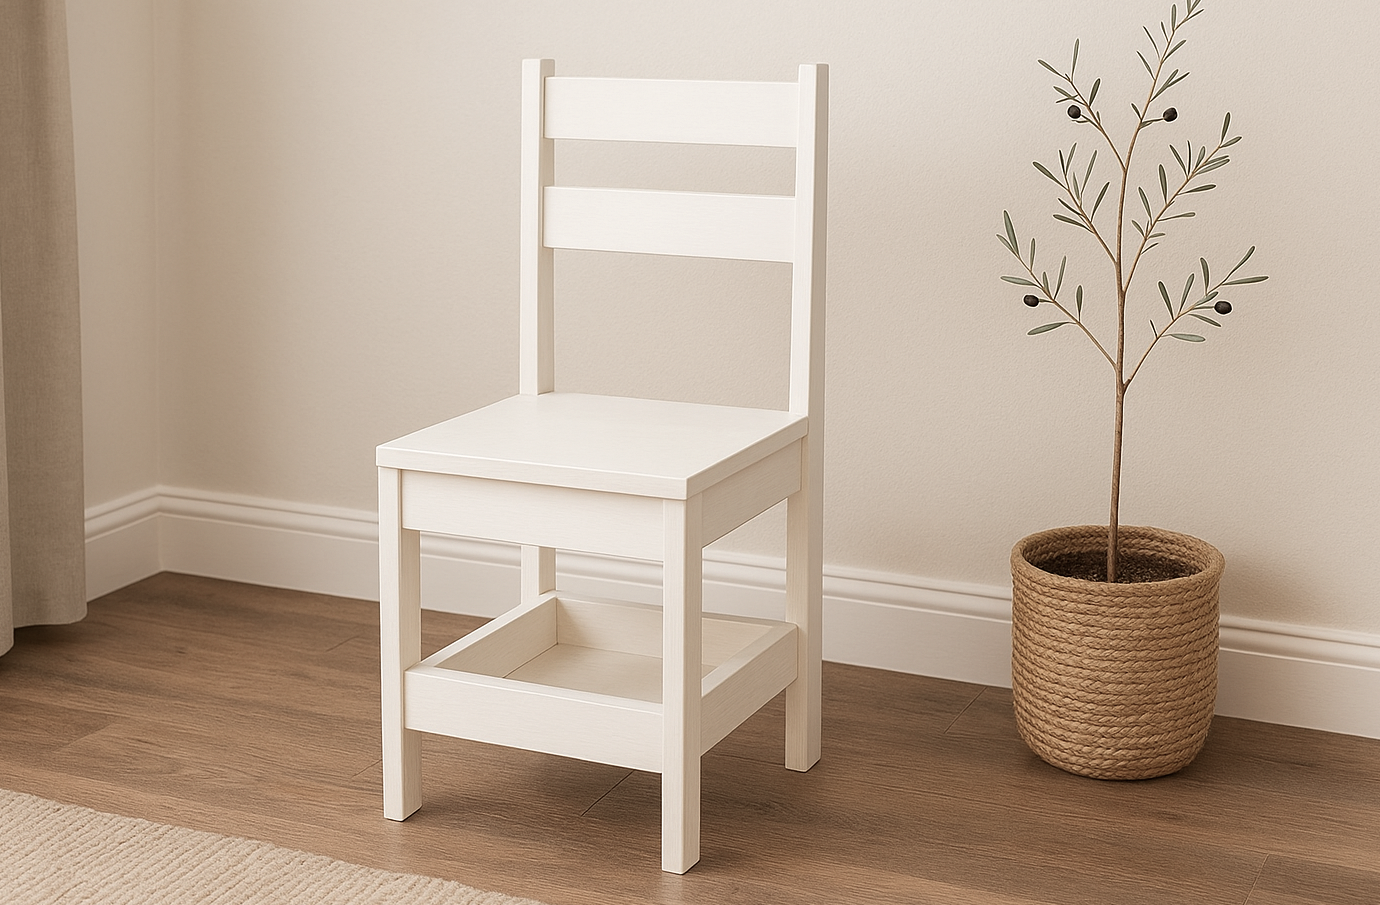
Build your own kids chairs with storage. It's perfect for homeschool or playrooms where each child can have their own chair, with their own supplies stored right in their chair! Solid wood design is easy to paint or stain. Simple woodworking project requires no special tools or techniques.
Specifications
| Project type | Kids Tables and Chairs |
|---|---|
| Room | Bedroom |
| Style | Cottage Style Furniture Plans |
| Difficulty | Intermediate |
| Estimated cost | Under $20 |
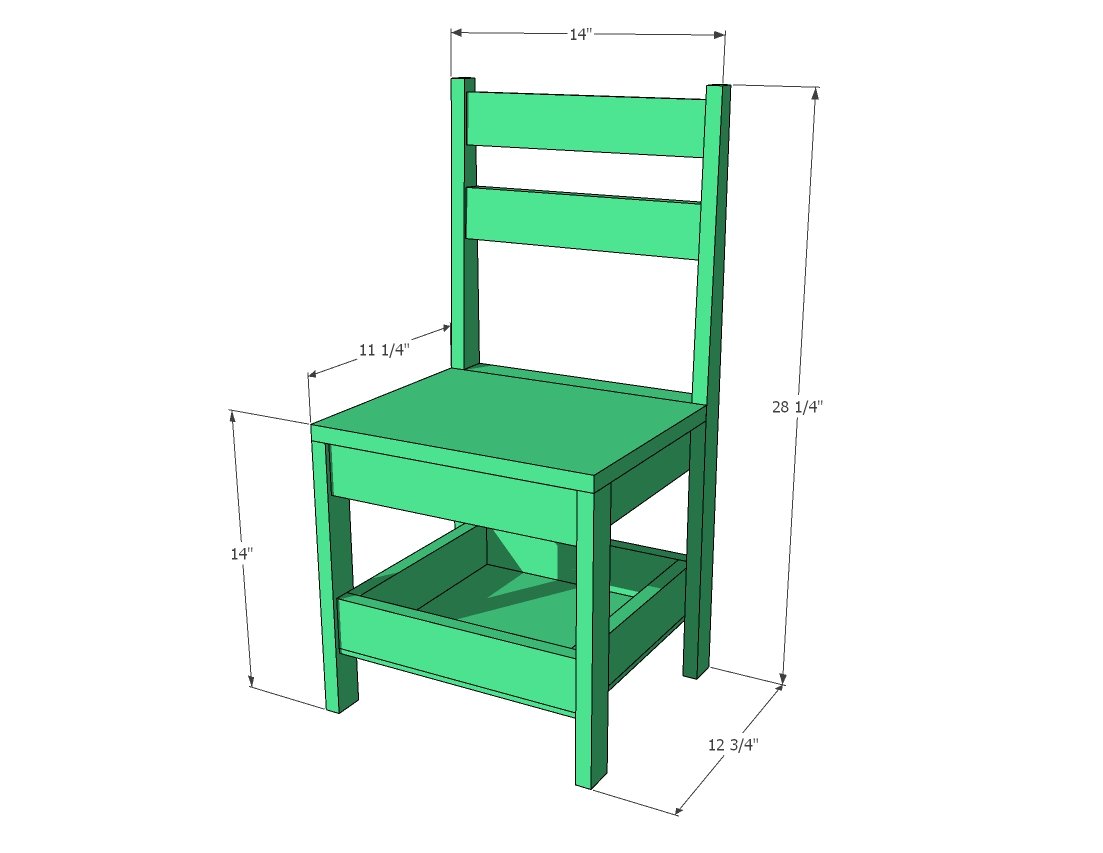
Dimensions
Use the size-specific shopping and cut lists below.
Shopping List
- 13 feet of 1x3 boards (Recommend buying two 8'- 1x3 furring strips and cut the good parts out for the chair and discard the bad sections)
- 1 - 1x2 @ 8 feet long
- 1 - 1x12 @ 14"
- 1/4" plywood minimum 12" x 12"
- 3/4" and 1-1/4" brad nails
- 1-1/2" self tapping screws like these
- Wood glue
- wood filler, paint or stain
Cut List
- 4 - 1x3 @ 11" - seat frames
- 4 - 1x3 @ 12-1/2" - seat frames
- 1 - 1/4" plywood @ 12-1/2" x 12-1/2" (can be 12" x 12" if you are trying to make the pieces work on a dimensional piece of plywood) - storage bottom
- 2 - 1x2 @ 28" - back legs
- 2 - 1x2 @ 13-1/4" - front legs
- 1- 1x2 @ 12-1/2" - seat back
- 2 - 1x3 @ 12-1/2" - back slats
- 1 - 1x12 @ 14" - seat
Tools
- measuring tape
- square
- pencil
- safety glasses
- hearing protection
- drill
- circular saw
- sander
Step-by-step Instructions
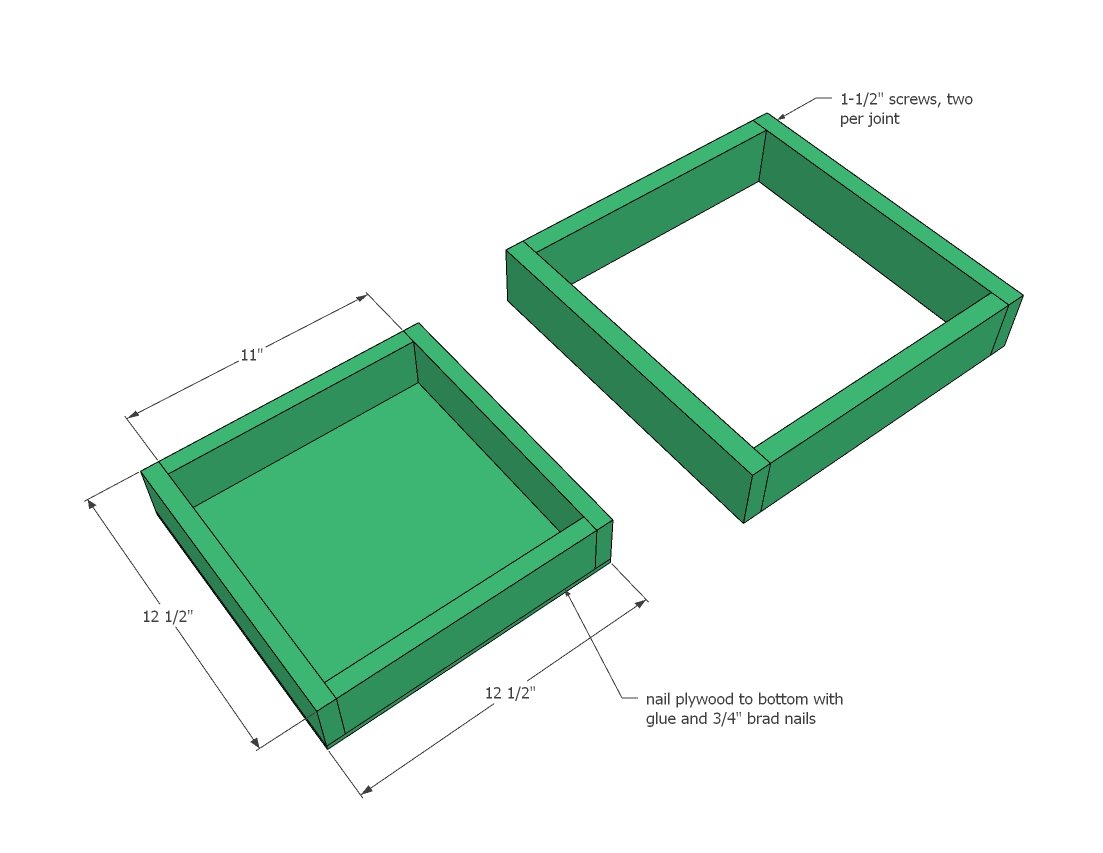
Build two frames with 1x3s. Attach at corners with 1-1/2" self tapping screws, two screws per joint.
Attach 1/4" plywood to bottom of the frame with 3/4" brad nails and glue.
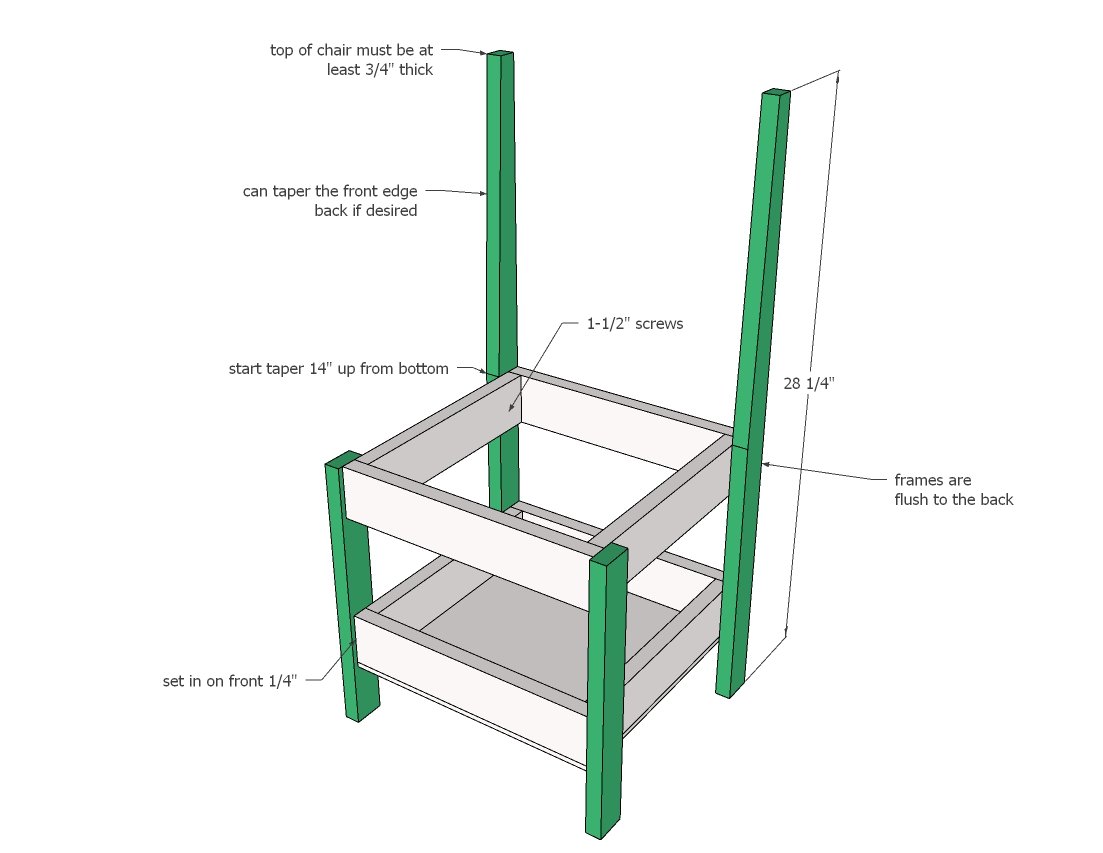
Cut back legs in taper if desired, starting the taper at 14" from the bottom of the leg.
Attach the frames to the legs, with the tops of the frames at 13-1/4". Use glue and screw at a slight angle from the inside of the frames into the back side of the legs. Screws at an angle will be stronger, and also since your screws are 1-1/2" long, there is a risk of the screw popping through. The angle will help with that.
Attach back rests with the 1-1/2" self tapping screws.
Then add the seat back with 1-1/4" brad nails and glue.
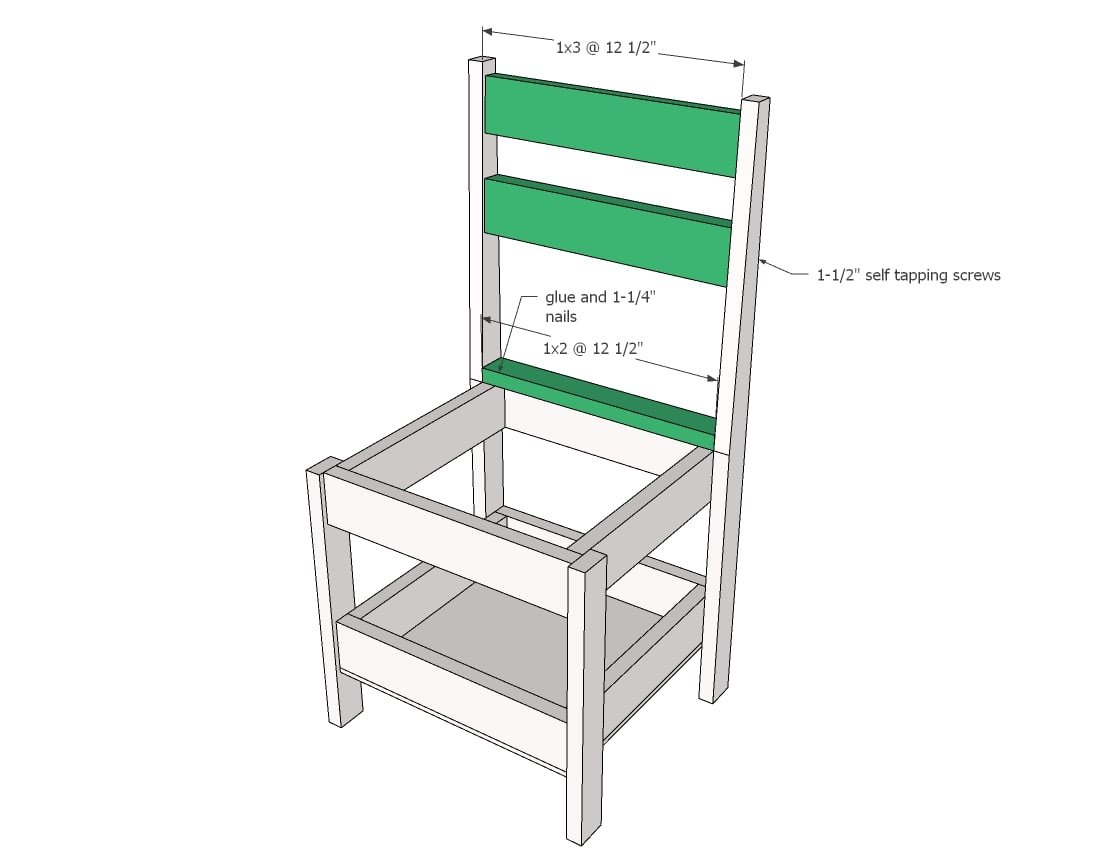
Step 4
Attach seat with 1-1/4" brad nails and glue.
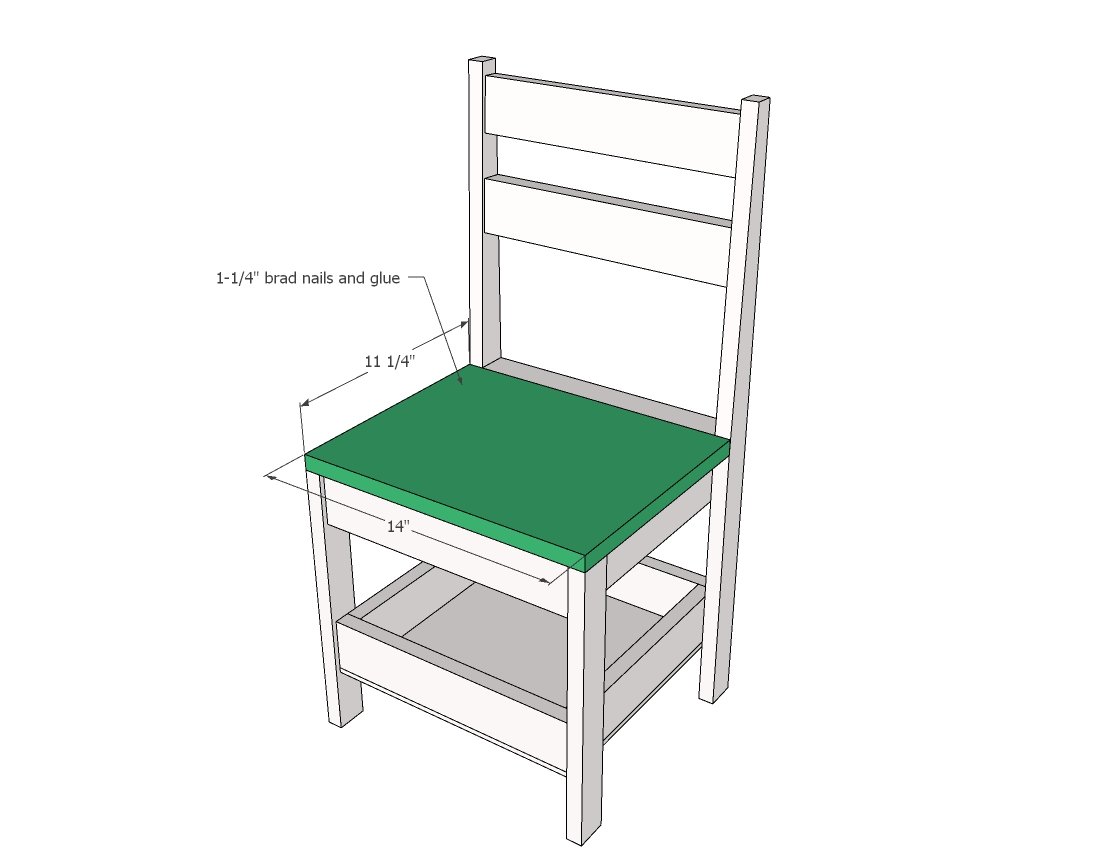
Finishing
Sand all surfaces, starting with a medium grit and finishing with fine. Wipe off the dust, fill any holes or gaps with wood filler, and sand smooth once dry. Apply primer if you're painting, then finish with your choice of paint or stain and seal with a durable clear topcoat. For outdoor projects, use exterior-rated primer, paint or stain, and sealer so the piece stands up to the weather.
Source (temporary): https://www.ana-white.com/woodworking-projects/kids-chair-storage-base