Kids’ Trestle Craft Table with Storage
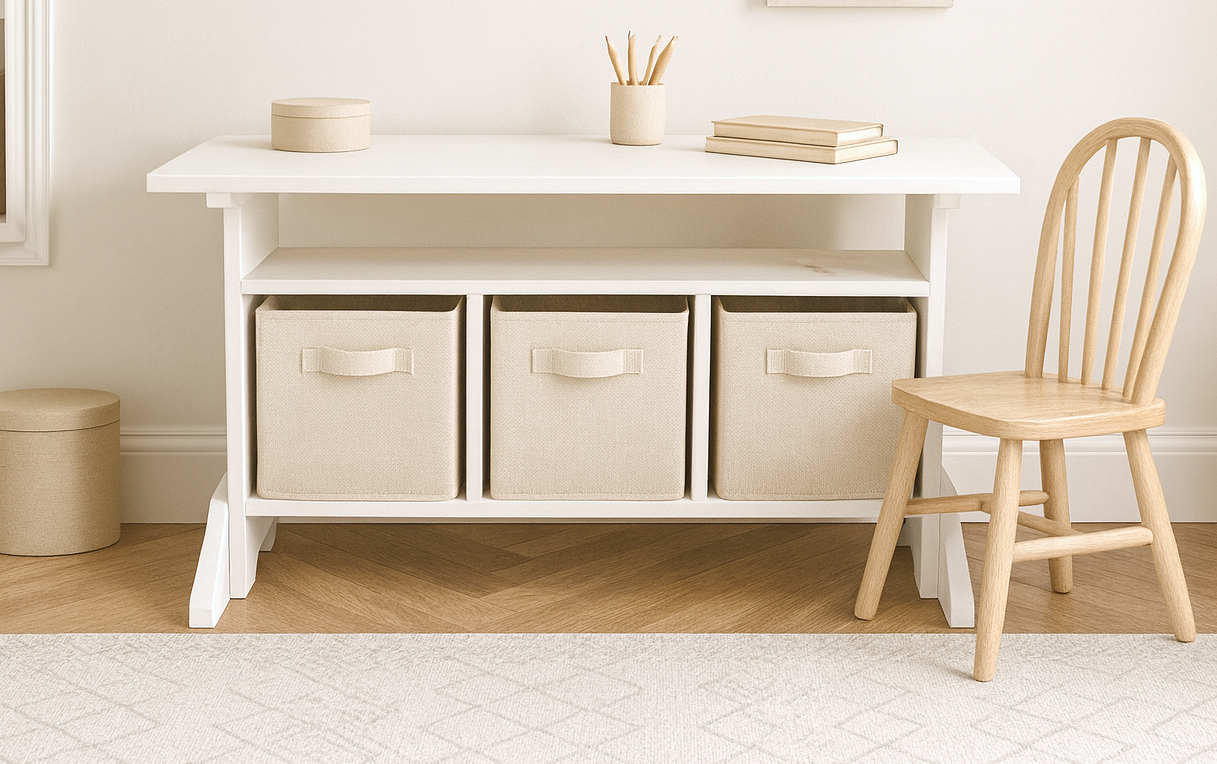
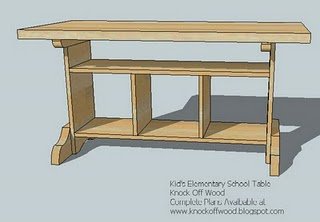
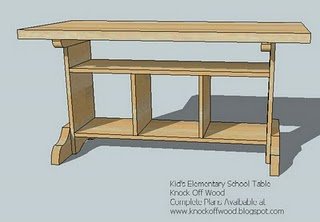
Give your kids the perfect spot for creativity, homework, and play with this Kids’ Trestle Craft Table. Designed with both function and style in mind, this project features a sturdy trestle base and spacious cubby storage, making it a beautiful and practical addition to any playroom or learning space. The wide tabletop provides plenty of room for art projects, puzzles, or schoolwork, while the lower cubbies keep supplies neatly organized in baskets or bins. The trestle design adds timeless charm, ensuring the table is as stylish as it is kid-friendly., this project is simple to tackle, even for beginner woodworkers. Clear instructions and diagrams walk you through every stage, so you can build a piece that will be loved (and used) for years to come. Whether you need a craft station, a homework desk, or a central hub for play, this table combines durability, storage, and style —all in one easy-to-build project.
Specifications
| Project type | Kids Tables and Chairs |
|---|---|
| Room | Kids and Toys |
| Difficulty | Intermediate |
Dimensions
Use the size-specific shopping and cut lists below.
Shopping List
- 2 - 1x12 @ 8 feet long
- 1 - 2x6 @ 8 feet long
- 1 - 2x2 @ 8 feet long
- 48" x 24" Project Panel/Tabletop (Available at Lowes or Home Depot) or 1/4 sheet of plywood or MDF
Can use 2" self tapping screws or 1-1/4" pocket hole screws (if you have a Kreg Jig) for joinery. A brad nailer with 1-1/4" brad nails is helpful for attaching dividers.
Cut List
- 2 - 1x12 @ 36" (Top and Bottom of Cubbies)
- 2 - 1x12 @ 11 1/2" (Cubby Dividers)
- 2 - 1x12 @ 22 1/4" (Sides)
- 2 - 2x6 @ 23 1/2" (Foot/Trestle Supports)
- 2 - 2x2 @ 23 1/2" (Tabletop Supports)
Tools
- measuring tape
- square
- safety glasses
- drill
- circular saw
- jigsaw
- nailer
- sander
Step-by-step Instructions
Step 1
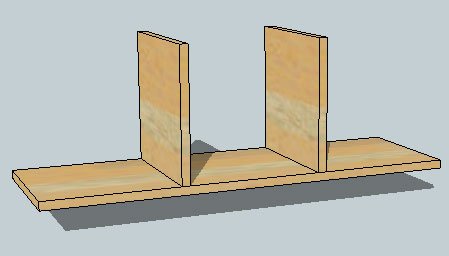
Attach the dividers to the bottom, with dividers set in 11-1/2" on each side. Use 1-1/4" brad nails or 2" self tapping wood screws, or 3/4" pocket holes and 1-1/4" pocket hole screws.
Step 2
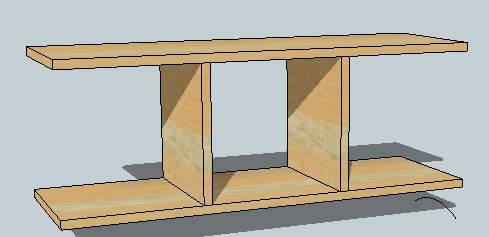
Attach the top piece, also set with 11-1/2" spacing on sides.
Step 3
Attach the sides to the storage part, with a 3-1/2" space under the bottom of the bottom shelf. Pocket holes are recommended, but you can also use 2" self tapping wood screws.
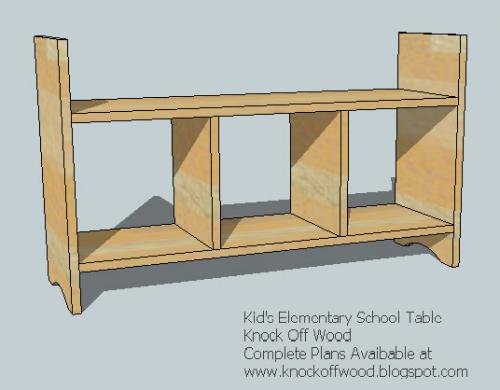
Step 4
Use a jigsaw to create the cut out shape for the feet. Also cut out the sides of the storage part (see previous step) to match using a jigsaw.
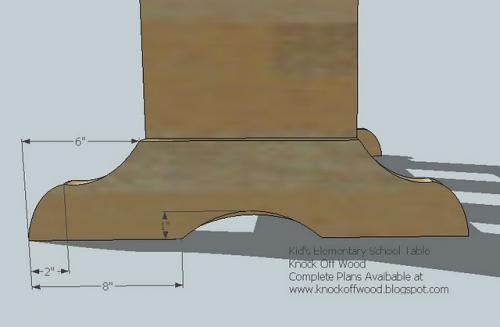
Step 5
Use 2" self tapping screws to attach the storage part to the legs from the insides.
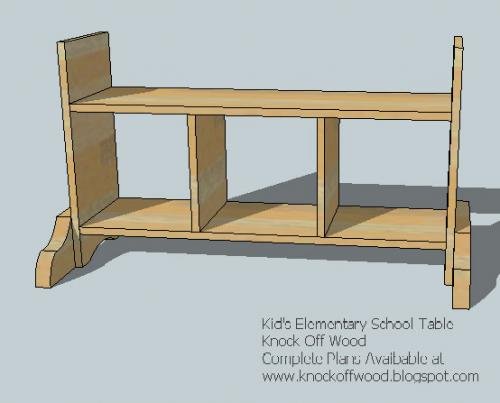
Step 6
Round the corners of the 2x2a as shown, then attach to the top insides of the storage shelf with 2" screws, centered with even overhangs on the ends. Repeat for both sides.
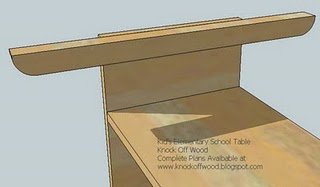
Step 7
Predrill and attach through the 2x2s the tabletop, adjust the length of your fastener so it works for your tabletop thickness (so screws don't protrude through)
Finishing
Sand all surfaces, starting with a medium grit and finishing with fine. Wipe off the dust, fill any holes or gaps with wood filler, and sand smooth once dry. Apply primer if you're painting, then finish with your choice of paint or stain and seal with a durable clear topcoat. For outdoor projects, use exterior-rated primer, paint or stain, and sealer so the piece stands up to the weather.
Source (temporary): https://www.ana-white.com/woodworking-projects/kids-trestle-craft-table-storage-free-diy-plans