Kids Trestle Style Play Table
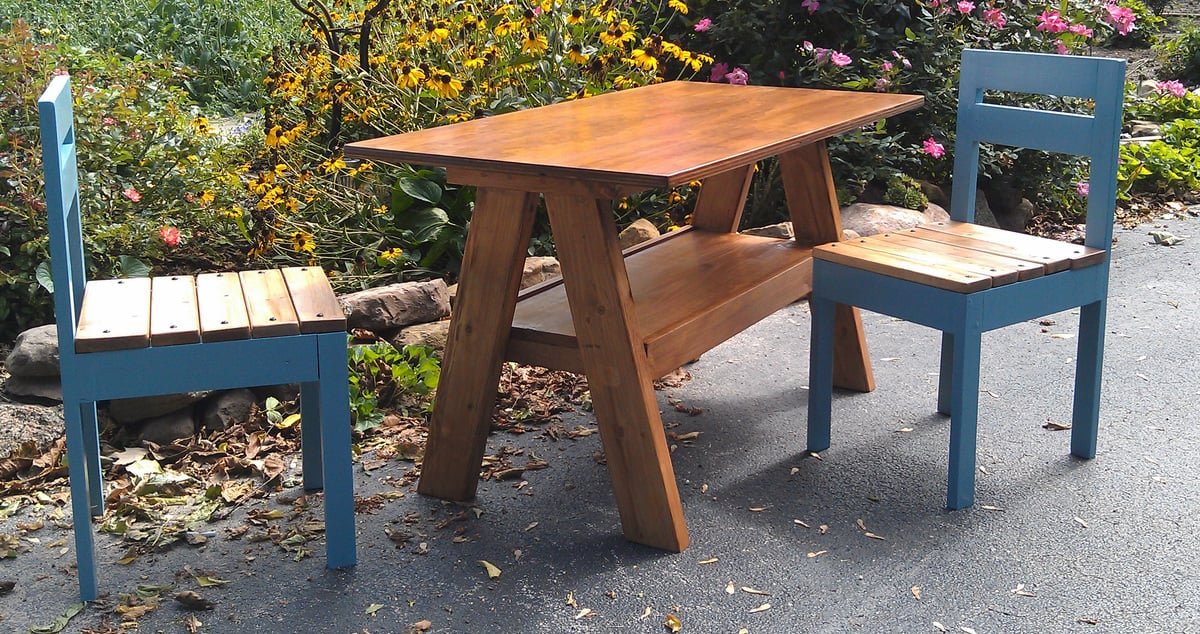
Build the perfect play table for your littles. Sized perfectly for young children to do activities, play games and schoolwork. We love this trestle table with it's large top, and open shelf on the bottom. It's easy to store craft supplies in the shelf. include step by step diagrams, shopping lists and cut list. Also shown: Four dollar kids chair plans
Specifications
| Project type | Kids Tables and Chairs |
|---|---|
| Room | Kids and Toys |
| Style | Farmhouse Furniture |
| Difficulty | Beginner Projects |
| Estimated cost | $20 - $50 |
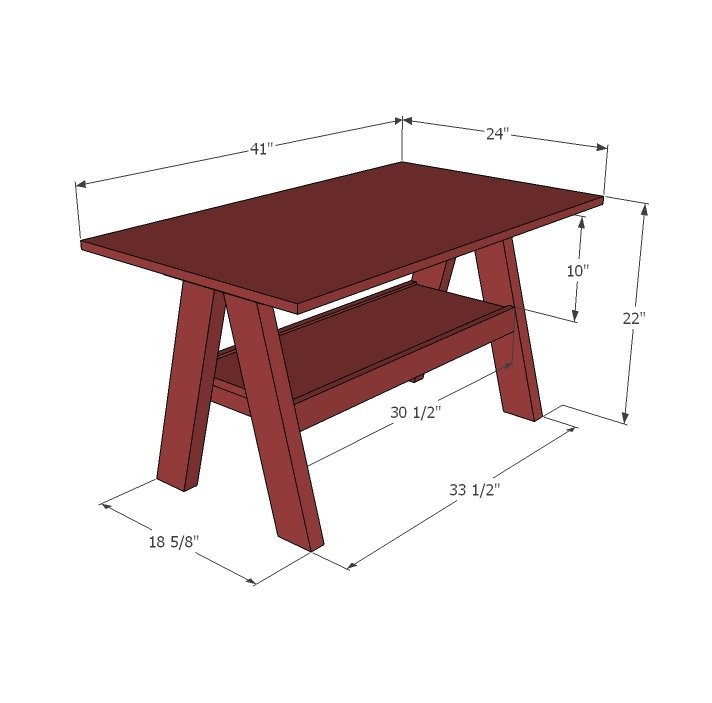
Dimensions
Use the size-specific shopping and cut lists below.
Shopping List
- 1 - 2x4 @ 8 feet long - pick a good one!
- 1 - 1x12 @ 4 feet long
- 1 - 1x3 @ 8 feet long
- 1 - 1x2 @ 8 feet long
- 1 - 2x2 @ 8 feet long
- 24" x 48" sheet of 3/4" plywood or other project board measuring at least 24" x 41" (tabletop)
Cut List
- 4 - 2x4 @ 22" - Both ends cut at 15 degrees off square, ends are parallel
- 4 - 1x2 @ 11 1/4" (End Cleats)
- 1 - 1x12 @ 30 1/2" (Shelf)
- 2 - 1x3 @ 30 1/2" (Shelf Trim)
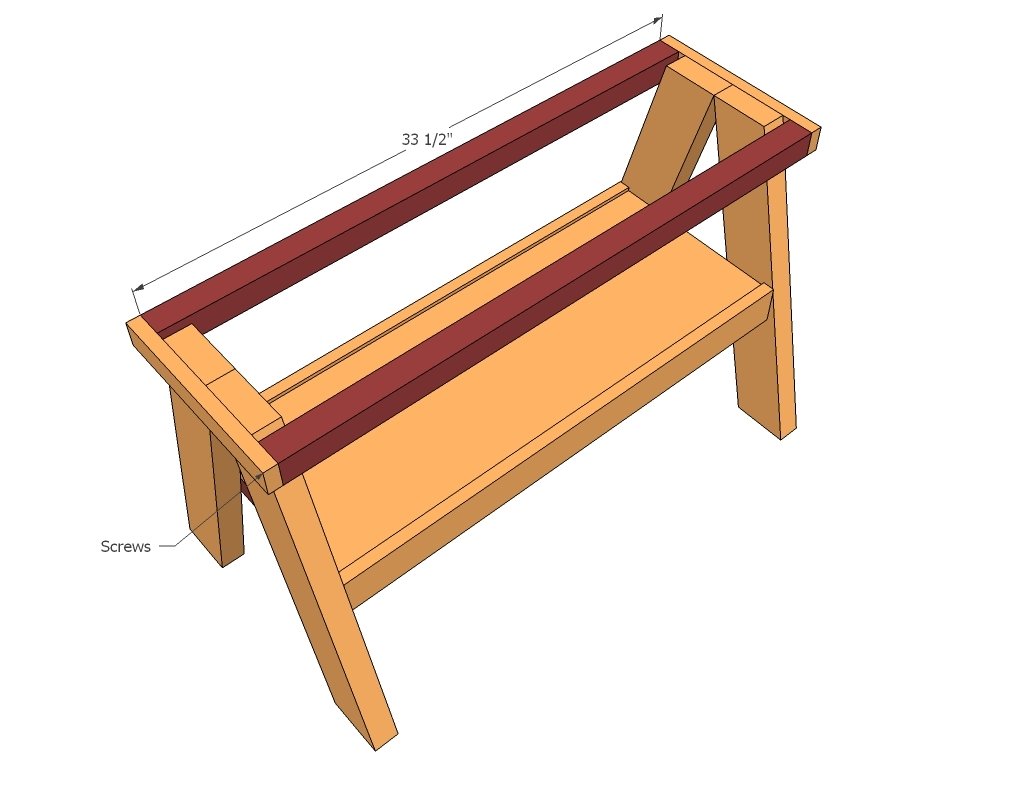
- 2 - 2x2 @ 33 1/2" (Top Supports)
- 1 - 3/4" plywood or other sheet goods @ 24" x 41" (Top)
Tools
- measuring tape
- square
- pencil
- safety glasses
- hearing protection
- drill
- compound miter saw
- nailer
- sander
- level
- countersink drill bit
Step-by-step Instructions
Step 1
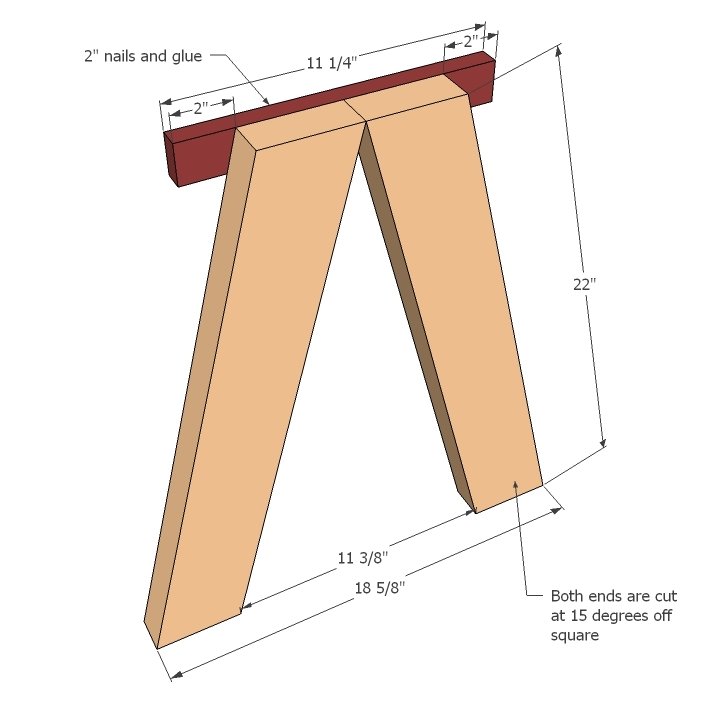
Carefully lay out your legs as shown above so tops are flush, bottoms are spread to measurements. Mark the top of the cleats 2" on each end and lay on top for a dry fit. Remove, apply glue at joint and replace. Use 2" nails or countersunk screws to attach. Remember to build two legs sets.
Step 2
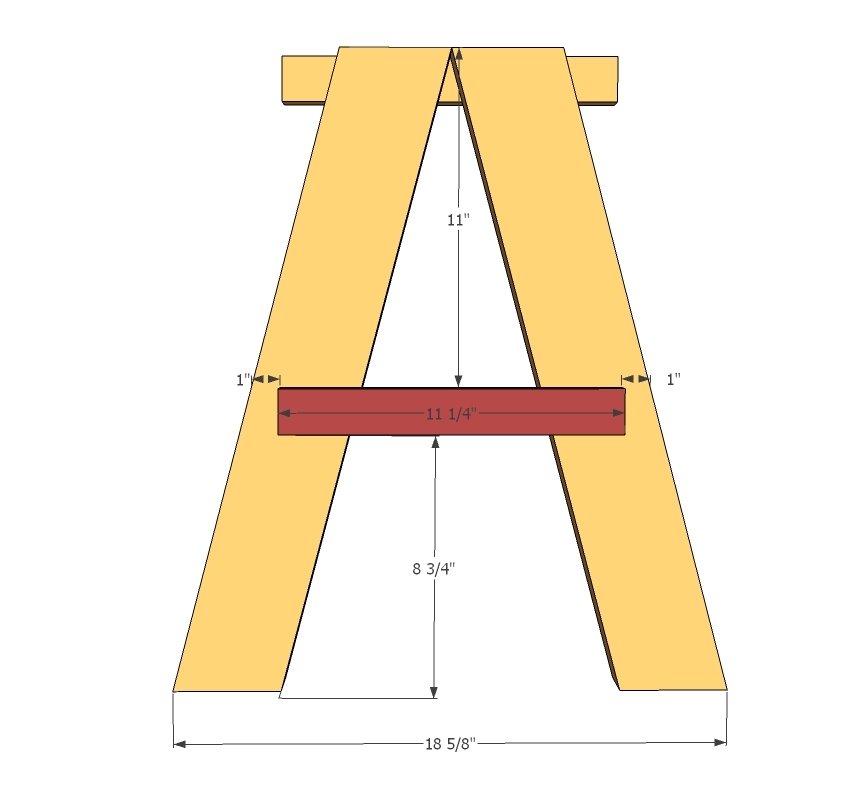
Once your legs are done, it's time to add the shelf cleat. Flip the leg sets over and carefully readjust so legs are positioned as in diagram. Mark the placement of the cleat and dry fit. Remove, apply glue at joint and replace. 2" screw or nails to attach.
Step 3
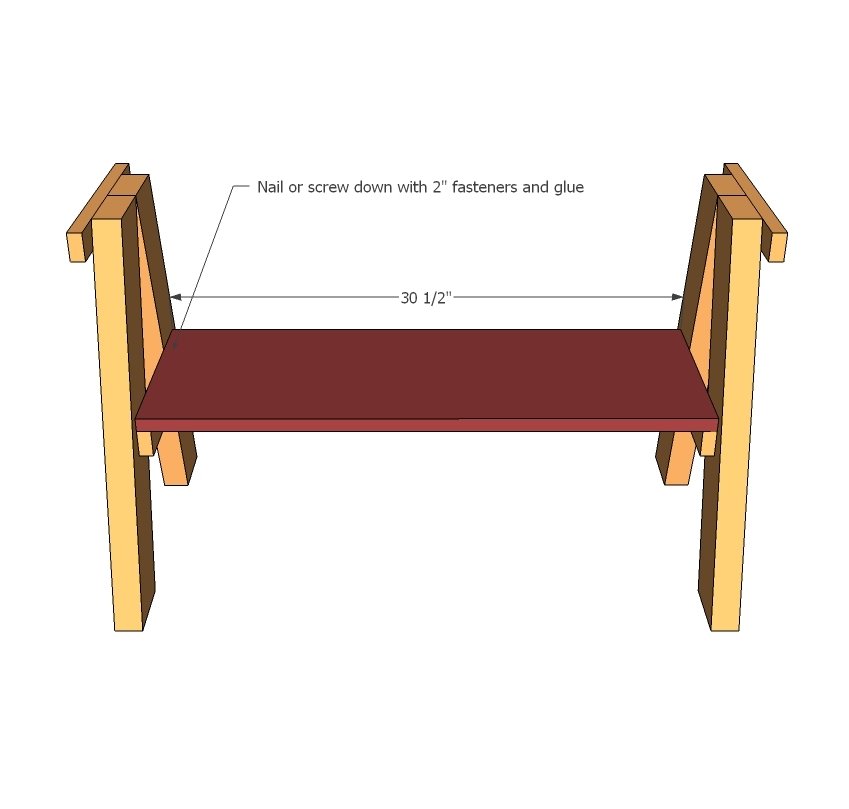
An easy but motivating step. Place the shelf on the shelf cleat and screw or nail down with glue.
Step 4
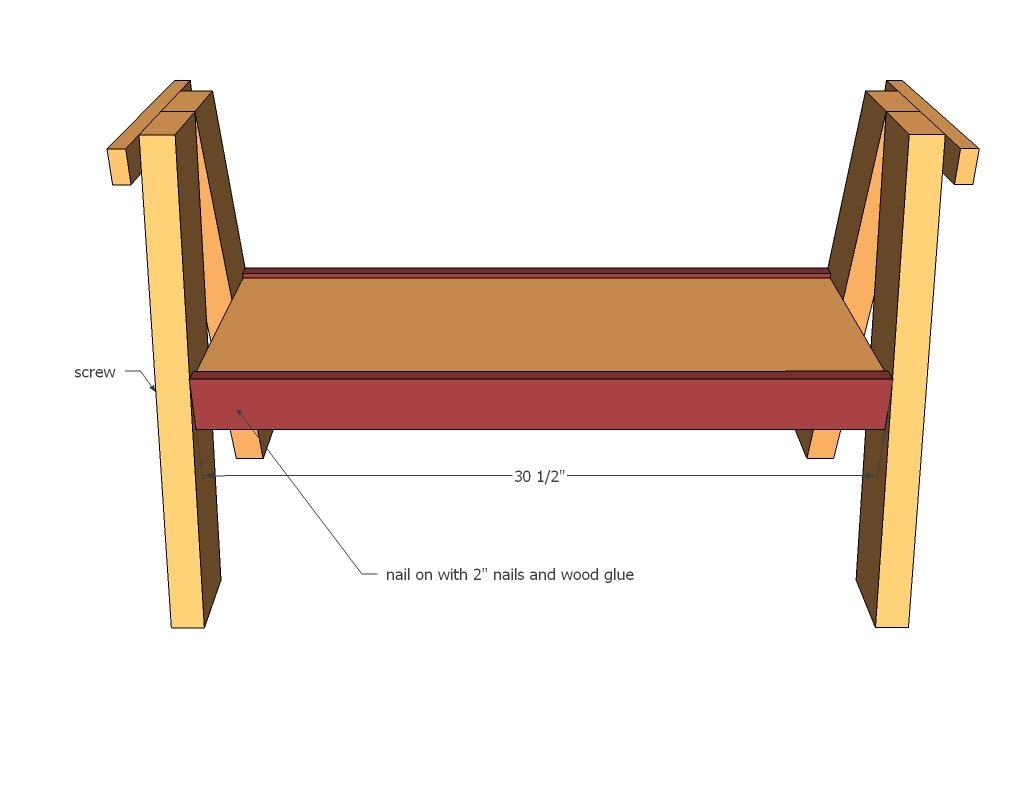
The shelf trim will not just keep items on the shelf, but it will reinforce the side to side structure of the table. Make sure you also screw from the outsides for added strength. Is placed flush to the bottom of the 1x2 shelf cleats under the shelf. You will need a few 3" screws here.
Step 5
Step 6
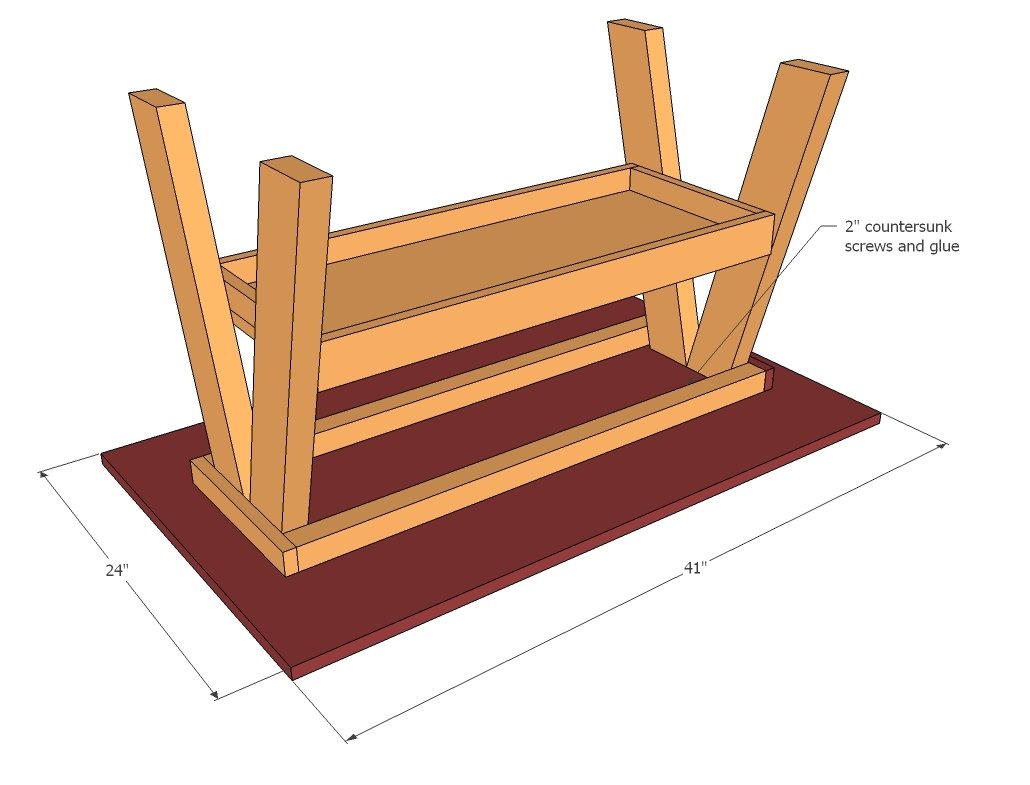
Center the base on the tabletop with project turned upside down. Screw on with 2" screws and glue through tabletop supports.
Finishing
Sand all surfaces, starting with a medium grit and finishing with fine. Wipe off the dust, fill any holes or gaps with wood filler, and sand smooth once dry. Apply primer if you're painting, then finish with your choice of paint or stain and seal with a durable clear topcoat. For outdoor projects, use exterior-rated primer, paint or stain, and sealer so the piece stands up to the weather.
Source (temporary): https://www.ana-white.com/woodworking-projects/kids-trestle-style-play-table