King Size Fancy Farmhouse Bed
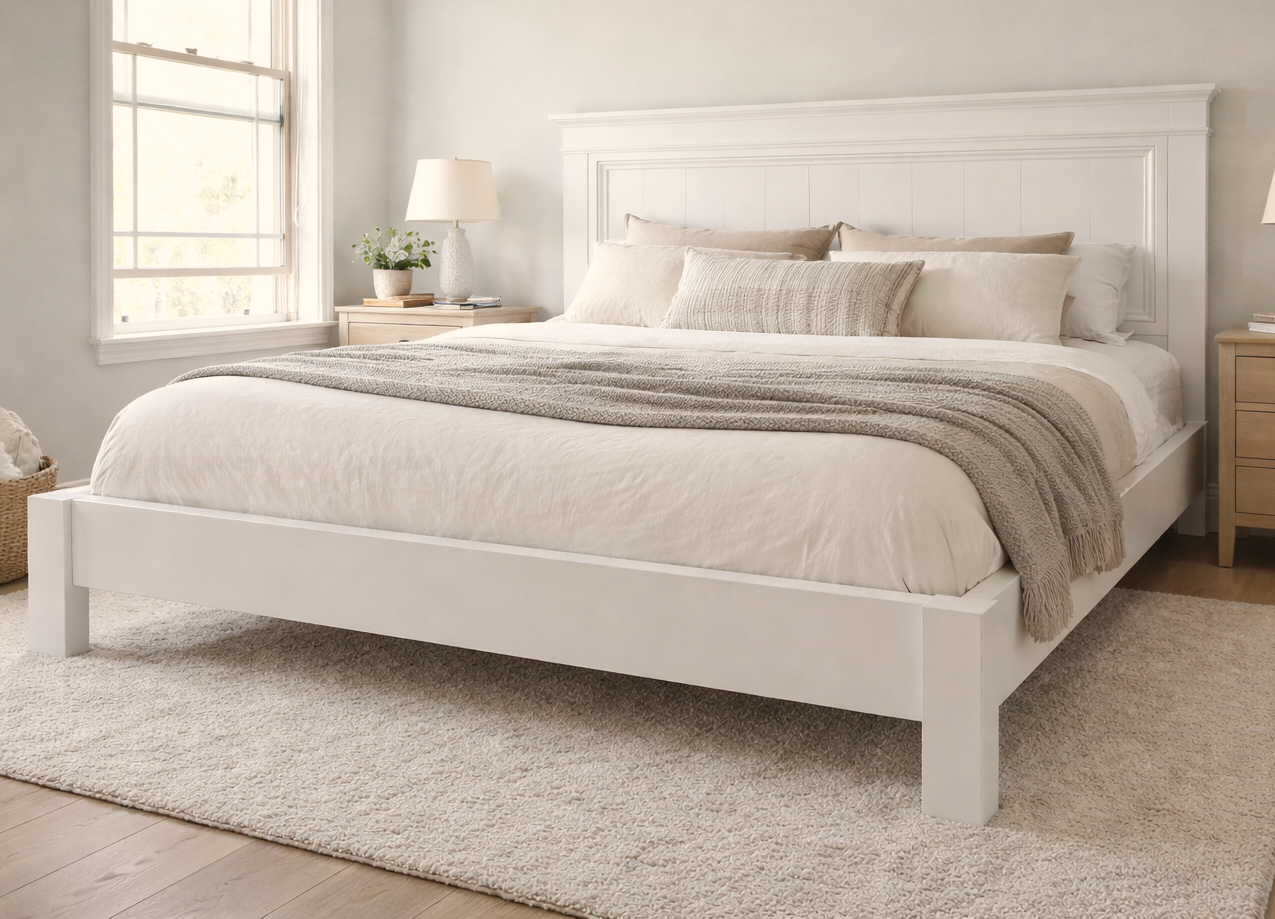
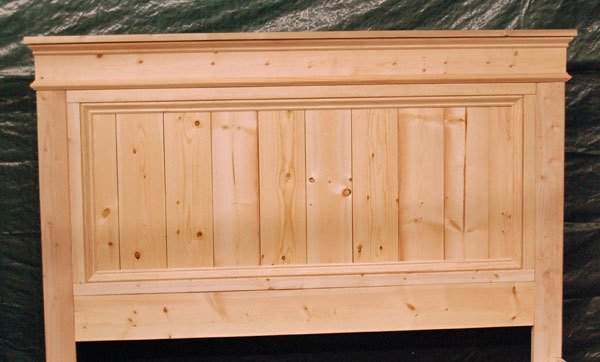
Build your own bed - this bed plan features moulding for more detail. from feature step by step plans, diagrams, shopping and cut list, and dozens of real reader submitted photos.
Specifications
| Project type | Beds and Bed Frames |
|---|---|
| Room | Bedroom |
| Style | Farmhouse Furniture |
| Difficulty | Intermediate |
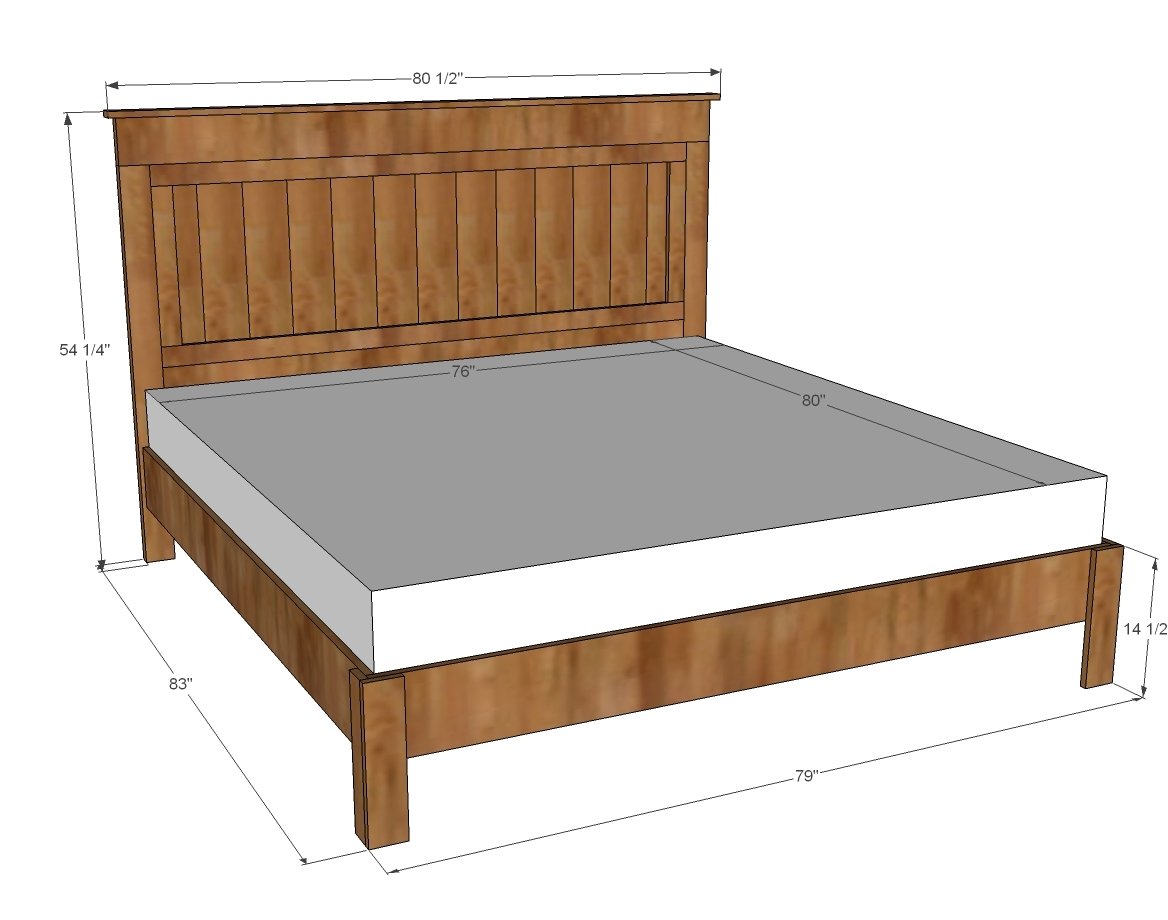
Dimensions
Use the size-specific shopping and cut lists below.
Shopping List
Boards
- 26+ feet of 1x6 boards or tongue and groove (recommended)
- 4 - 1x3 @ 8 feet long
- 9 - 2x4 @ 8 feet or stud length
- 2 - 2x6 @ 8 feet long
- 3 - 1x8 @ 8 feet long
- 1 - 1x4 @ 3 feet long
Screws
- Recommend 1 1/4" and 2 1/2" pocket hole screws
- Recommend 1 1/4" and 2" finish nails
- Recommend 4 1/2" diameter bolts, with nuts and washers, 3 1/2" or longer (for attaching headboard to bed base)
Moulding
- 1 – 8′ Stick of Chair Rail moulding (use this stick on the bottom tier of the headboard)
- 4 – 8′ Sticks of Base Cap moulding (use this type of moulding to trim panel and for the top tier on the headboard)
Cut List
Headboard
- 13 - 1x6 (boards or tongue and groove) @ 24" (can be a tad shorter to get everything on a single 8' long board)
- 2 - 1x3 @ 71 1/2" (inner frame top)
- 2 - 1x3 @ 19" CUT TO FIT (inner frame sides)
- 2 - 2x4 @ 48" (legs)
- 1 - 2x6 @ 71 1/2"
- 1 - 2x6 @ 78 1/2"
- 1 - 1x3 @ 80 1/2"
Base
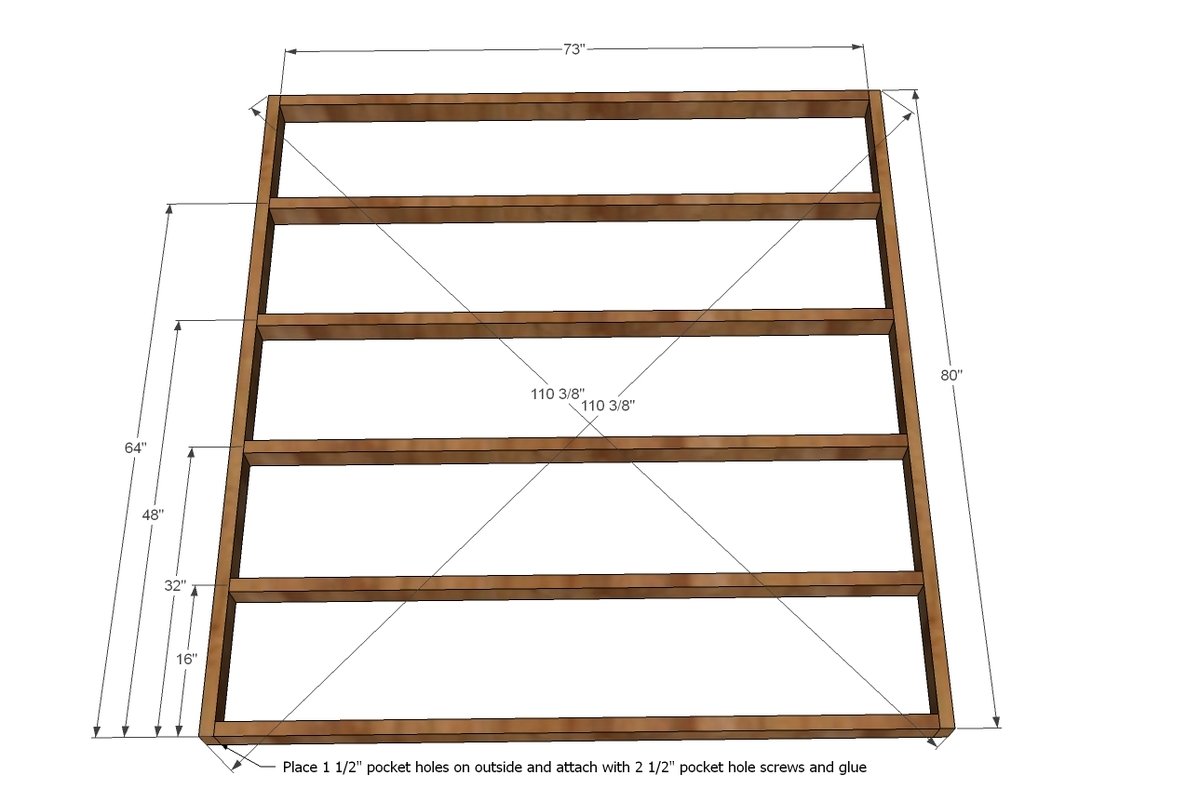
- 2 - 2x4 @ 80"
- 6 - 2x4 @ 73"
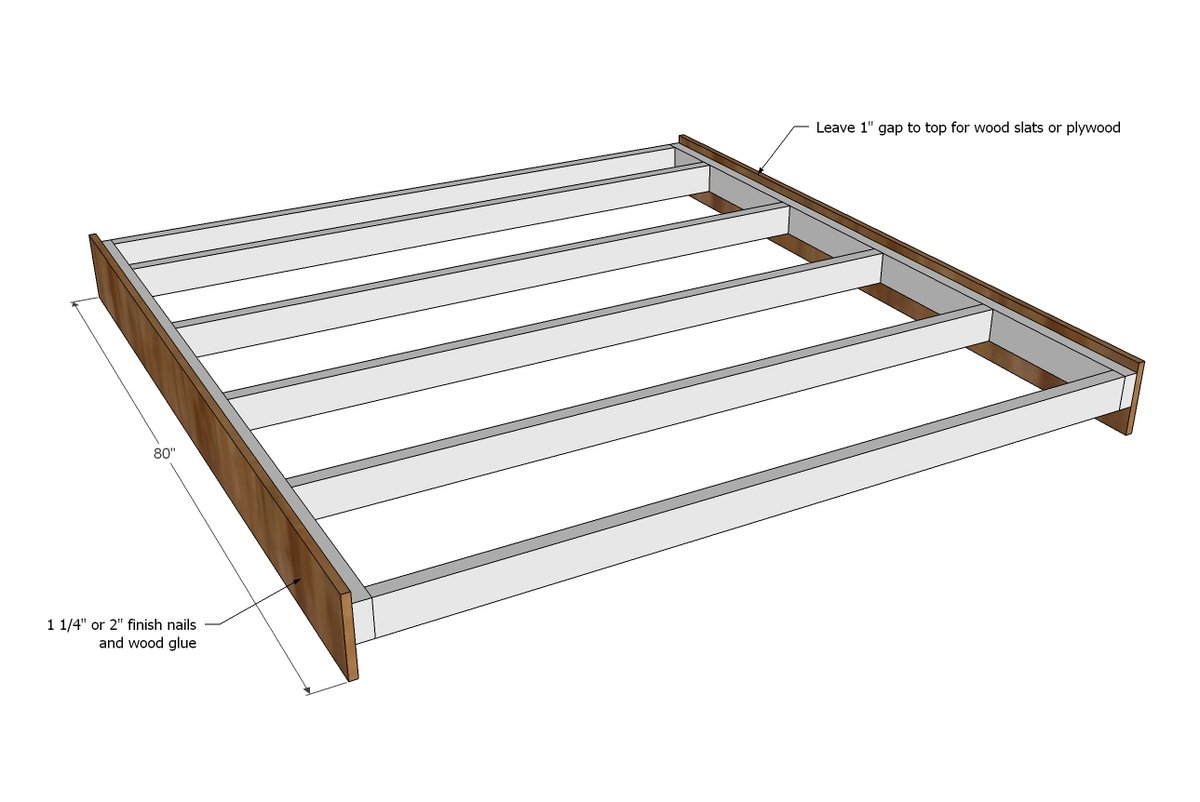
- 2 - 1x8 @ 80"
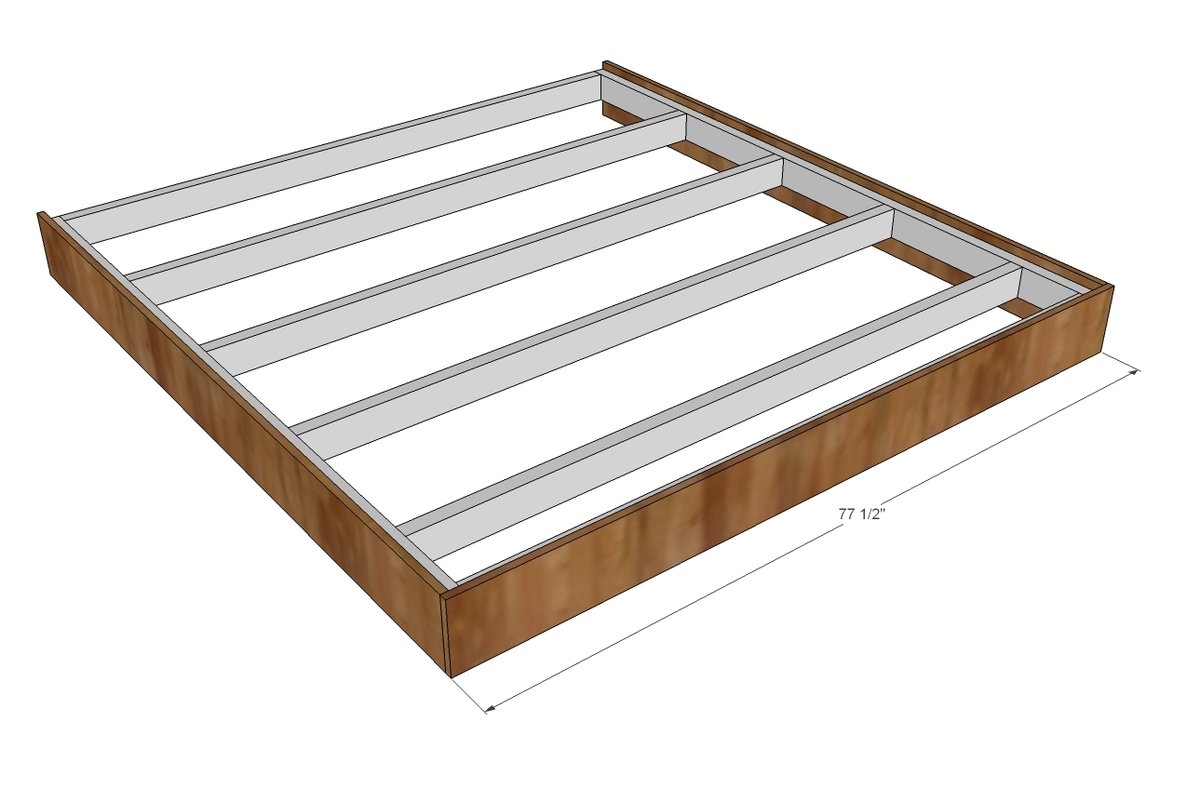
- 1 - 1x8 @ 77 1/2"
- 2 - 1x3 @ 14 1/2"
- 2 - 1x4 @ 14 1/2"
- 4 - 2x4 @ 13 1/2"
Tools
- measuring tape
- square
- pencil
- safety glasses
- hearing protection
- kreg-jig
- drill
- compound miter saw
- nailer
- sander
- level
Step-by-step Instructions
Step 1
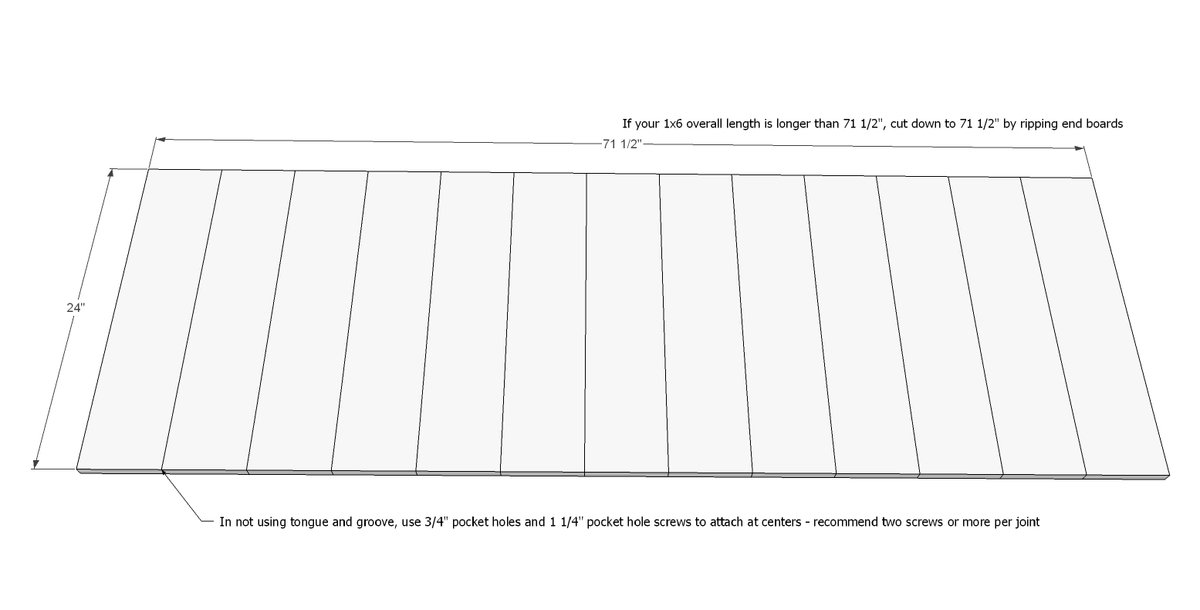
Start by putting the center panel together. I recommend 1x6 tongue and groove - then you can just glue and fit together. You may need to trim off with a circular saw the ends to get the exact measurements as shown below. If your panel is a little smaller, that's okay - we can work with that.
Step 2
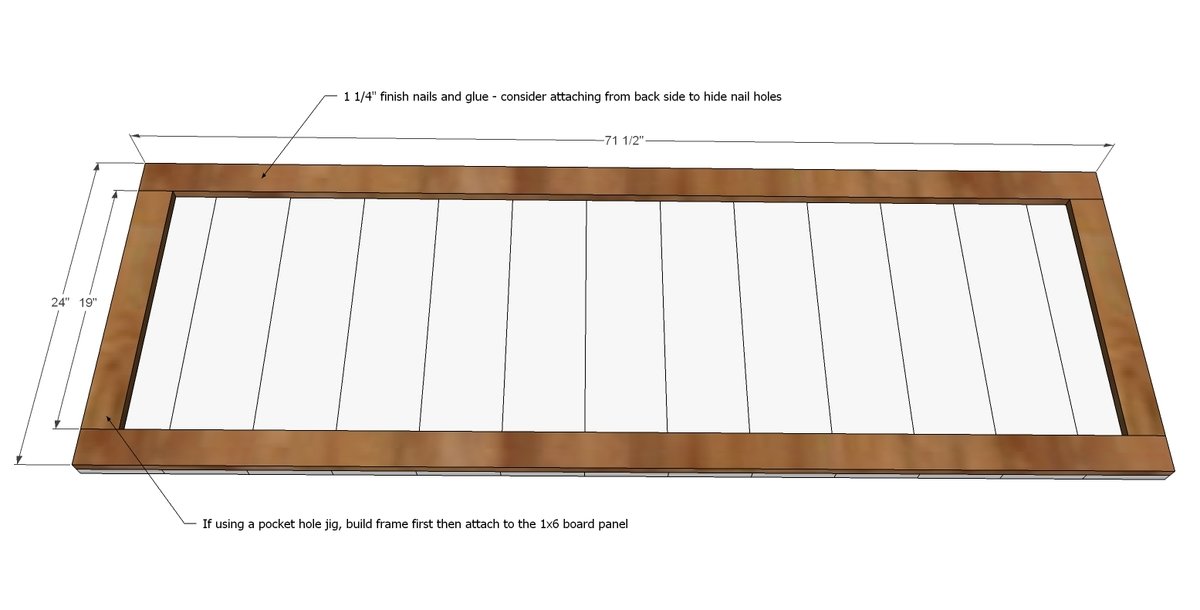
Build the frame first, then attach with nails and glue to the panel. If your center panel is a little smaller, split the difference, centering the panel in the middle of the frame.
Attach legs.
Note that if your panel boards are less than 3/4" thick, you may need to use a shorter pocket hole or screw. You can also drill the pocket holes in the legs into the panel if that is easier for you.
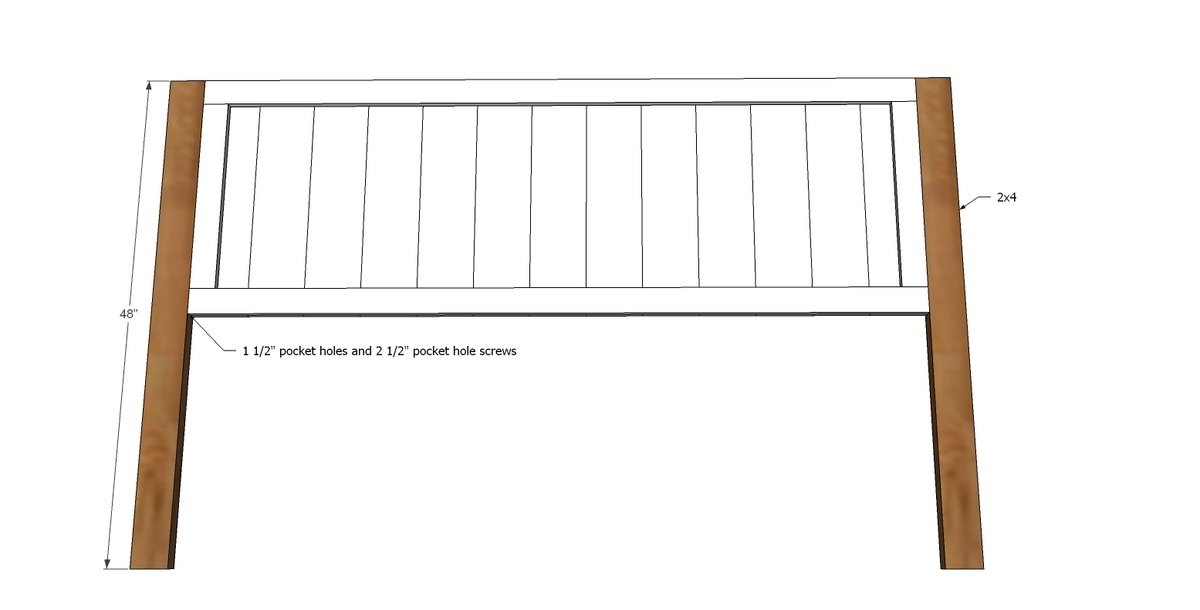
Step 4
Now attach the base.
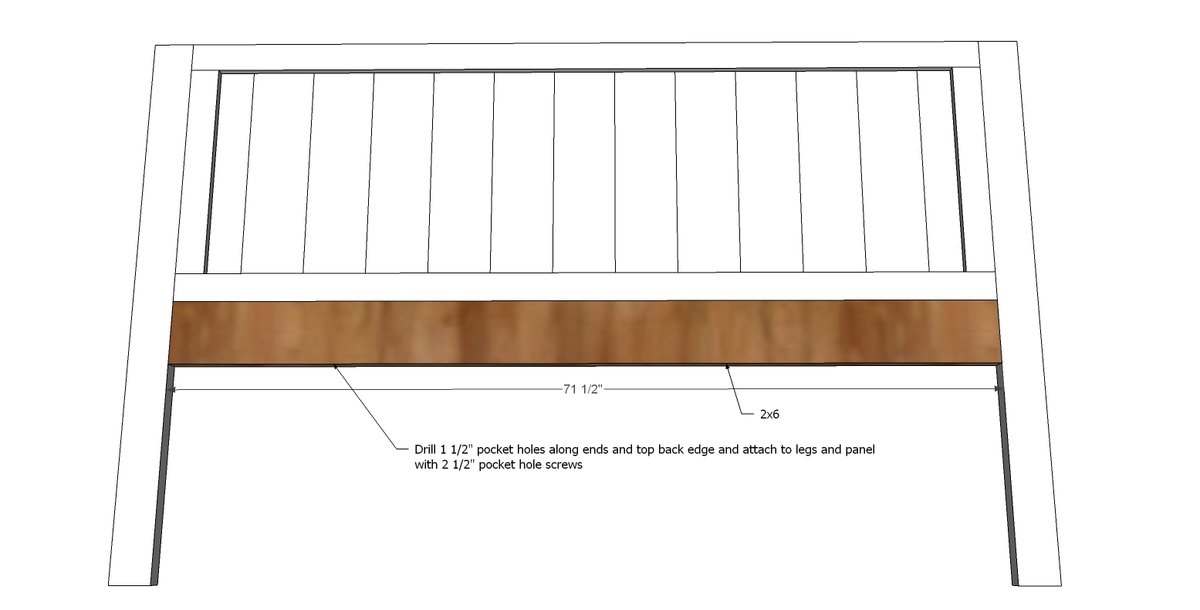
Step 5
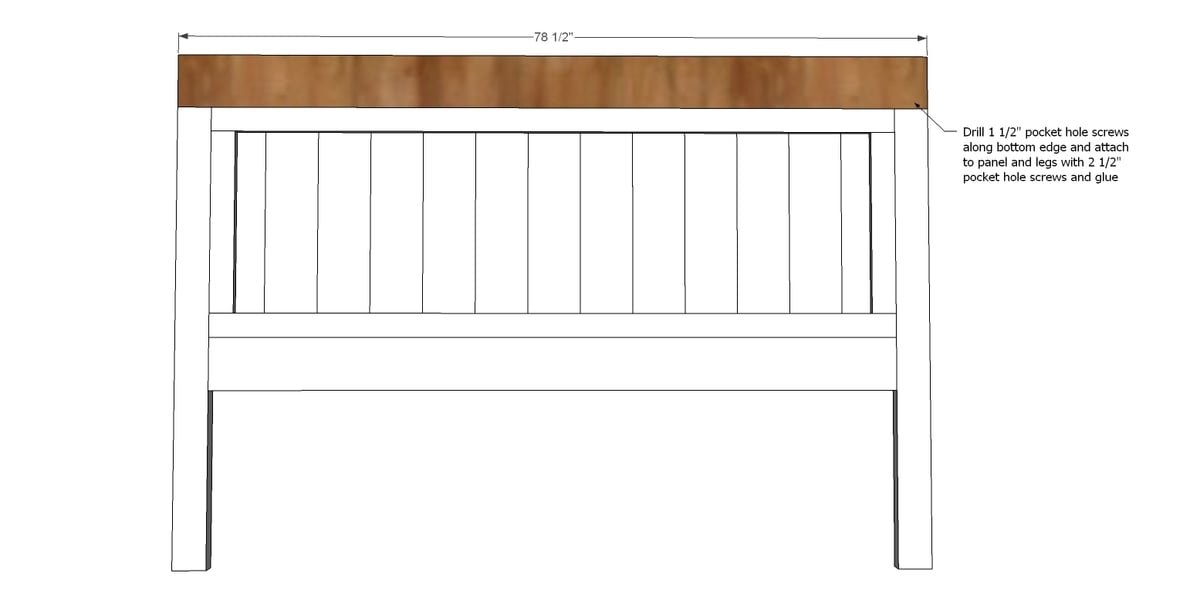
Step 6
And finally, attach top with glue and nails or screws.
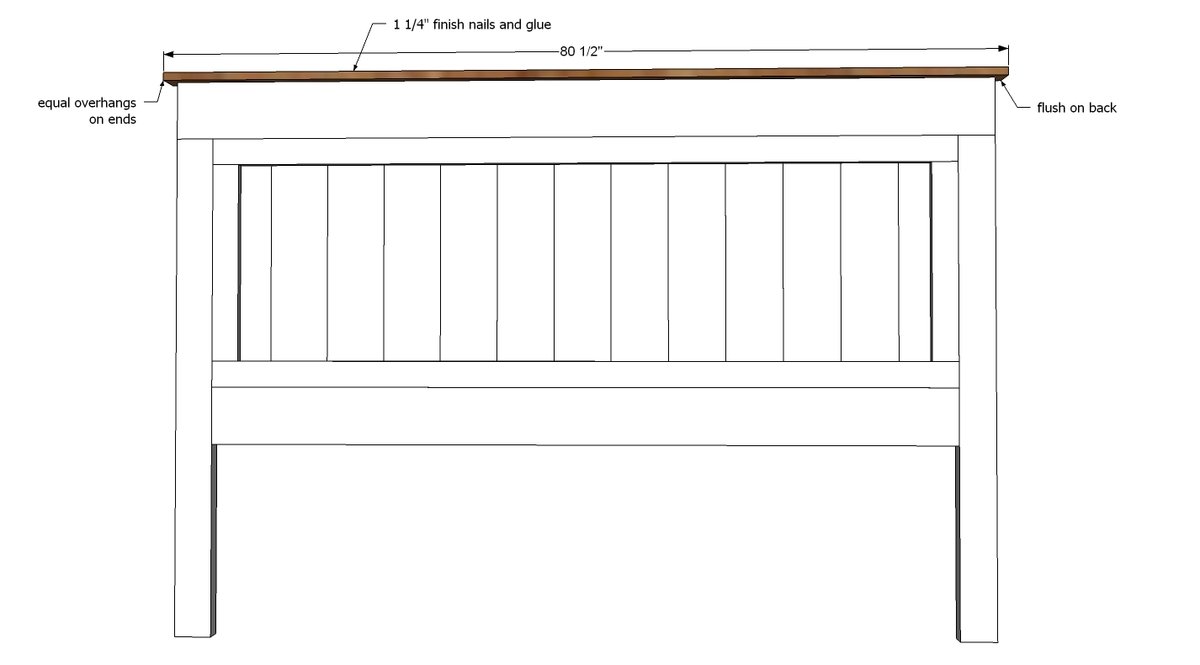
Step 7
Measure and cut the moulding to fit as shown in this diagram. Note that the center panel is framed with the base cap moulding. Also at the underside of the 1x3 is base cap moulding. The chair rail moulidng is placed at the tops of the legs. Nail on and glue. Set headboard aside.
Step 8
We are going to build a really sturdy base for the bed. First, frame up the platform with 2x4s.
Step 9
Leave 1" to the top and attach side rails with nails and glue.
Step 10
Then attach bottom footboard rail.
Step 11
Attach side legs as shown here, flush to end.
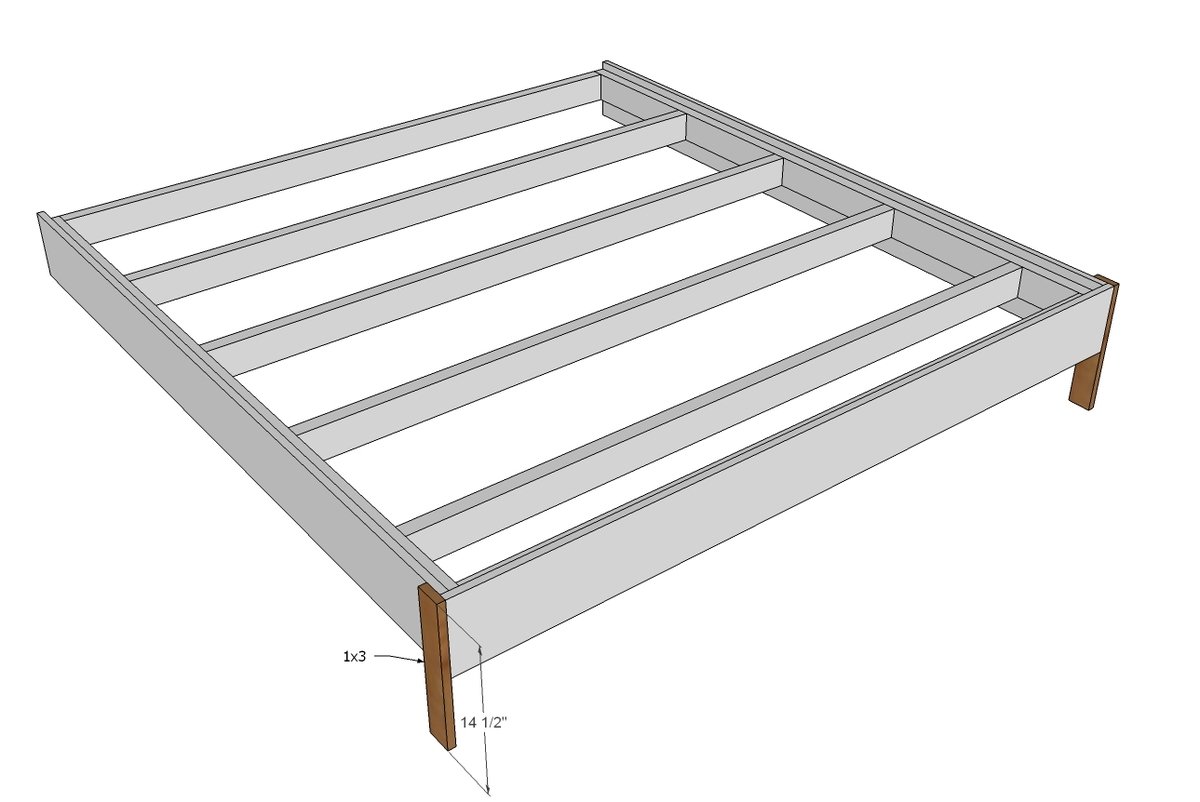
Step 12
And then attach the end leg 1x4 as shown here. Keep outside edge as flush as possible.
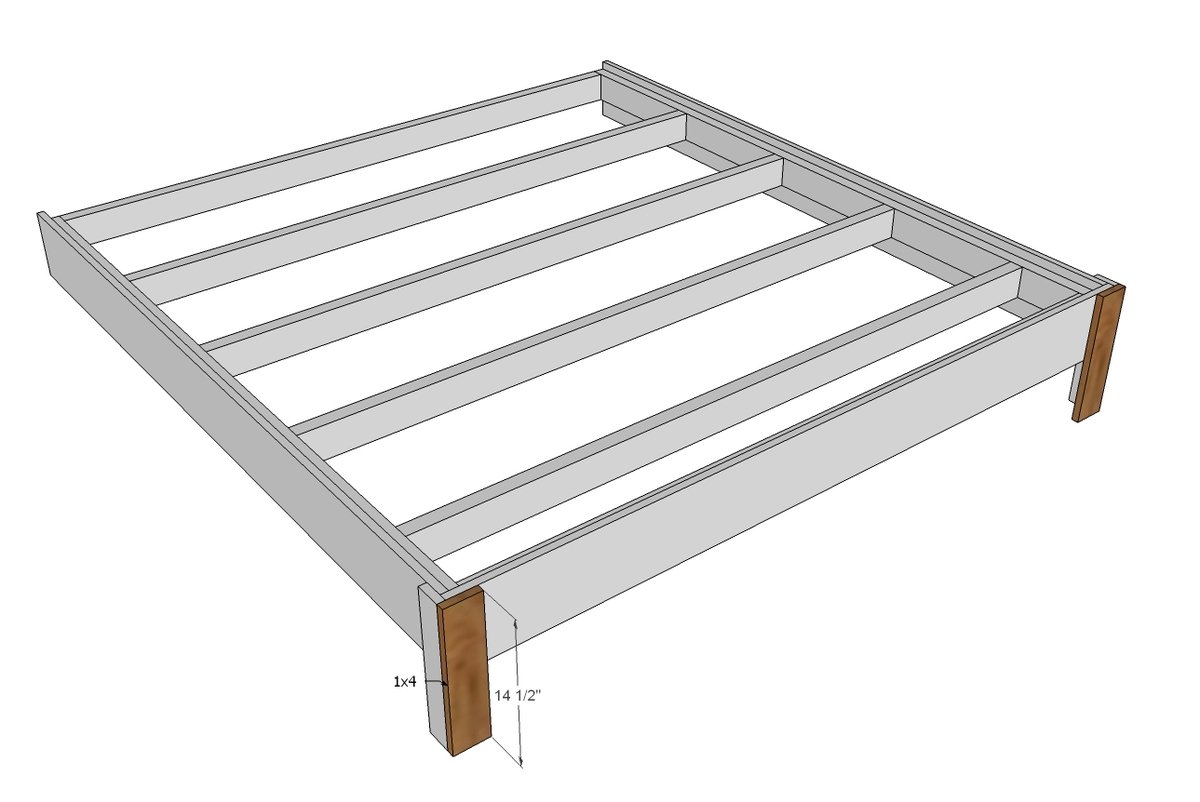
Step 13
Fit base to headboard and clamp in place. Drill holes and attach with bolts. Use washer and nuts.
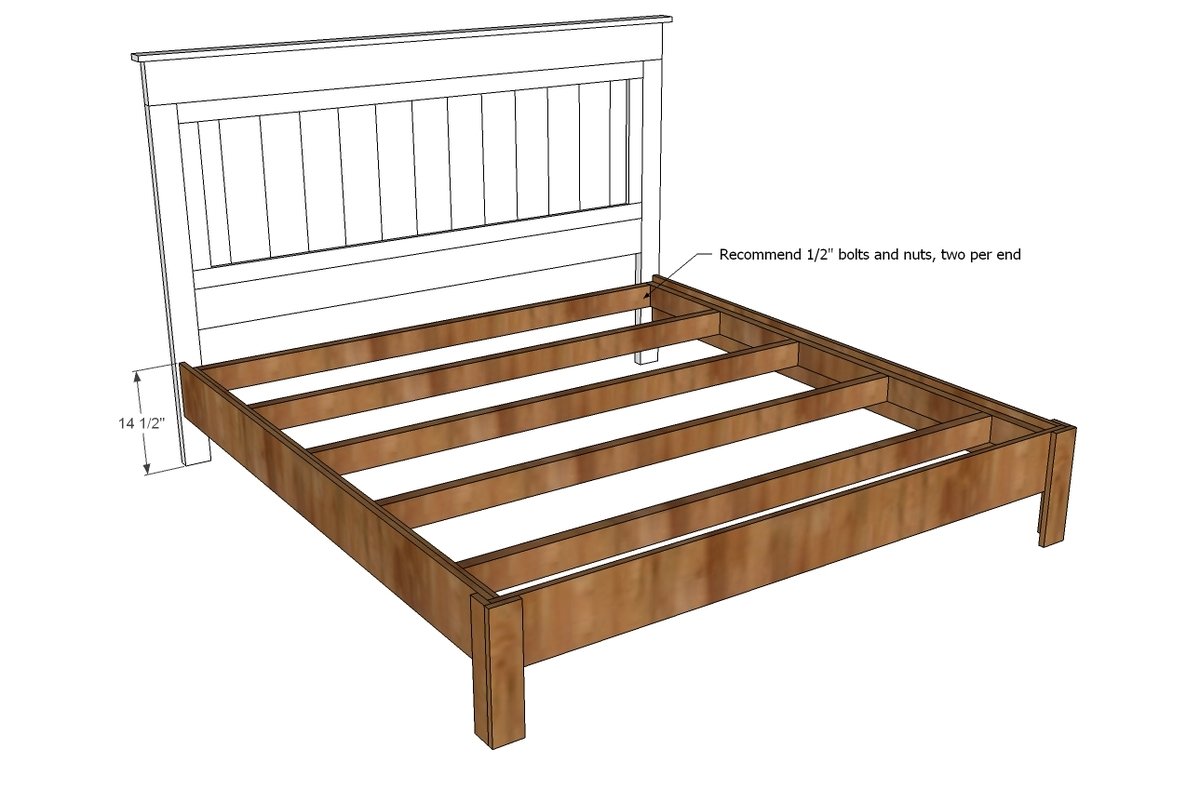
Step 14
You'll need additional support for a king. I recommend at minimum 4 center legs to bear the weight of the bed as shown. For heavier loads, you can add more legs.
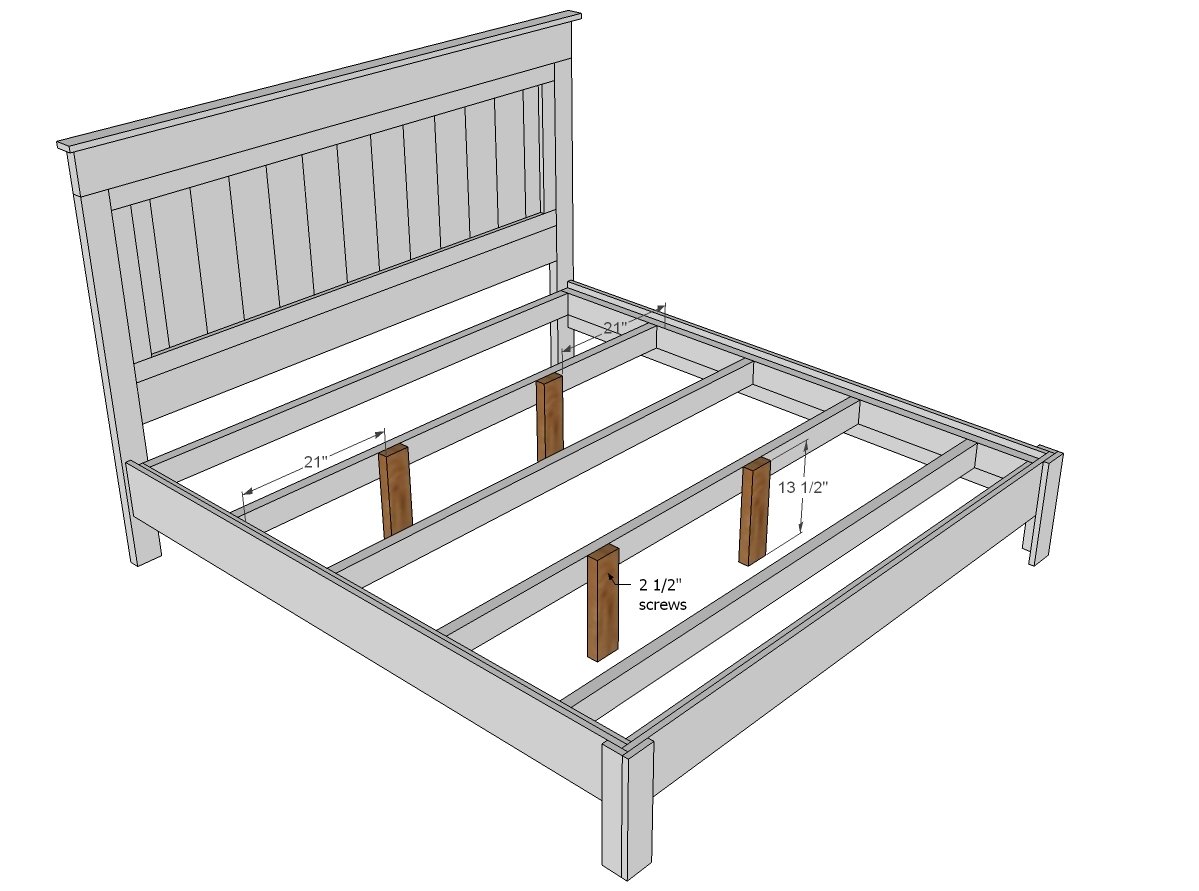
Finishing
Sand all surfaces, starting with a medium grit and finishing with fine. Wipe off the dust, fill any holes or gaps with wood filler, and sand smooth once dry. Apply primer if you're painting, then finish with your choice of paint or stain and seal with a durable clear topcoat. For outdoor projects, use exterior-rated primer, paint or stain, and sealer so the piece stands up to the weather.
Source (temporary): https://www.ana-white.com/woodworking-projects/king-size-fancy-farmhouse-bed