King Size Framed Upholstered Headboard
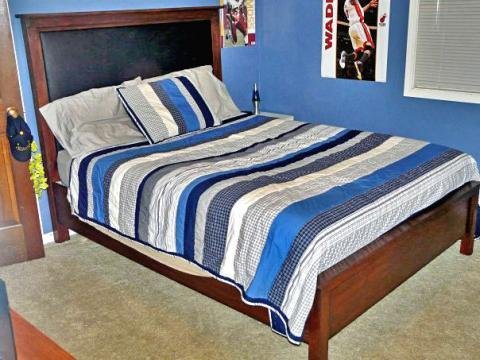
Create a luxurious headboard for your bed with these simple plans. Special thanks to Amy for sharing her photo. Amy also built the bed (it's a queen size) from her own plan.
Specifications
| Project type | Upholstered Projects |
|---|---|
| Room | Bedroom |
| Style | Cottage Style Furniture Plans |
| Difficulty | Intermediate |
| Estimated cost | $50 - $100 |
Dimensions
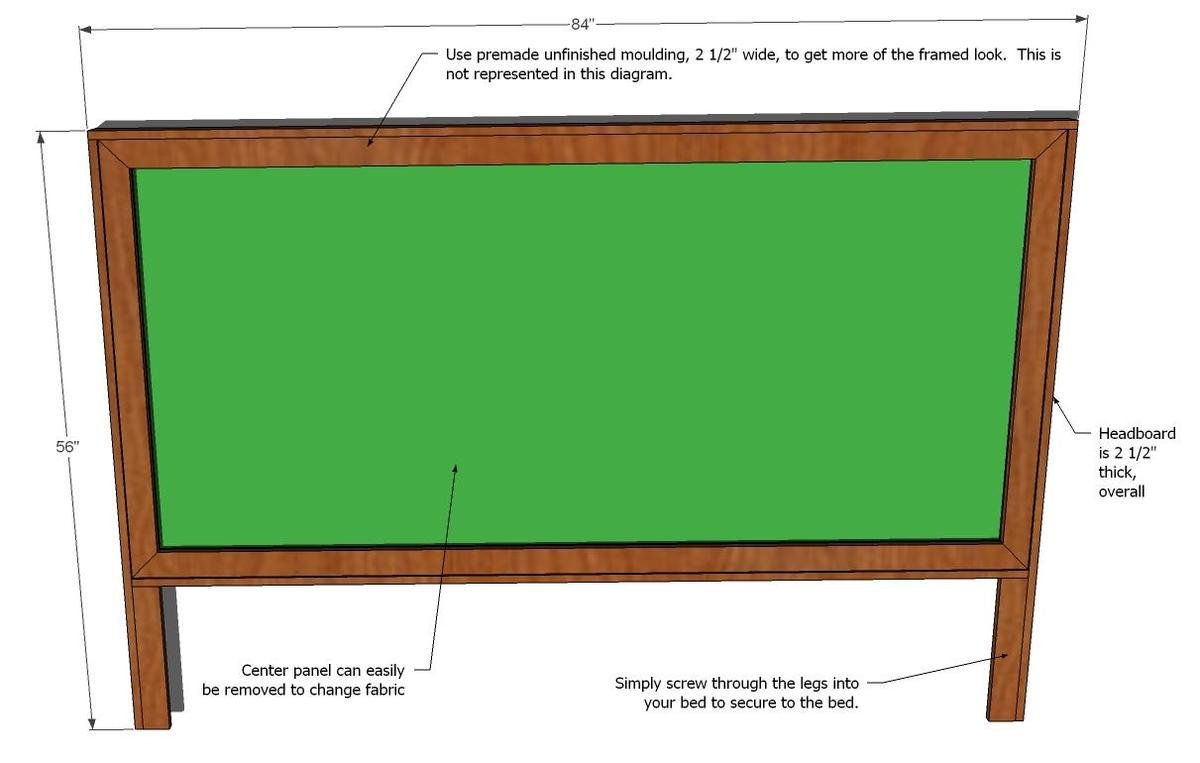
Use the size-specific shopping and cut lists below.
Shopping List
1 – 3/4 MDF or plywood (can be low grade, but make sure the plywood is straight and not damaged)
1 – 1/2 Plywood (can be low grade, but make sure the plywood is straight and not damaged)
6 – 1×3 boards
2 – 10′ sticks of 2 1/2″ unfinished moulding
2″ nails
1 1/4″ nails
Glue
Wood Filler
Sand Paper
Paint, stain or varnish
Fabric (approximately 2 1/2 yards, at least 45″ width)
Foam Padding
Staples
1″ screws to screw panel to back
2″ screws to fasten headboard to the bed or to the wall
Cut List
A) 1 – 3/4″ Plywood or MDF @ 76 1/2″ x 40” (Back, you can use builder’s grade plywood)
B) 2 – 1×3 @ 76 1/2″ (Top and Bottom Trims, Bottom Layer)
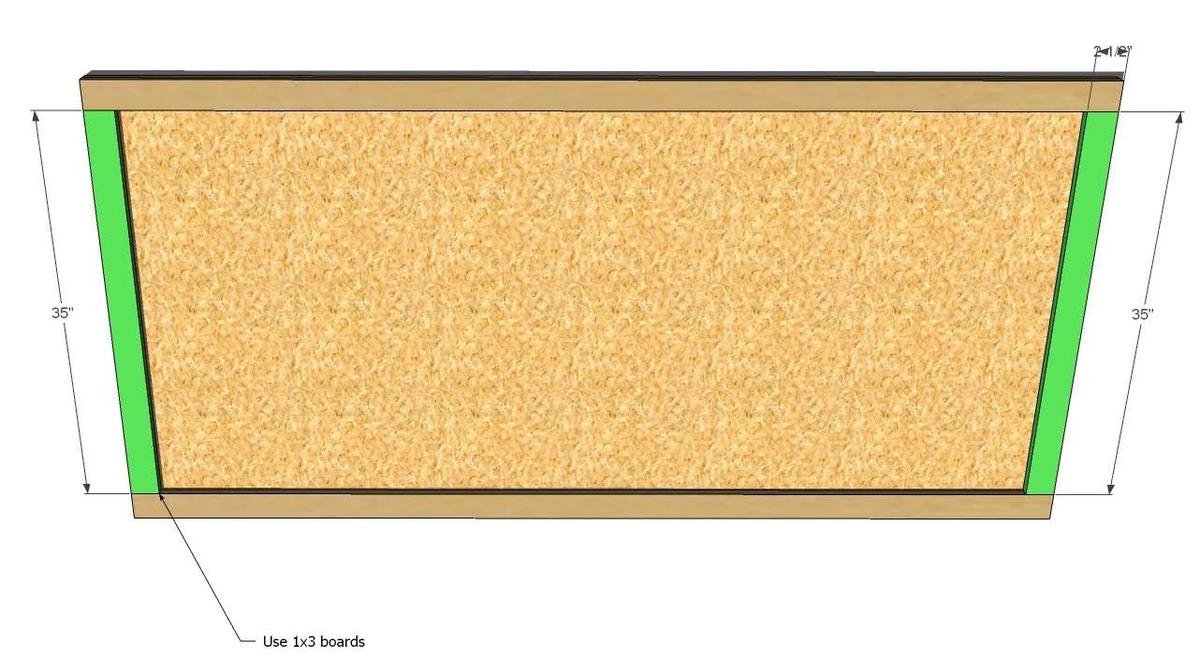
C) 2 – 1×3 @ 35″ (Side Trim, Bottom Layer)
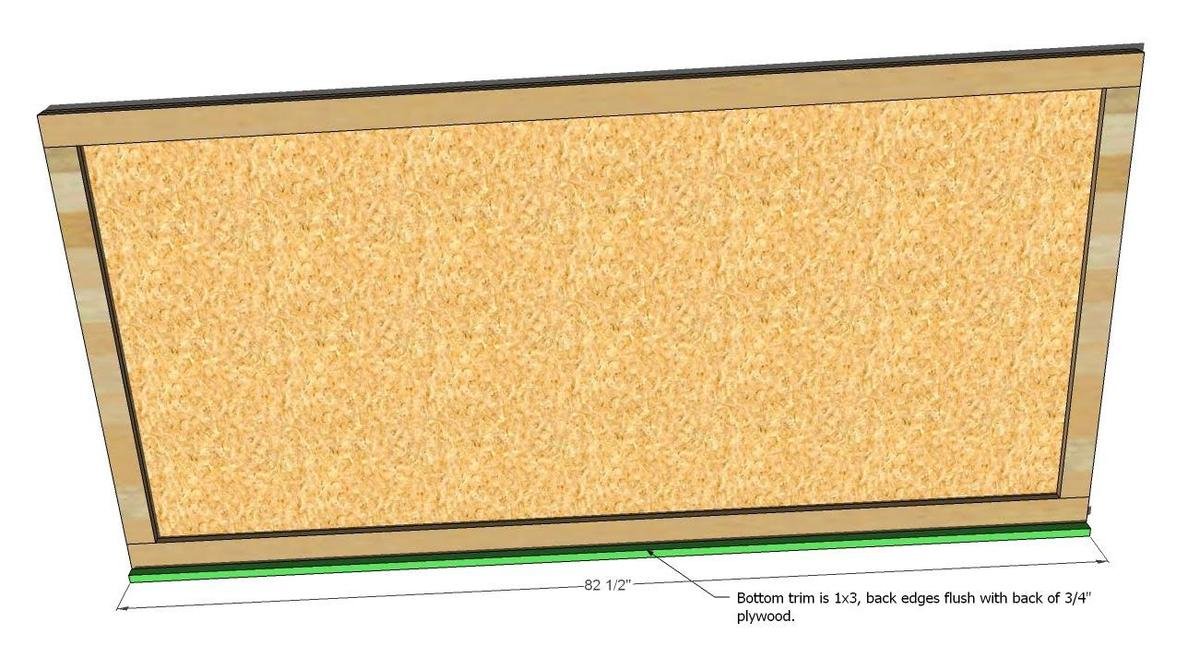
D) 1 – 1×3 @ 76 1/2″ (Bottom)
E) 2 – 1×3 @ 55 1/4″ (Legs)
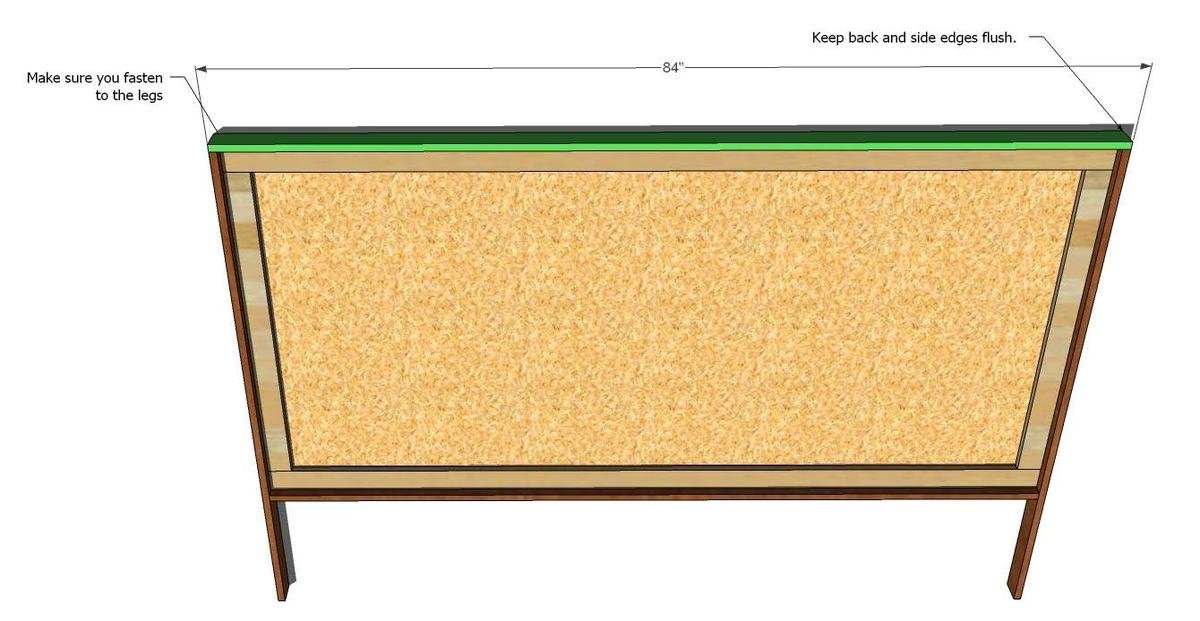
F) 1 – 1×3 @ 78″ (Top)
G) 2 – 1×3 @ 14 1/2″ (Fronts of Legs) Store bought moulding, cut to fit the opening, covering the 1×3 bottom layer trim. 1/2″ plywood, cut to fit the opening (approximately 35″ x 71 1/2″)
Tools
- measuring tape
- square
- pencil
- safety glasses
- hearing protection
- circular saw
- nailer
- sander
Step-by-step Instructions
Please note that the above piece should be cut at 76 1/2″ x 40″
1. Back. Cut or have cut the back of the headboard. Overall dimensions are 76 1/2″ x 40″
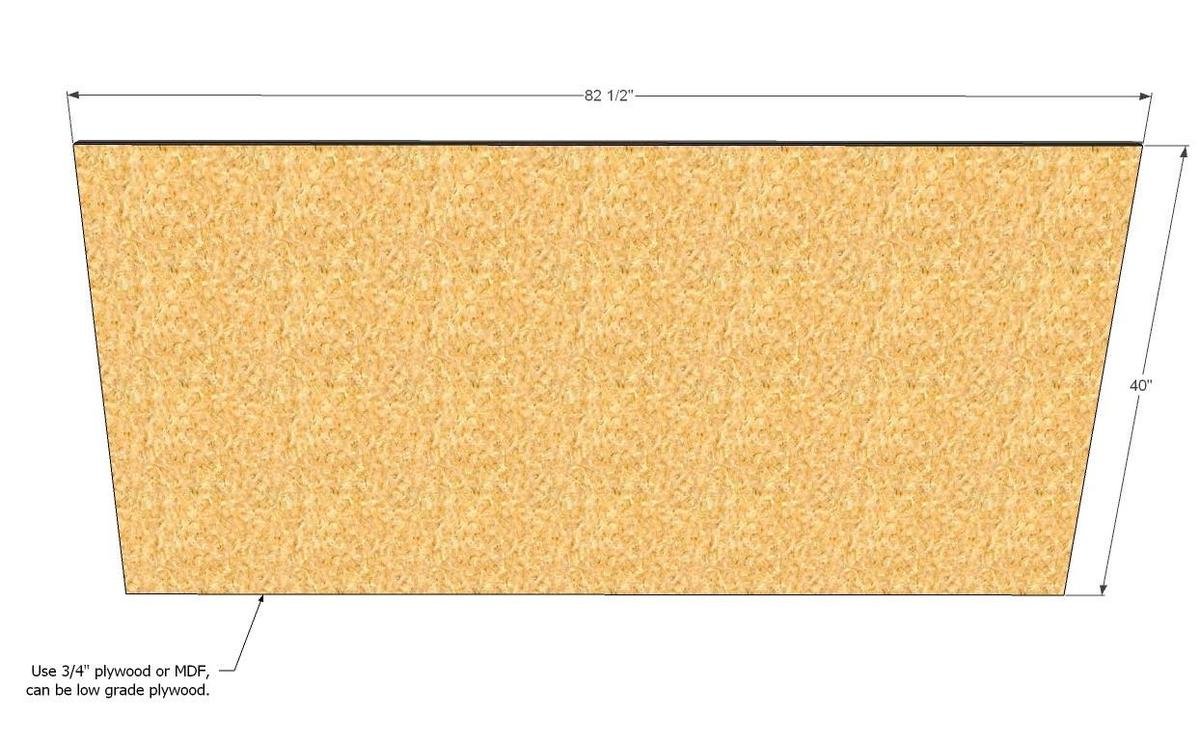
Please note that the top and bottom trim, boards B, will be 1×3 cut at 76 1/2″ overall length.
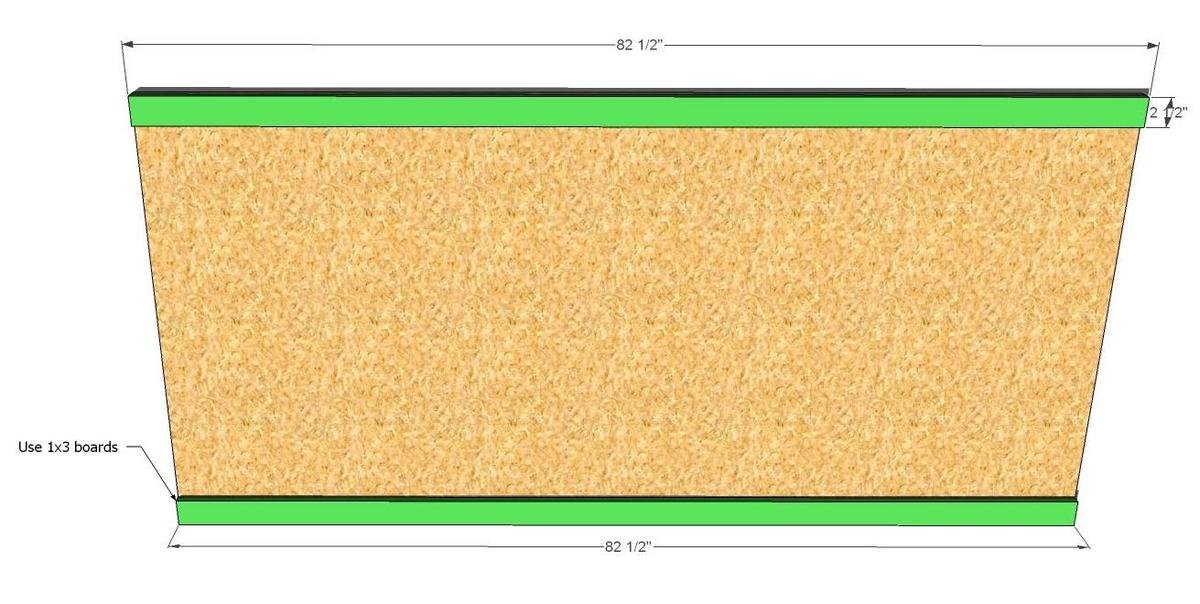
2. Top and Bottom Trim, Bottom Layer. Use 1 1/4″ nails and glue to fasten the trim pieces to the back, as shown above.
Step 3
3. Side Trim, Bottom Layer. Fasten the side trim to the back, as shown above. Use 1 1/4″ nails and glue. Keep outside edges flush.
Please note that the bottom piece will be 76 1/2″, and not 82 1/2″ as shown above.
4. Bottom. Fasten the bottom in place, using 2″ nails and glue. Be certain to fasten to both the back and the bottom layers of trim. Keep back and sides flush. The front will overhang 1″.
Step 5
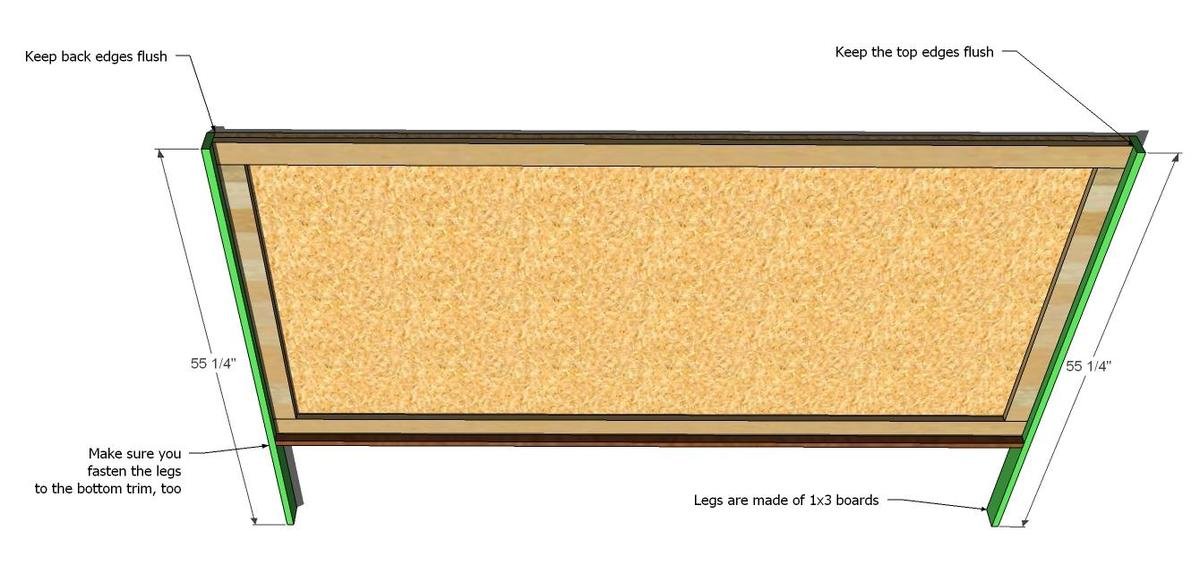
Please note that the top will be 78″ long and not 84″ as shown above.
6. Top. Fasten the top in place, as shown above. The top will be a 1×3 cut at 78″, not 84″ as shown above. You will need to fasten with the 2″ nails and glue, fastening to the legs, top trim and back.
Step 7
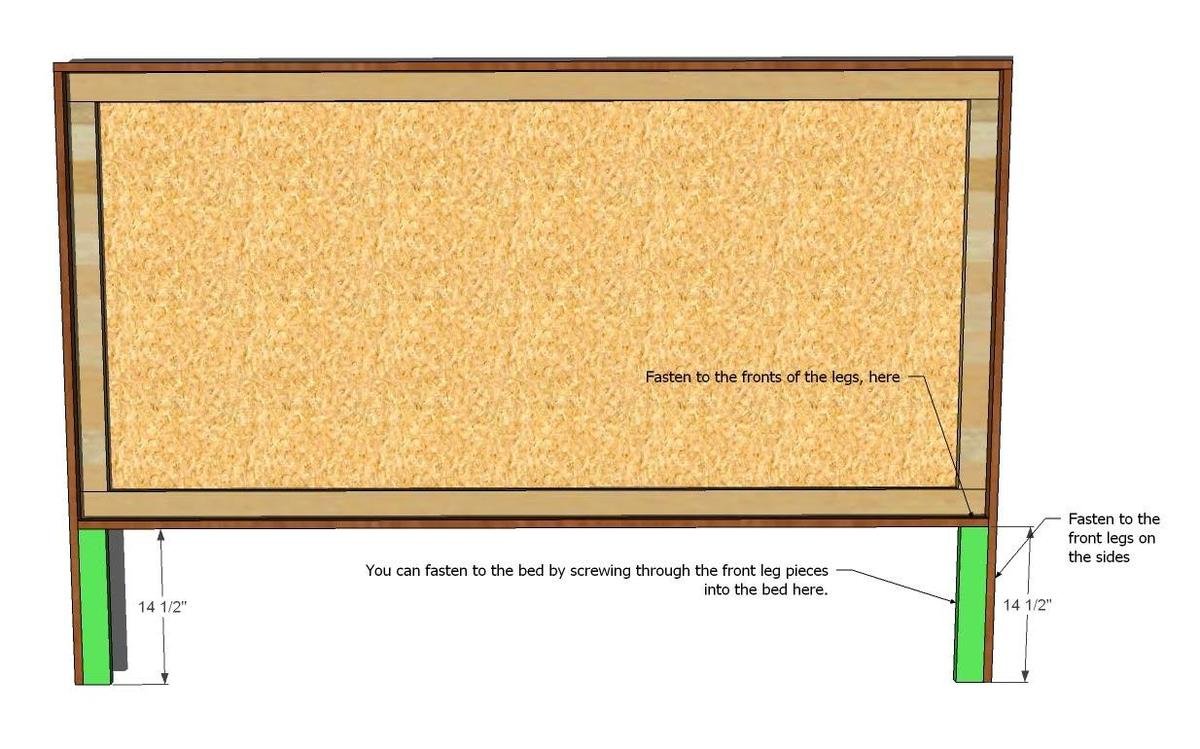
7. Front Legs. Fasten with 2″ nails through thes sides of the legs into the side edge of the fronts of the legs. Also fasten the top of the leg fronts to the headboard as shown above.
Step 8
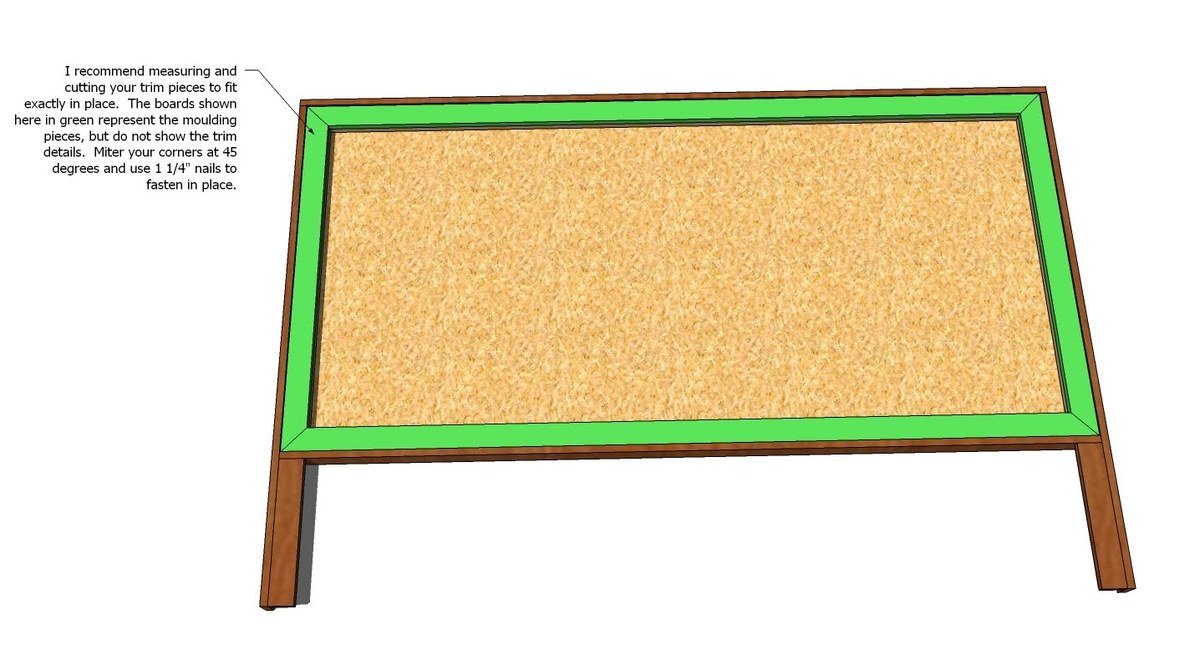
Frame. Measure and cut your frame from the store bought moulding. Miter the corners at 45 degrees. Uses 1 1/4″ nails and glue.
Step 9
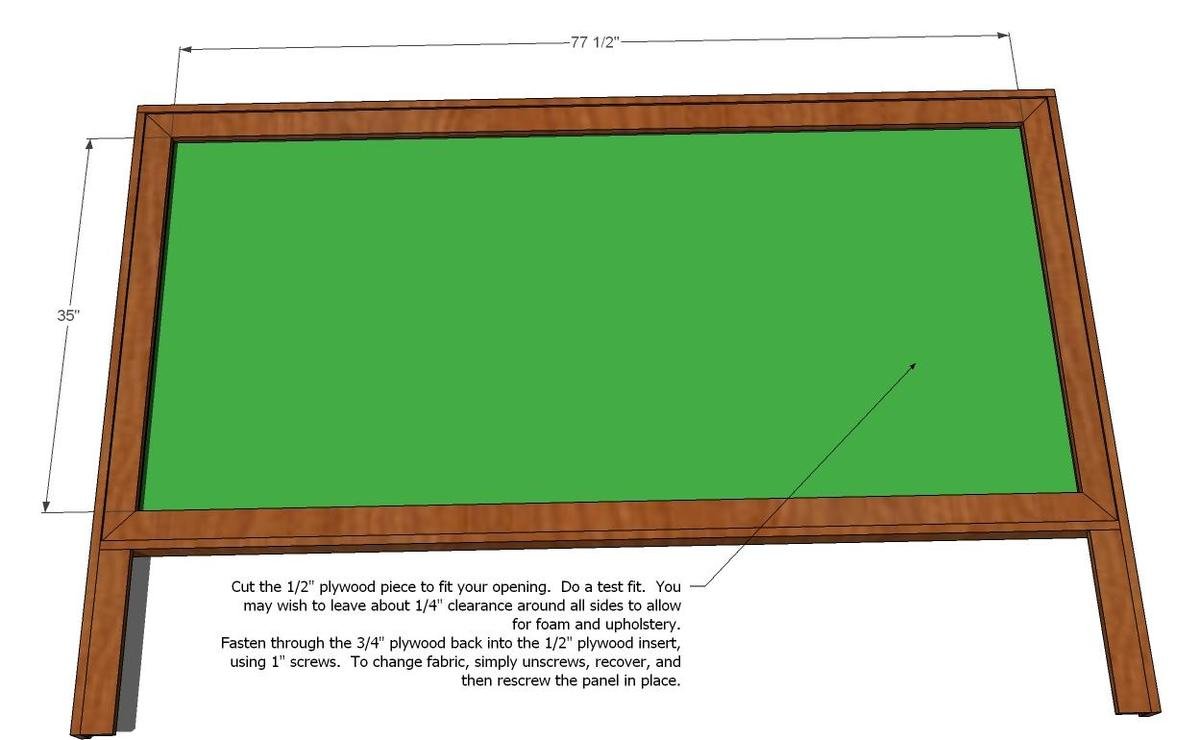
Fabric Insert. Measure and cut the panel insert, shown in green above. Your panel should measure approximately 35″ high x 71 1/2″ long. This is correct, and the dimensions given above for the length are 6″ too long. Dry fit your panel. You may wish to leave some room around the panel to give allowance for foam backing and fabric. When you are satisfied with the fit of the panel, cover with foam, batting and fabric, stapling on the back. Using the 1″ screws, screw from the back of the headboard into the center panel, holding the panel in place. You will want screws in each of the corners, and in the center.
Finishing
Sand all surfaces, starting with a medium grit and finishing with fine. Wipe off the dust, fill any holes or gaps with wood filler, and sand smooth once dry. Apply primer if you're painting, then finish with your choice of paint or stain and seal with a durable clear topcoat. For outdoor projects, use exterior-rated primer, paint or stain, and sealer so the piece stands up to the weather.
Source (temporary): https://www.ana-white.com/woodworking-projects/king-size-framed-upholstered-headboard