Kitchen Cabinet Sink Base 36 Full Overlay Face Frame
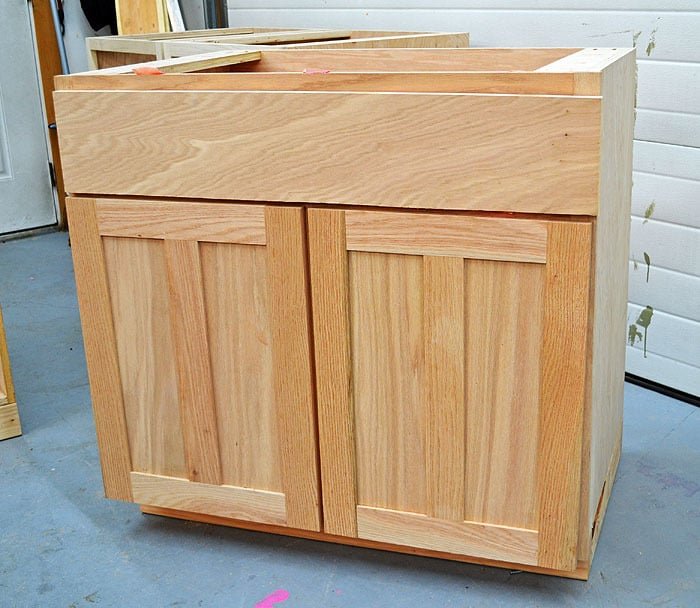
Build your own kitchen cabinets! to DIY standard sink base with full overlay doors and face frame. As shown, built for about $100 using premium PureBond 3/4" Hardwood Oak plywood, hardwood face frame and doors. 3D Model to Download With all kitchen plans, I'll be uploading 3D Models to Google 3D Warehouse in a Collection so you can download the models and design your own kitchens! I've already added a few plans to the collection, more will be coming as I build and blog more plans. This model is actually a 36" wide drawer/door base - it's the same as the sink base, but you just leave the drawer out and the back off as done in this plan. I'll put together another plan for the 36" wide drawer/door base in a bit.
Specifications
| Project type | Cabinet Plans |
|---|---|
| Room | kitchen |
| Style | Cottage Style Furniture Plans |
| Difficulty | Intermediate |
| Estimated cost | $50 - $100 |
Dimensions
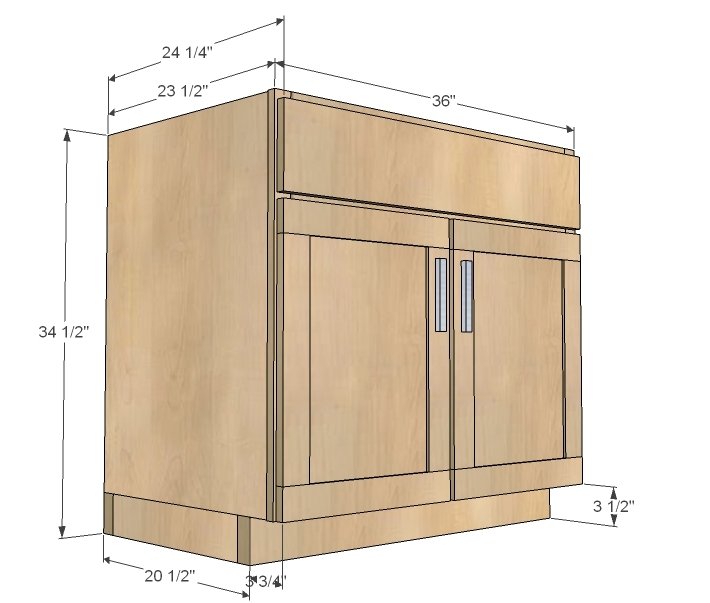
Use the size-specific shopping and cut lists below.
Shopping List
1 sheet 3/4" cabinet grade plywood, MDF or Melamine (shown built with PureBond Formaldehyde Free Plywood in Oak ) ripped into strips 22 3/4" wide, 8 feet long (you will only need one strip, but you will have to buy a whole sheet to get the strip)- SAVE THE SCRAP STRIP!!!
1 - 2x4 @ 8 feet long or stud length
14 feet of 1x2 boards
2 feet of 1x3 boards
1x3 furring strips or scrap plywood for supports
Doors and Drawer Face not included in this plan
Cut List
2 - 3/4" plywood @ 22 3/4" wide x 31" long
1 - 3/4" plywood @ 22 3/4" wide x 34" long
3 - 1x2 @ 33"
2 - 1x2 @ 31"
1 - 1x3 @ 21"
2 - supports @ 34"
2 - supports @ 22"
2 - 2x4 @ 17 1/2"
2 - 2x4 @ 35 1/2"
Tools
- measuring tape
- square
- pencil
- safety glasses
- hearing protection
- kreg-jig
- drill
- compound miter saw
- table saw
- sander
Step-by-step Instructions
Step 1
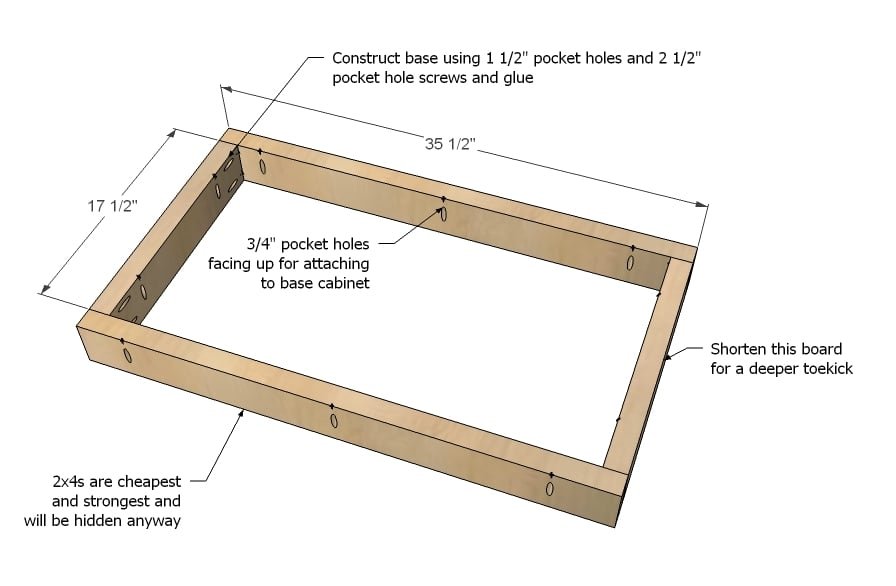
Please read this post before beginning any cabinet construction. It talks about general building techniques, how to modify, and other good stuff about cabinet building! Build the base as shown in diagram. Plan ahead and drill pocket holes to attach base to underside of cabinet in later steps. Once base is built, set aside. Note that base is 1/2" less in width than cabinet to account for face frame overhang.
Step 2
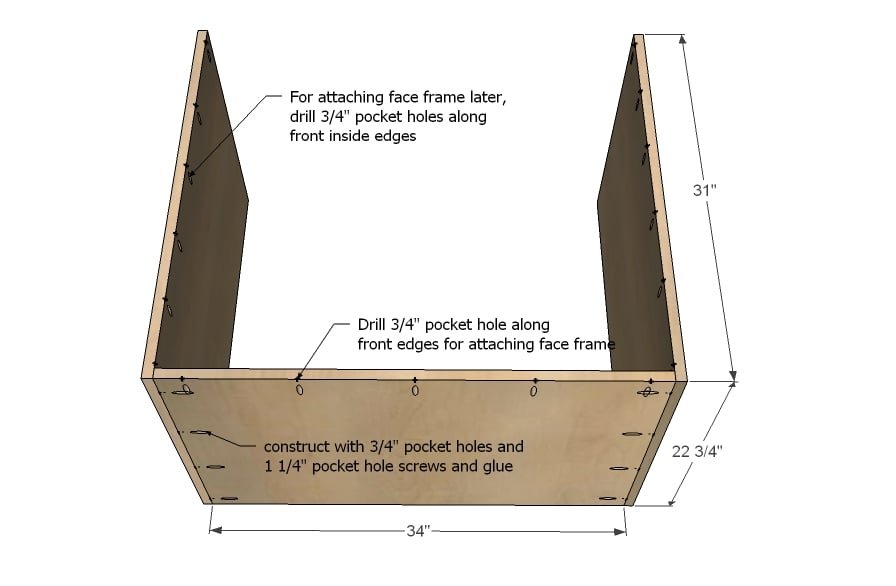
Build the carcase as shown in diagram. Make sure you also drill 3/4" pocket holes along front edges for attaching face frames in later steps.
Step 3
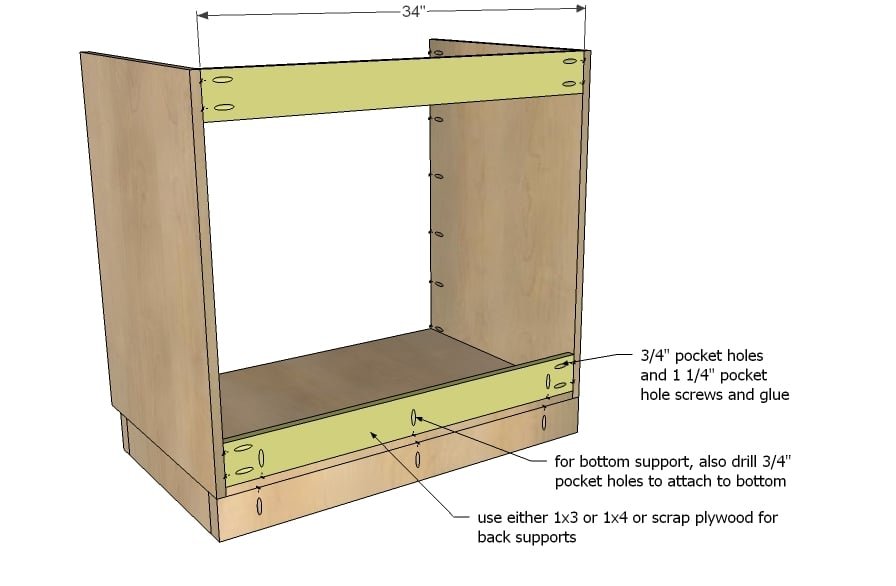
We used scrap plywood strip for the back supports, but 1x3 or 1x4 boards can also be used. These supports add a ton of strength to the cabinet - especially since this is a sink base and is backless.
Step 4
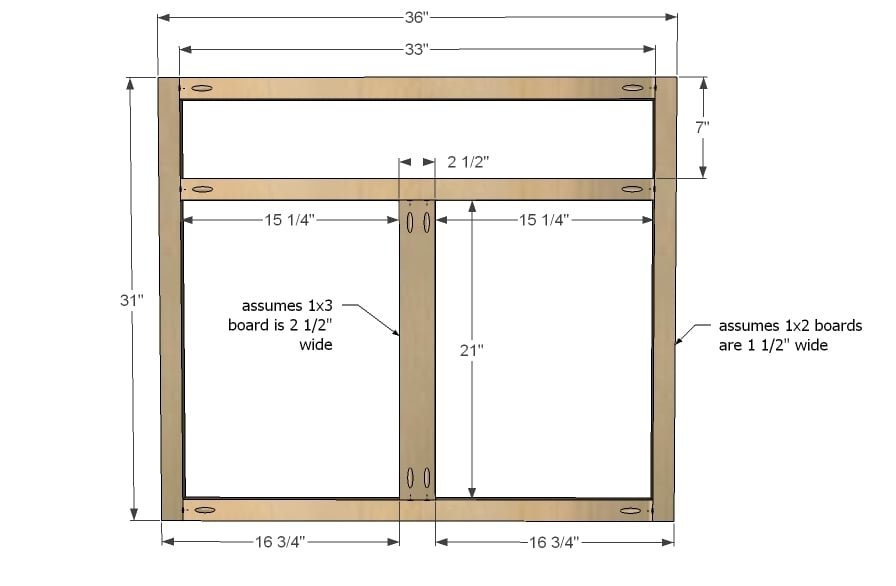
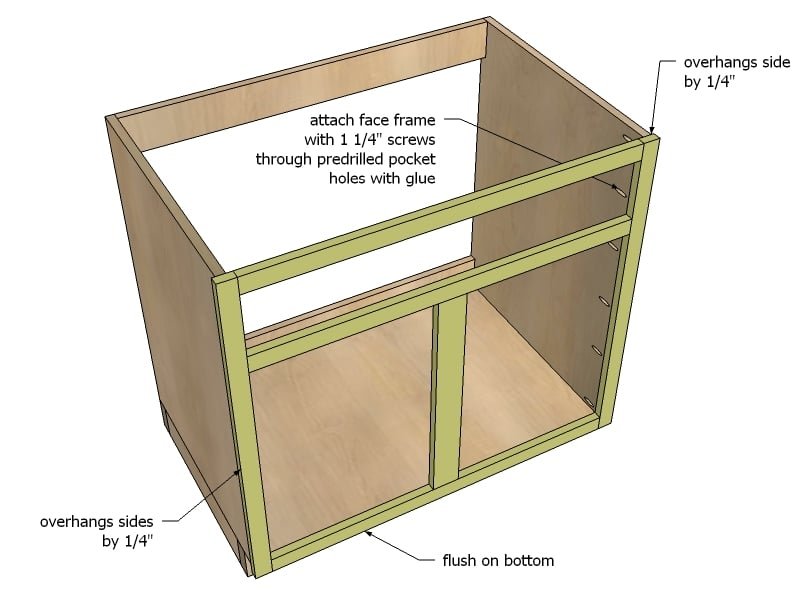
The trick to face frames is clamping each joint, marking each joint, and having a flat level surface. Use glue and build with 3/4" pocket holes and 1 1/4" pocket hole screws. NOTE: If your face frames are hardwood - recommended if you are attaching hinges to the face frame - then use fine threaded pocket hole screws.
Step 5
Step 6
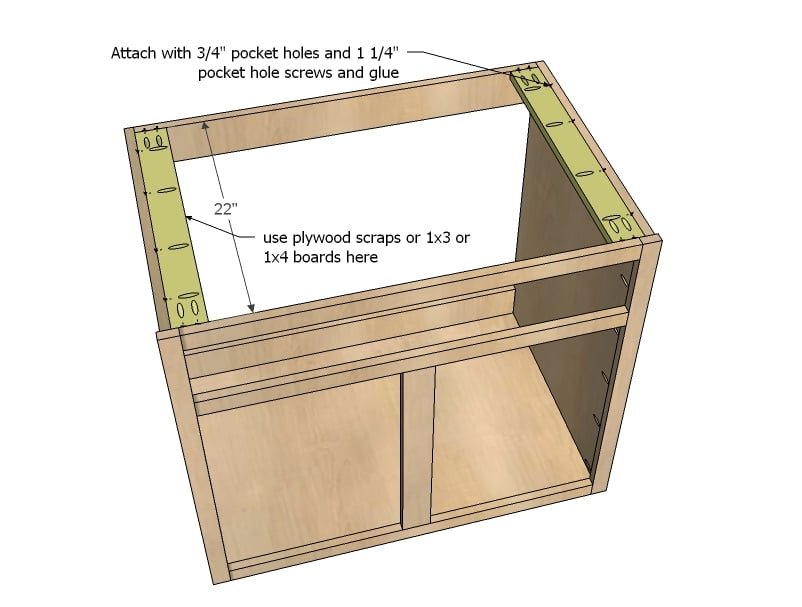
These guys are for attaching the top plywood when all your cabinets are in place to support the countertop. They also provide corner support, keeping your cabinets square. We used scrap plywood pieces, but 1x3 or 1x4 boards would do the trick too.
Step 7
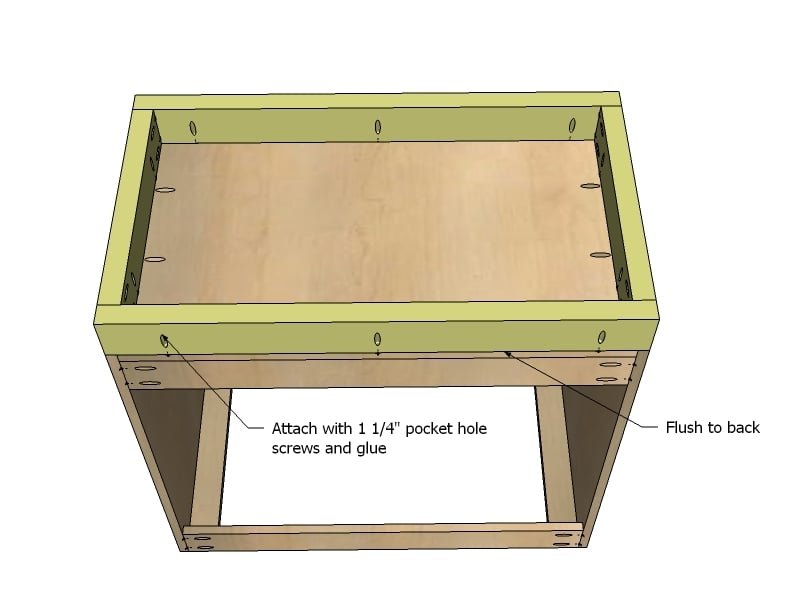
Once the carcase has been built, attach the base, flush to back and sides.
Step 8
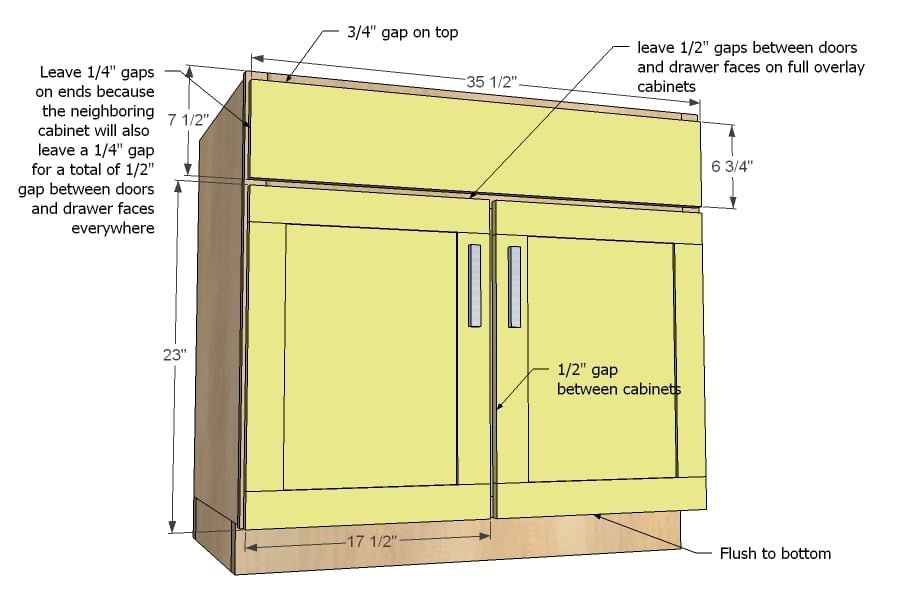
We found the most time consuming part of building the cabinets was the doors. Here's the measurements but I'm going to save door construction for another post - so we can use the same building techniques regardless of the door size. The drawer face is of course just a 1x8 ripped down to size.
Step 9
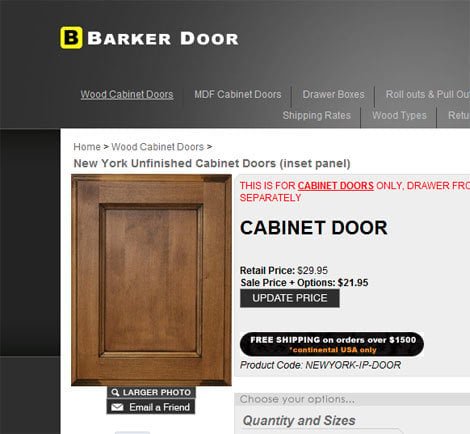
An alternative is to use a door building service. Because doors take such high abuse and are more likely to warp, could be a good idea to look into ordering doors unfinished. Doors also require more tools and know-how, and are the part that you see on your cabinets. They are also cheap to ship. The cabinet box cost us about $50 to build. Ordering two doors will put us up to $90 - not bad for PureBond 3/4" plywood cabinets, built with glue and screws! Very reasonable, especially if you are planning lots of open cabinetry up top (no doors = less $$$$). PS - Barker door has no idea who I am, they just are the least expensive door option I've found online. I have never used them or worked with them but we are considering ordering doors from them for the second kitchen for fancier drawers and doors. Would love to hear your thoughts on ordering doors!
Finishing
Sand all surfaces, starting with a medium grit and finishing with fine. Wipe off the dust, fill any holes or gaps with wood filler, and sand smooth once dry. Apply primer if you're painting, then finish with your choice of paint or stain and seal with a durable clear topcoat. For outdoor projects, use exterior-rated primer, paint or stain, and sealer so the piece stands up to the weather.
Source (temporary): https://www.ana-white.com/woodworking-projects/kitchen-cabinet-sink-base-36-full-overlay-face-frame