Large 4 Drawer Dresser
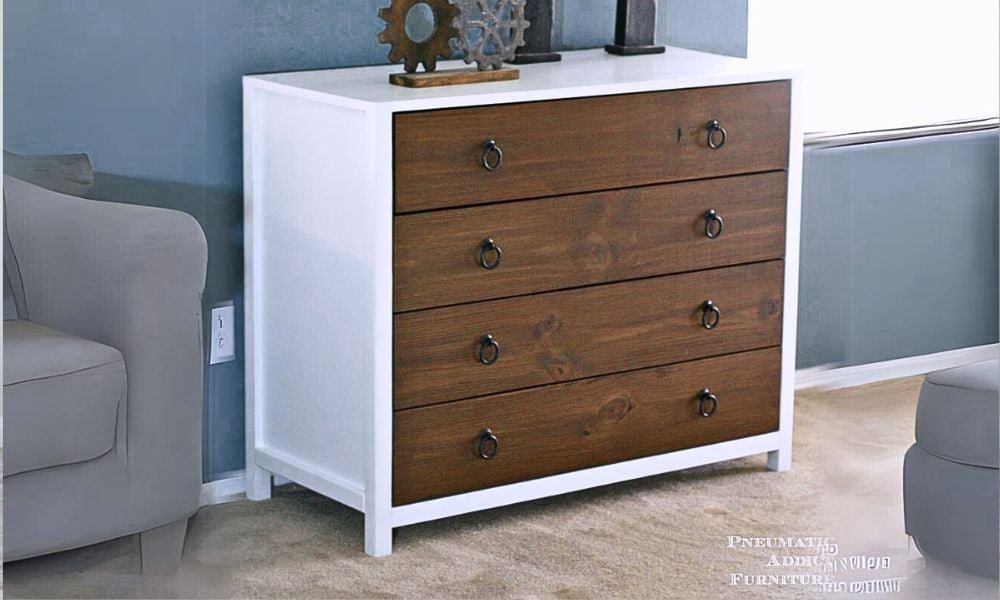
DIY 4 drawer dresser with wide, roomy drawers. This is a perfect accent dresser for a small space, room, or entry! We love the wide drawers with wood faces, to add texture and beauty to your space. This is a free step by step project plan from including diagrams, shopping, cut list and reader photos.
Specifications
| Project type | Dresser Plans |
|---|---|
| Room | Bedroom |
| Style | Modern Style Furniture Plans |
| Difficulty | Intermediate |
| Estimated cost | $100-$150 |
Shopping List
- 1 sheet of 3/4" plywood cut into strips 15-3/4" wide
- 3 - 2x2 @ 8 feet long
- 2 - 1x2 @ 8 feet long
- 48" x 48" sheet of 1/4" plywood (for back, save scrap piece as a drawer bottom)
- 5 - 1x6 @ 8 feet long
- 2 - 1x8 @ 8 feet long (MUST be 7-1/4" wide)
- 4 - 16" drawer slides
Cut List
- 2 - 3/4" plywood 15-3/4" x 31-1/4" (sides)
- 4- 2x2 @ 33-1/2" (legs)
- 2 - 1x2 @ 15-3/4" (side trim)
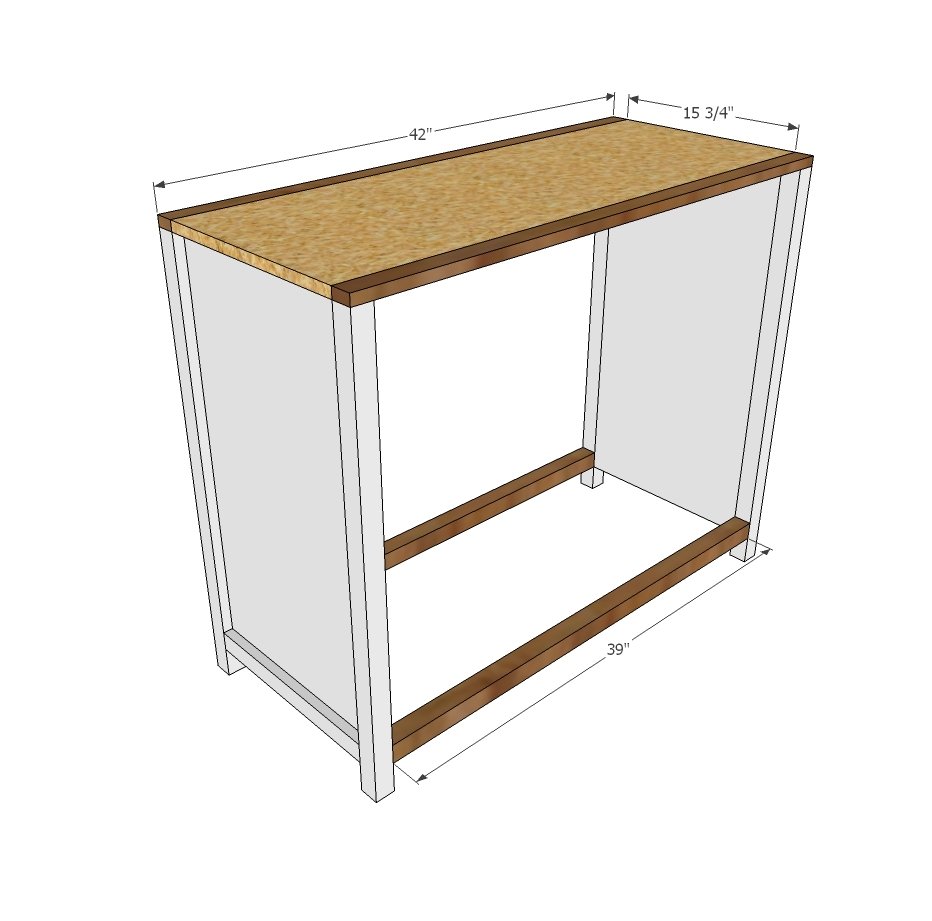
- 2 - 2x2 @ 39" (bottom support)
- 1 - 3/4" plywood @ 15-3/4" x 42" (top)
- 2 - 1x2 @ 42" (top trim)
- 1 - 1/4" plywood @ 42" x 31-3/4"
- 4 - 3/4" plywood @ 15-3/4" x 36-1/2" (drawer bottoms) - to conserve materials, consider cutting the top drawer bottom out of scrap 1/4" plywood from the back and attaching to bottom
- 8 - 1x6 @ 36-1/2" (drawer front and back)
- 8 - 1x6 @ 17-1/4" (drawer sides)
- 4 - 1x8 @ 38-3/4" (drawer faces)
Tools
- measuring tape
- square
- pencil
- safety glasses
- hearing protection
- kreg-jig
- drill
- circular saw
- nailer
- sander
Step-by-step Instructions
Step 1
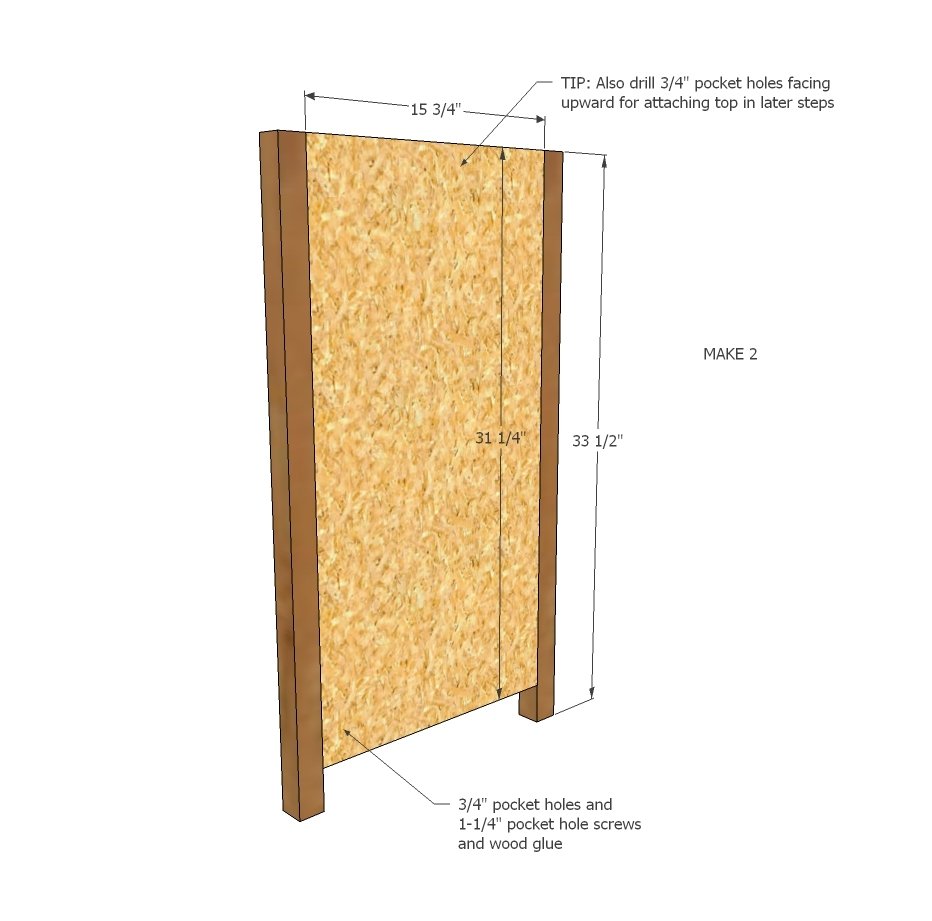
Build two of the sides by attaching side panels to legs.
Step 2
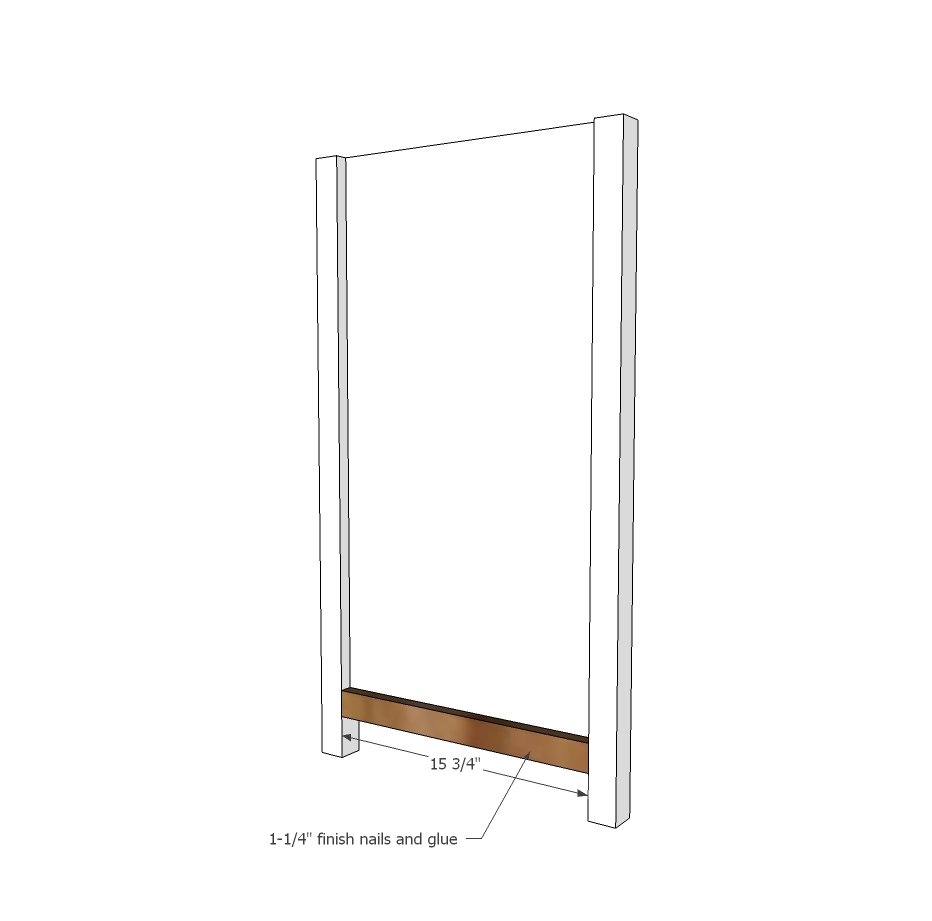
Trim outside bottom of side panels with 1x2. Use glue and 1-1/4" nails. Tip for perfectionist - you could attach the 1x2 to the legs first with pocket holes, and then add the panel, screwing on from the back with 1-1/4" screws.
Step 3
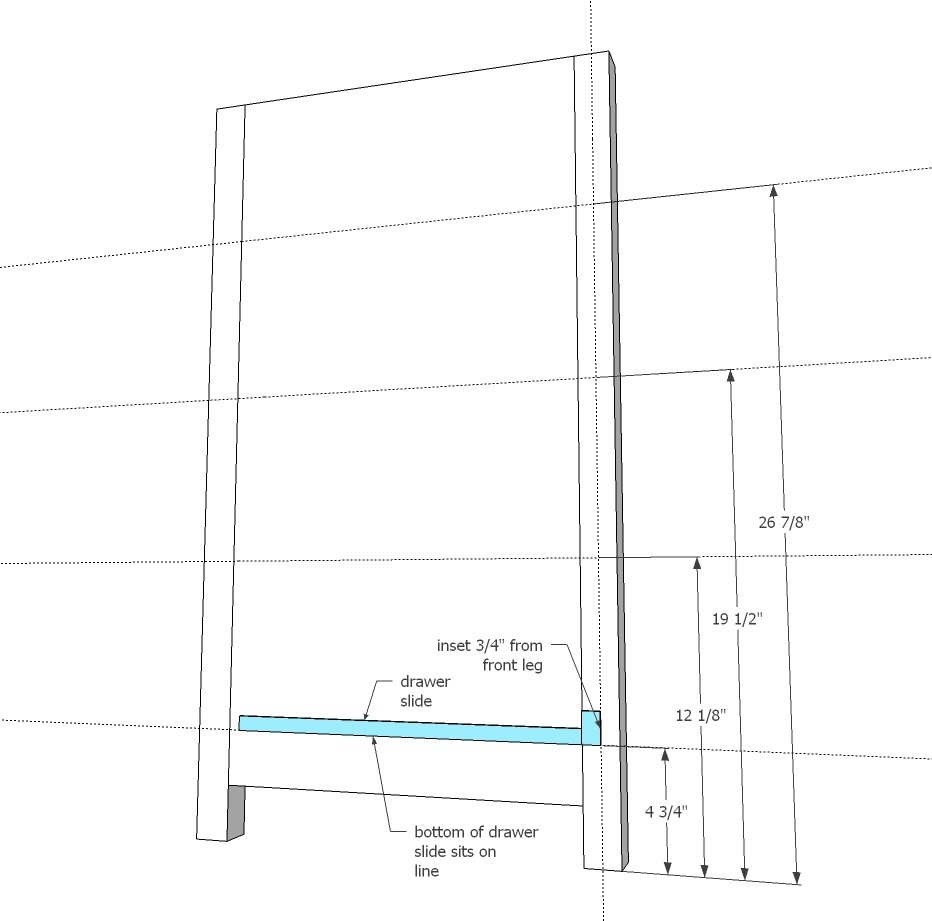
If you want to add the drawer slides now, sometimes thats easier. You can also just mark the insides for drawer slides and install in later steps.
Step 4
Attach top front trim to top panel. Attach bottom pieces to sides, this time with pocket hole jig set for 1-1/2" thickness and using 2-1/2" long pocket hole screws.
Here's a quick video on how to size drawers and install
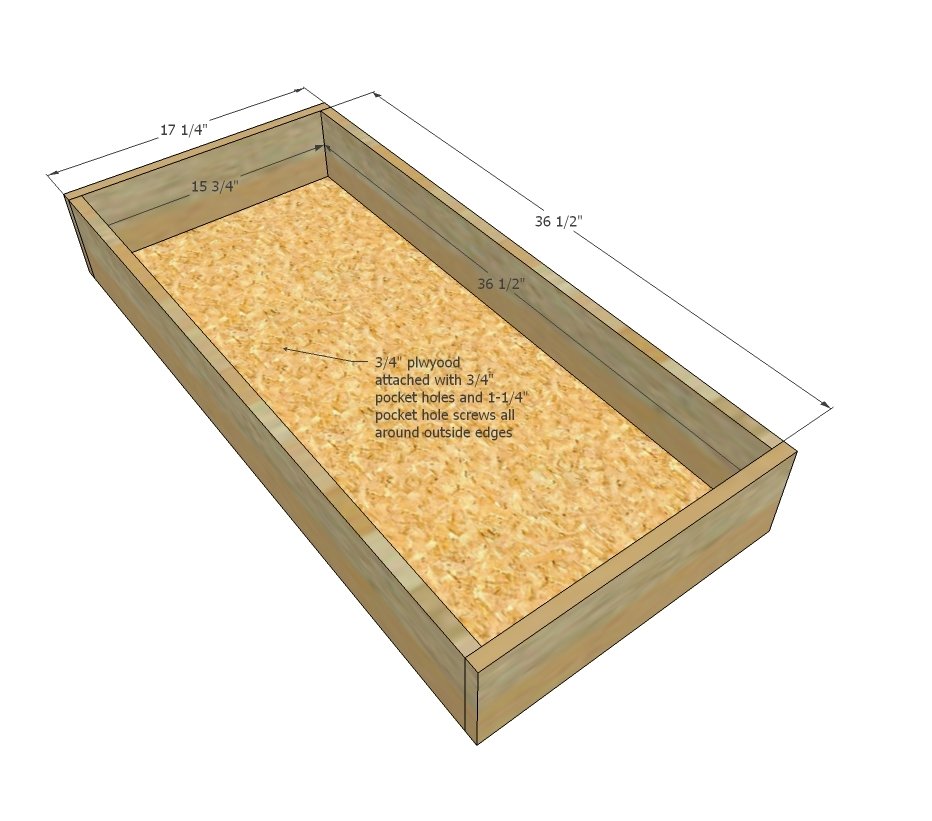
Step 6
Install drawers inset 3/4" from outside to allow for drawer faces.
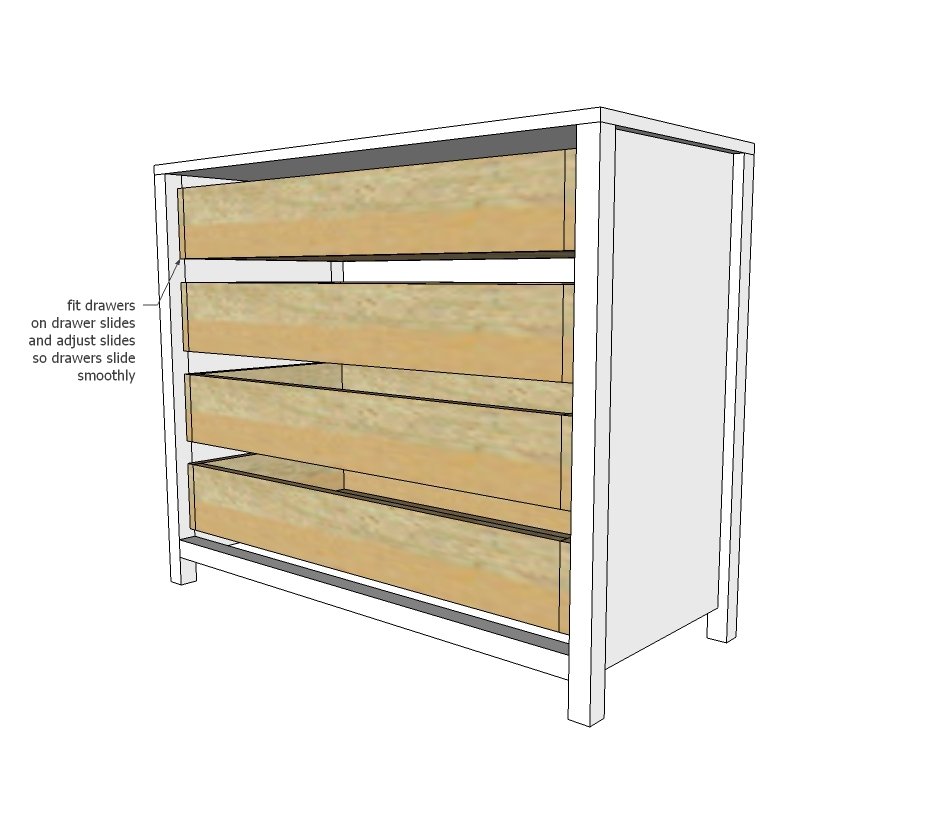
Step 7
Attach center supports to keep dresser from pulling apart at center.
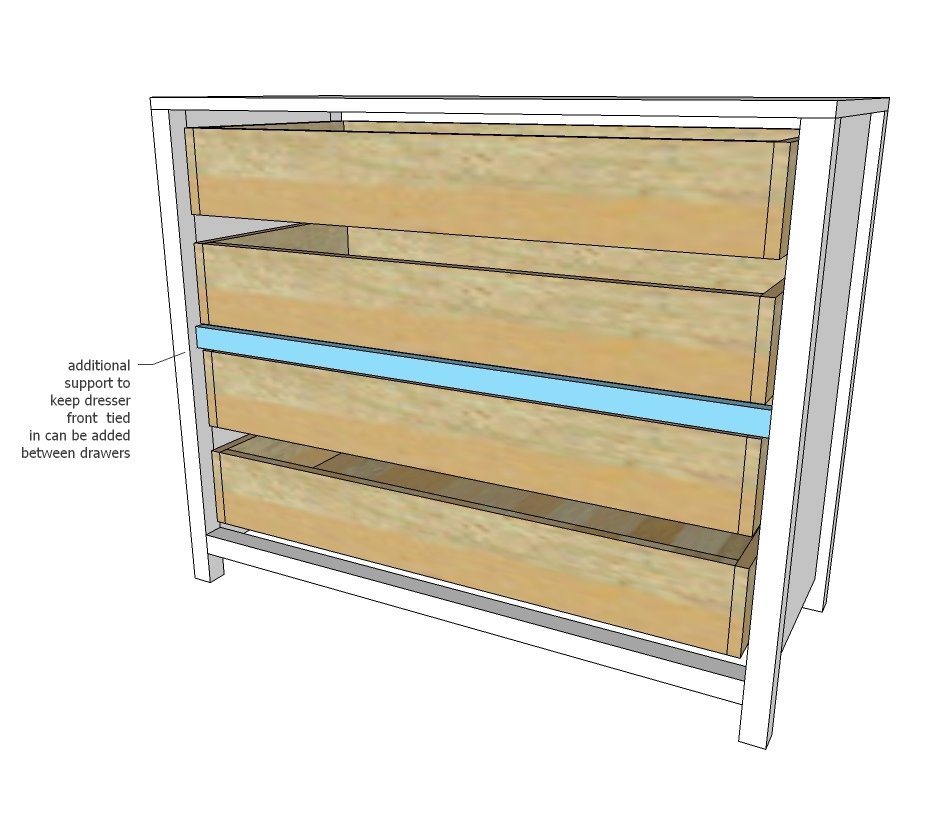
Step 8
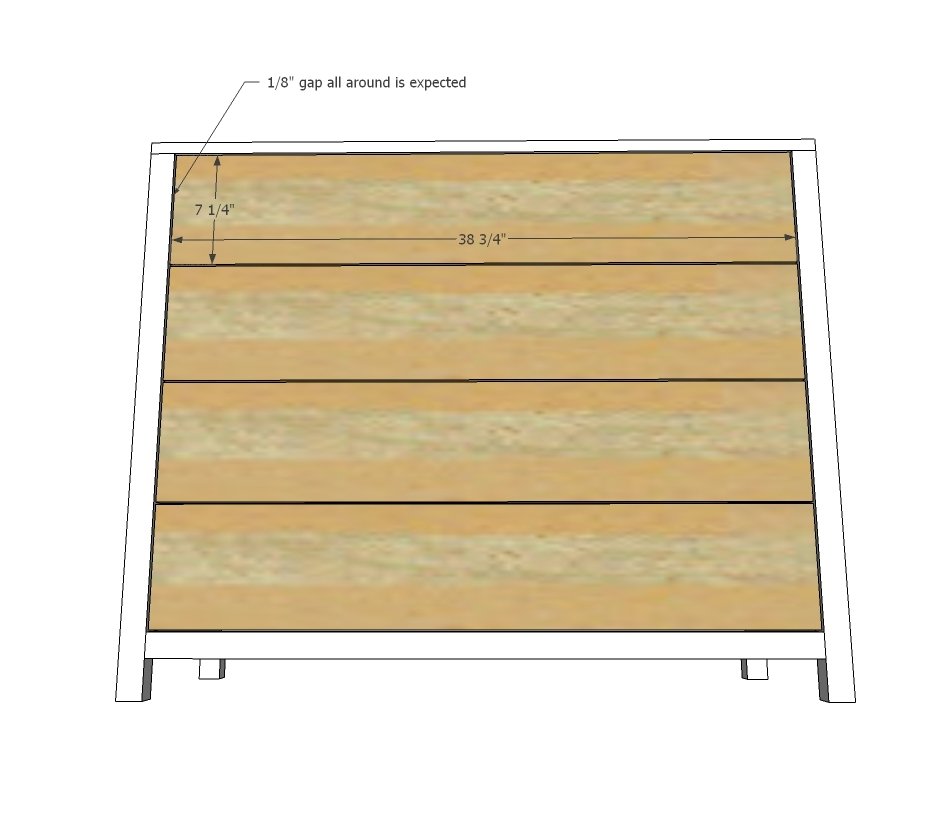
Attach drawer faces over drawer boxes, with approximately 1/8" gap around all sides. Nail on with 1-1/4" nails and glue. Then pull drawers out and screw from inside with 1-1/4" screws (you can use pocket hole screws).
Finishing
Sand all surfaces, starting with a medium grit and finishing with fine. Wipe off the dust, fill any holes or gaps with wood filler, and sand smooth once dry. Apply primer if you're painting, then finish with your choice of paint or stain and seal with a durable clear topcoat. For outdoor projects, use exterior-rated primer, paint or stain, and sealer so the piece stands up to the weather.
Source (temporary): https://www.ana-white.com/woodworking-projects/large-4-drawer-dresser-plans