Large Covered Sandbox
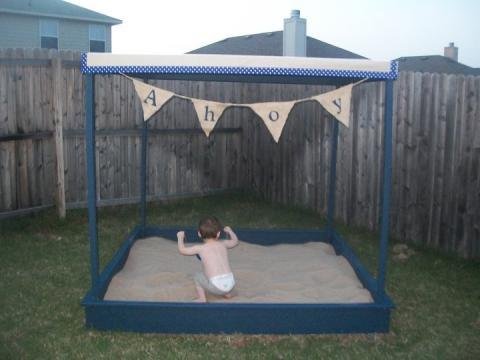
Provide endless hours of play under shade with this easy to build sandbox. Featuring a large play area and canopy, this sandbox will bring all the fun of the beach to your back yard.
Specifications
| Project type | Toys |
|---|---|
| Room | Outdoor |
| Style | Cottage Style Furniture Plans |
| Difficulty | Beginner Projects |
| Estimated cost | $50 - $100 |
Dimensions
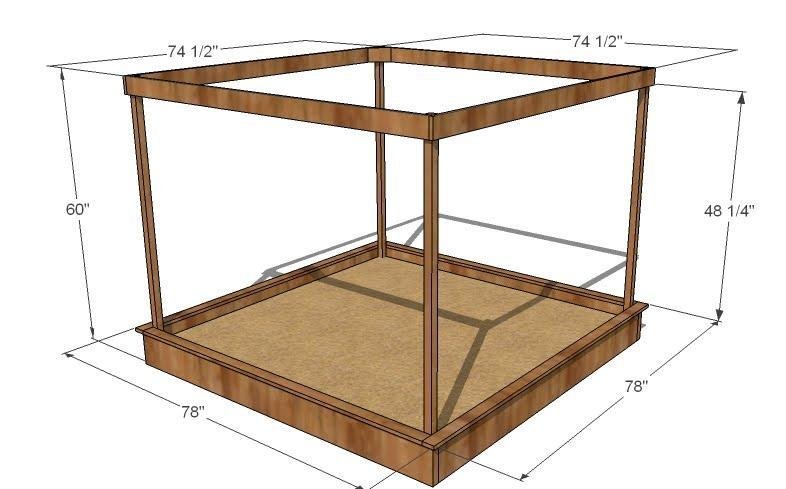
Use the size-specific shopping and cut lists below.
Shopping List
4 – 2×8 Boards (8′ Length) 4 – 1×3 Boards (8′ Length)
4 – 2×2 Boards (8′ Length)
4 – 1×4 Boards (8′ Length)
Cut List
2 – 2×8 Boards @ 76″ (Sandbox Sides) 2 – 2×8 Boards @ 73″ (Sandbox Sides)
2 – 1×3 Boards @ 73″ (Top Trim)
2 – 1×3 Boards @ 78″ (Top Trim)
4 – 2×2 Boards @ 67 1/2″ (Canopy Posts)
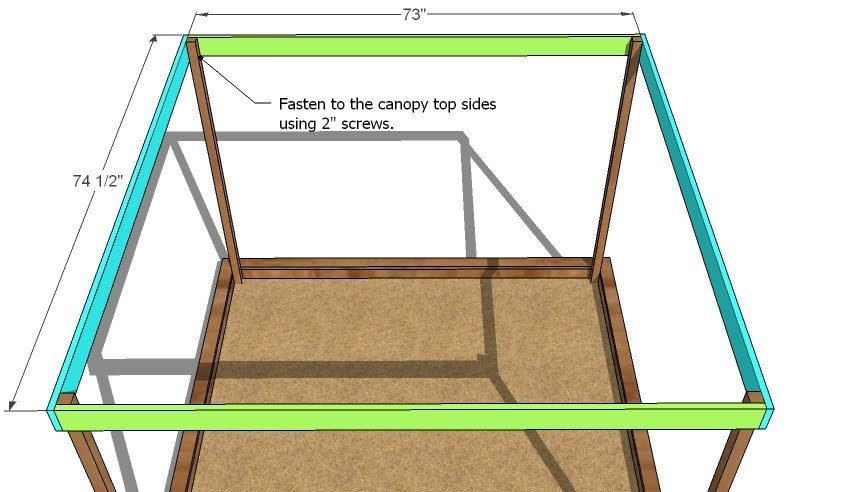
2 – 1×4 Boards @ 73″ (Canopy Sides)
2 – 1×4 Boards @ 74 1/2″ (Canopy Sides)
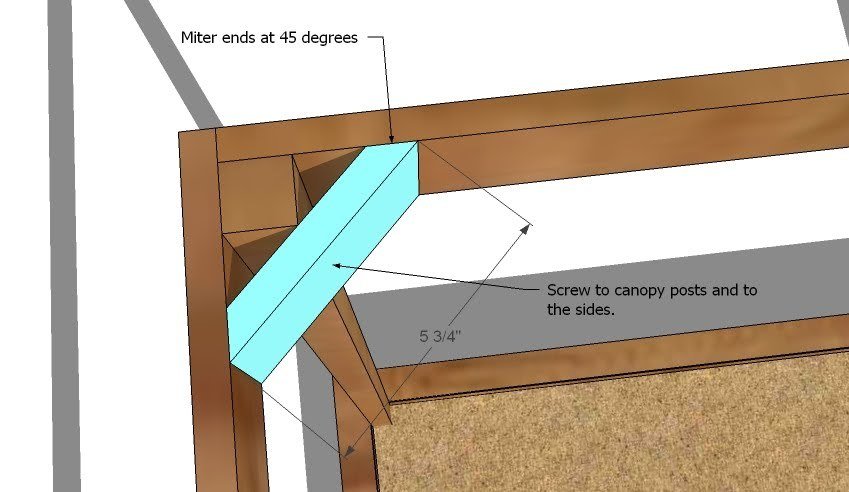
4 – 1×4 @ 5 3/4″ (Corner Bracing for Canopy Top, ends mitered at 45 degrees)
Tools
- measuring tape
- square
- pencil
- hammer
- safety glasses
- hearing protection
- drill
- circular saw
- sander
- staple gun
- level
Step-by-step Instructions
Step 1
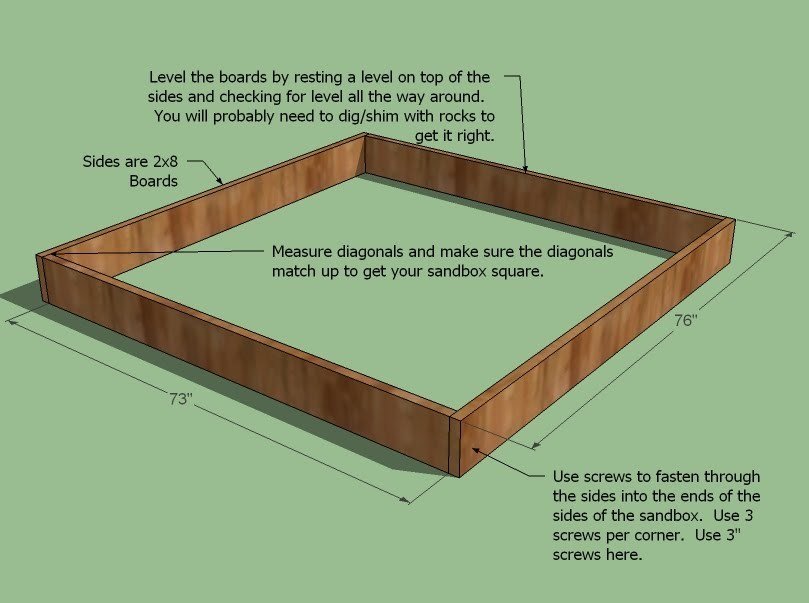
Dig. That’s right. Dig. Rake, whatever you need to do, create a level surface for your sandbox. Then build the sandbox as shown above, using 3″ screws to fasten the corners. Predrill and countersink your screw holes. Level the sandbox by using rocks as shims or digging down high points.
Step 2
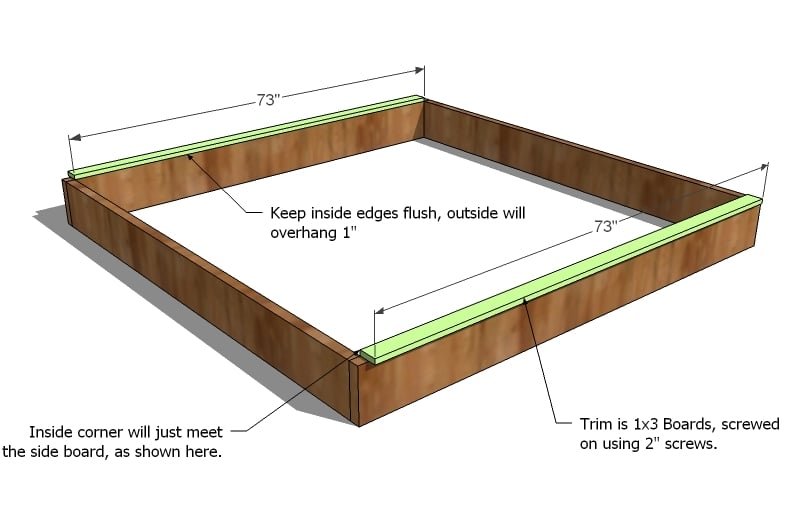
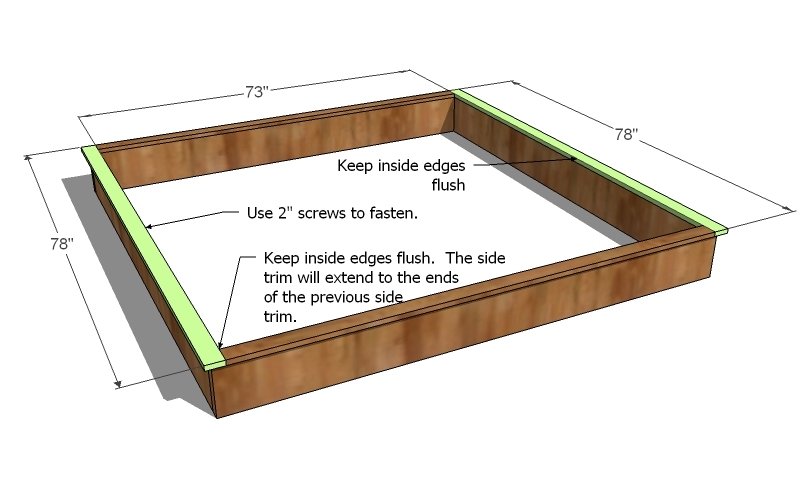
Trim. Fasten the top trim to the LONGER sides, as shown above. Use the 2″ screws. Keep inside edges flush.
Step 3
Trim. Finish the trim, as shown above, screwing in place using 2″ screws. Notice how this trim overlaps the joint on the sandbox sides? Make sure you fasten to both sides of the sandbox sides to reinforce the joint.
Step 4
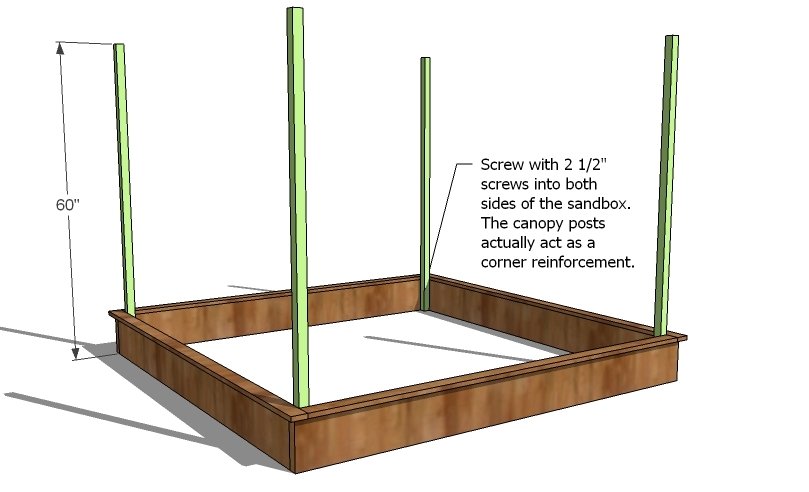
Canopy Posts. The canopy posts actually act as corner blocking to strengthen your corners. Be sure to screw the corners to both pieces of the sides, two screws per side, for a total of 8 screws per corner.
Step 5
Step 6
Canopy Corners. To keep the top straight, add corner blocking as shown above. Make sure your canopy is square before attaching the blocking.
Finishing
Sand all surfaces, starting with a medium grit and finishing with fine. Wipe off the dust, fill any holes or gaps with wood filler, and sand smooth once dry. Apply primer if you're painting, then finish with your choice of paint or stain and seal with a durable clear topcoat. For outdoor projects, use exterior-rated primer, paint or stain, and sealer so the piece stands up to the weather.
Source (temporary): https://www.ana-white.com/woodworking-projects/large-covered-sandbox