Large Custom Mudroom Organizer with Cubbies and Hooks
DIY Mudroom organizer plans from
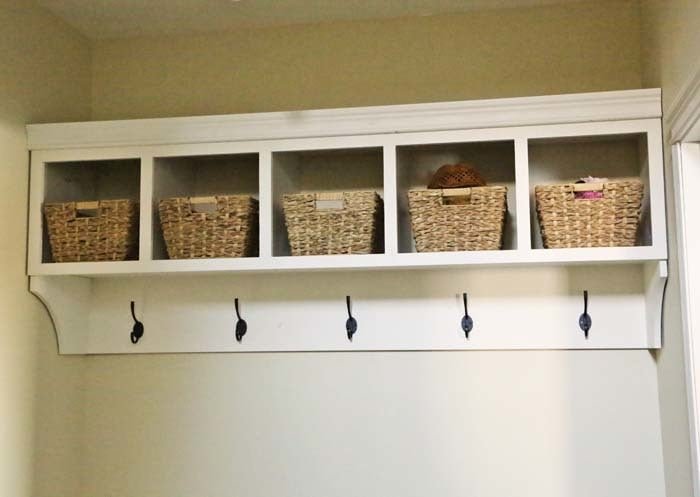
Specifications
| Project type | shelves |
|---|---|
| Room | Entryway and Mudroom |
| Difficulty | Intermediate |
| Estimated cost | $50 - $100 |
Dimensions
Use the size-specific shopping and cut lists below.
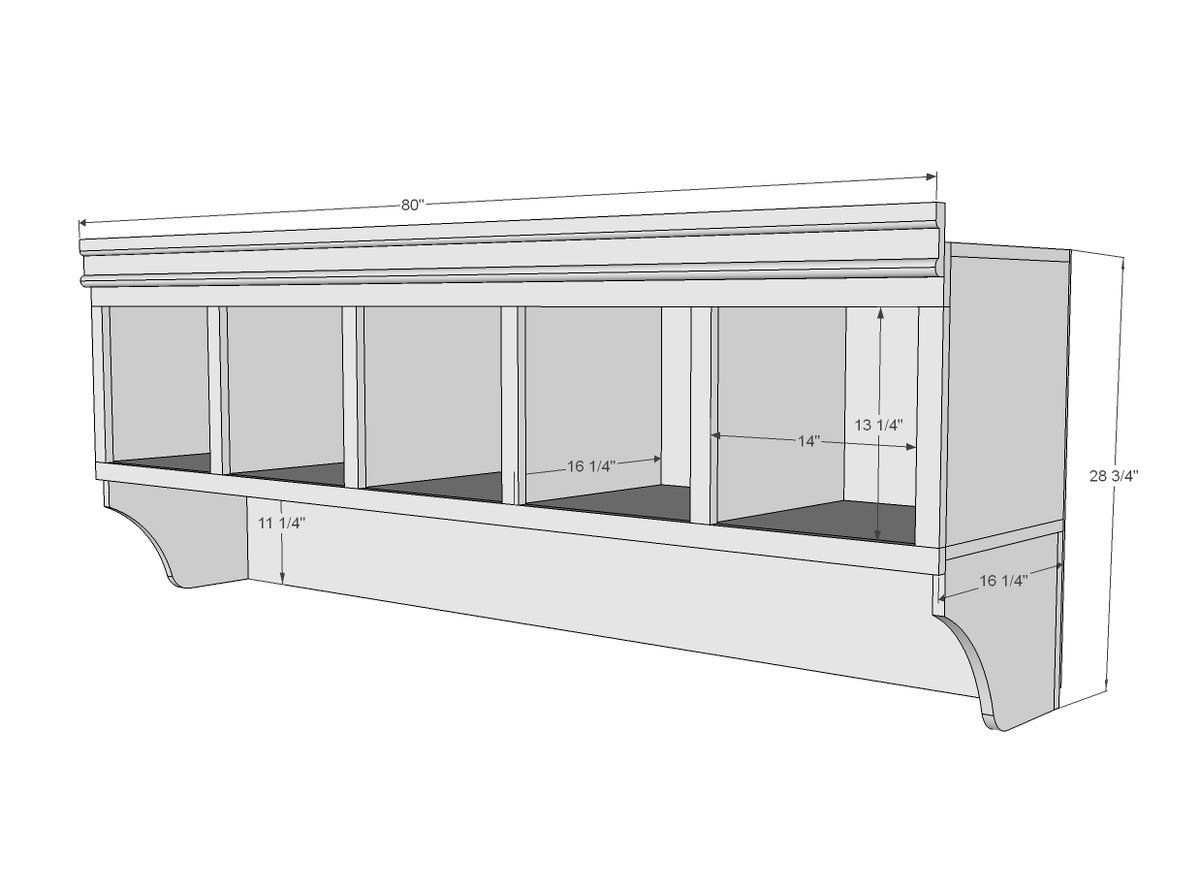
Shopping List
1 - sheet 3/4" plywood cut into (3) 8' long strips, 15-3/4" wide (Have your hardware store do this) 1 - 1x12 @ 10 feet long 1 - 1x4 @ 8 feet long 2 - 1x2 @ 8 feet long I stick crown moulding or other moulding 7' long Hooks 1 - 1/4" pocket hole screws 1-1/4" finish nails (for attaching back and face frame) Long screws of attaching to studs in walls (we used 3-1/2" long screws)
Cut List
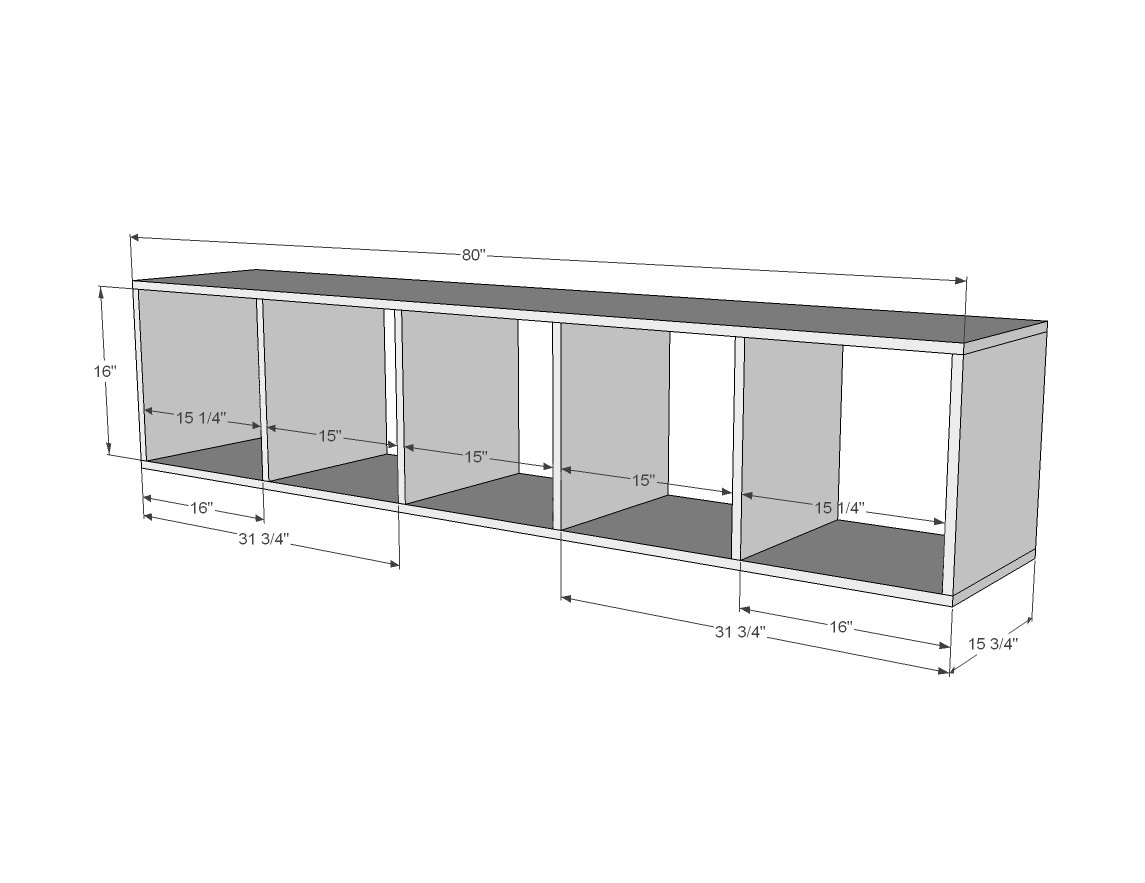
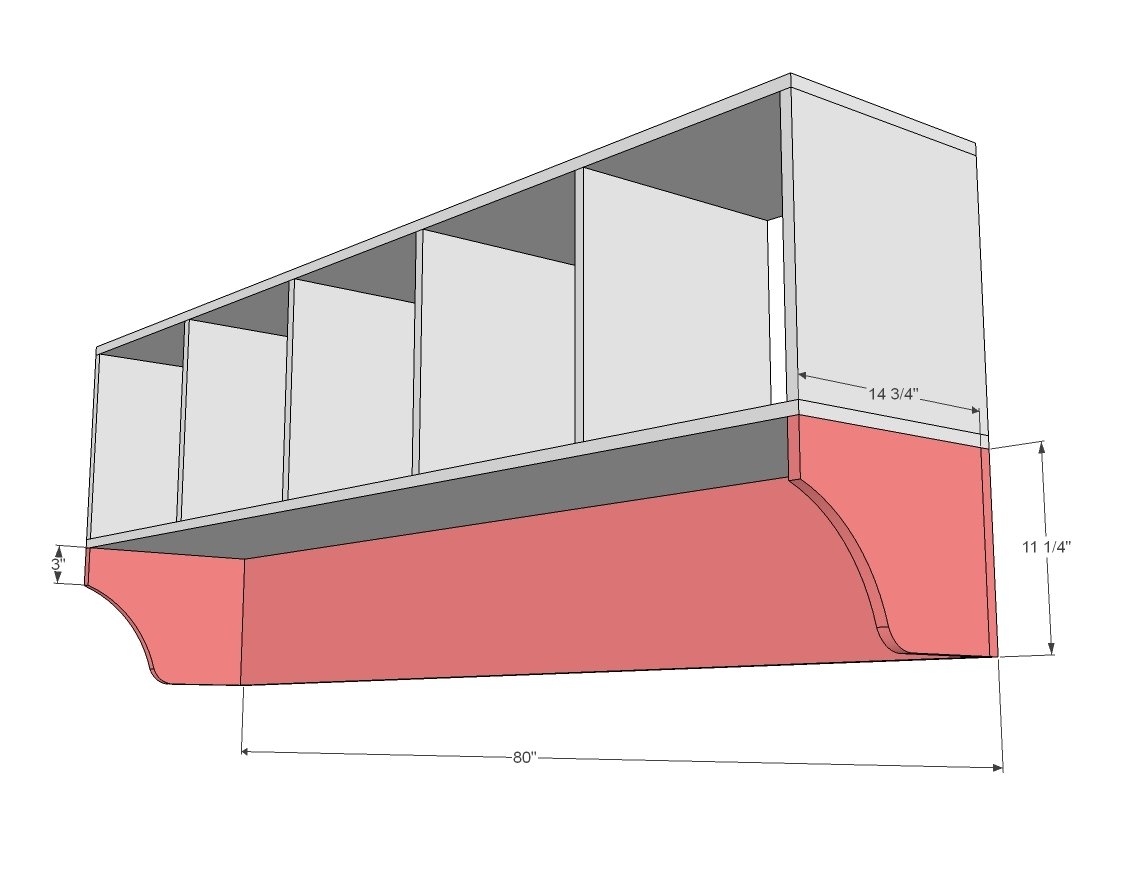
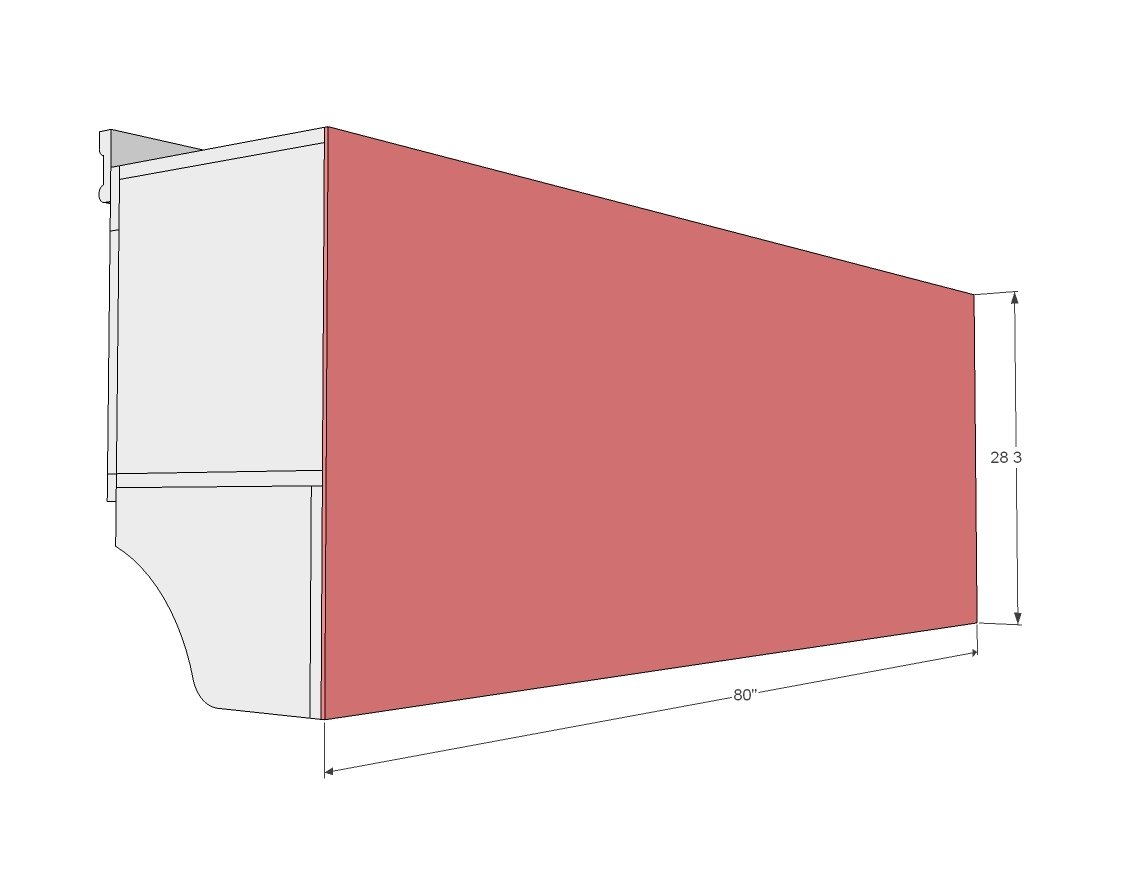
2 - 3/4" plywood @ 15-3/4" x 80" (top and bottom) 6 - 3/4" plywood @ 15-3/4" x 16" (dividers) 1 - 1x12 @ 80" (back of hooks) 2 - 1x12 @ 14-3/4" (side bottom trim) FACE FRAME 1- 1x4 @ 80" 6 - 1x2 @ 13-1/4" 1- 1x2 @ 80" Crown moulding @ 80" Optional back is 80" x 28-3/4" (actually could be less because the plywood doesn't have to cover the entire 1x12 board back)
Tools
- measuring tape
- square
- pencil
- safety glasses
- hearing protection
- kreg-jig
- drill
- jigsaw
- compound miter saw
- nailer
Step-by-step Instructions
Step 1
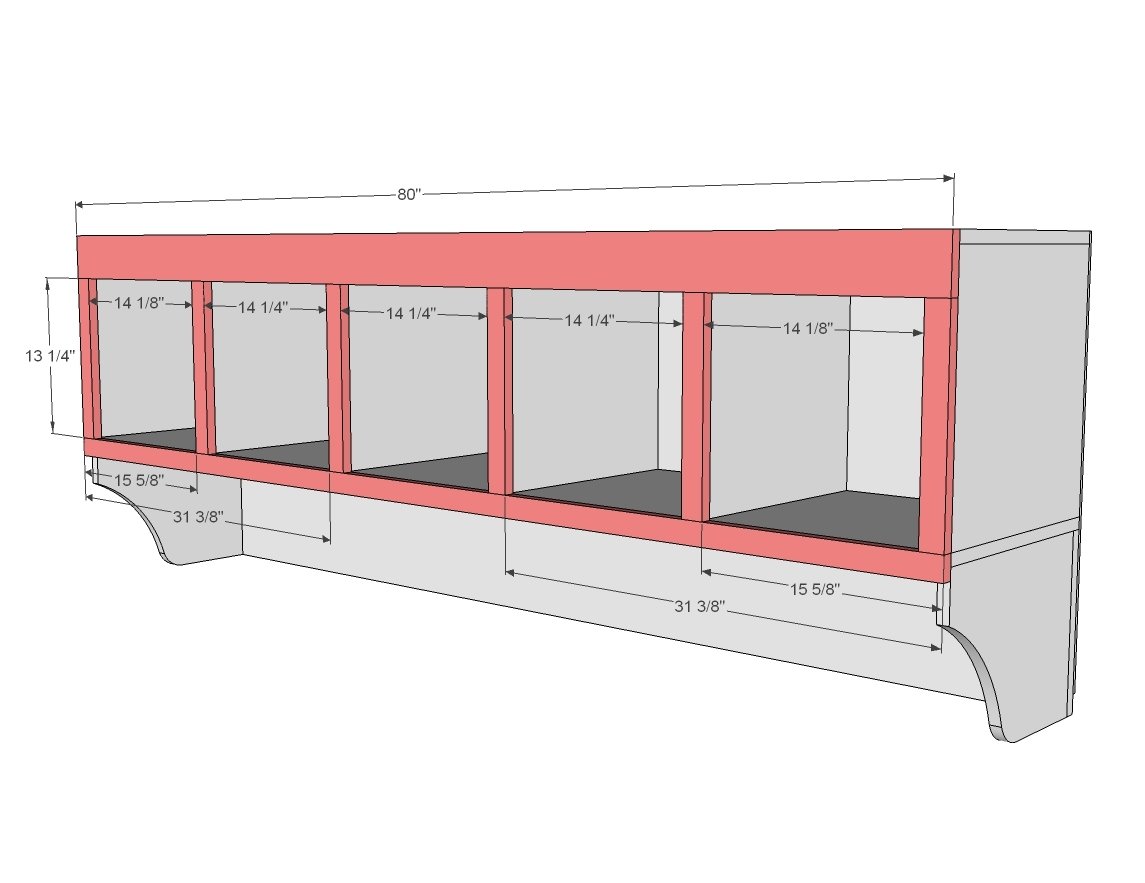
First, we built the cubby portion. You can do this with pocket holes or nails (or even better, staples) and glue.
Step 2
Next, we built the base part, and then attached it to the cubby part with 3/4" pocket holes and 1-1/4" pocket hole screws. The main reason we built the bottom portion with 1x12s is because we jigsawed the curved cuts, it's solid wood, and no edge banding is required. If we'd used plywood for those pieces, it would have been very difficult to edge band a curved cut.
Step 3
We built the face frame separately with 3/4" pocket holes and 1-1/4" pocket hole screws, then attached to front of cubbies with finish nails and glue.
Step 4
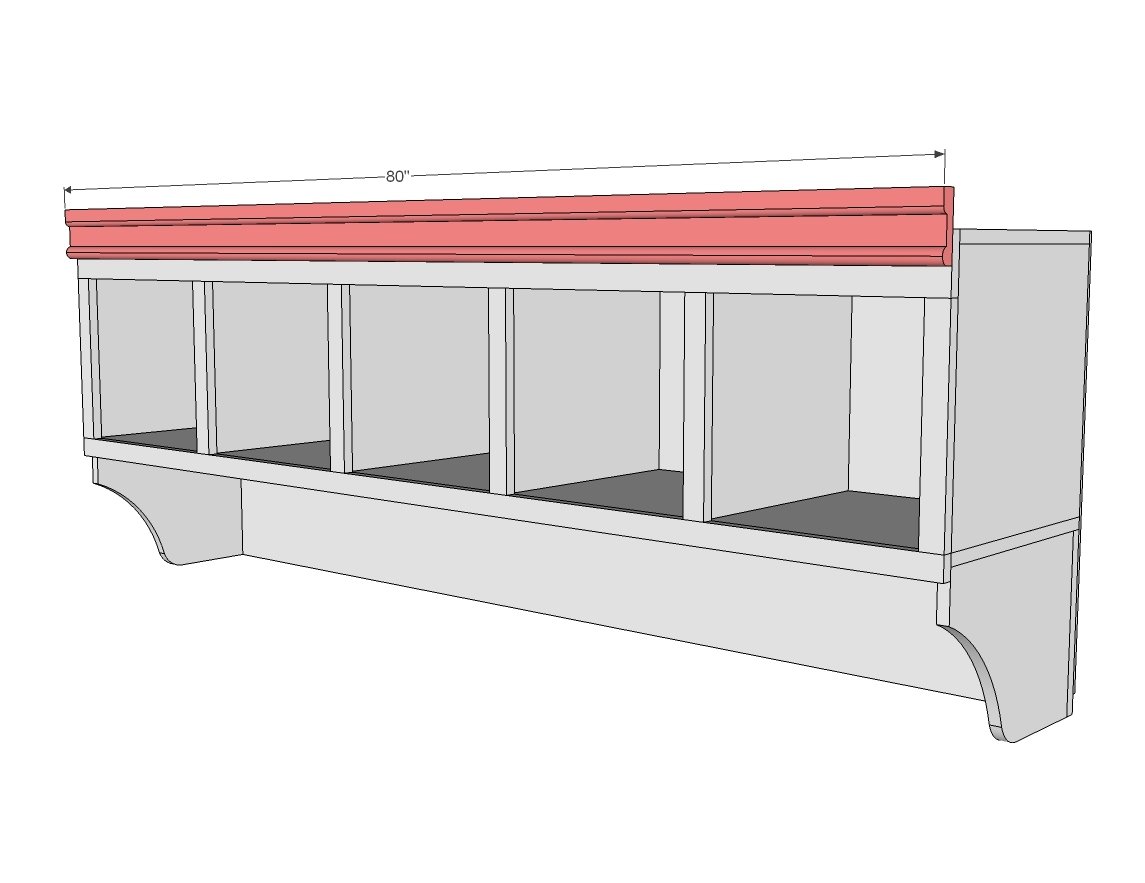
We actually added the moulding in place, cutting it to fit. I'd recommend a small moulding so you can still use the area on top for storage (totes anyone???).
Step 5
Step 6
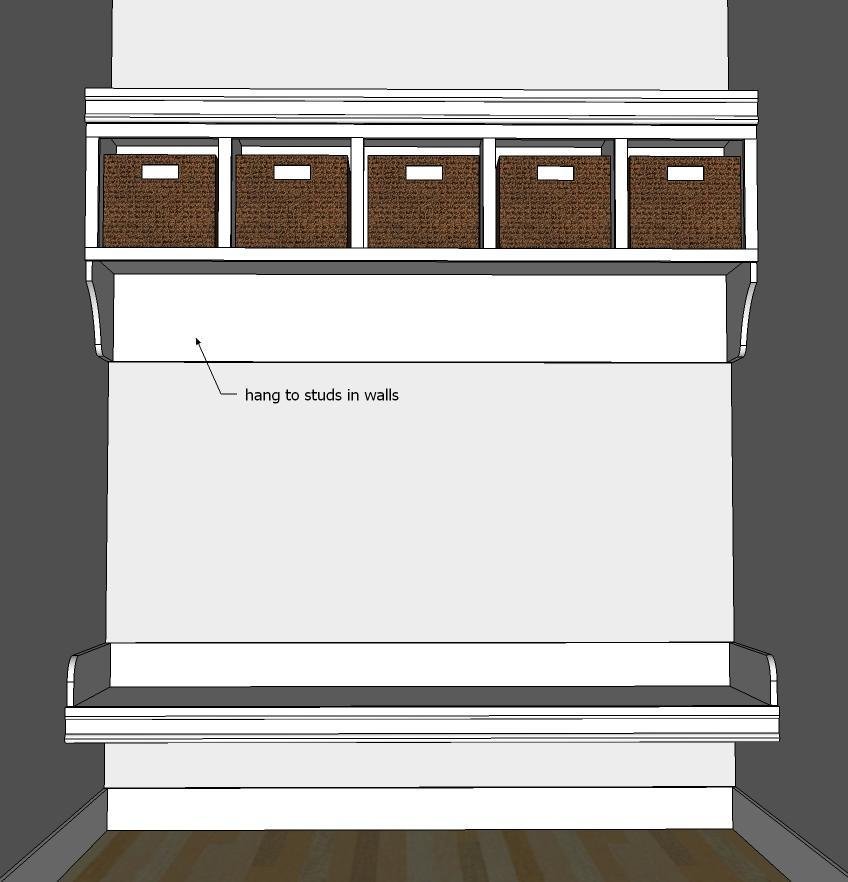
Hang the organizer on the wall, screwing through the 1x12s and also the sides of the plywood into the side walls. Make sure you hit studs - this thing is heavy and will get only heavier with stuff in it!
Finishing
Sand all surfaces, starting with a medium grit and finishing with fine. Wipe off the dust, fill any holes or gaps with wood filler, and sand smooth once dry. Apply primer if you're painting, then finish with your choice of paint or stain and seal with a durable clear topcoat. For outdoor projects, use exterior-rated primer, paint or stain, and sealer so the piece stands up to the weather.
Source (temporary): https://www.ana-white.com/woodworking-projects/large-custom-mudroom-organizer-cubbies-and-hooks