Large Outdoor Bench with X Backs
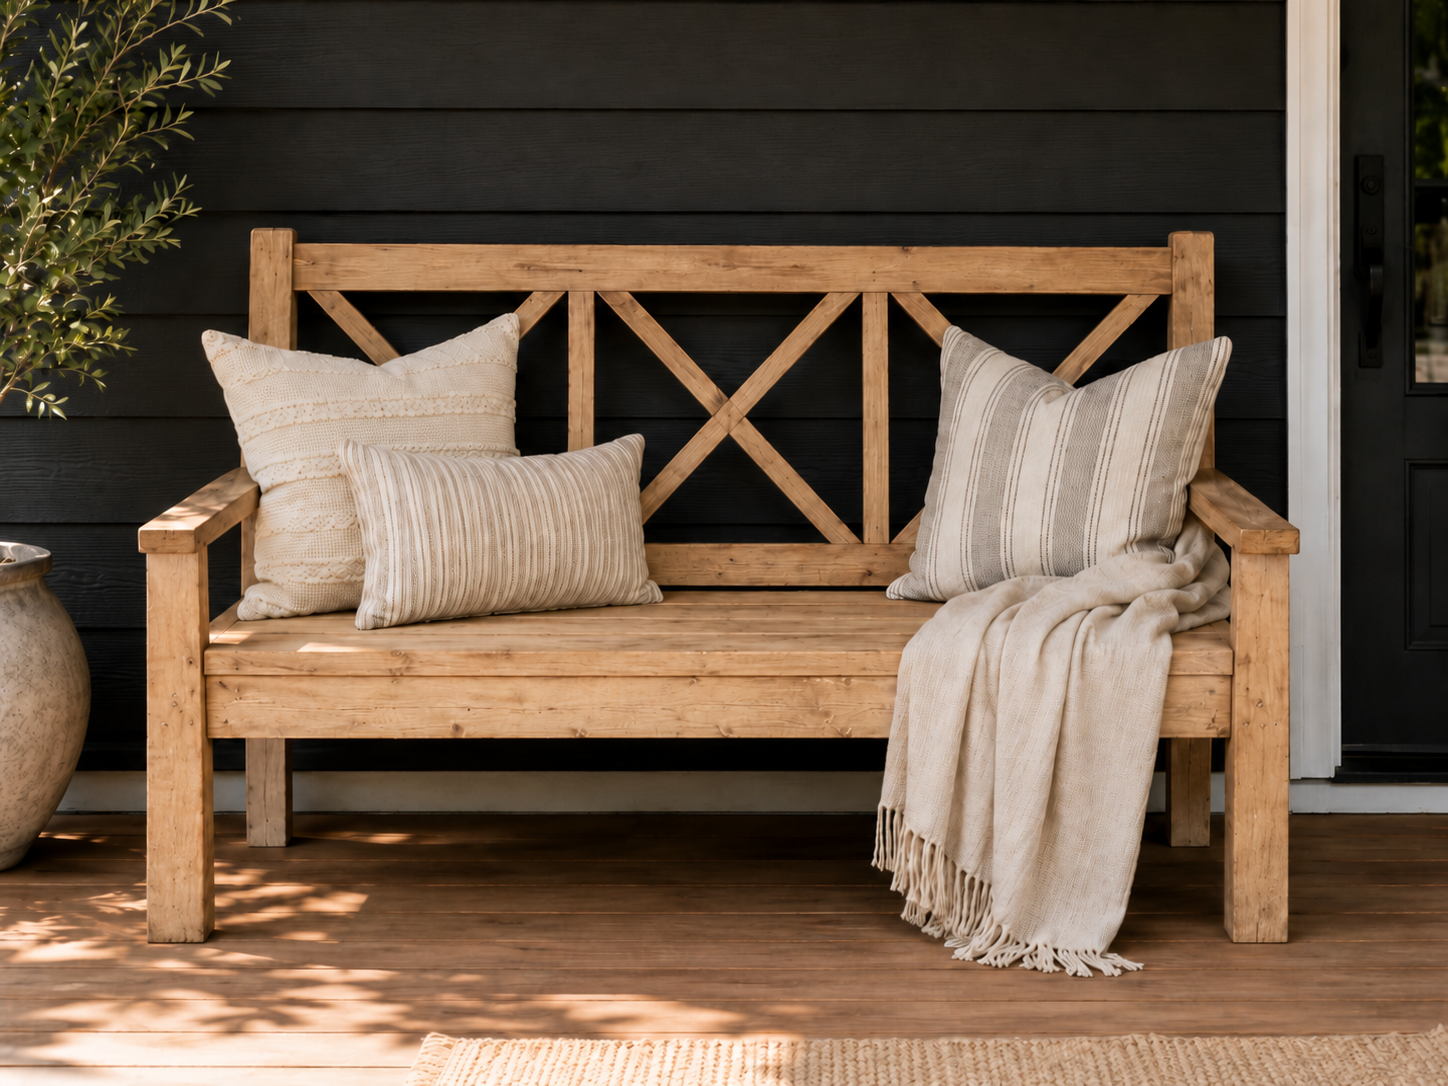
for this large X-back front porch bench make it easy to create an inviting outdoor spot that looks beautiful and is built to last. With its roomy size, classic design, and low-maintenance construction, this bench is perfect for styling with pillows and cozy throws to make your front porch feel warm and welcoming. It’s an easy build with big impact — a great project for adding charm, comfort, and curb appeal to your home.
Specifications
| Project type | Bench |
|---|---|
| Room | Entryway and Mudroom |
| Style | Cottage Style Furniture Plans |
| Difficulty | Intermediate |
Dimensions
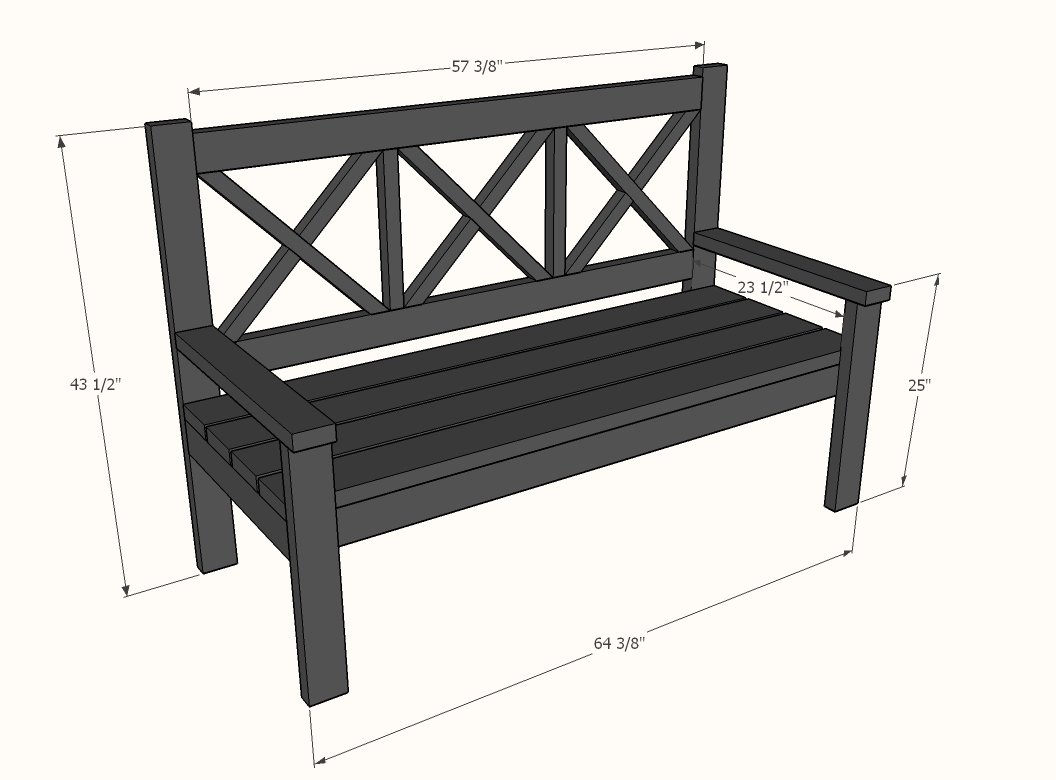
Use the size-specific shopping and cut lists below.
Shopping List
- 7 - 2x4 @ 8 feet long
- 2 - 2x6 @ 12 feet long
- 2 - 2x2 @ 8 feet long
- About 50 - 2-1/2" self tapping star bit outdoor wood screws (deck screws or Spax or similar)
- About 30 - 2-1/2" pocket hole screws (outdoor)
Cut List
- 2 - 2x4 @ 43-1/2" (back legs)
- 2 - 2x4 @ 57-3/8" (back horizontal boards)
- 2 - 2x4 @ 61-3/8" (seat framing front and back)
- 2 - 2x4 @ 23-1/2" (seat framing ends)
- 2 - 2x4 @ 20-1/2" (seat framing under supports)
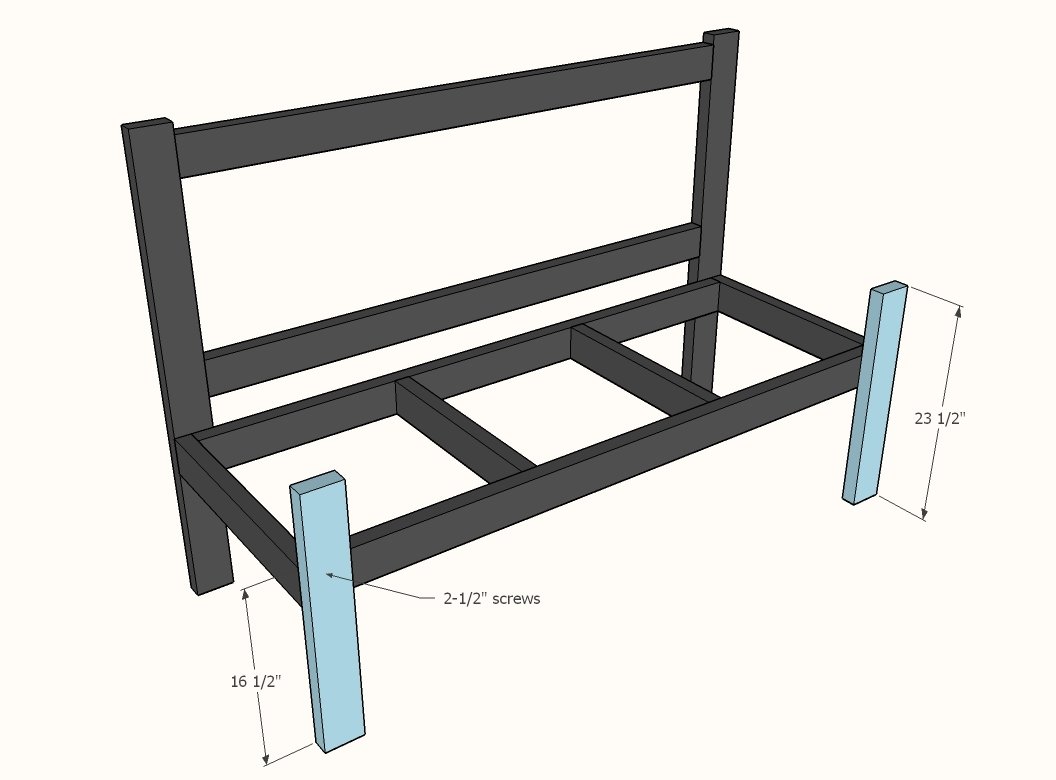
- 2 - 2x4 @ 23-1/2" (front legs)
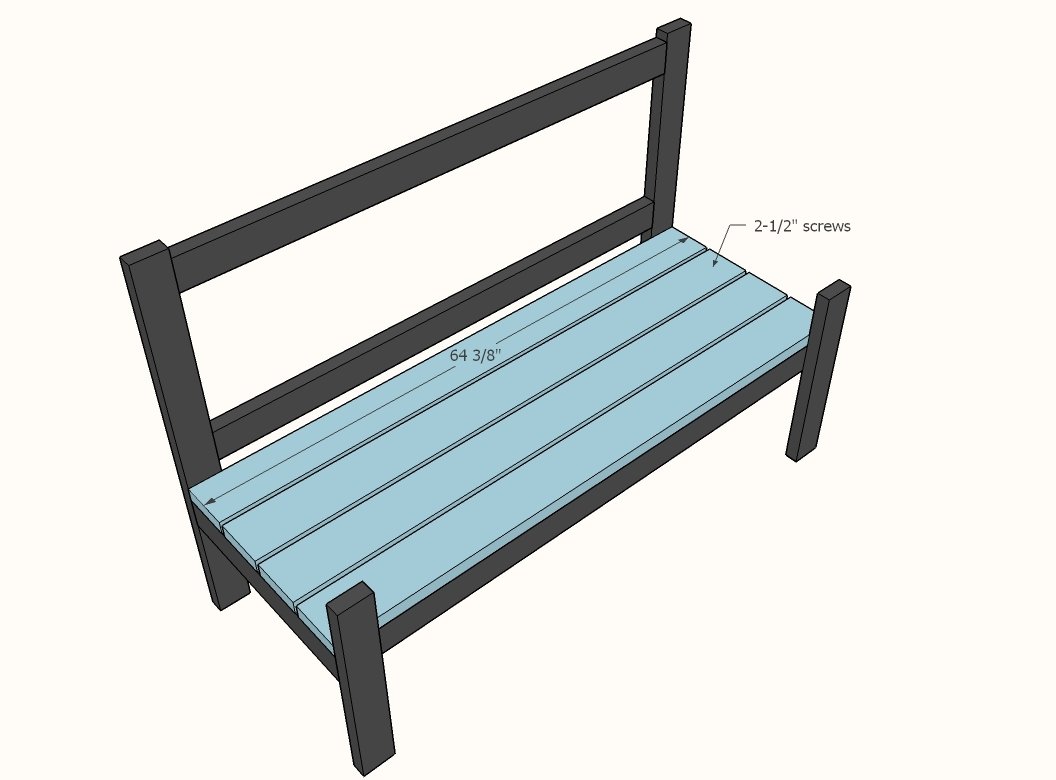
- 4 - 2x6 @ 64-3/8" (seat slats)
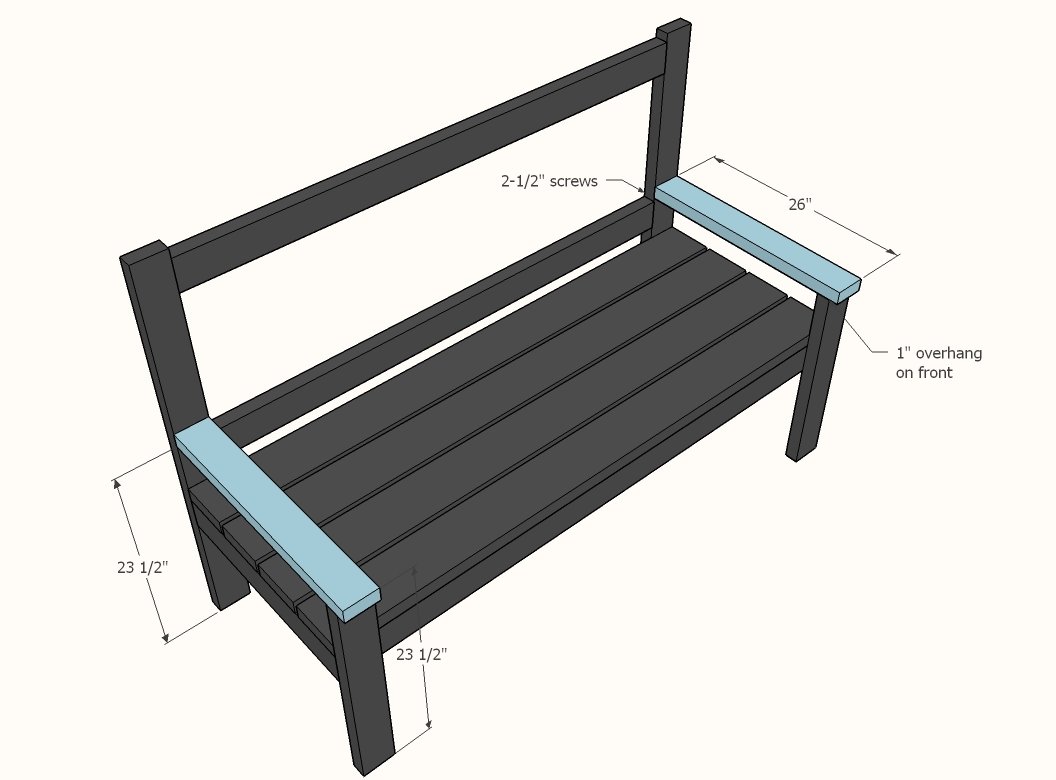
- 2 - 2x4 26" (arms)
We recommend cutting the back pieces to fit. You can "scribe" them by simply placing a long piece of wood in place and tracing the cuts with a pencil, then cutting the wood on the pencil lines.
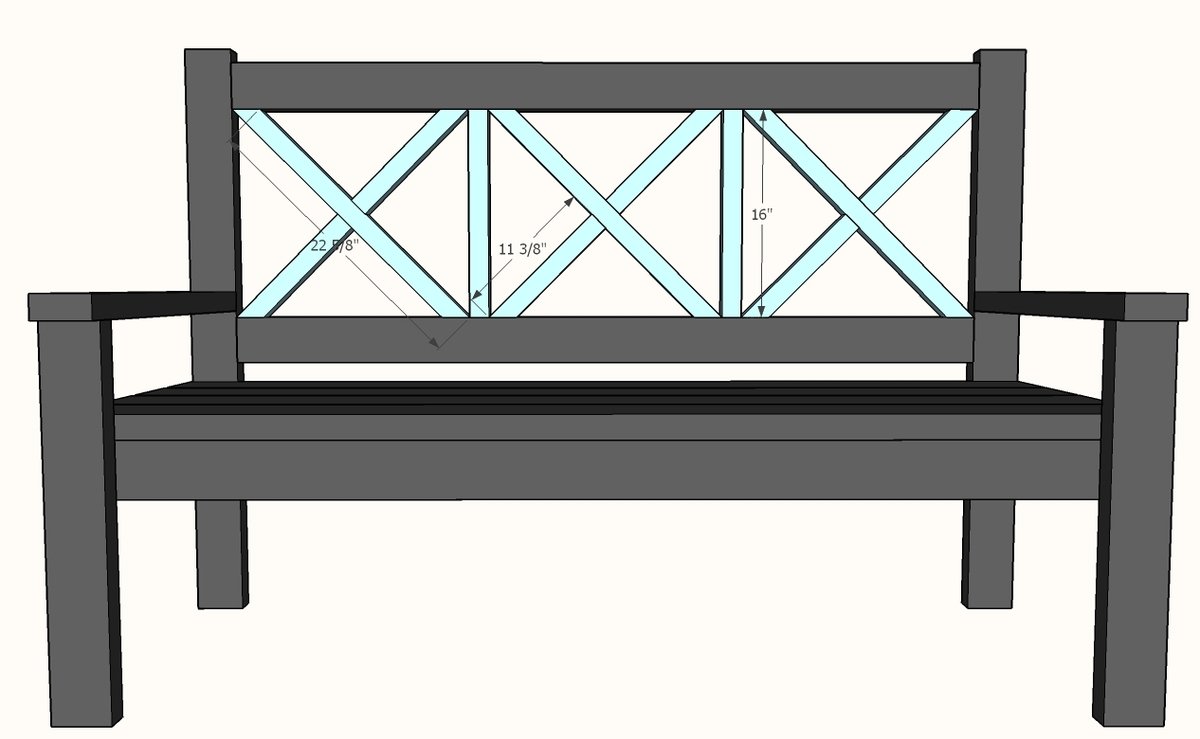
- 2 - 2x2 @ 16" (decorative back vertical pieces)
- 3 - 2x2 @ 22-5/8" - both ends cut at 45 degrees, ends are parallel, long point to long point measurement (long X pieces)
- 6 - 2x2 @ 11-3/8" - one end cut at 45 degrees, longest point measurement (short X pieces)
Tools
- measuring tape
- square
- pencil
- kreg-jig
- drill
- compound miter saw
- sander
- countersink drill bit
Step-by-step Instructions
Step 1
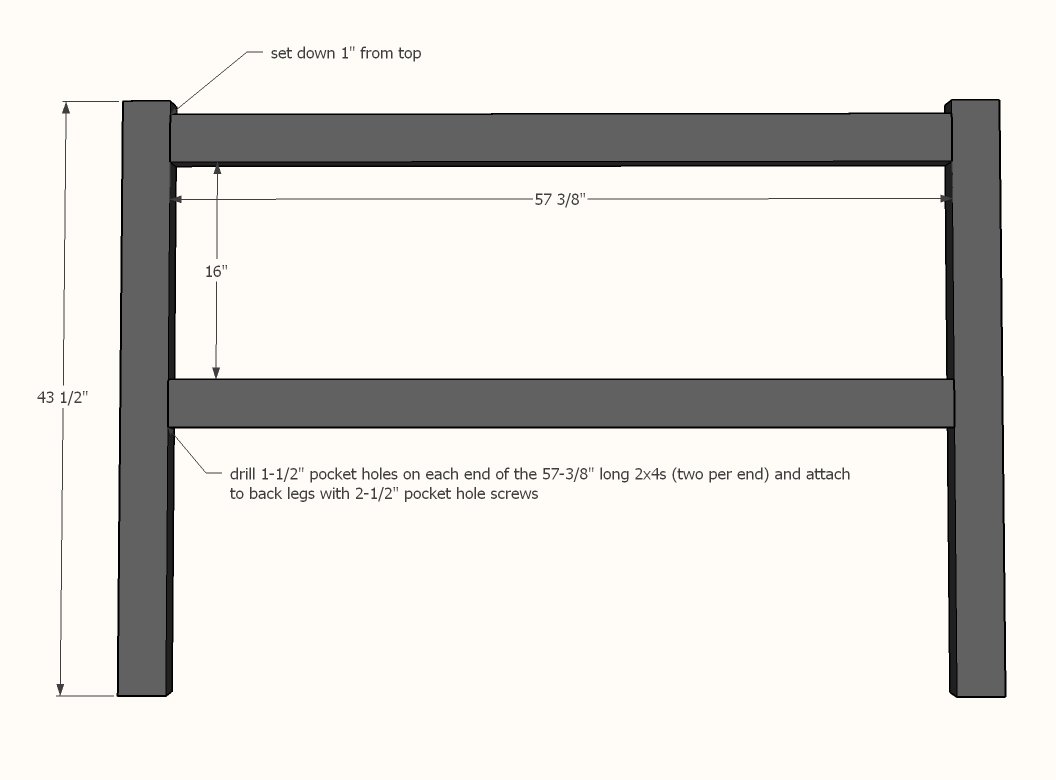
Build the back with 1-1/2" pocket holes and 2-1/2" pocket hole screws. If you prefer you can also add the decorative pieces now (may be easier to work on a bench top instead of at the back of the bench later on).
Step 2
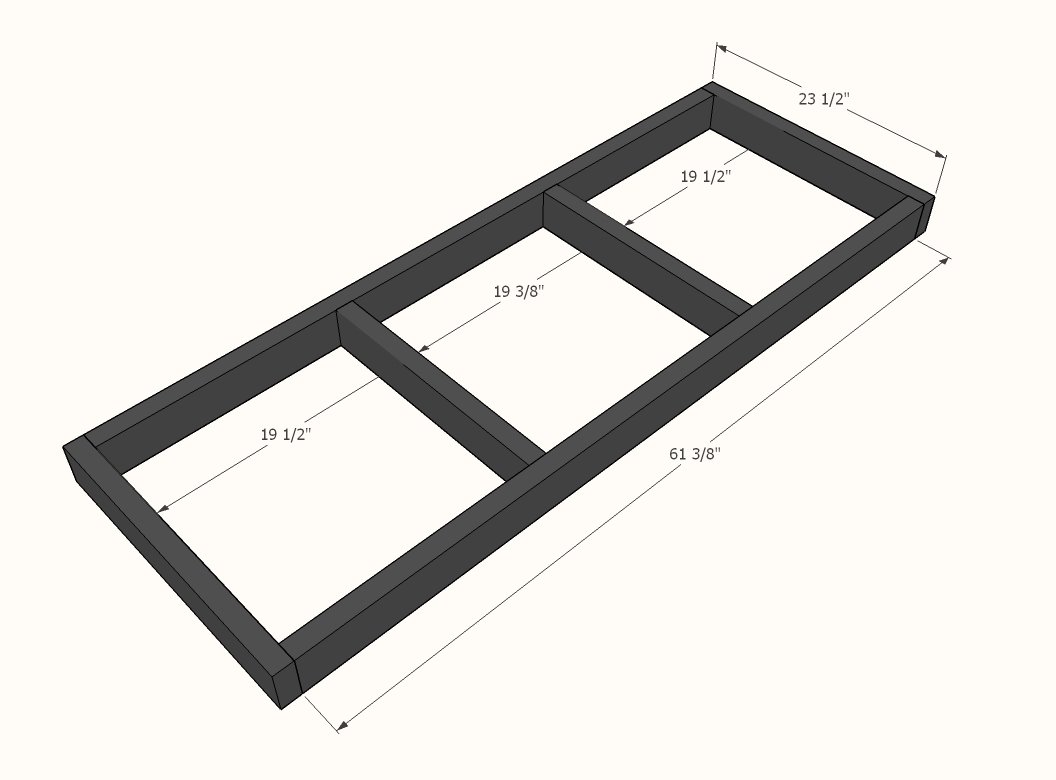
Build the seat framing either with pocket holes or 2-1/2" self tapping exterior screws.
Step 3
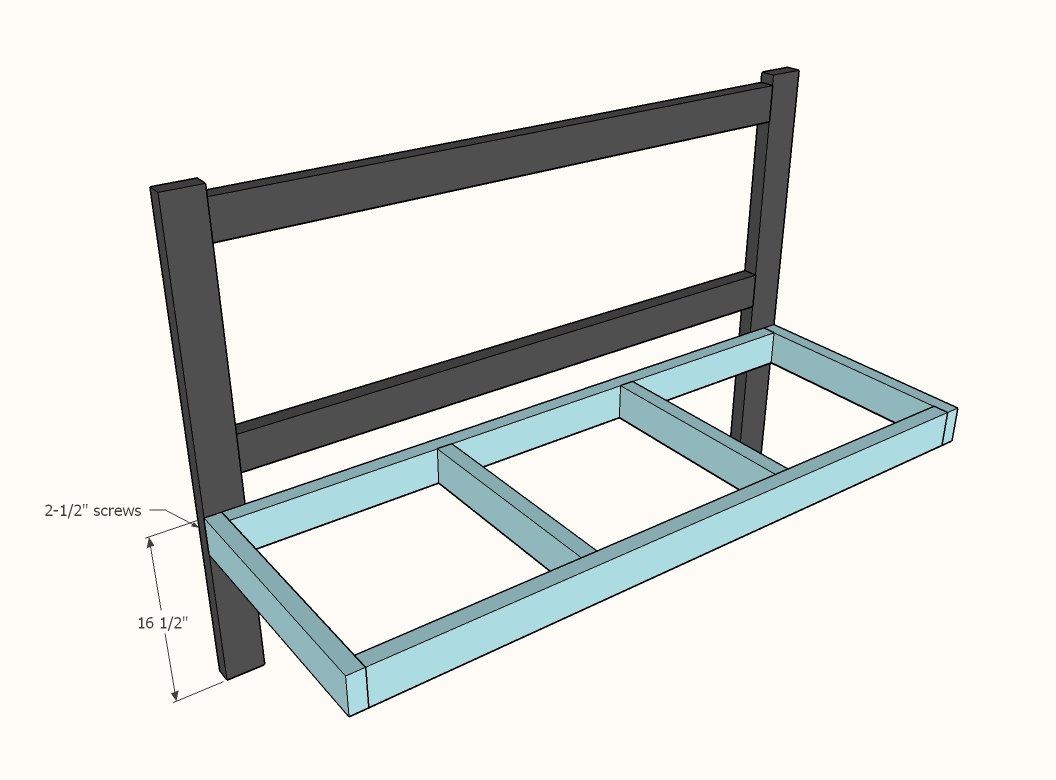
Attach seat framing to back with 2-1/2" exterior screws.
Step 4
Attach front legs to front of seat framing with 2-1/2" screws.
Step 5
Step 6
Add the arms. I used 2-1/2" screws from top and back to attach.
Step 7
First, add the 2x2s that are 16" long, centering so there is 18-1/8" spaces between the 2x2s and 2x4 back legs. Then cut out all the pieces for the Xs on the back and fit in the openings. Once they are all fit, mark the pocket holes that need to be drilled on the back side and also the joint (What I do is put an A and A on the two pieces at the joint, then a B and B on the next two pieces at next joint and so on). The reason for this is you want to avoid a situation where your pocket holes are on the front of the bench. On the 45 degree sides, you can drill a pocket hole, there won't be much material removed, but it will work just fine. Trust me on this one. Then attach with 2-1/2" pocket hole screws and glue from back side.
Finishing
Sand all surfaces, starting with a medium grit and finishing with fine. Wipe off the dust, fill any holes or gaps with wood filler, and sand smooth once dry. Apply primer if you're painting, then finish with your choice of paint or stain and seal with a durable clear topcoat. For outdoor projects, use exterior-rated primer, paint or stain, and sealer so the piece stands up to the weather.
Source (temporary): https://www.ana-white.com/woodworking-projects/large-outdoor-bench-x-backs