Large Square Wall Cubby Organizer for Small Items
for Wall Cubby Organizer Upgrade your wall space with this stylish 25-cubby wall organizer —a beginner-friendly project designed for both function and charm. make it easy to create a statement piece that keeps your space organized while showcasing your creativity. Perfect for entryways, kitchens, craft rooms, or any place that needs compact storage, this organizer is ideal for displaying small items like jars, seasonal décor, or collectibles. The simple yet sturdy construction makes it a rewarding weekend build for any skill level. ✅ Highlights: • 25 spacious cubbies for storage or display • Beginner-friendly plans using basic tools and materials • Uses standard lumber like 1×6 boards and ¼″ plywood • Smart, space-saving design — hangs easily on any wall • Fully customizable with your choice of paint or stain 📏 Dimensions: Approximately 32″ wide × 32″ tall × 5½″ deep — large enough to make a statement but sized to fit most walls. 🛠 What You’ll Need: • 1×6 boards (4 pieces at 8 feet) • ¼″ plywood for the back • Screws or nails, wood glue, clamps, and finishing supplies This project is a great way to use up scrap wood while adding a beautiful, functional piece to your home. Whether you want a decorative display, a mini cubby mail center, or an advent calendar base, this wall cubby organizer is as adaptable as it is eye-catching.
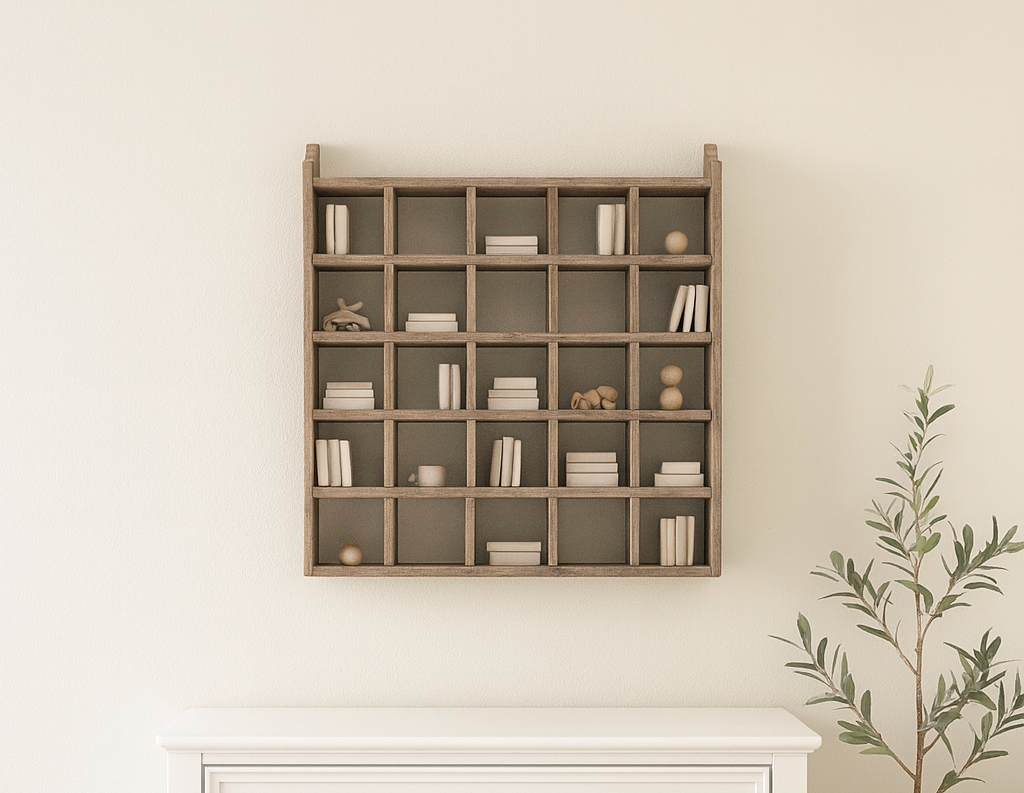
Specifications
| Project type | shelves |
|---|---|
| Room | Bathroom |
| Style | Cottage Style Furniture Plans |
| Difficulty | Beginner Projects |
| Estimated cost | $20 - $50 |
Dimensions
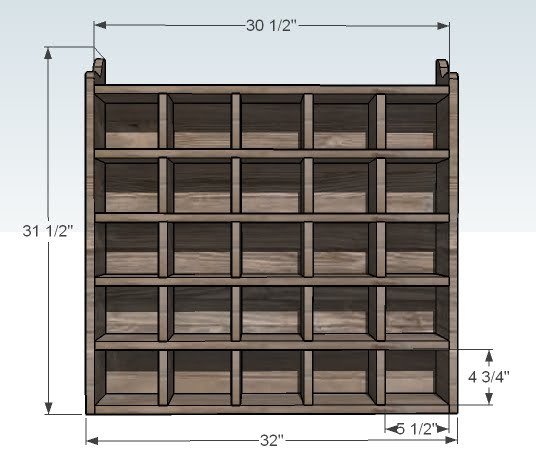
Use the size-specific shopping and cut lists below.
Shopping List
- 4 – 1×6 Boards, 8′ Long
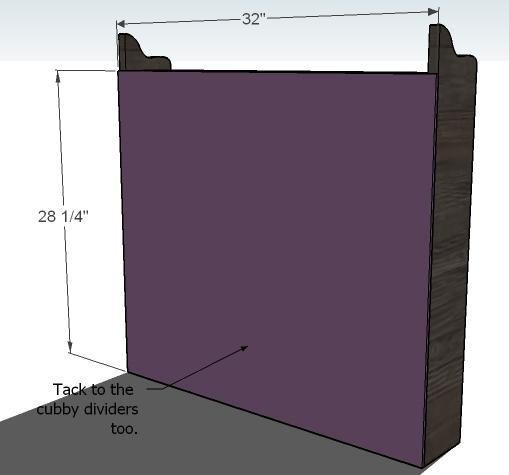
- 1 – 1/4″ Plywood at least 28 1/4″ x 32″
- 2″ Screws or nails
- 1 1/4″ Nails
- Wood Glue
- Finishing Supplies (Paint, Wood Filler, etc)
- Picture Hanging Kit (Optional)
Cut List
6 – 1×6 @ 30 1/2″ (Shelves) 20 – 1×6 @ 4 3/4″ (Cubby Dividers) 2 – 1×6 @ 31 1/2″ (Sides) 1/4″ Scrap plywood @ 28 1/4″ x 32″ (Back)
Tools
- measuring tape
- square
- pencil
- safety glasses
- hearing protection
- circular saw
- nailer
- sander
Step-by-step Instructions
Step 1
Nail or screw your cubby dividers to the shelves as shown above, creating five different shelves with four cubby dividers attached. Use glue and 2″ fasteners.
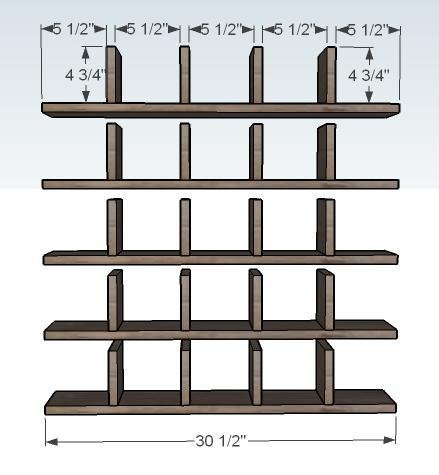
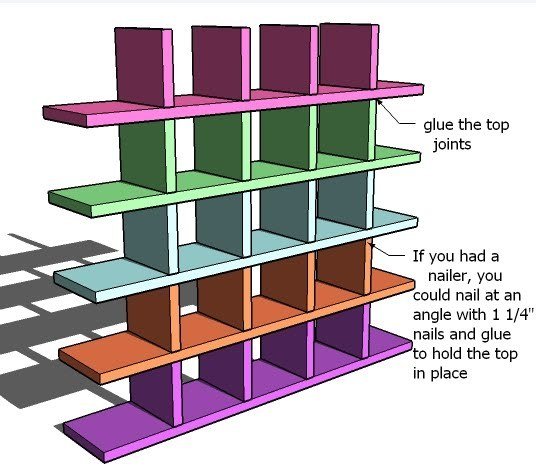
TOP OF CUBBIES
Attach the cubbies with glue and clamp and let dry. If you have a nailer, you could nail at an angle as shown above. Also, if you have a Kreg Jig™, you could drill pocket holes on the faces of the cubby dividers to attach. Your cubbies should be laying flat on the FRONT FACE of the cubbies. Make sure everything is square before you let the cubbies dry. If you need to, you can glue two shelves together, clamp, let dry, and then add another shelf, glue, clamp, let dry and so on (because like me, you probably don’t have an endless supply of clamps).
TOP
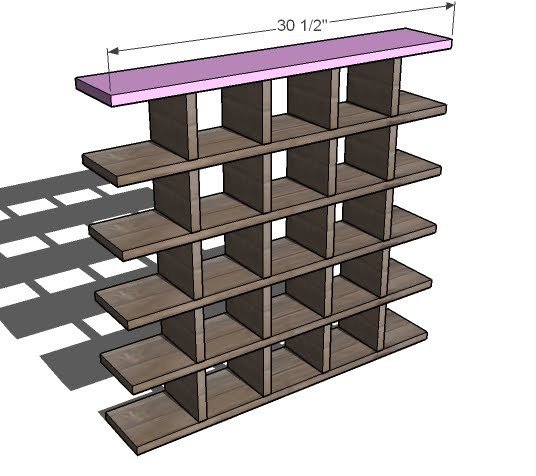
Attach the top to the shelf as shown above, using screws or nails and glue.
SIDES
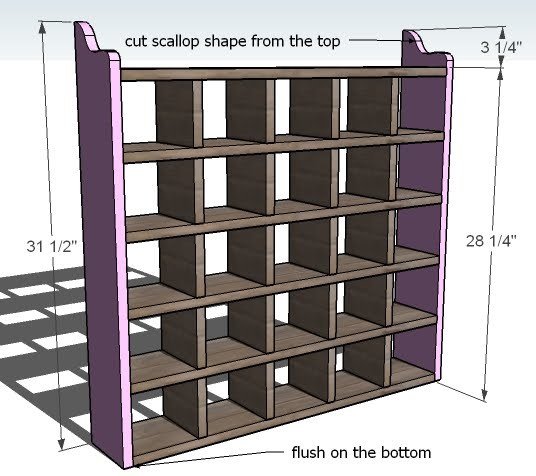
The sides will help tie everything together. You fasten the sides to the shelves to keep the shelves in place as the cubby dividers dry. Make sure you attach the sides so that the face is resting down (you can either cut out later with a jigsaw the scalloped pattern or do it before you assemble the sides).
Step 5
Finishing
Sand all surfaces, starting with a medium grit and finishing with fine. Wipe off the dust, fill any holes or gaps with wood filler, and sand smooth once dry. Apply primer if you're painting, then finish with your choice of paint or stain and seal with a durable clear topcoat. For outdoor projects, use exterior-rated primer, paint or stain, and sealer so the piece stands up to the weather.
Source (temporary): https://www.ana-white.com/woodworking-projects/large-square-wall-cubby-organizer-small-items