Large Three Sided Outdoor Bar
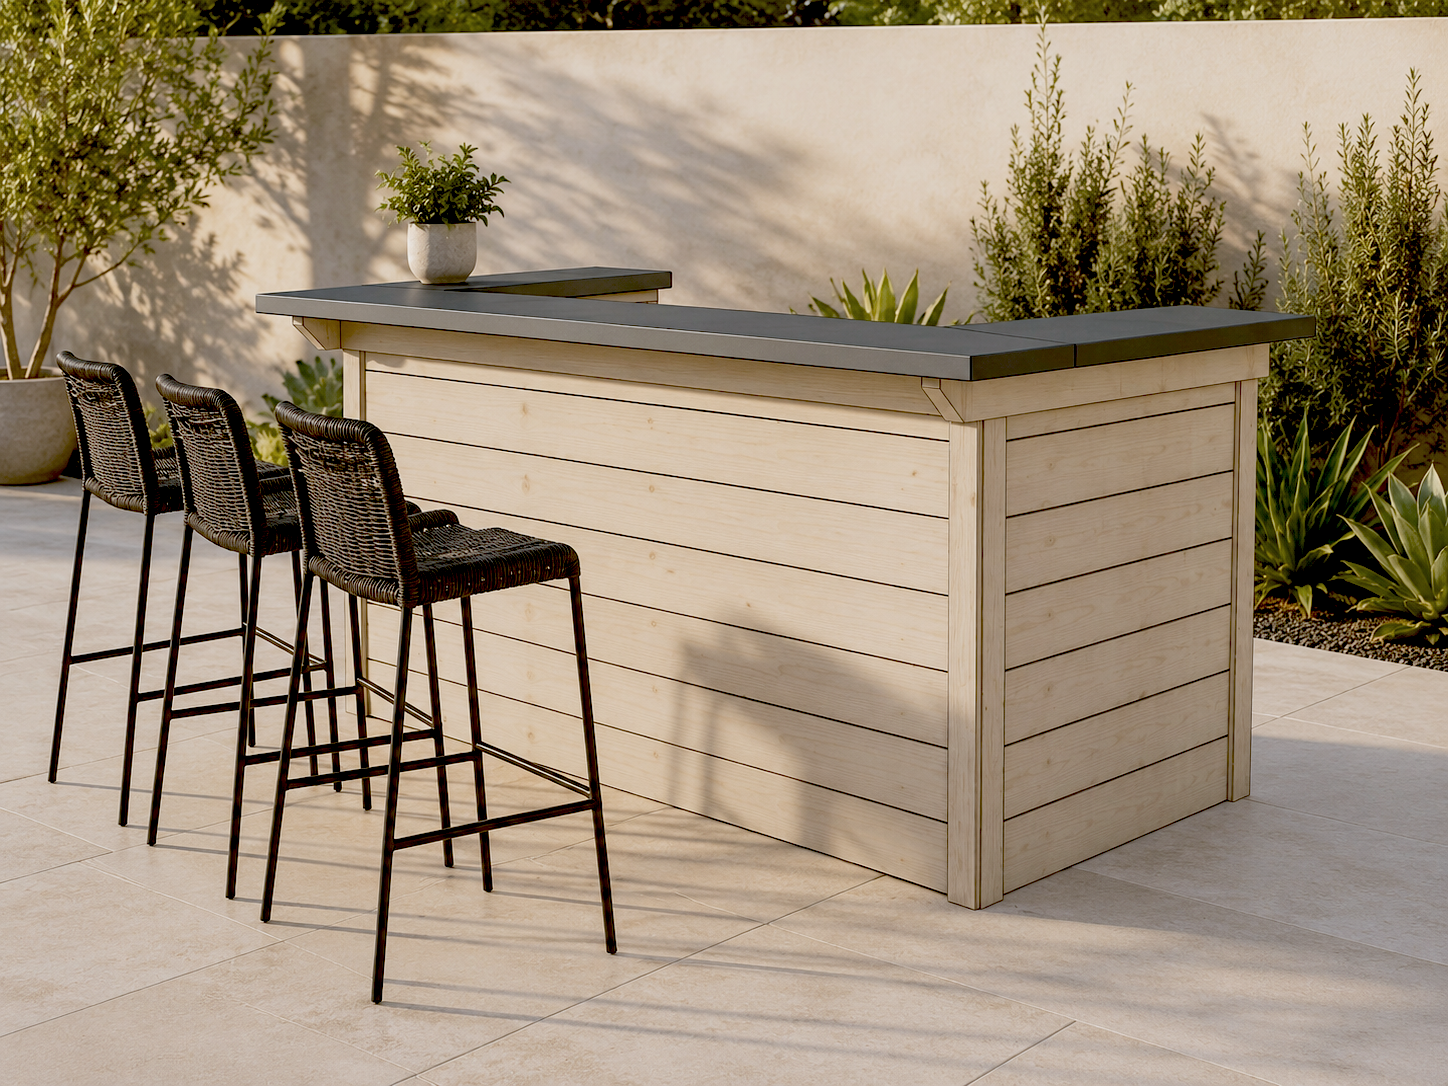
to build an outdoor bar. This outdoor bar is built using a 2x4 framing, with cedar fence pickets for durability and to keep the cost down. The top is a 2x12. No pocket holes, simple building steps and readily available lumber make this big project doable in a weekend with one person. Perfect for events, backyards or markets! The plans are free with step by step diagrams, shopping list and cut list and more!
Specifications
| Project type | Picnic Tables and Outdoor Dining |
|---|---|
| Room | Outdoor |
| Difficulty | Intermediate |
Dimensions
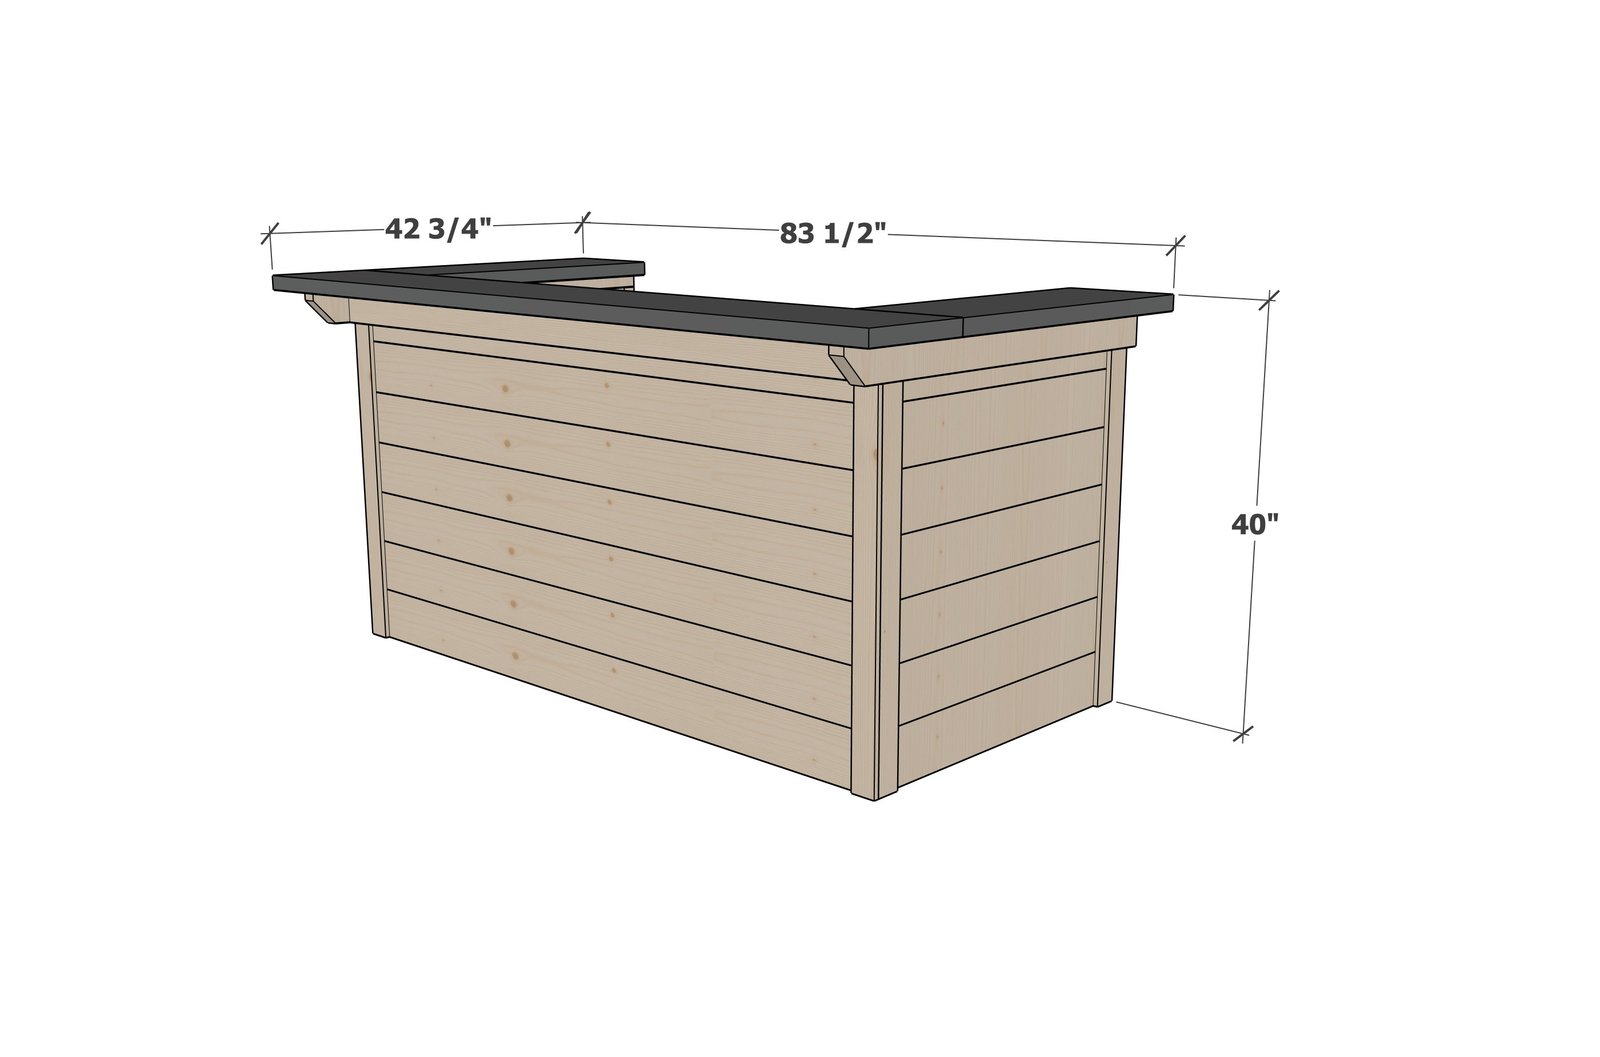
Use the size-specific shopping and cut lists below.
Shopping List
- 9 - 2x4 @ 8 feet long
- 14 - 5-1/2" wide fence pickets, not dog eared, 72" long
- 2 - 2x12 @ 10 feet long
- 3 - 1x3 @ 6 feet long
Cut List
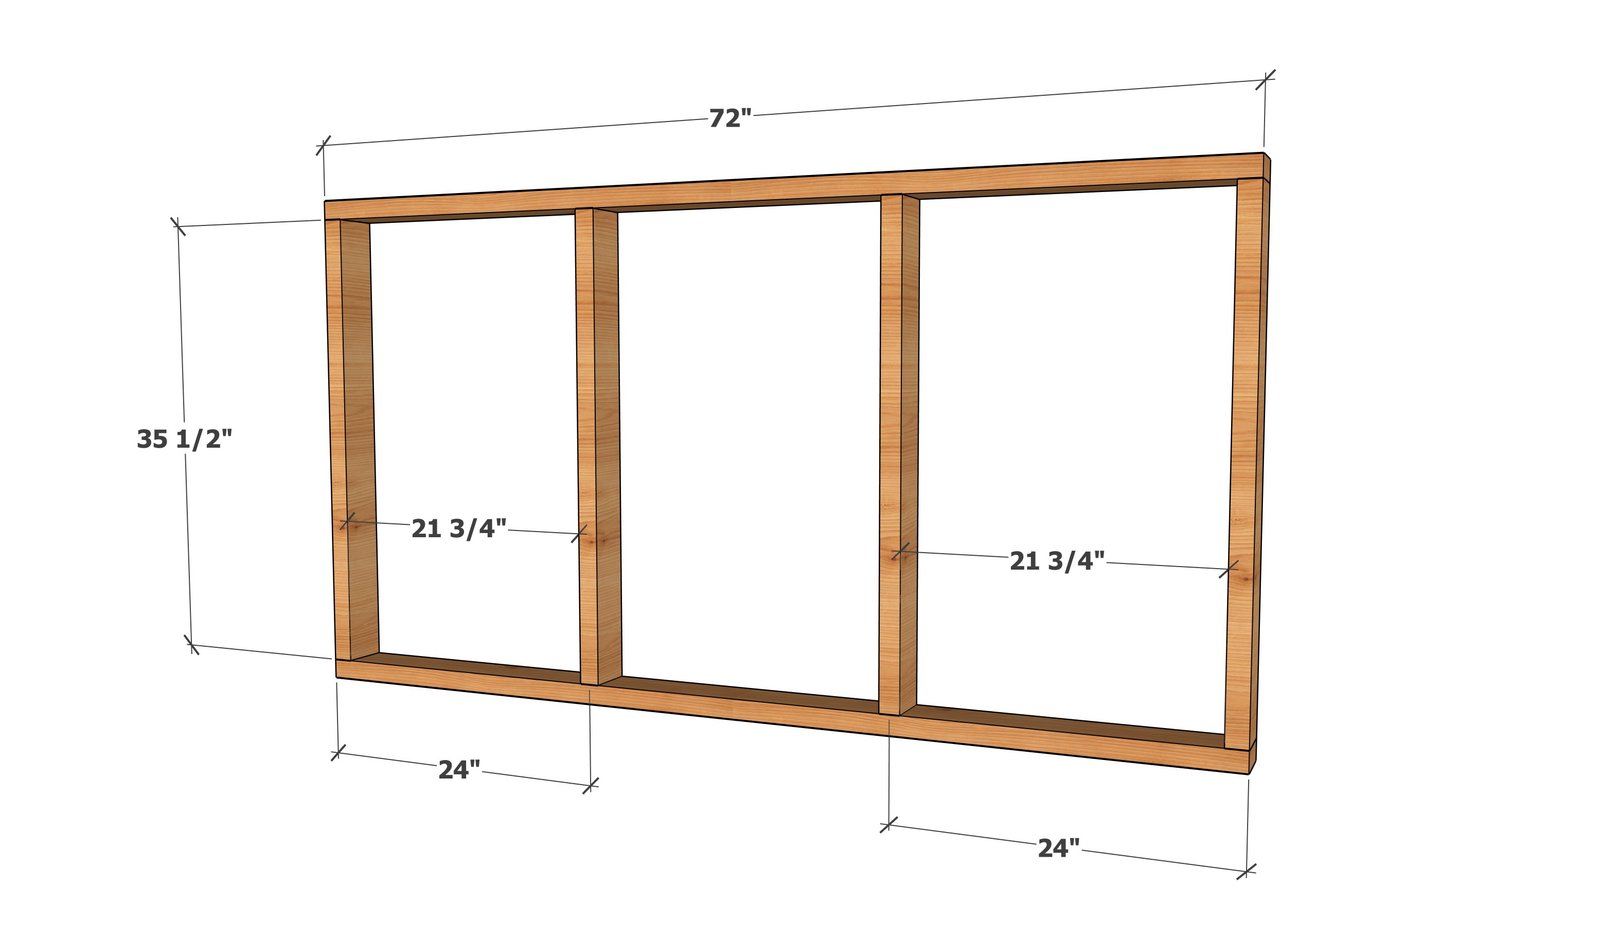
- 2 - 2x4 @ 72" - front top and bottom
- 8 - 2x4 @ 35-1/2" - vertical studs
- 2 - 2x4 @ 21-3/4" - front horizontal pieces
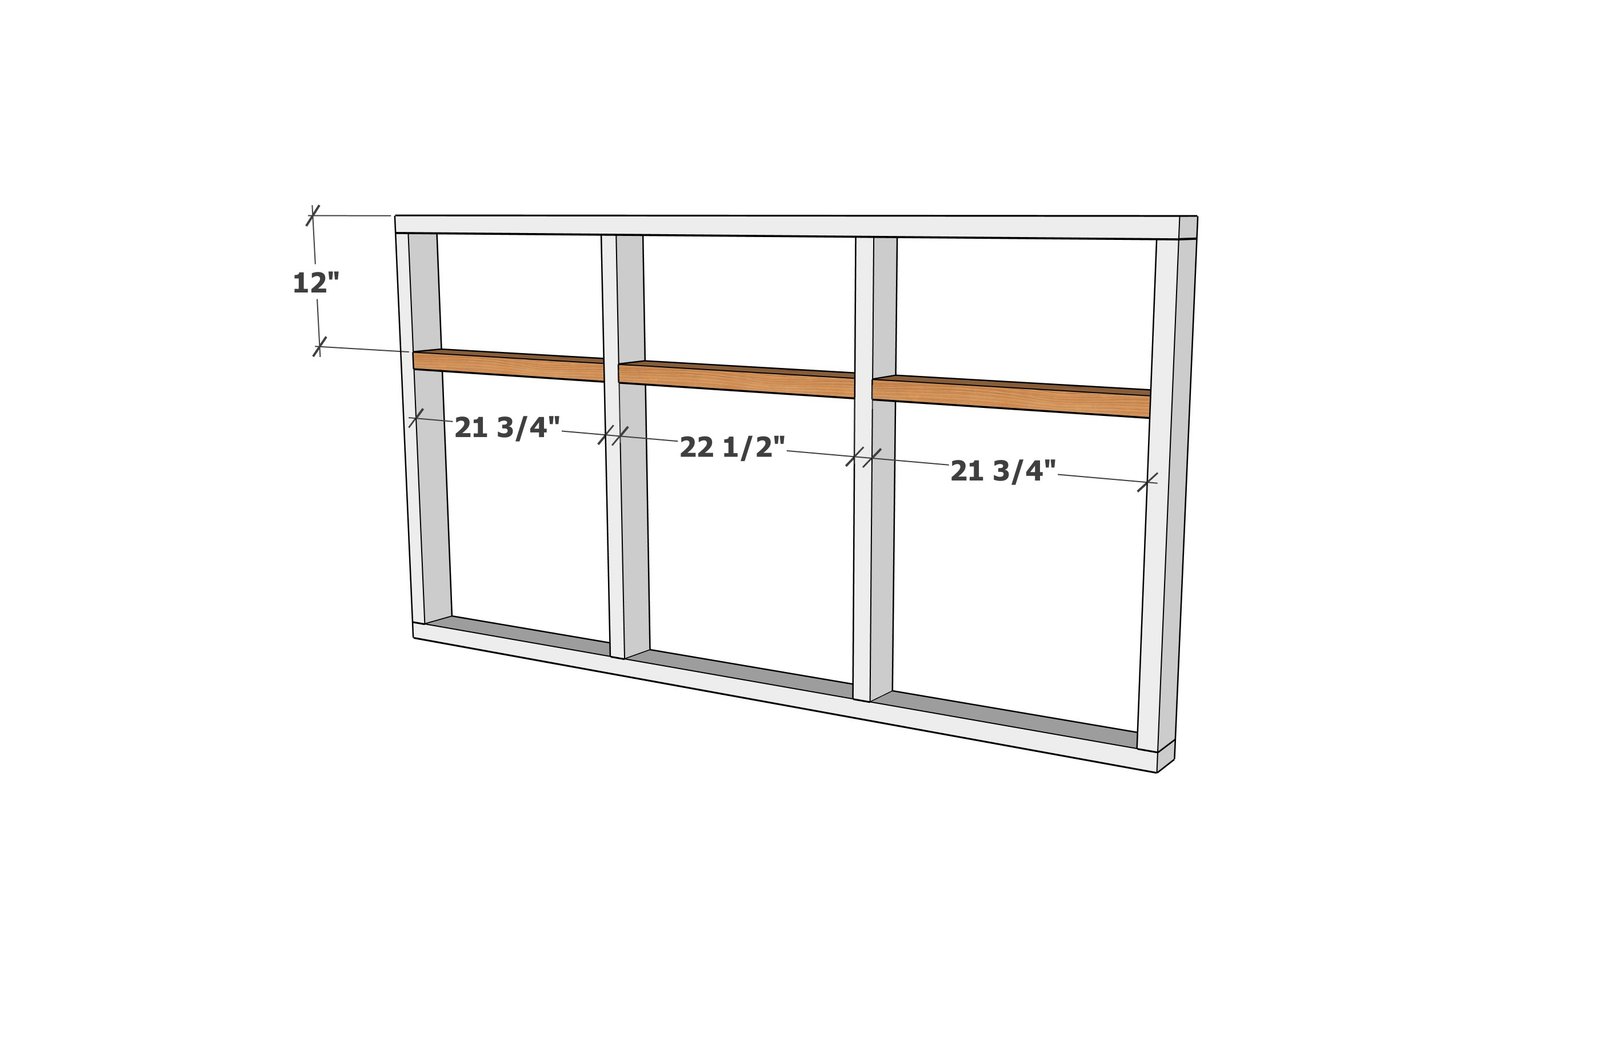
- 1 - 2x4 @ 22-1/2" - front middle horizontal piece
- 7 - 1x6 or fence pickets @ 72" - front siding
- 4 - 2x4 @ 31-1/2" - side walls top and bottom
- 2 - 2x4 @ 28-1/2" - side walls center horizontal pieces
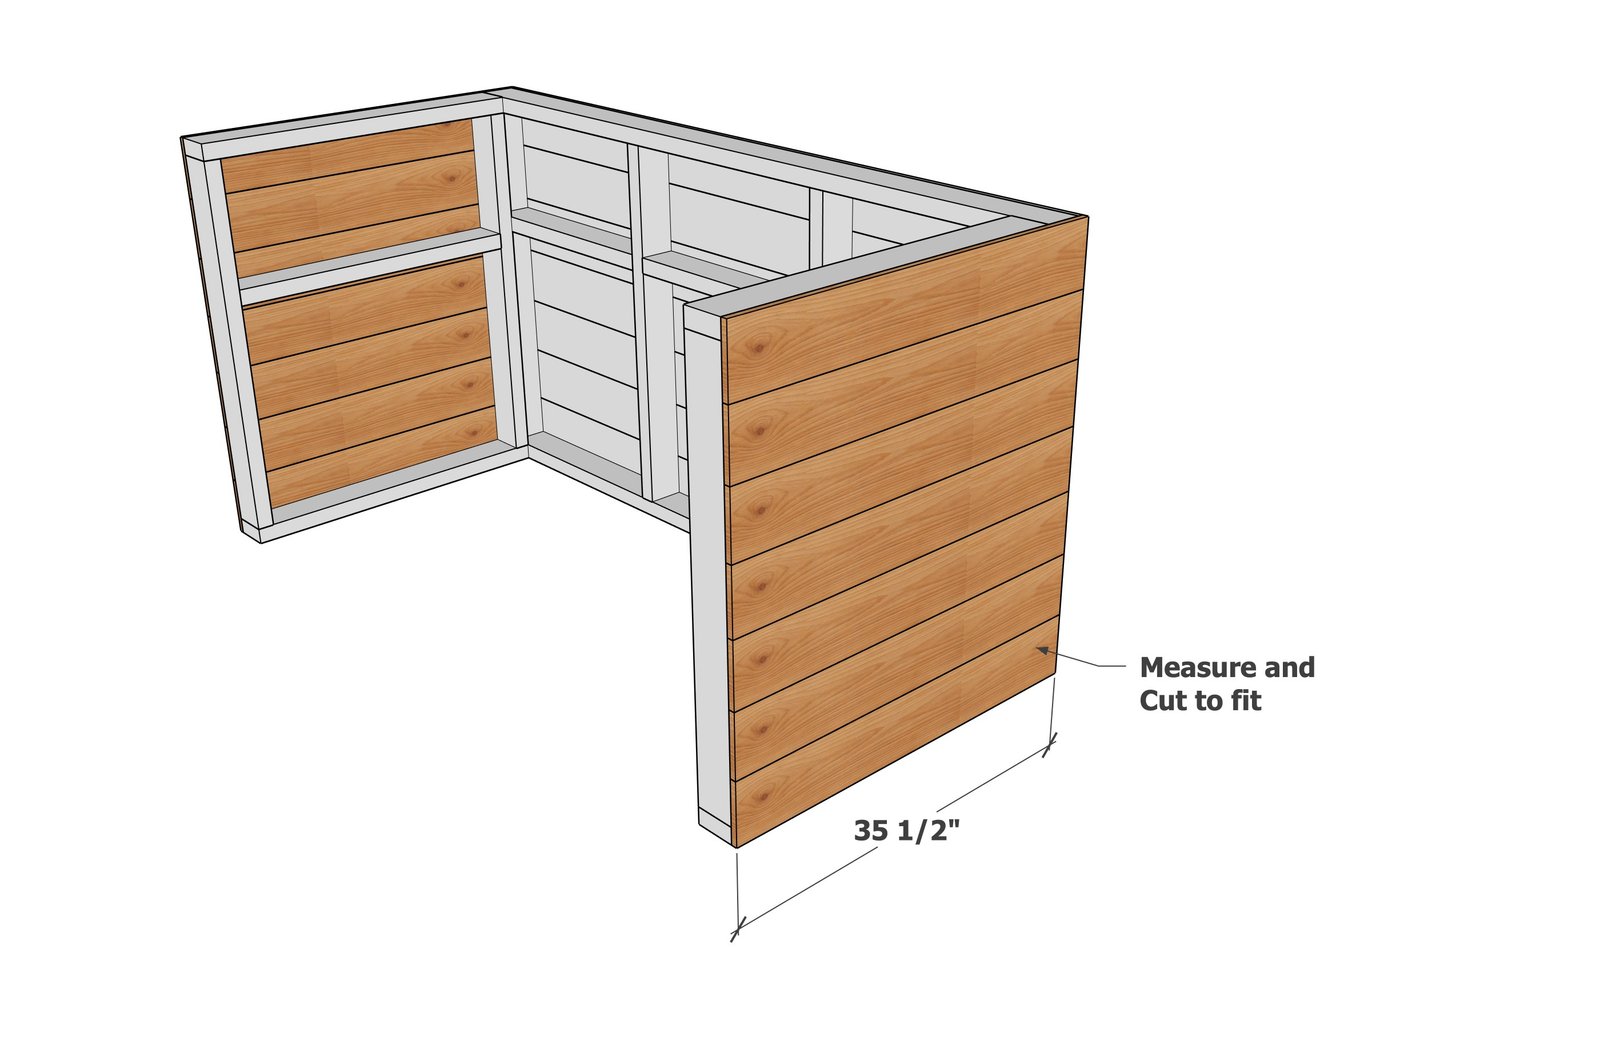
- 14 - 1x6 or fence pickets @ 35-1/2" - measure and cut to fit
- 2 - 2x4 @ 41-1/4" - side top trim
- 1 - 2x4 @ 73" - front top trim - measure and cut to fit
- 6 - 1x3 @ 35" - side trim
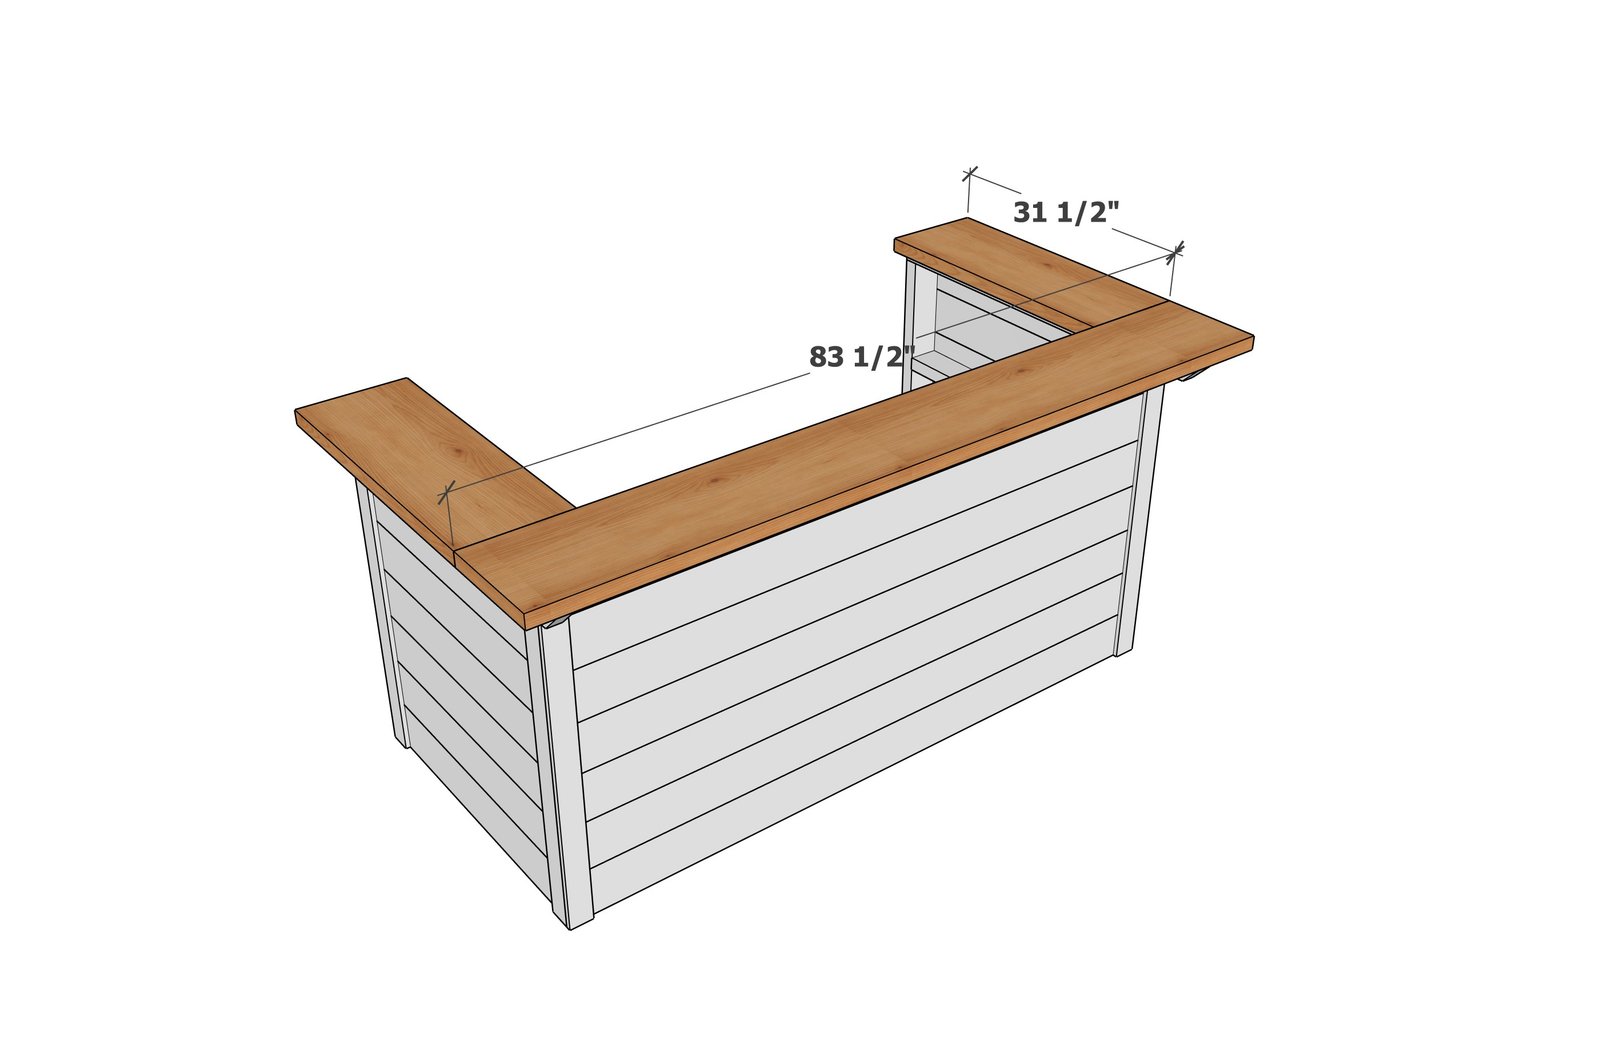
- 1 - 2x12 @ 83-1/2" - front countertop
- 2 - 2x12 @ 32-1/2" - side countertop
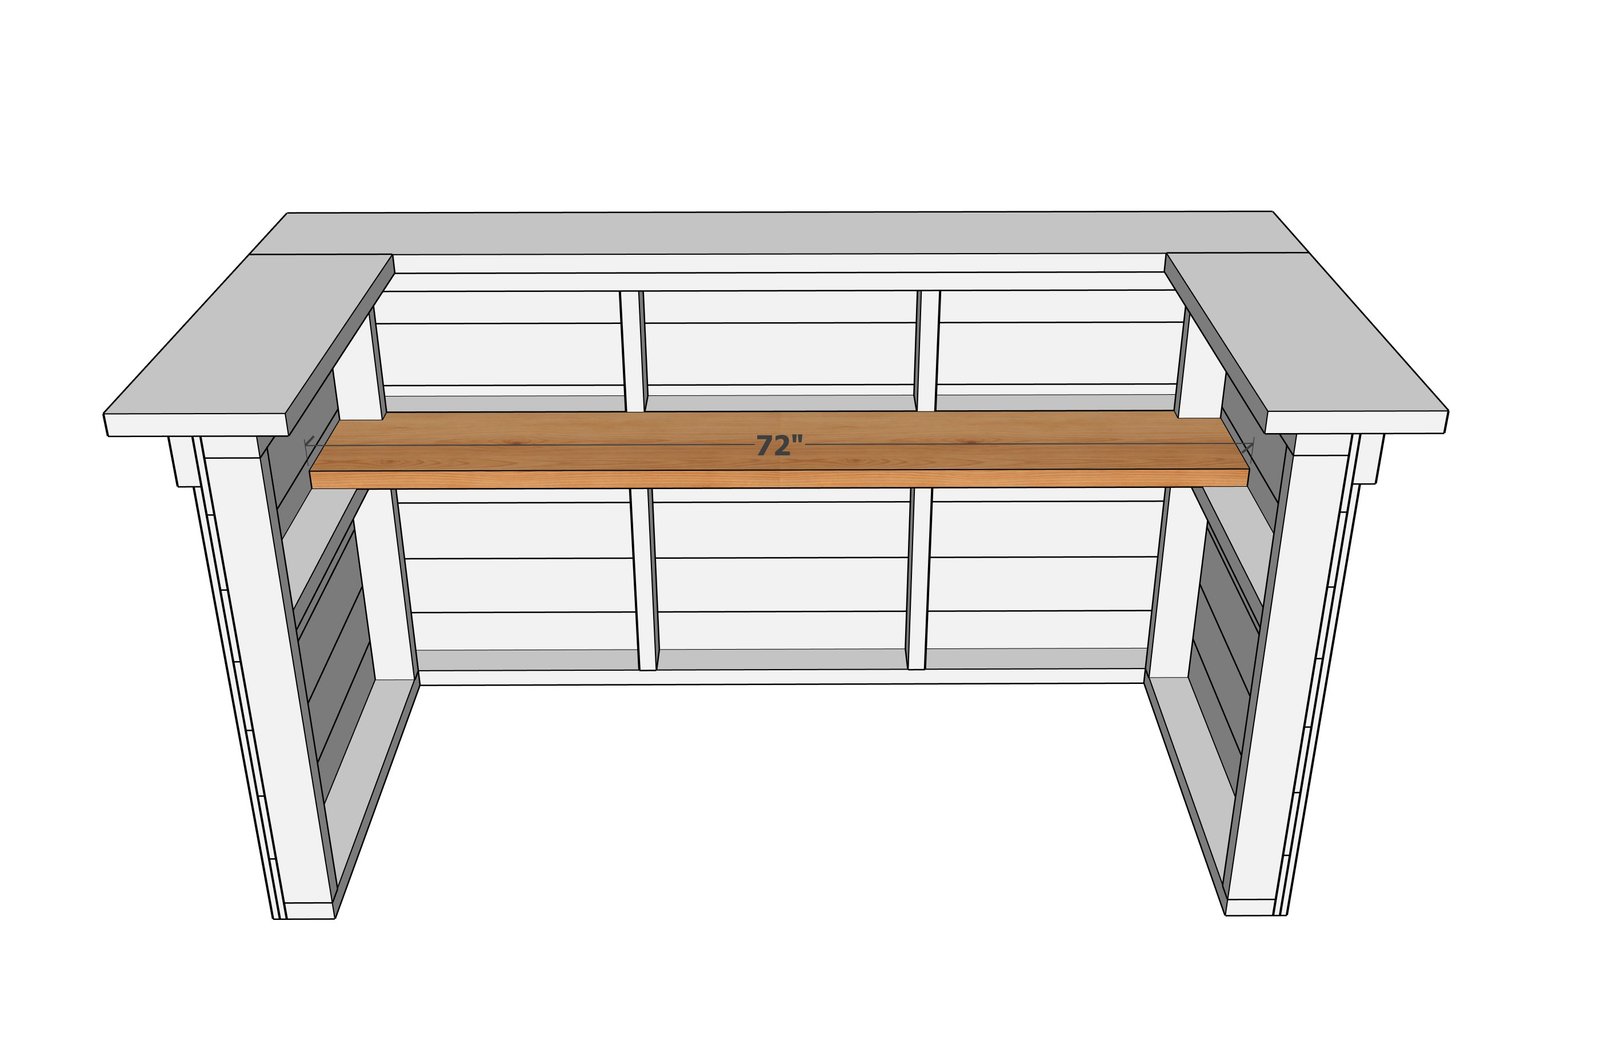
- 1 - 2x12 @ 72" - inside shelf
Tools
- measuring tape
- square
- pencil
- safety glasses
- drill
- circular saw
- compound miter saw
- nailer
- sander
Step-by-step Instructions
Step 1
Build the front wall with 2-3/4" self tapping screws, two per joint.
Step 2
Add in the blocking. The center blocking will require adding screws at a slight angle to attach.This is not structural so a perfect joint is not required here.
Step 3
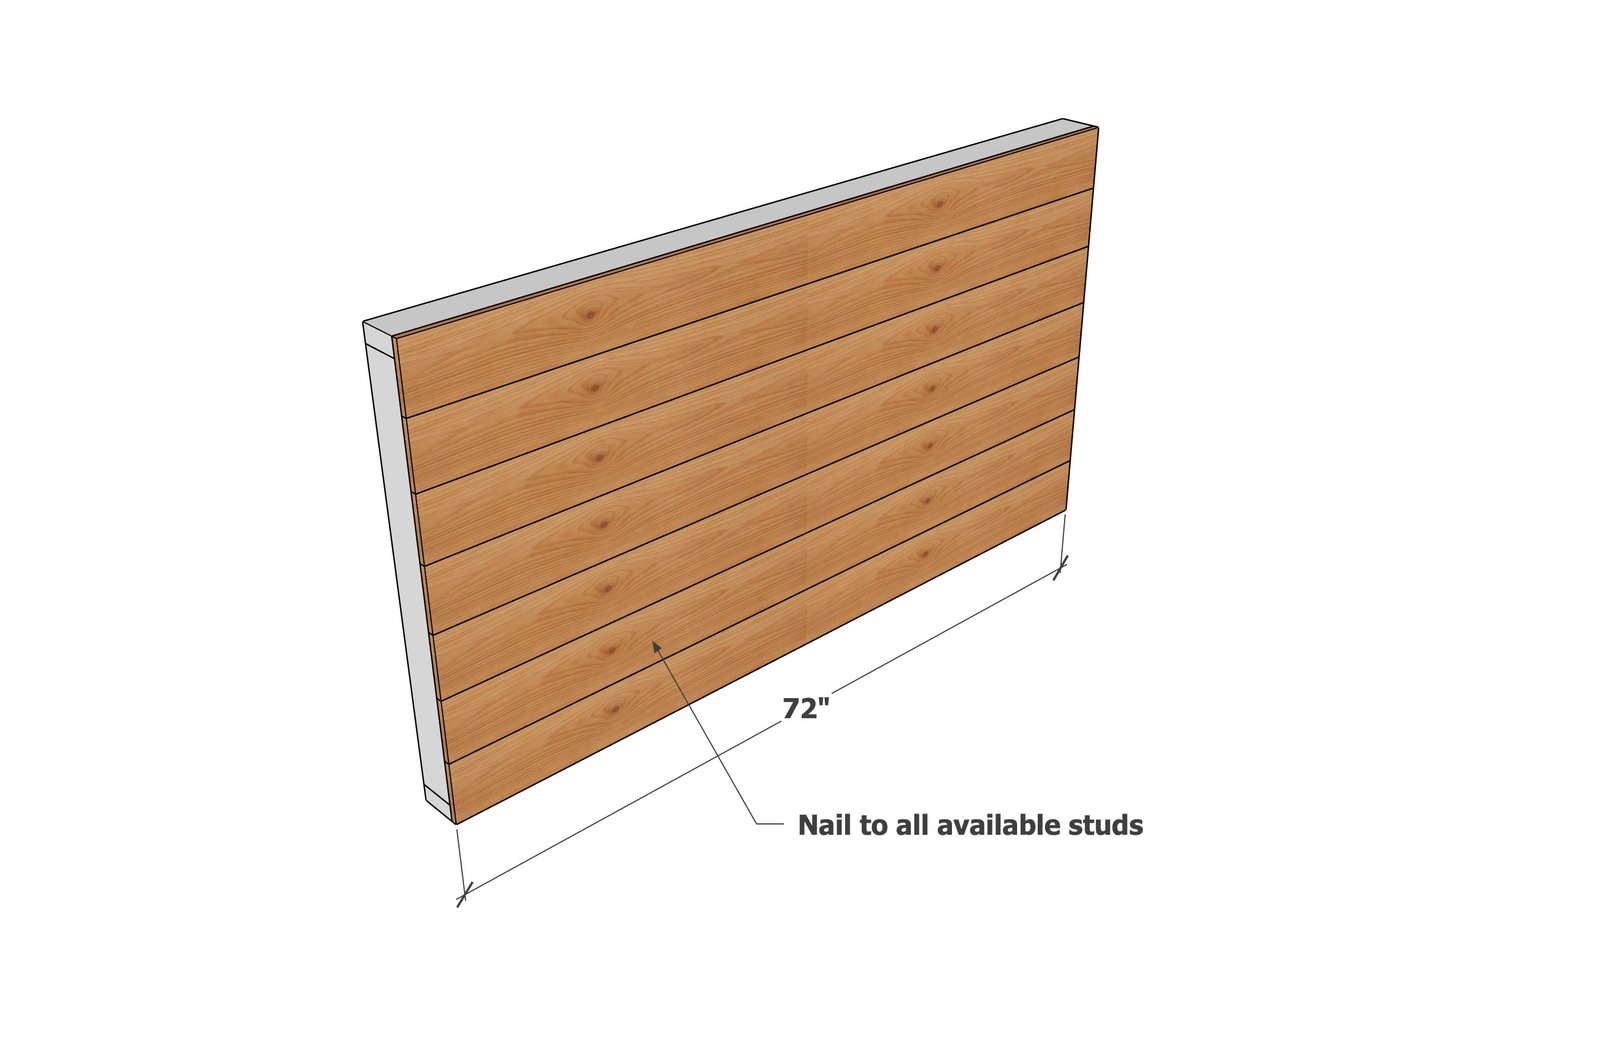
Attach the cedar fence pickets to the front, evenly spacing out the fence pickets. Attach with brad nails.
Step 4
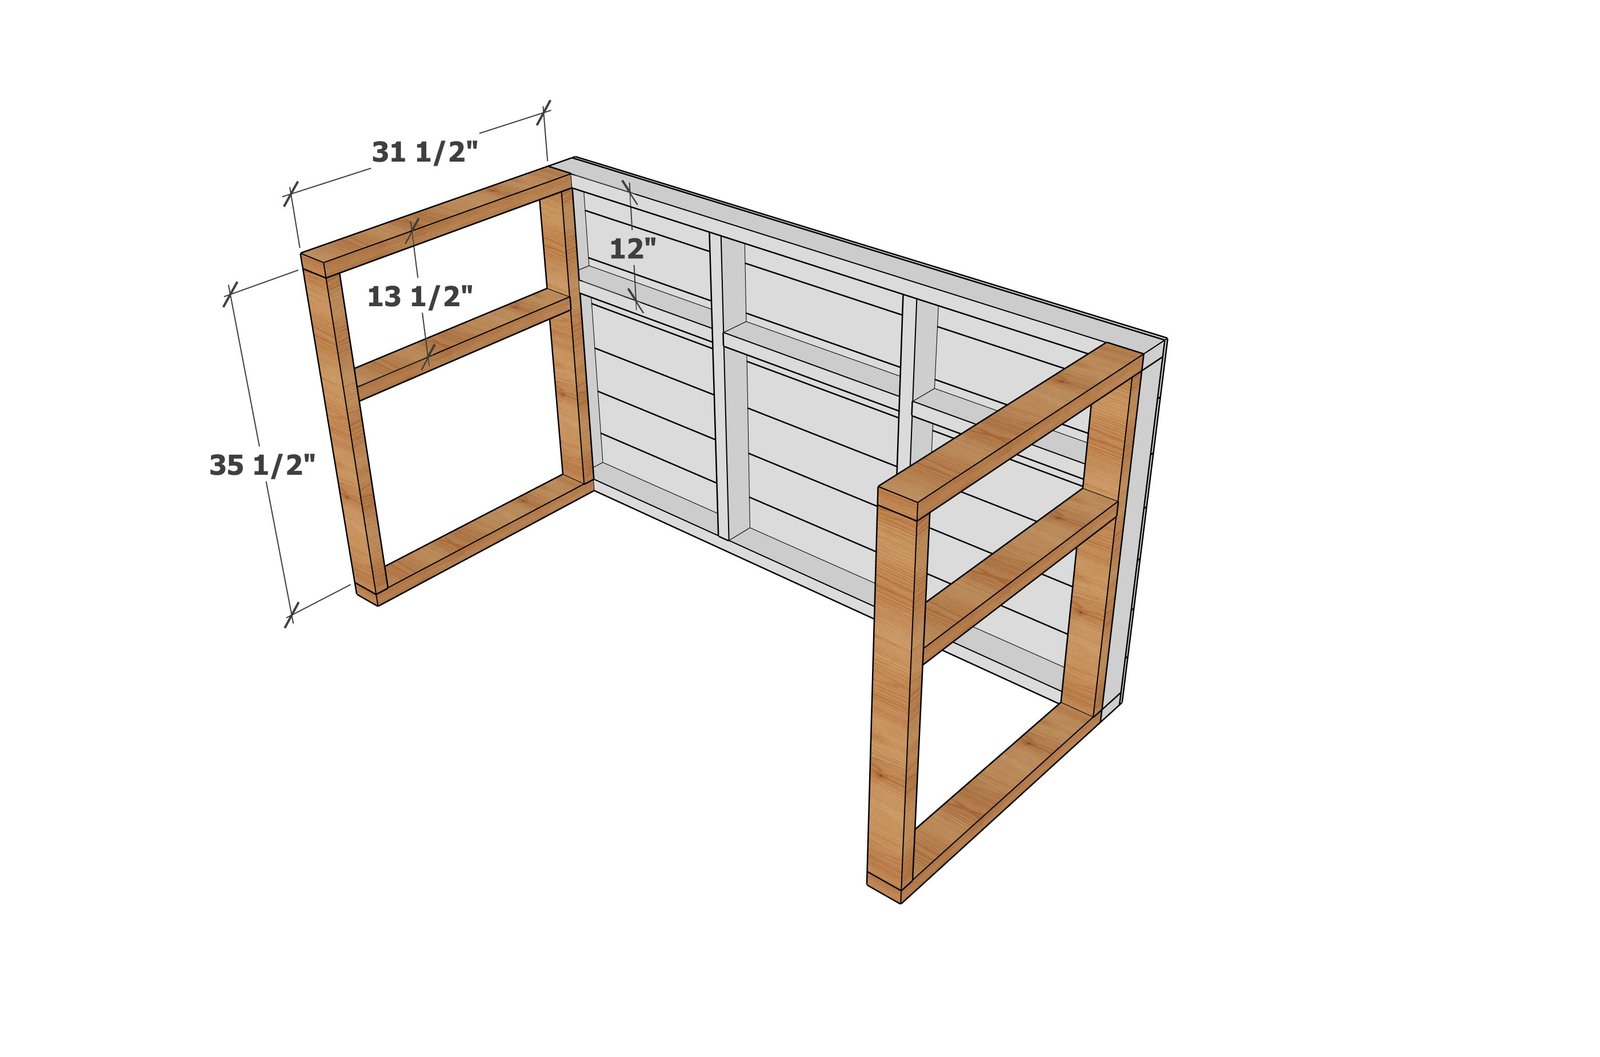
Build the side framing first with the 2-3/4" screws. Then attach the side framing to the front.
Step 5
Cover the side framing with fence pickets, attaching with brad nails.
Step 6
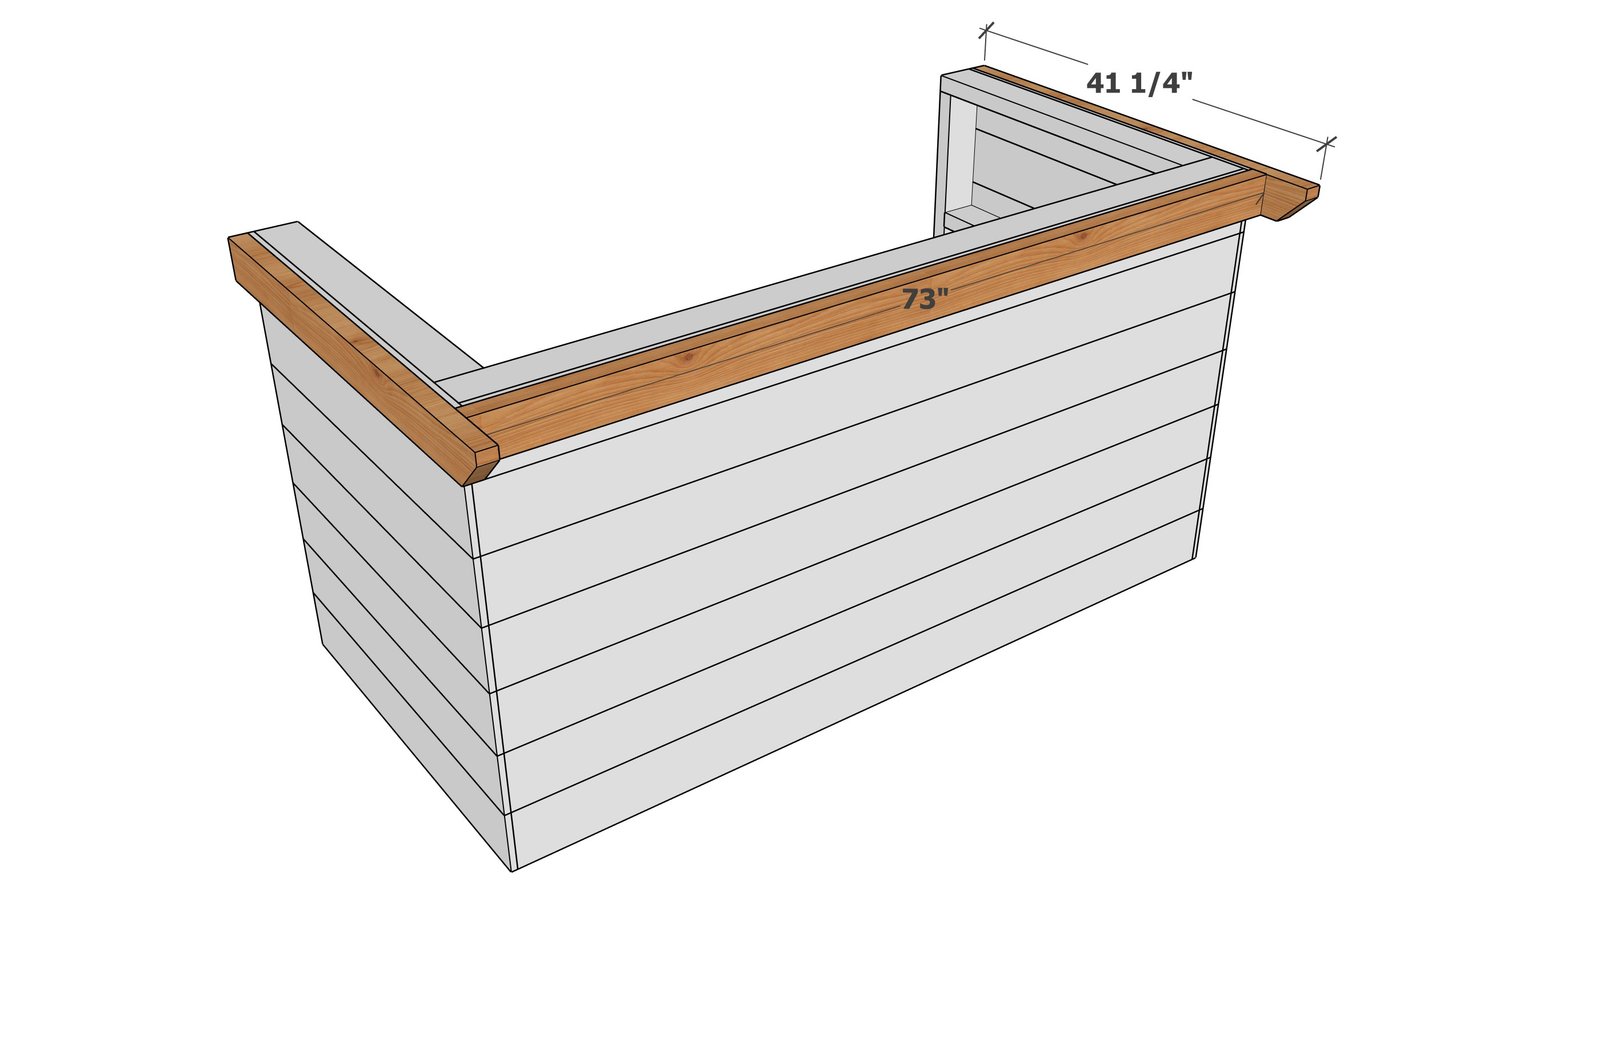
Use screws to attach the side pieces first. Then measure and cut the middle piece and attach between the side pieces with screws.
Step 7
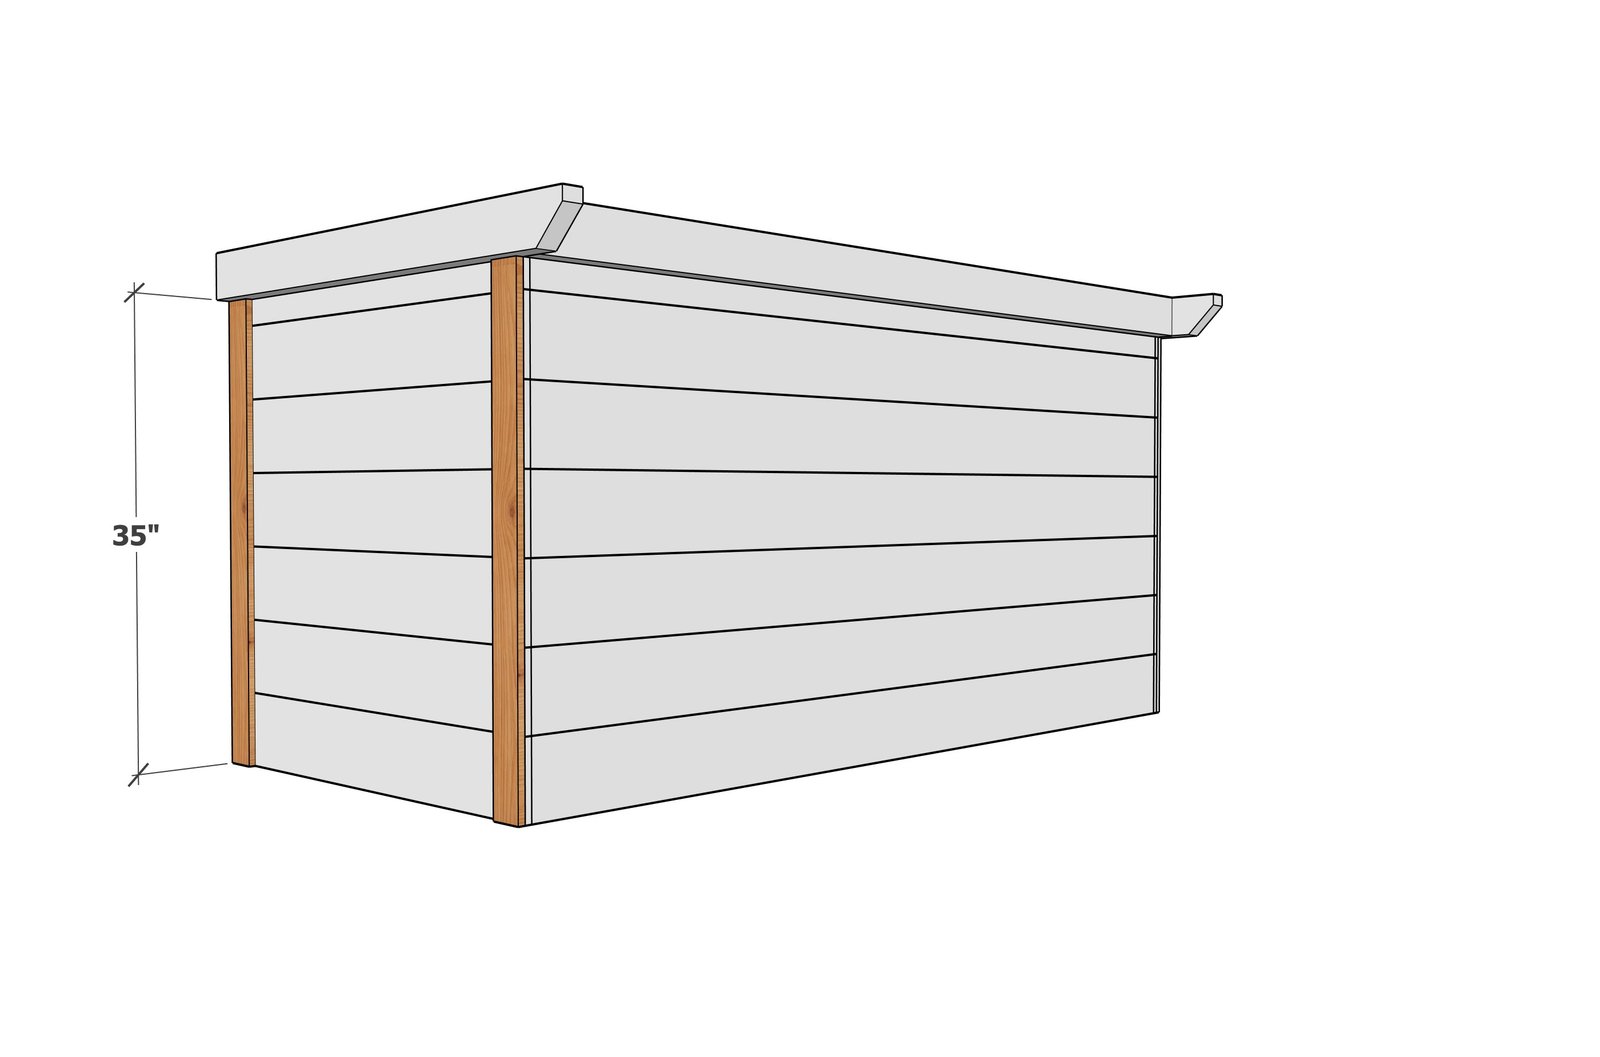
Add trim to the sides with the screws.
Step 8
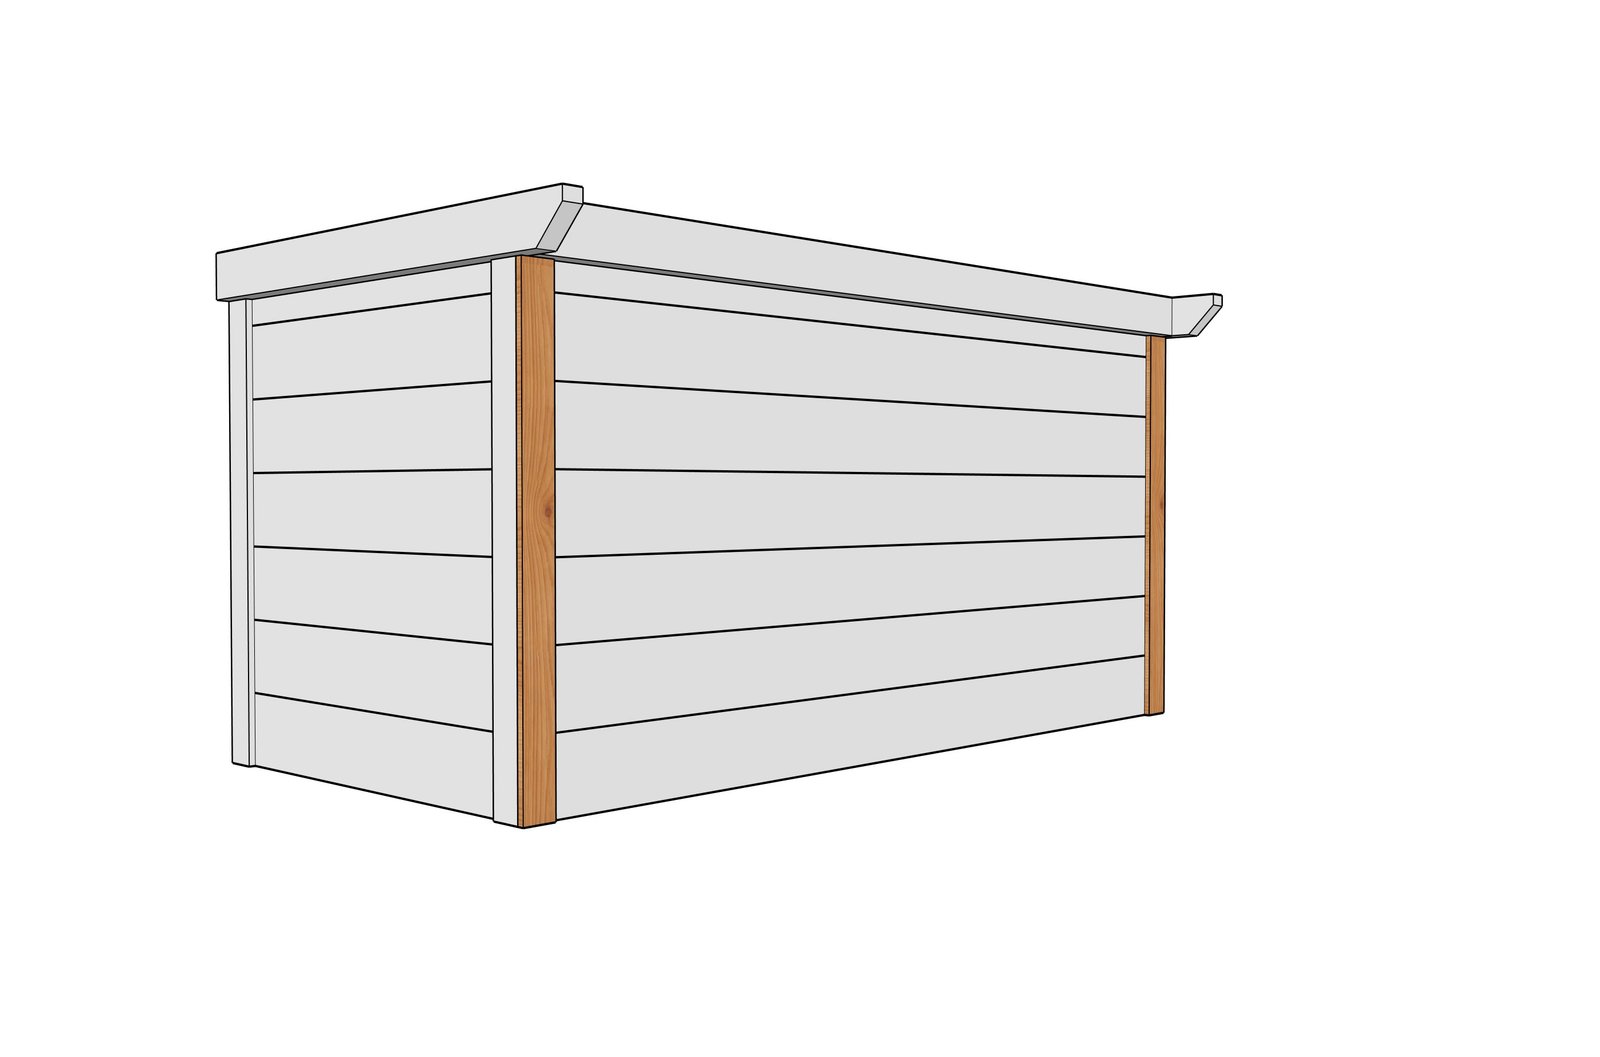
Now add trim to the front with the screws.
Step 9
Notch out the 2x12 shelf to fit with a jigsaw or circular saw. Then fit inside and screw down.
Step 10
For best results with the bar top, attach together first with 1-1/2' pocket holes and 2-1/2" pocket hole screws. Position the 2x12 boards so that the crown (bark side) is up, so over time, the water will drain down and not cup in the center. Then attach the entire top to the top of the bar.
Finishing
Sand all surfaces, starting with a medium grit and finishing with fine. Wipe off the dust, fill any holes or gaps with wood filler, and sand smooth once dry. Apply primer if you're painting, then finish with your choice of paint or stain and seal with a durable clear topcoat. For outdoor projects, use exterior-rated primer, paint or stain, and sealer so the piece stands up to the weather.
Source (temporary): https://www.ana-white.com/woodworking-projects/large-three-sided-outdoor-bar-free-plans