Large Wooden Milk Crate Tutorial using Cedar Fence Pickets
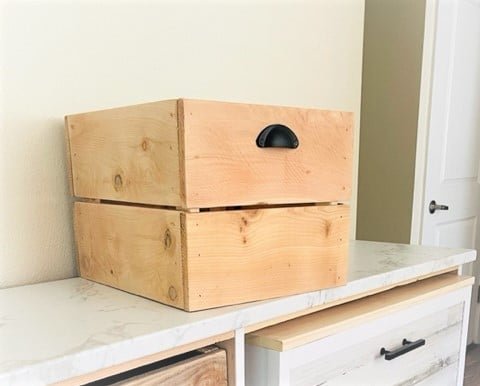
DIY Large Wooden Milk Crate – Using Cedar Fence Pickets Build your own large wooden milk crate using affordable cedar fence pickets with this! Designed to be simple, functional, and budget-friendly, this DIY crate offers beautiful rustic charm and versatile storage for any room. Whether you're organizing a mudroom, pantry, playroom, or craft space, these crates are perfect for bins, baskets, and even wall-mounted storage. Why you’ll love this project: • Built entirely from cedar fence pickets – super affordable and easy to find • Large size – ideal for deep storage or fitting into cubby shelves • Beginner-friendly – only basic tools and cuts required • Sturdy and lightweight for everyday use • Easy to customize with paint, stain, or handles The includes: • Full cut list and shopping list using standard cedar pickets • Step-by-step tutorial with photos and diagrams • Optional add-ons: caster wheels, handles, or stenciled labels • Sanding, assembly, and finishing tips Use these crates to add rustic farmhouse charm and functional storage to your home—inside or out! Download the now and get building for less than the price of a store-bought bin!
Specifications
| Project type | Crate Plans and Projects Made with Crates |
|---|---|
| Room | Storage Solutions |
| Style | Farmhouse Furniture |
| Difficulty | Starter Projects |
Dimensions
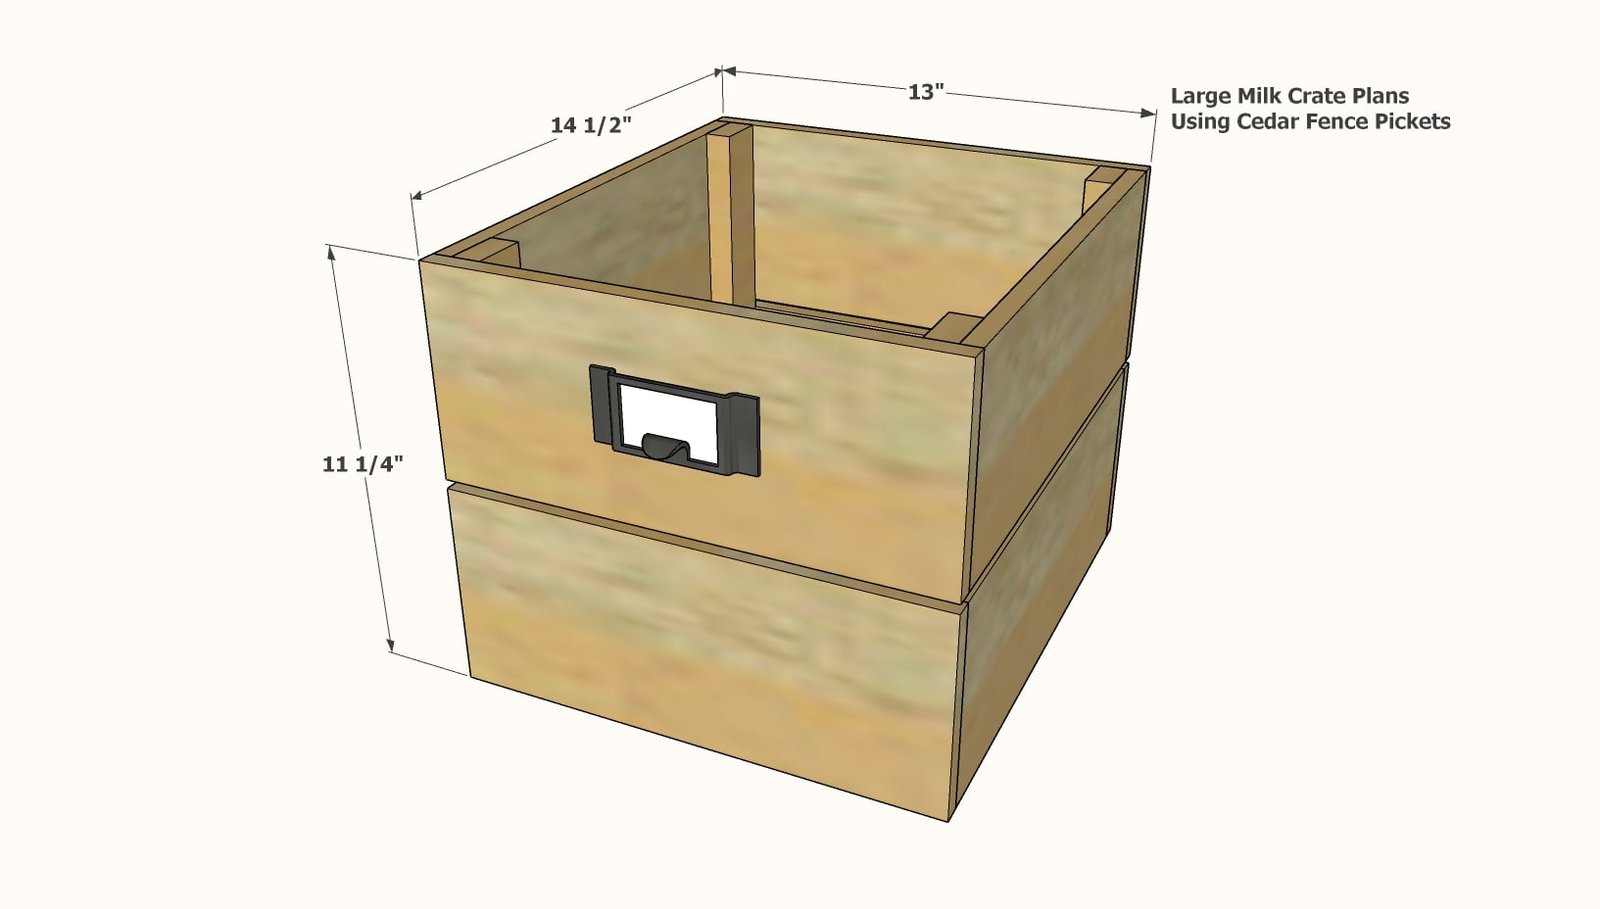
Use the size-specific shopping and cut lists below.
Shopping List
- 2 - cedar fence pickets, 5-1/2" wide x 6 feet long
- 1 - 1x2 furring strip, 8 feet long
- 1-1/4" and 1" brad nails
- wood glue
Cut List
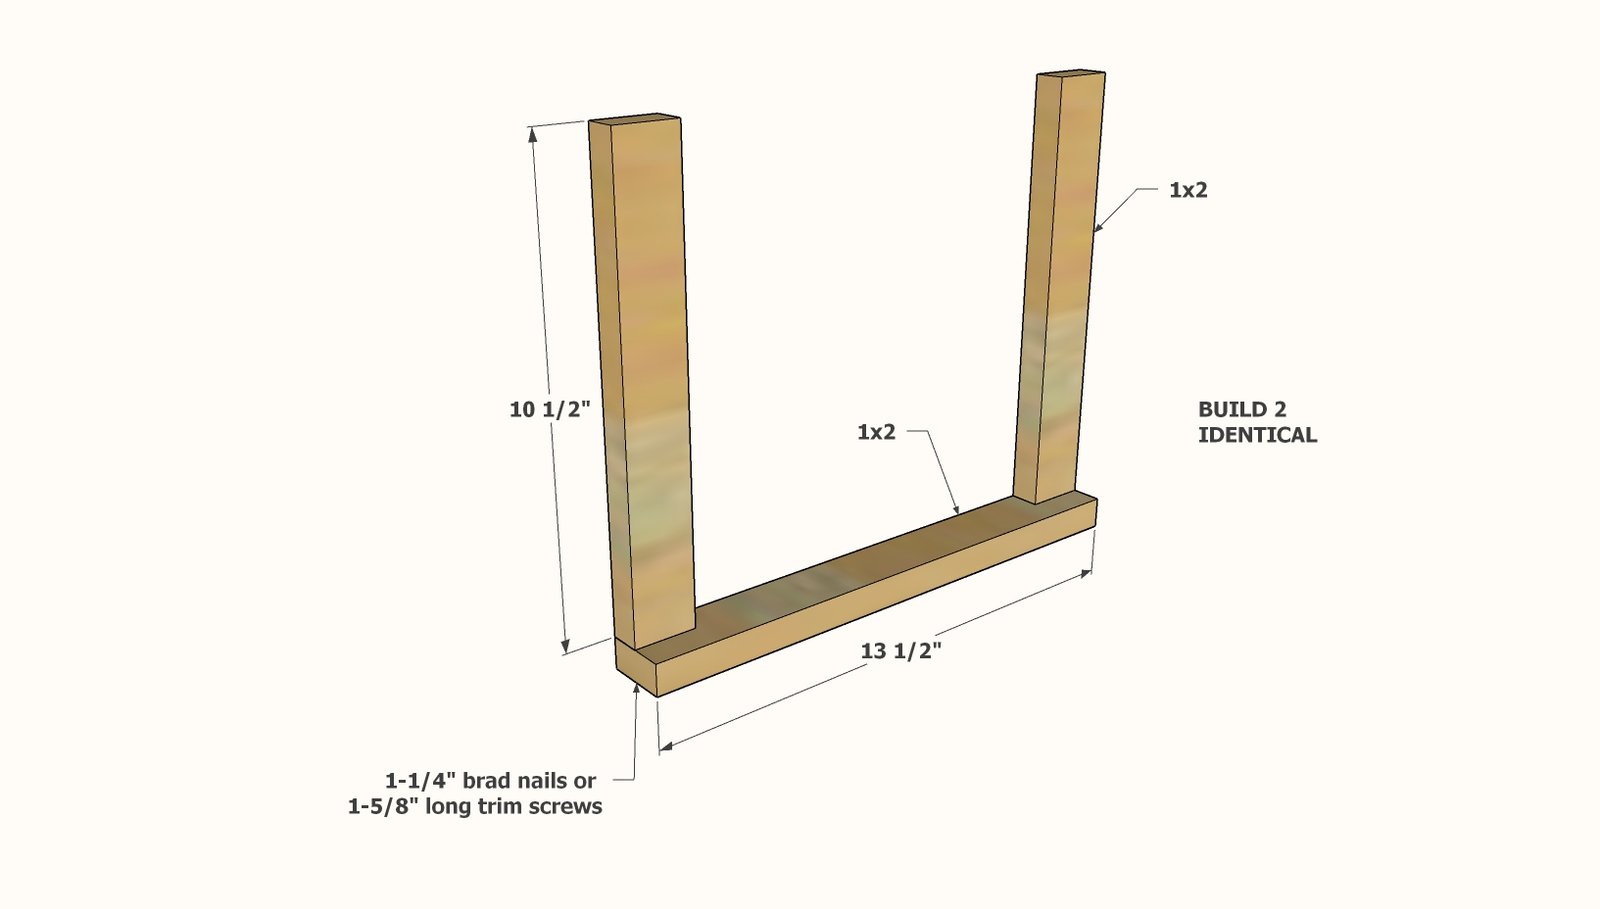
- 2 - 1x2 @ 13-1/2" - bottom frame
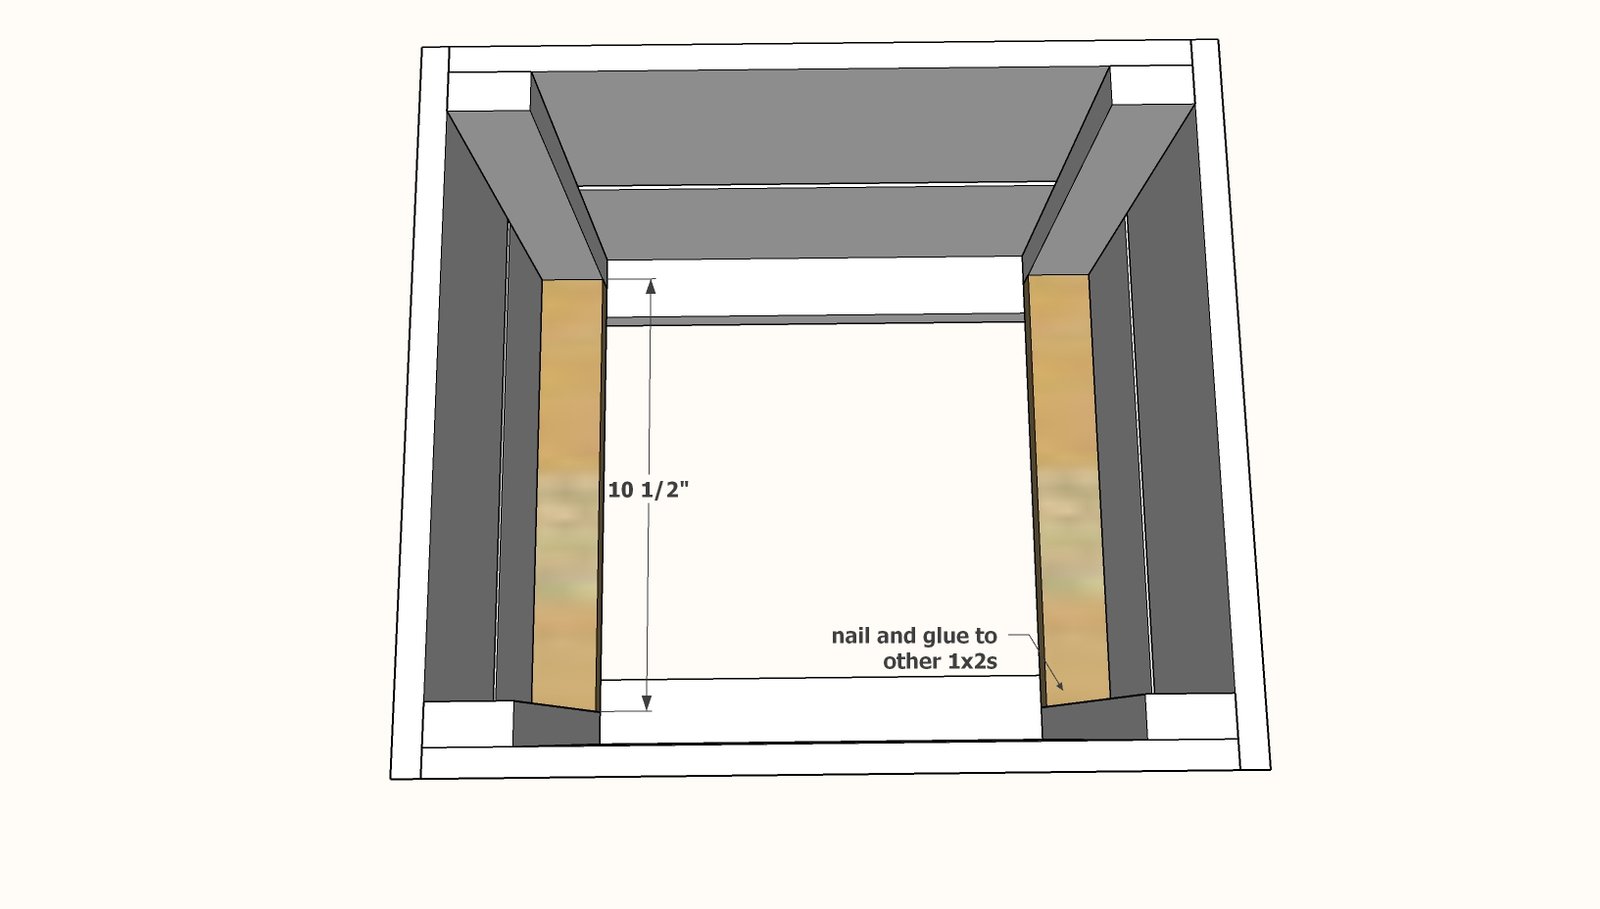
- 6 - 1x2 @ 10-1/2" - legs and bottom fill in pieces
- 4 - cedar fence pickets @ 13-1/2" - sides
- 4 - cedar fence pickets @ 13" - front and back
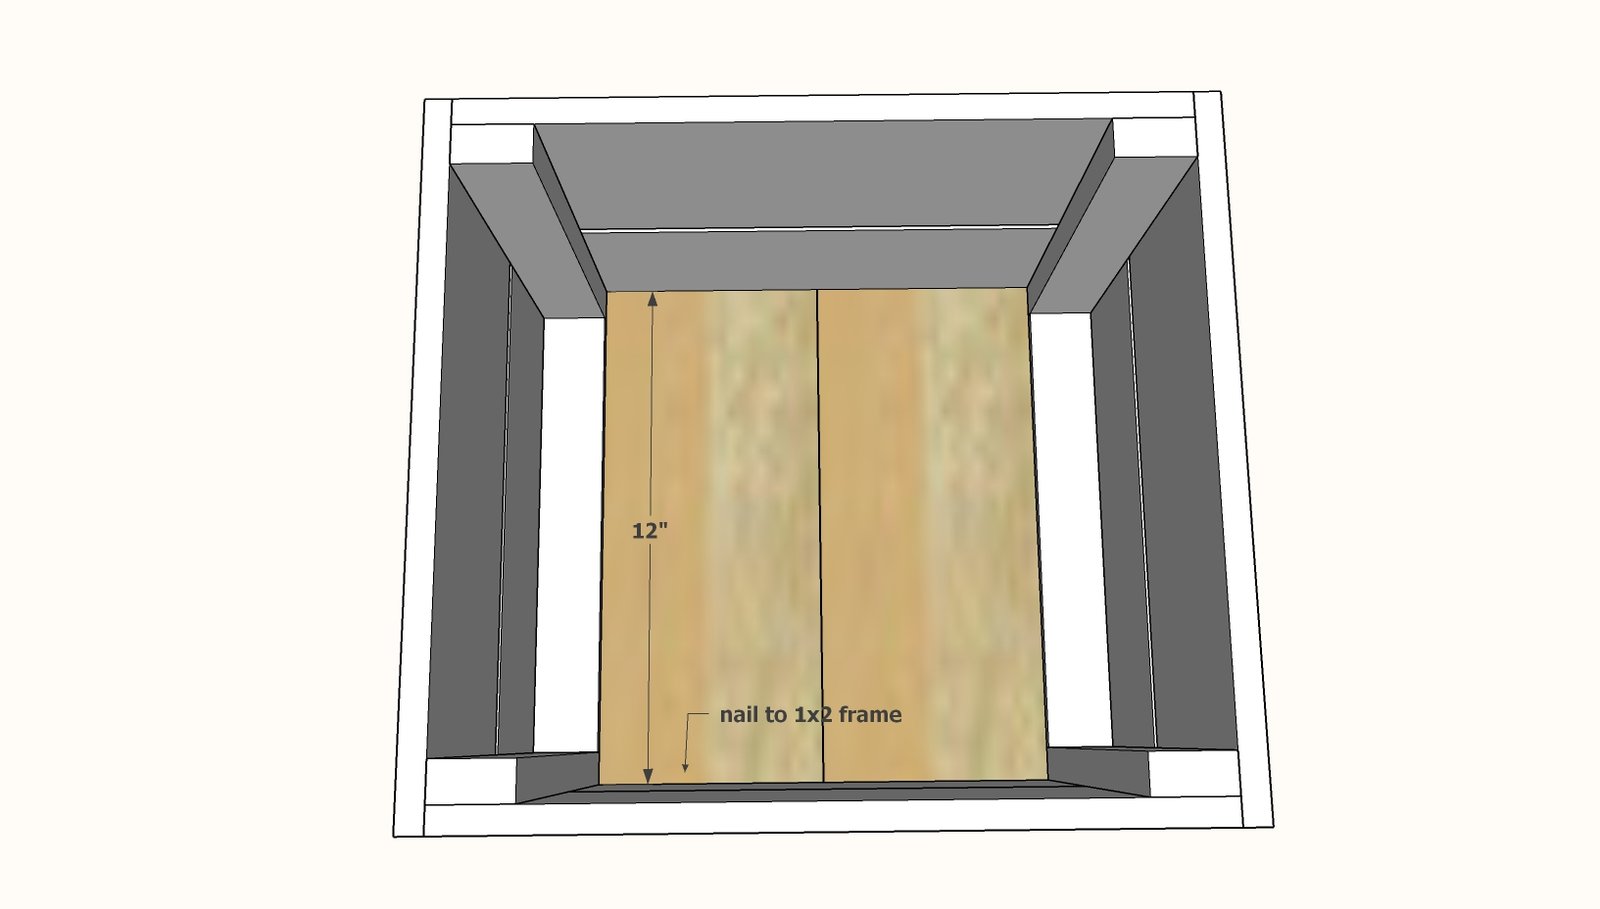
- 2 - cedar fence pickets @ 12" - bottom
Tools
- measuring tape
- square
- safety glasses
- circular saw
- nailer
- sander
Step-by-step Instructions
Cut the 1x2s with a circular saw or compound miter saw.
Nail the vertical 1x4s to the bottom 1x4 with 1-1/4" brad nails and glue. Build two identical. Crate depth adjustment: The bottom 1x2 sets the depth for the crate. For custom size, cut 1" less than the overall desired depth of your crate. Crate height adjustment: The vertical 1x2s set the depth of the crate. Cut 3/4" less than the overall desired height. As shown, height is designed to work with 2 cedar fence pickets.
Step 2
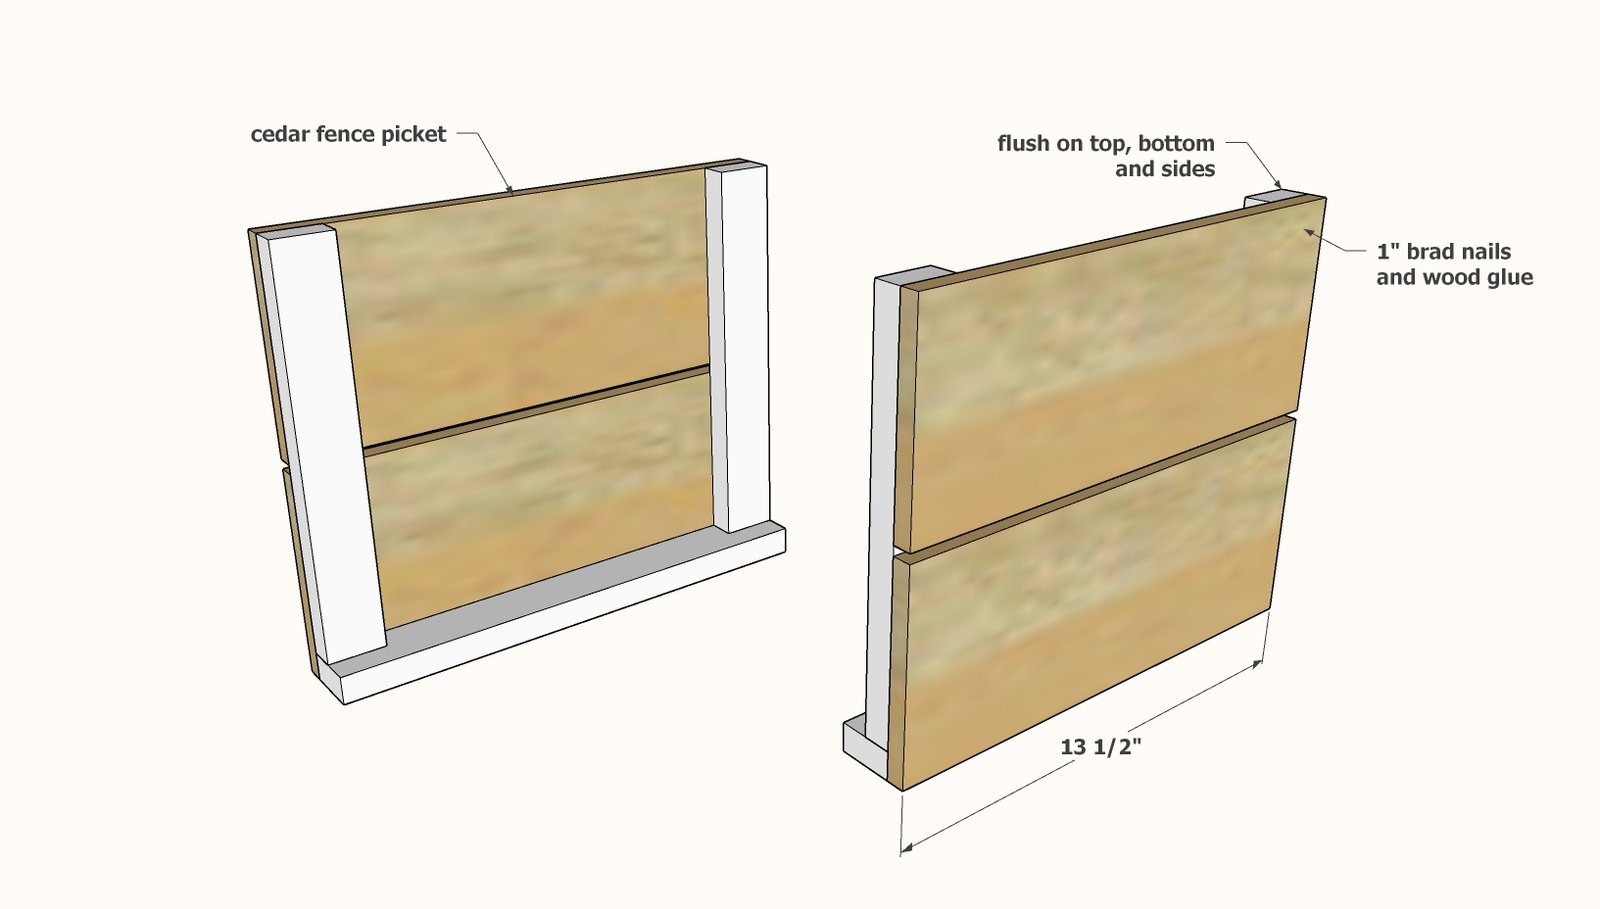
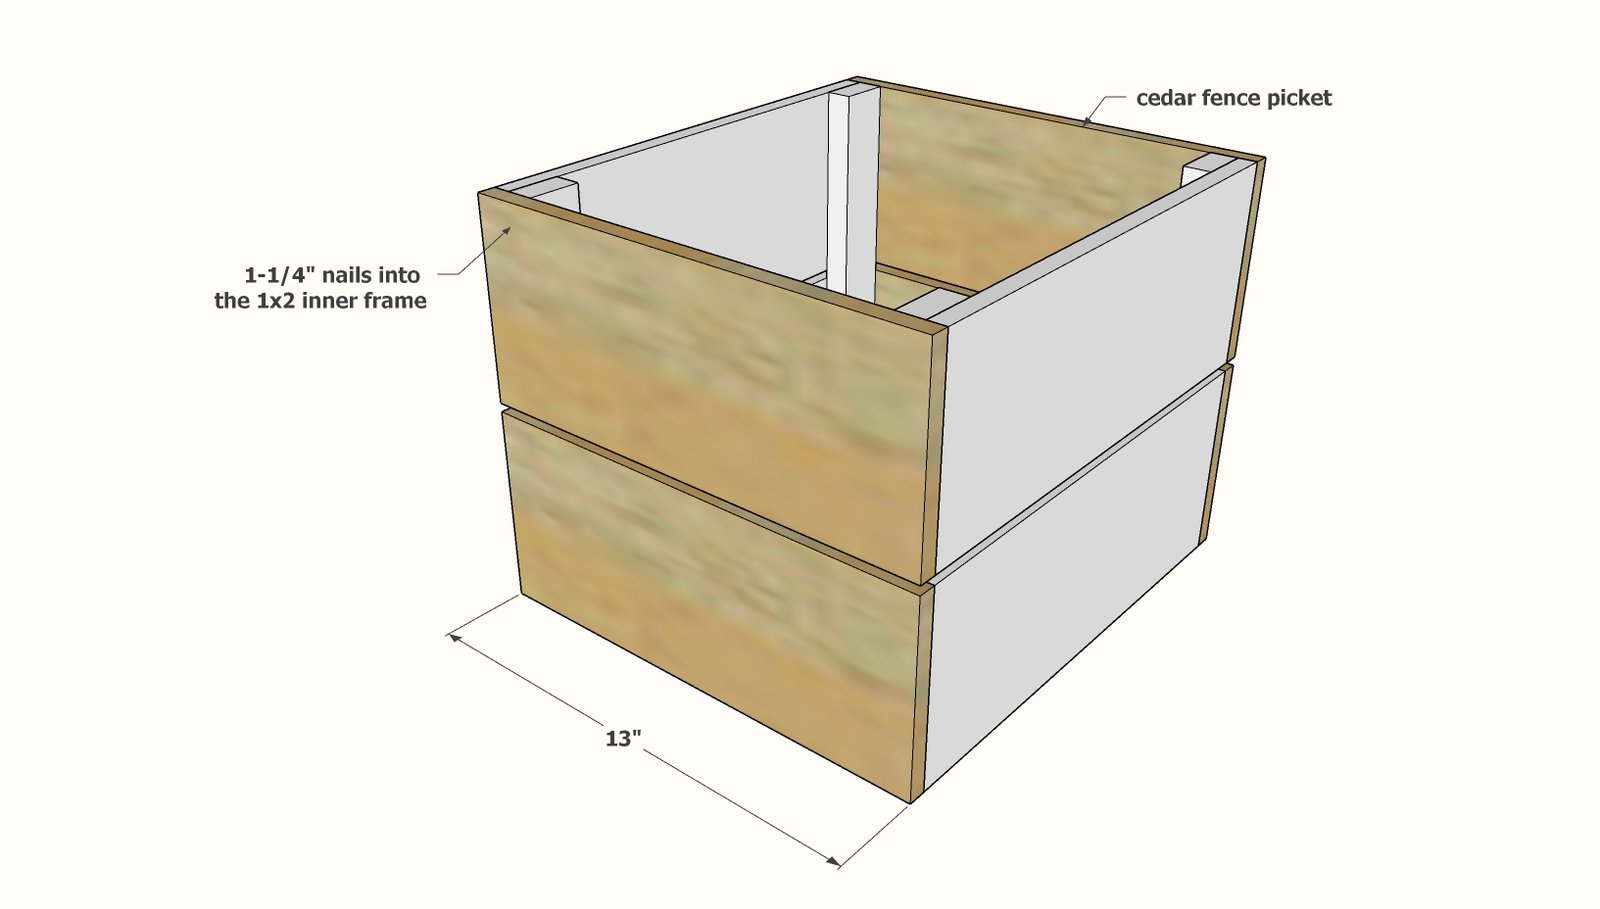
Cut the cedar fence pickets for the sides and nail to the 1x2 inner frame.
Step 3
Width Adjustment: The front and back cedar fence pickets set the width of the crate. Cut to the desired width of the crate. Attach the cedar fence pickets to the front and back with the 1" brad nails.
Step 4
Inside - fill in the insides between the 1x2s with 1x2 pieces.
Step 5
Inside - fill in the remaining inside with cedar fence pickets.
Finishing
Sand all surfaces, starting with a medium grit and finishing with fine. Wipe off the dust, fill any holes or gaps with wood filler, and sand smooth once dry. Apply primer if you're painting, then finish with your choice of paint or stain and seal with a durable clear topcoat. For outdoor projects, use exterior-rated primer, paint or stain, and sealer so the piece stands up to the weather.
Source (temporary): https://www.ana-white.com/woodworking-projects/large-wooden-milk-crate-tutorial-using-cedar-fence-pickets