Laundry Basket Organizer Tower
How to build laundry basket organizers! Clean up your laundry room with these simple laundry basket dressers made from a single sheet of plywood. from
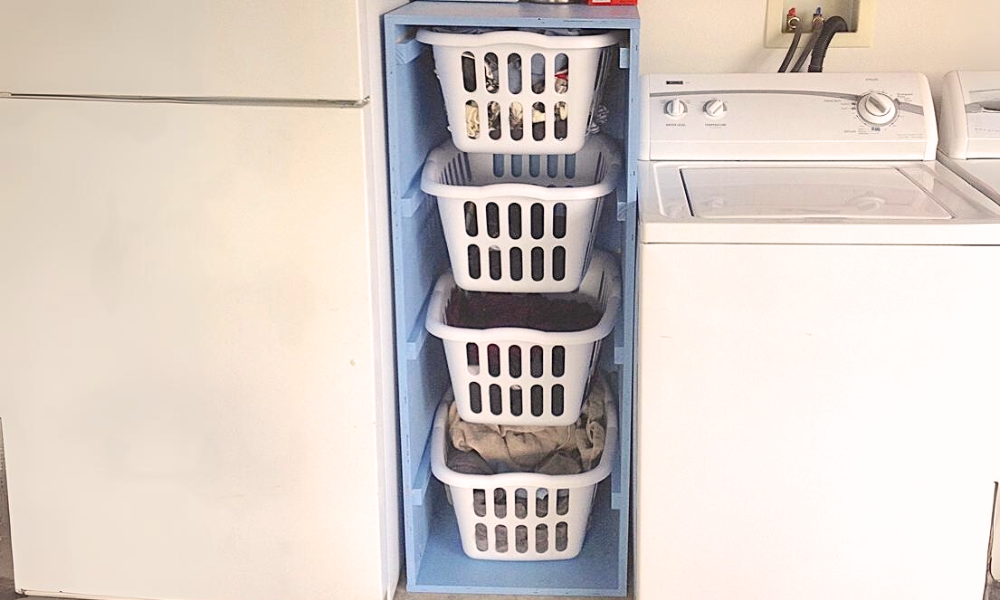
Specifications
| Project type | Dresser Plans |
|---|---|
| Room | Storage Solutions |
| Style | Cottage Style Furniture Plans |
| Difficulty | Beginner Projects |
| Estimated cost | $20 - $50 |
Dimensions
Use the size-specific shopping and cut lists below.
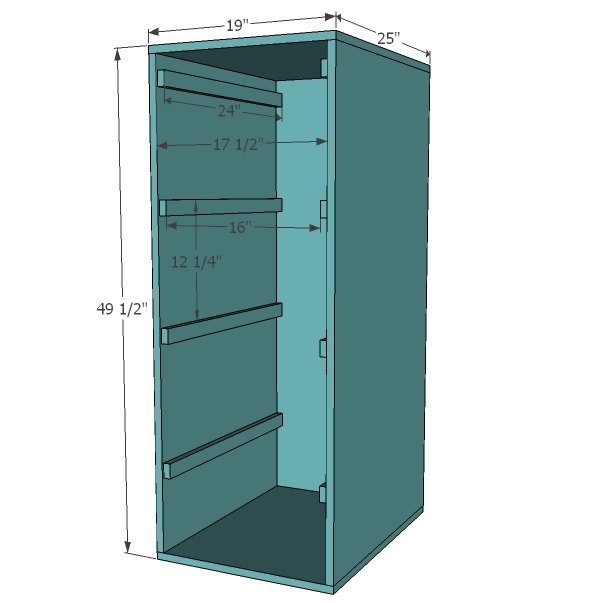
Shopping List
- 1 - Sheet 3/4" plywood or MDF
- 2 - 1x2 @ 8 feet long
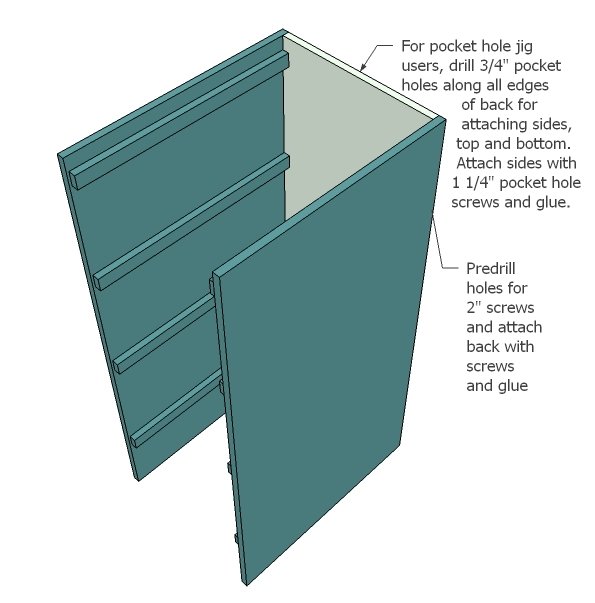
- 2" self tapoing star bit screws or 1 1/4" pocket hole screws
- 1 1/4" brad nails
- Glue
- Paint
- 4 Laundry Baskets, 16" x 24" (I use the Sterilite ones but measure and make sure the baskets you buy will fit)
Cut List
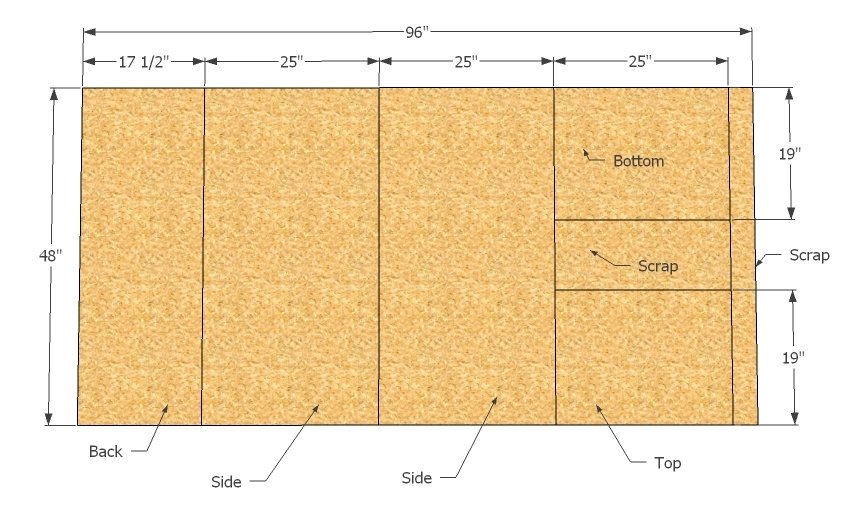
3/4" plywood cut as follows and shown in cutting diagram:
- Back: 17 1/2" x 48" Sides (2): 25" x 48"
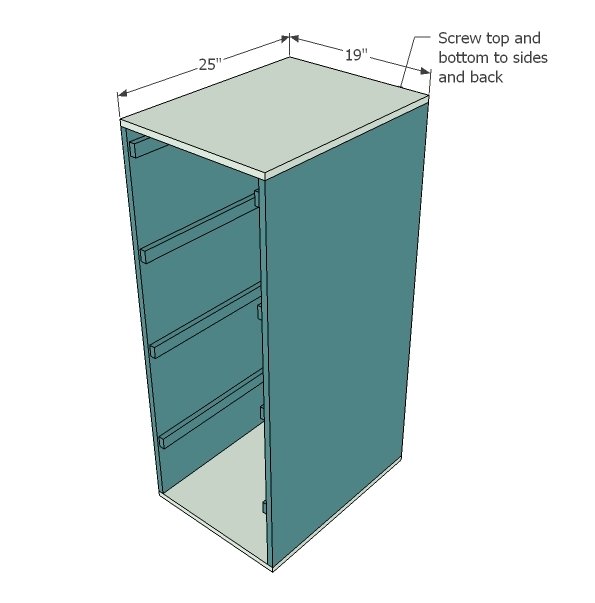
- Top & Bottom (2): 19" x 25"
8 - 1x2 @ 24" (it's okay if they are a tiny bit short to get all the cuts on the same boards)
Tools
- measuring tape
- square
- pencil
- safety glasses
- drill
- circular saw
- nailer
- sander
- countersink drill bit
Step-by-step Instructions
Step 1
Okeedok! Here we go. Just start at one end of the plywood, measure in 17 1/2" and make a straight line and cut. Then measure in 25", mark a line and cut. Repeat two more times. From the last 25" strip, cut into two pieces 19" wide for the top and bottom. Because the saw blade takes up space when cutting, you cannot just mark all cuts and have at it. You must measure, cut, then measure, cut and so on. If you have a hardware store that will make these cuts for you, by all means, beg and plead. It's much easier to carry the pieces than a full sheet of 3/4".
Step 2
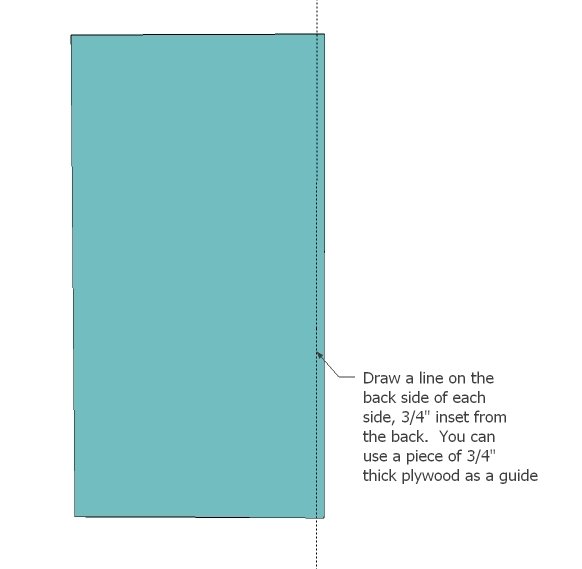
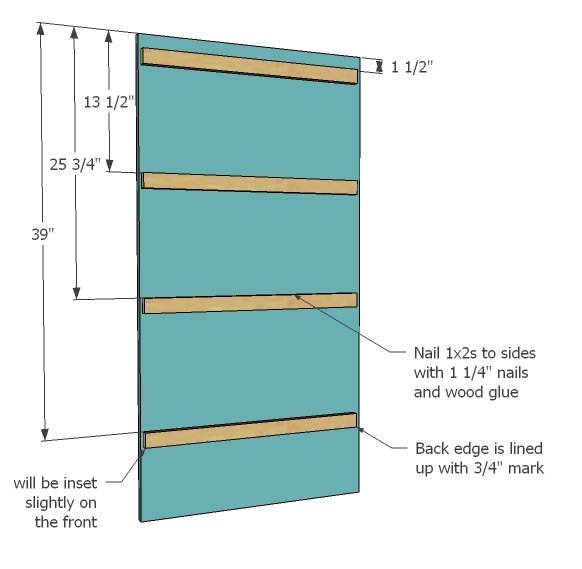
Get the two sides out and determine what side is uglier, and what edge is ugliest. Or shall we say less attractive. Anyway, make a mark down the edge 3/4" as shown in diagram. This will be the backs side. Do this on both sides.
Step 3
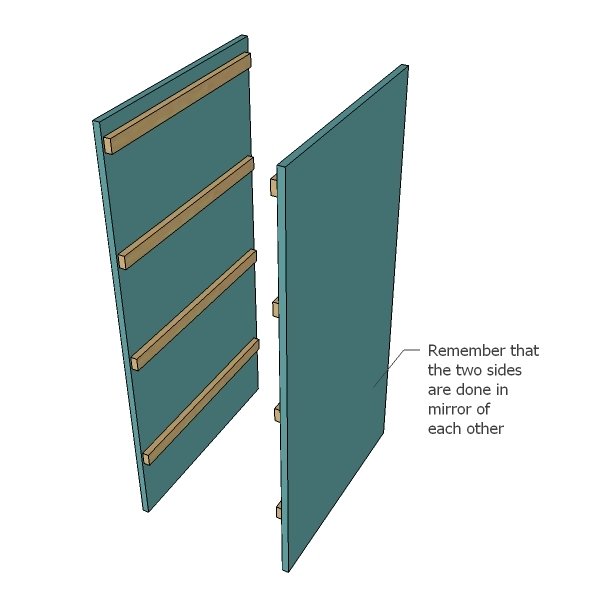
Now mark each side down as shown in the diagram. Make sure you make at least two marks so your cleats go on nice and square. Apply glue to back edge of cleats, and nail down with 1 1/4" nails. Note that the two sides are done in mirror.
Step 4
Just to illustrate the mirror requirement. If you make two the same... you'll be making two Laundry Basket Dressers, which might not be a bad thing at all!!
Step 5
Step 6
And the last step is to just add the tops. This should be pretty easy, just keep your outside edges flush and use glue. And that's it! How simple is that?
Finishing
Sand all surfaces, starting with a medium grit and finishing with fine. Wipe off the dust, fill any holes or gaps with wood filler, and sand smooth once dry. Apply primer if you're painting, then finish with your choice of paint or stain and seal with a durable clear topcoat. For outdoor projects, use exterior-rated primer, paint or stain, and sealer so the piece stands up to the weather.
Source (temporary): https://www.ana-white.com/woodworking-projects/laundry-basket-organizer-tower-4-tall-and-lengthwise