Leaning Ladder Wall Bookshelf
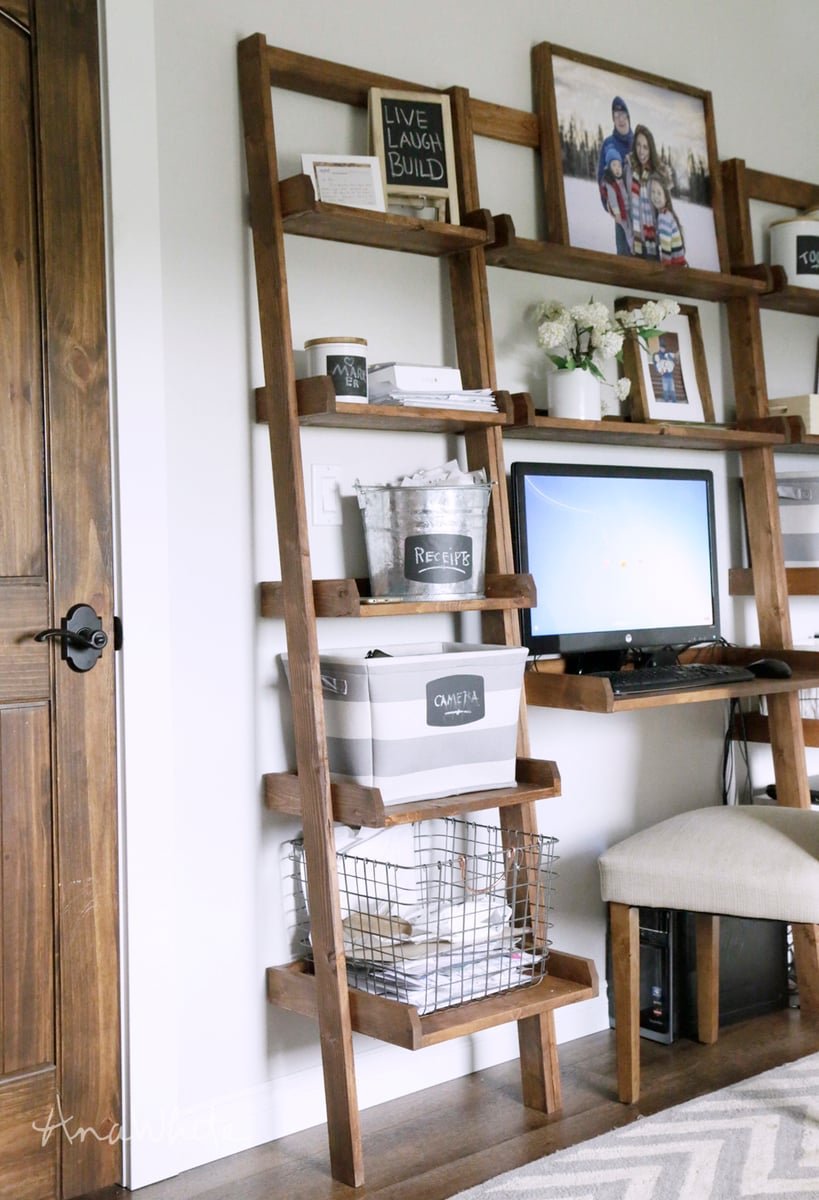
Use 1x board to build a leaning ladder wall bookshelf! Easy
Specifications
| Project type | Bookshelf and Bookcase Plans |
|---|---|
| Room | Storage Solutions |
| Style | Cottage Style Furniture Plans |
| Difficulty | Intermediate |
Dimensions
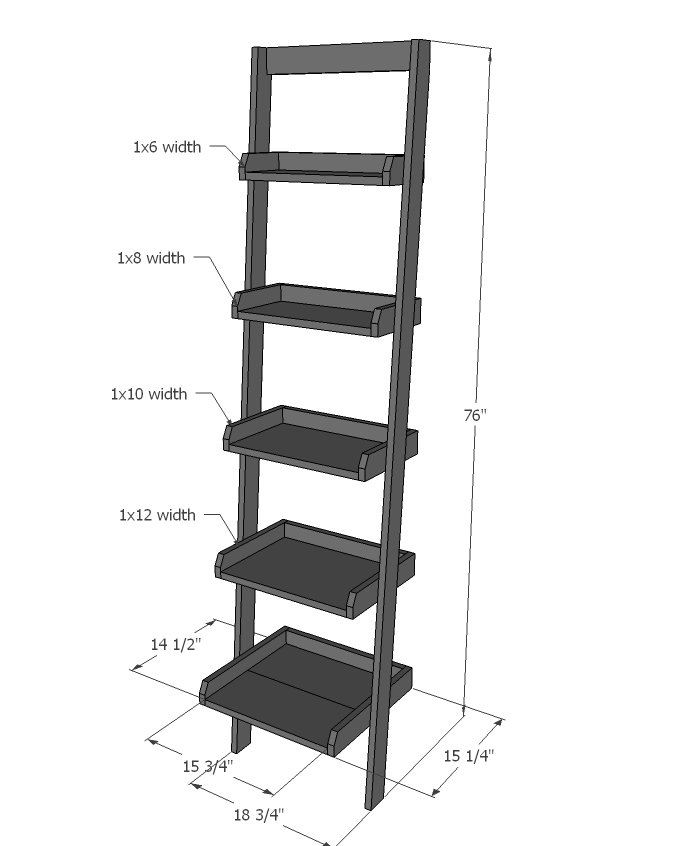
Use the size-specific shopping and cut lists below.
Shopping List
SHOPPING LIST FOR 1 BOOKSHELF
- 4 - 1x3 @ 8 feet long
- 1 - 1x6 @ 16" long
- 1 - 1x8 @ 4 feet long
- 1 - 1x10 @ 16" long
- 1 - 1x12 @ 16" long
Cut List
CUT LIST FOR ONE BOOKSHELF
FRAME
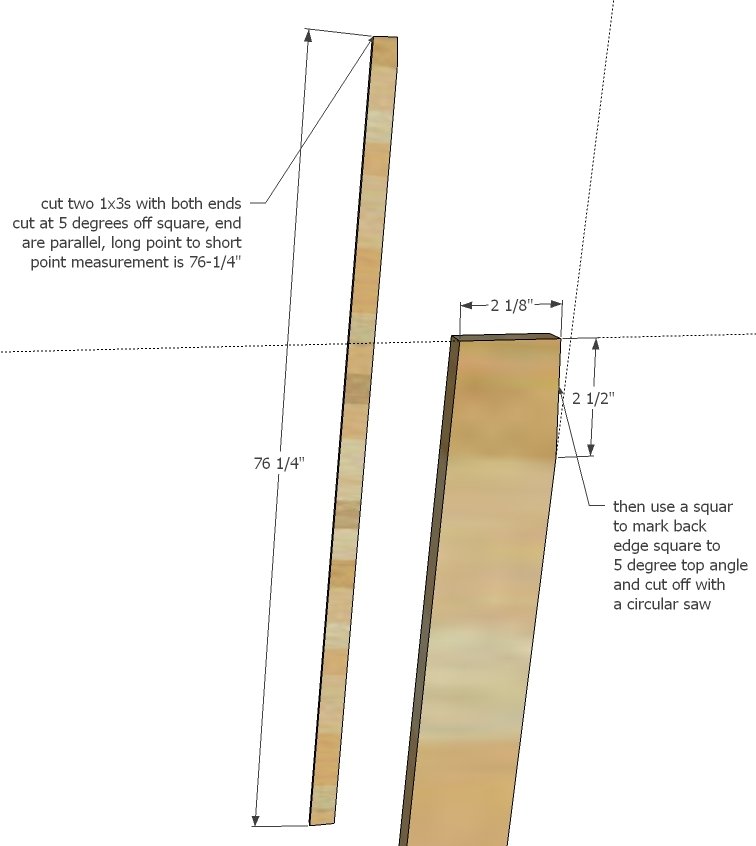
- 2 - 1x3 @ 76-1/4" - both ends cut at 5 degrees, parallel, long point to short point measurement
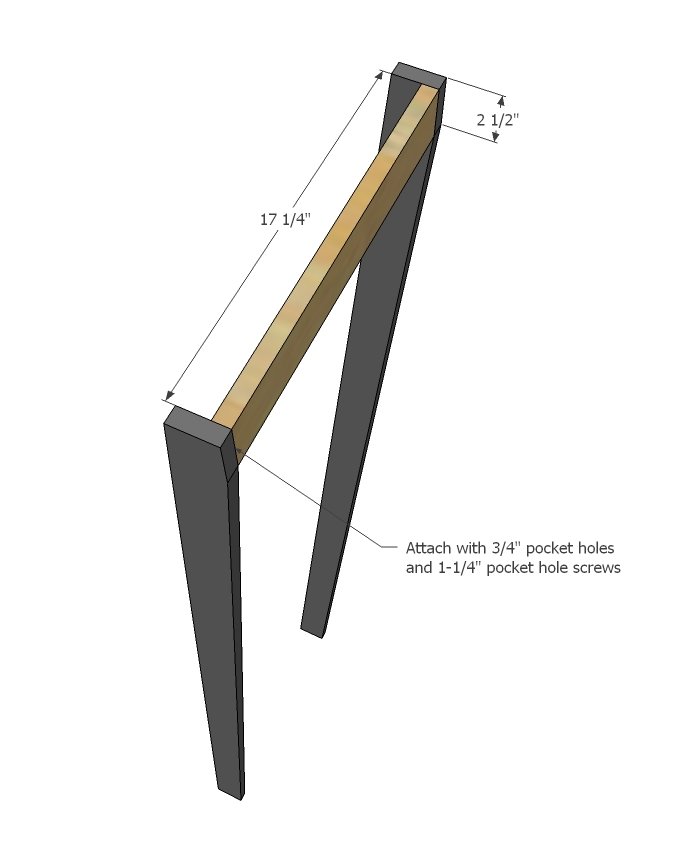
- 1 - 1x3 @ 17-1/4" - back support
SHELVES
- 5 - 1x3 @ 15-3/4"
- 1 - 1x6 @ 15-3/4"
- 3 - 1x8 @ 15-3/4"
- 1 - 1x10 @ 15-3/4"
- 1 - 1x12 @ 15-3/4"
- 2 - 1x3 @ 6-1/4"
- 2 - 1x3 @ 8"
- 2 - 1x3 @ 10"
- 2 - 1x3 @ 12"
- 2 - 1x3 @ 15-3/4"
Tools
- measuring tape
- square
- pencil
- safety glasses
- hearing protection
- kreg-jig
- drill
- circular saw
- compound miter saw
- nailer
- sander
- countersink drill bit
Step-by-step Instructions
Step 1
Cut the legs first, according to the cut list. Then use a speed square to mark off the back top corner square to the top angled cut, so 2-1/2" is cut off the back. Use a circular saw to cut this. This is shown in the video.
Step 2
Attach the back support to back of legs, flush to top and back.
Step 3
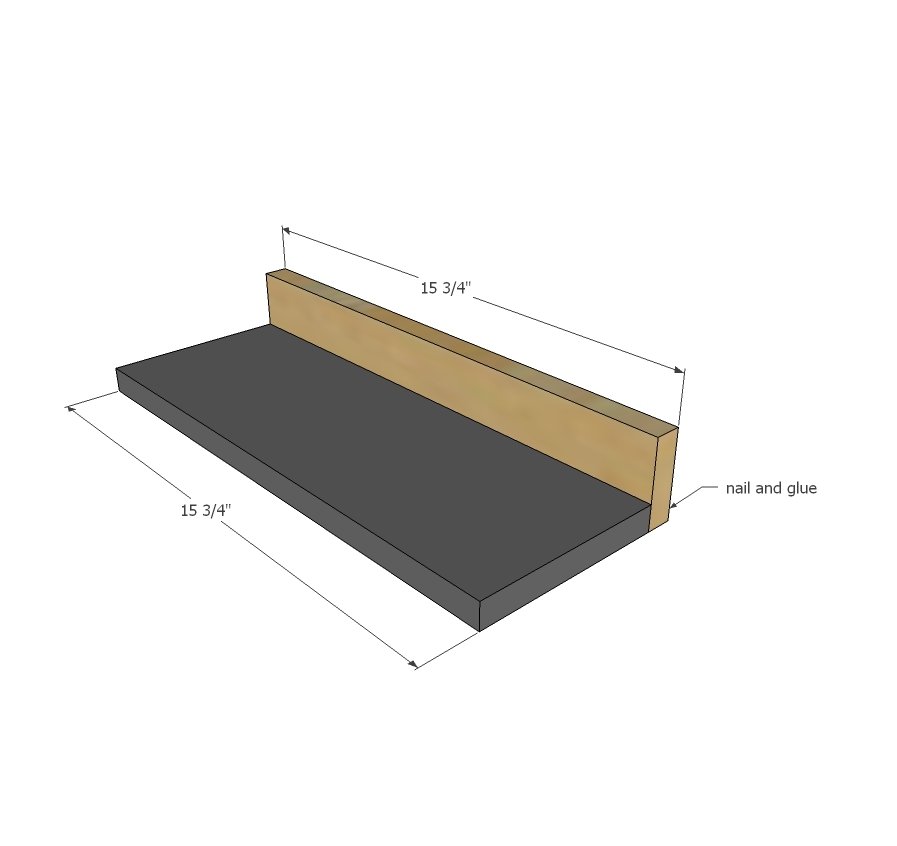
Build shelves by nailing and gluing backs to shelf bottoms with 1-1/4" brad nails or staples and wood glue. It is very important to glue all nailed joints.
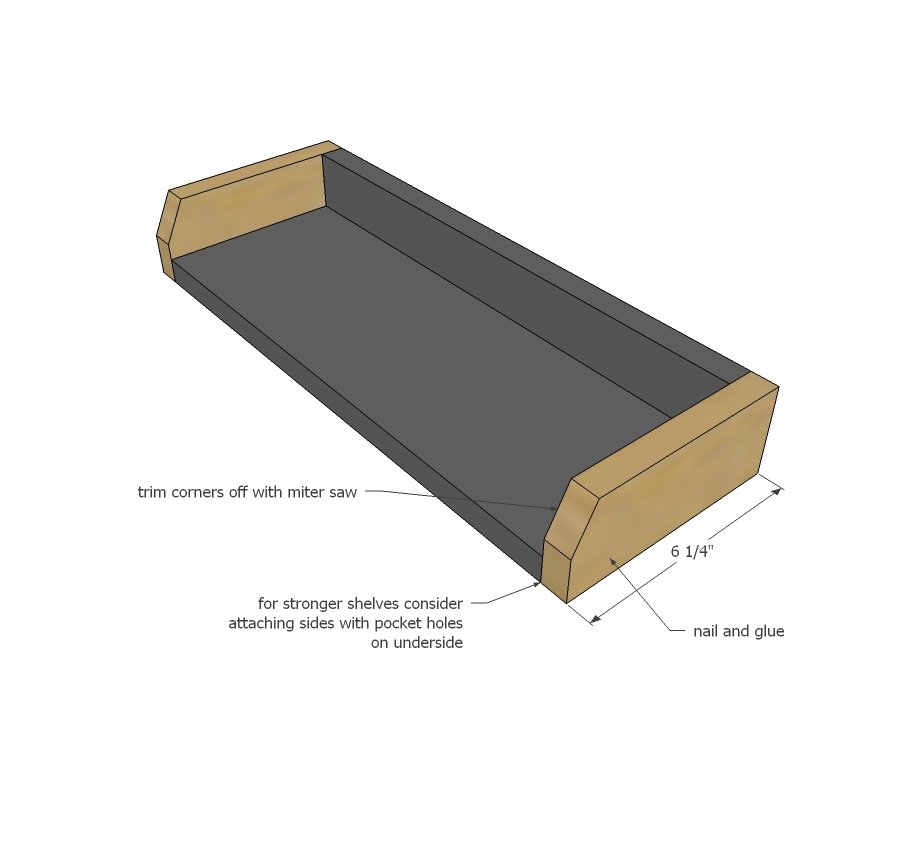
Add sides as you did the back.
For a stronger shelf, you can also pocket hole the sides on from underneath. I cut the corners on my sides at 22-1/2" degrees (I choose this number because it is a setpoint on my saw, the exact degree can differ). To do this quickly, I made a small mark on my saw with a pencil, when I had the board in the position I wanted to cut it at. Then after cutting, I just took the next side, lined it up with my marks, and cut. No measuring needed.
Step 5
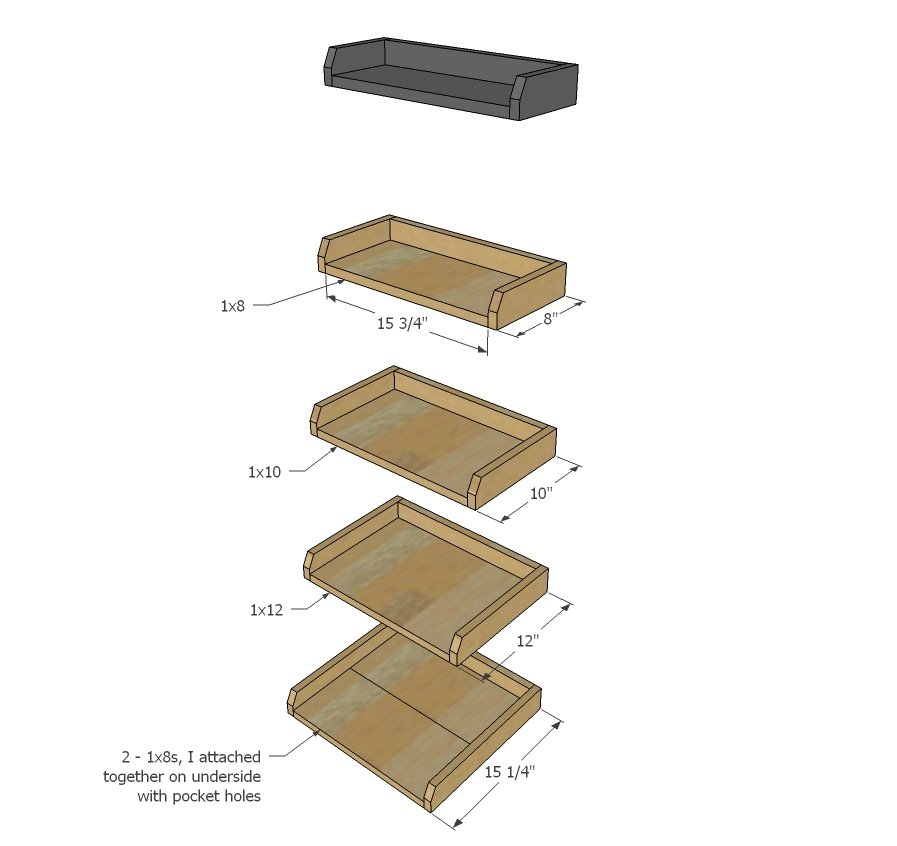
Step 6
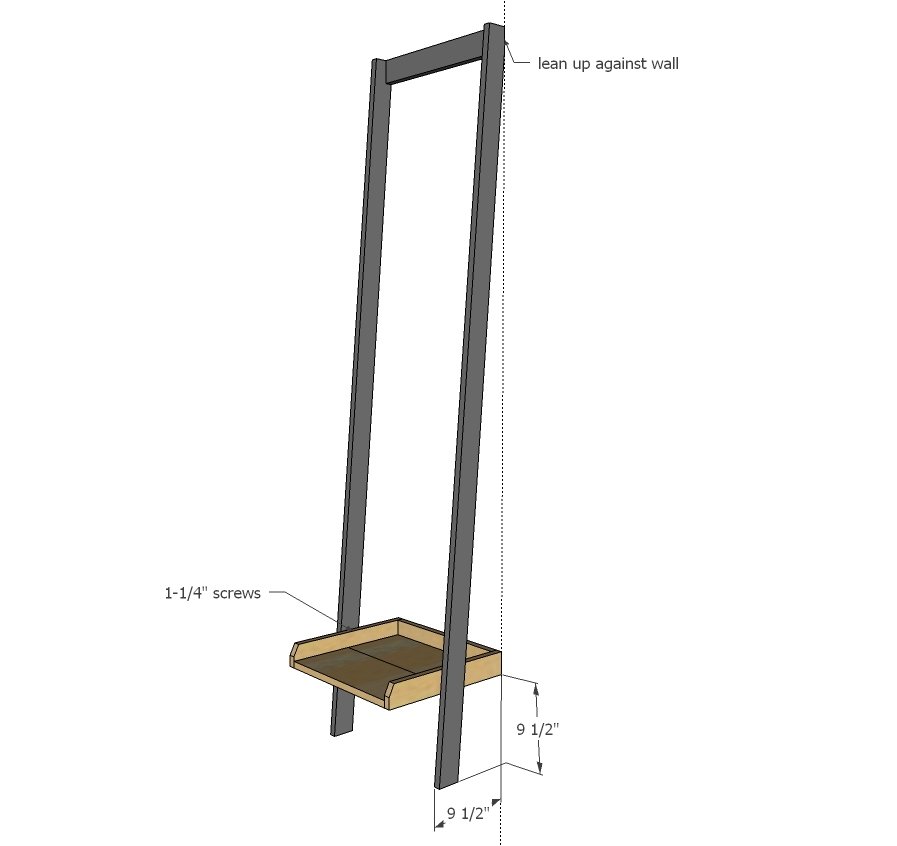
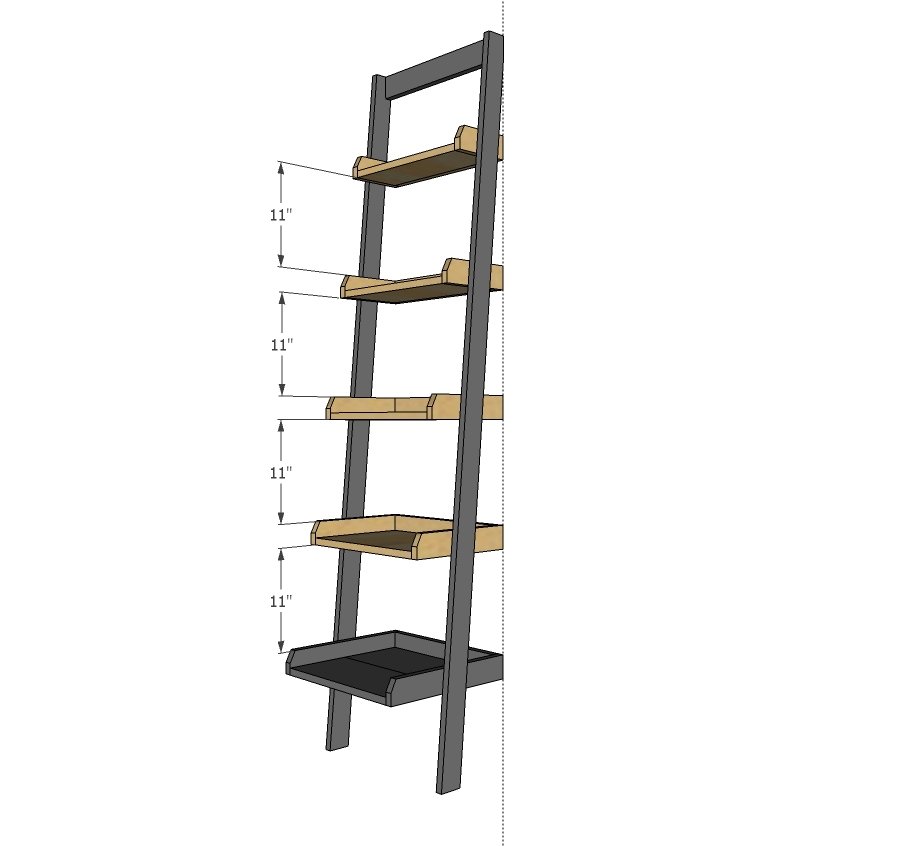
To get the bottom shelf in place, I first positioned the frame against a wall, making sure legs were 9-1/2" out from the wall. I then measured up 9-1/2" and added the shelf with clamps and used a level to ensure it was level. Then I screwed it on with 1-1/4" screws (you can use pocket hole screws here).
Step 7
For the rest of the shelves, I cut a block of plywood 11" long and used it as a spacer to position the remaining shelves. When installing, I recommend attaching the top to studs in the wall to prevent any forward tipping.
Finishing
Sand all surfaces, starting with a medium grit and finishing with fine. Wipe off the dust, fill any holes or gaps with wood filler, and sand smooth once dry. Apply primer if you're painting, then finish with your choice of paint or stain and seal with a durable clear topcoat. For outdoor projects, use exterior-rated primer, paint or stain, and sealer so the piece stands up to the weather.
Source (temporary): https://www.ana-white.com/woodworking-projects/leaning-ladder-wall-bookshelf