Lemonade Stand
to Build a Lemonade Stand with Cedar Fence Pickets Build your own lemonade stand from 2x4s and cedar fence pickets from This adorable lemonade stand features an easy to build design, using a 2x4 frame with cedar fence pickets. Just cut, screw together, then paint and decorate for the cutest lemonade stand on the block. This is a sturdy lemonade stand that can be used for years. It's easy to modify for different heights and sizes. with video tutorial from
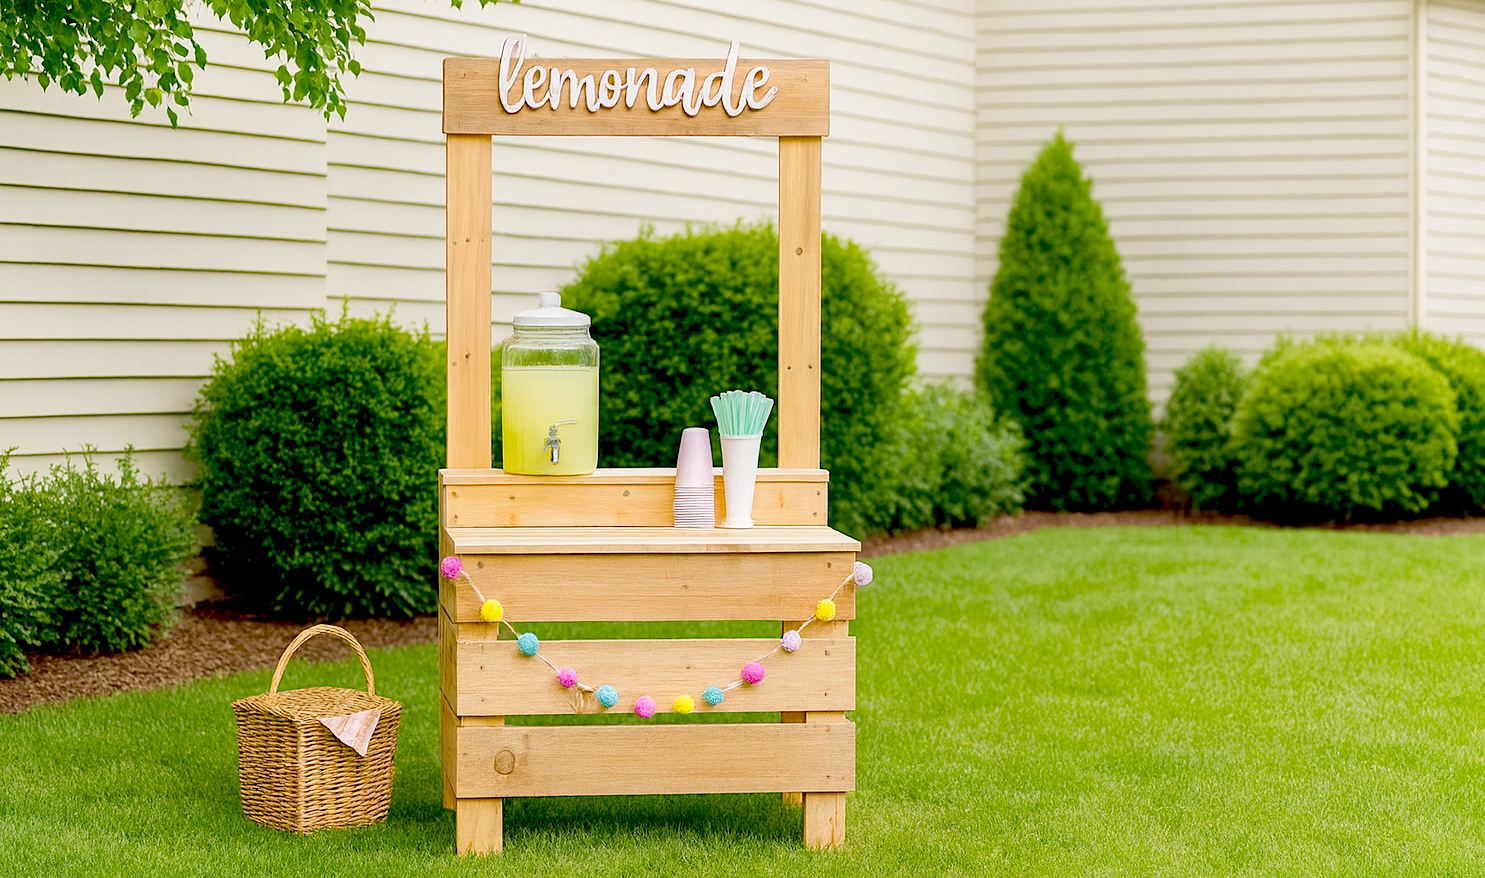
Specifications
| Project type | Play Kitchen Collection |
|---|---|
| Room | Outdoor |
| Difficulty | Starter Projects |
| Estimated cost | $20 - $50 |
Dimensions
Use the size-specific shopping and cut lists below.
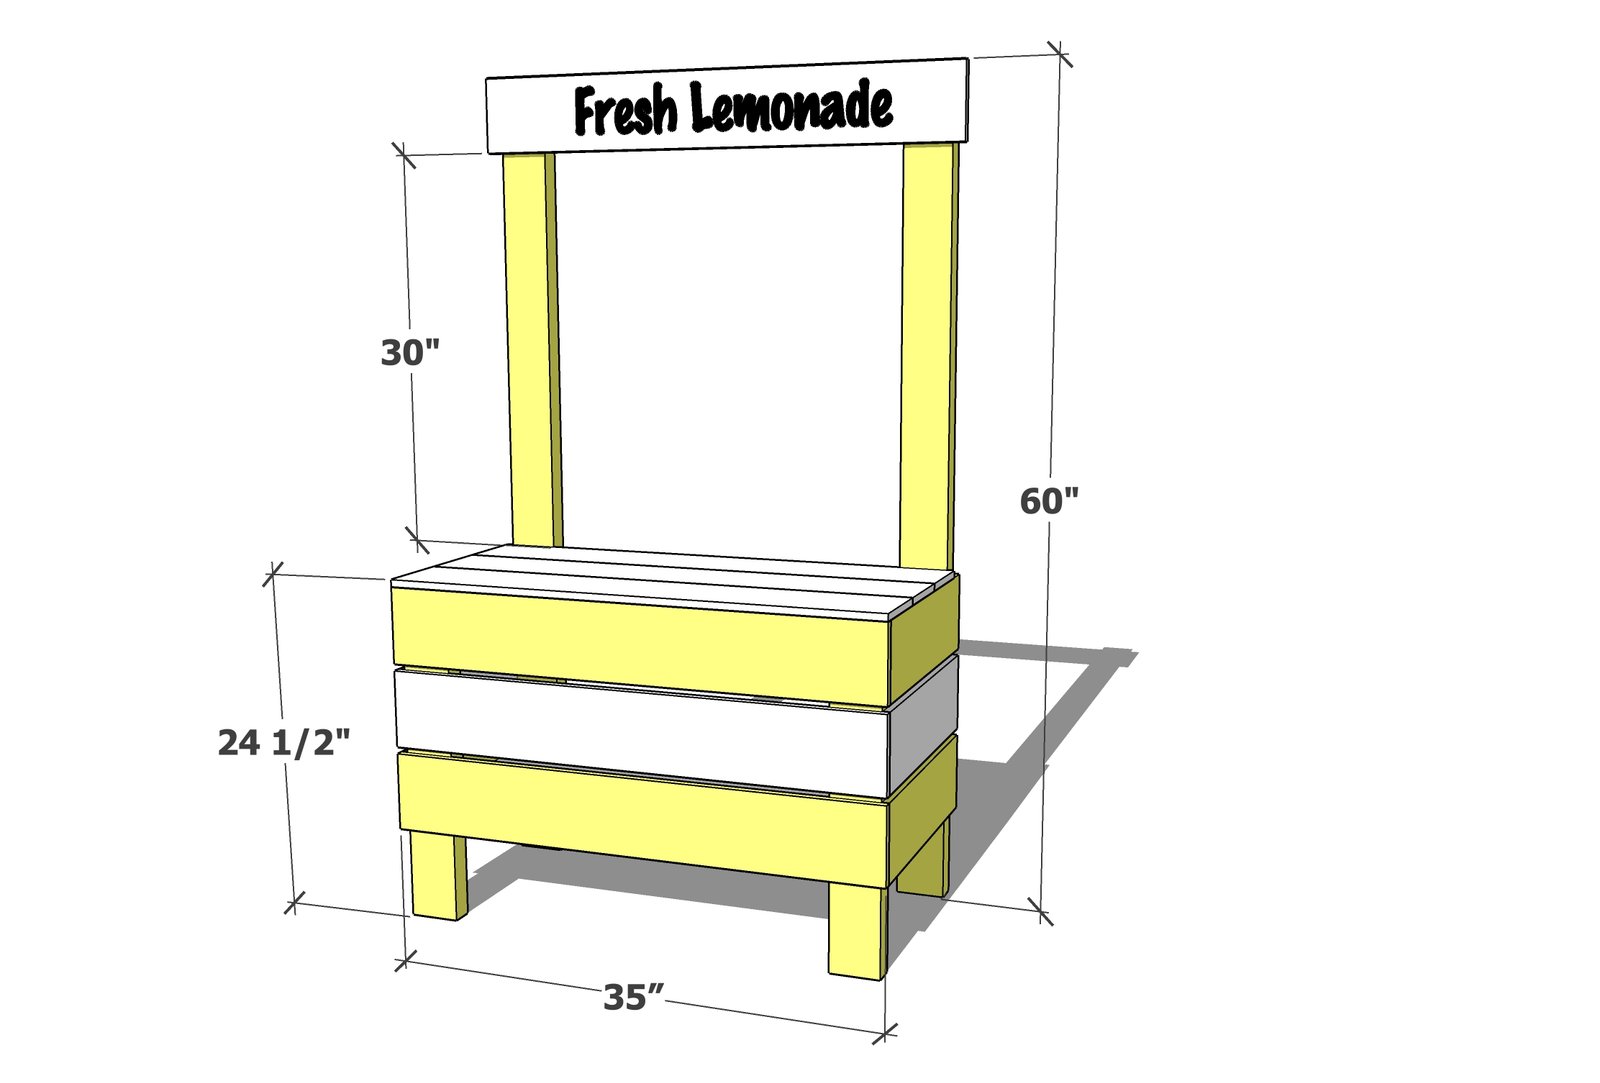
Shopping List
- 2 - 2x4 @ 12 feet long (or 3 2x4 @ 8 feet or stud length)
- 6 - 5-1/2" wide cedar fence pickets, 72" long (can be dogeared)
- 16 - 2-1/2" long self tapping star bit wood screws
- 60 - 1-1/2" long self tapping star bit wood screws
Cut List
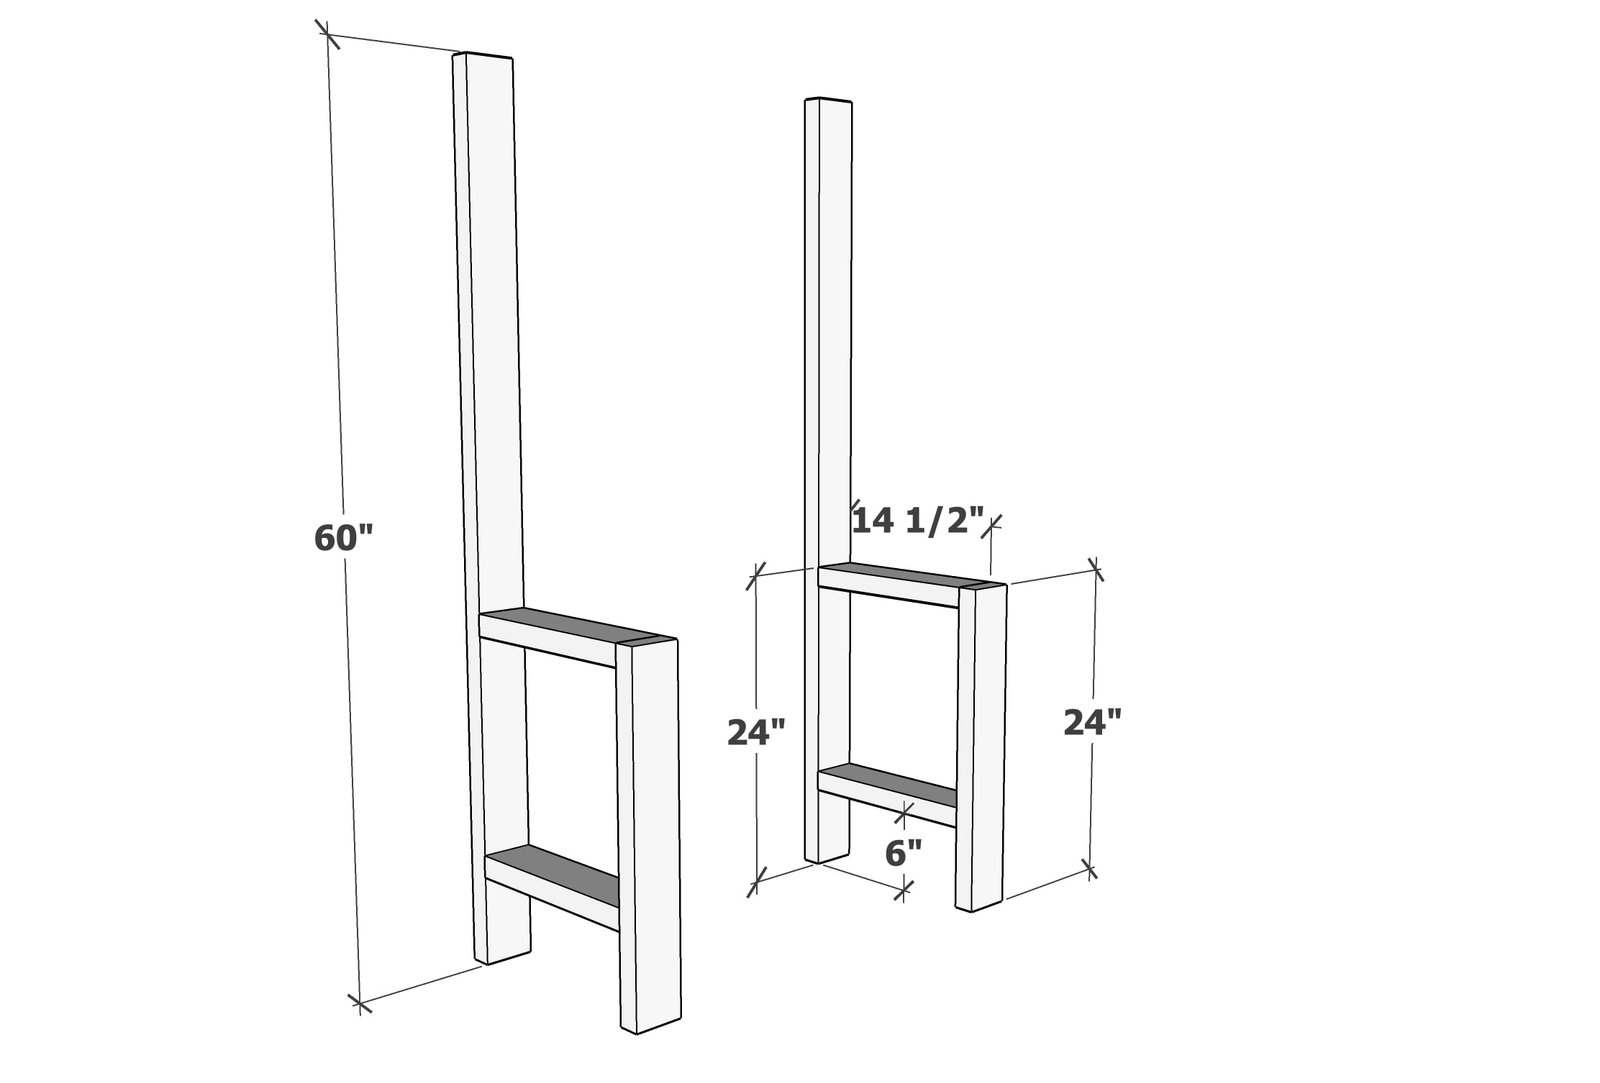
- 2 - 2x4 @ 60" - or height of the signage - back legs
- 2 - 2x4 @ 24" - or height of the tabletop - front legs
- 4 - 2x4 @ 14-1/2" - inner supports
- 6 - 5-1/2" wide cedar fence pickets @ 17-1/2" - side panels
- 7 - 5-1/2" wide cedar fence pickets @ 35" - front, top and sign
- 2 - 5-1/2" wide cedar fence pickets @ 34" - inside shelf
Tools
- measuring tape
- square
- pencil
- safety glasses
- drill
- circular saw
- sander
Step-by-step Instructions
Step 1
Using the longer screws, build the two frames as shown.
Step 2
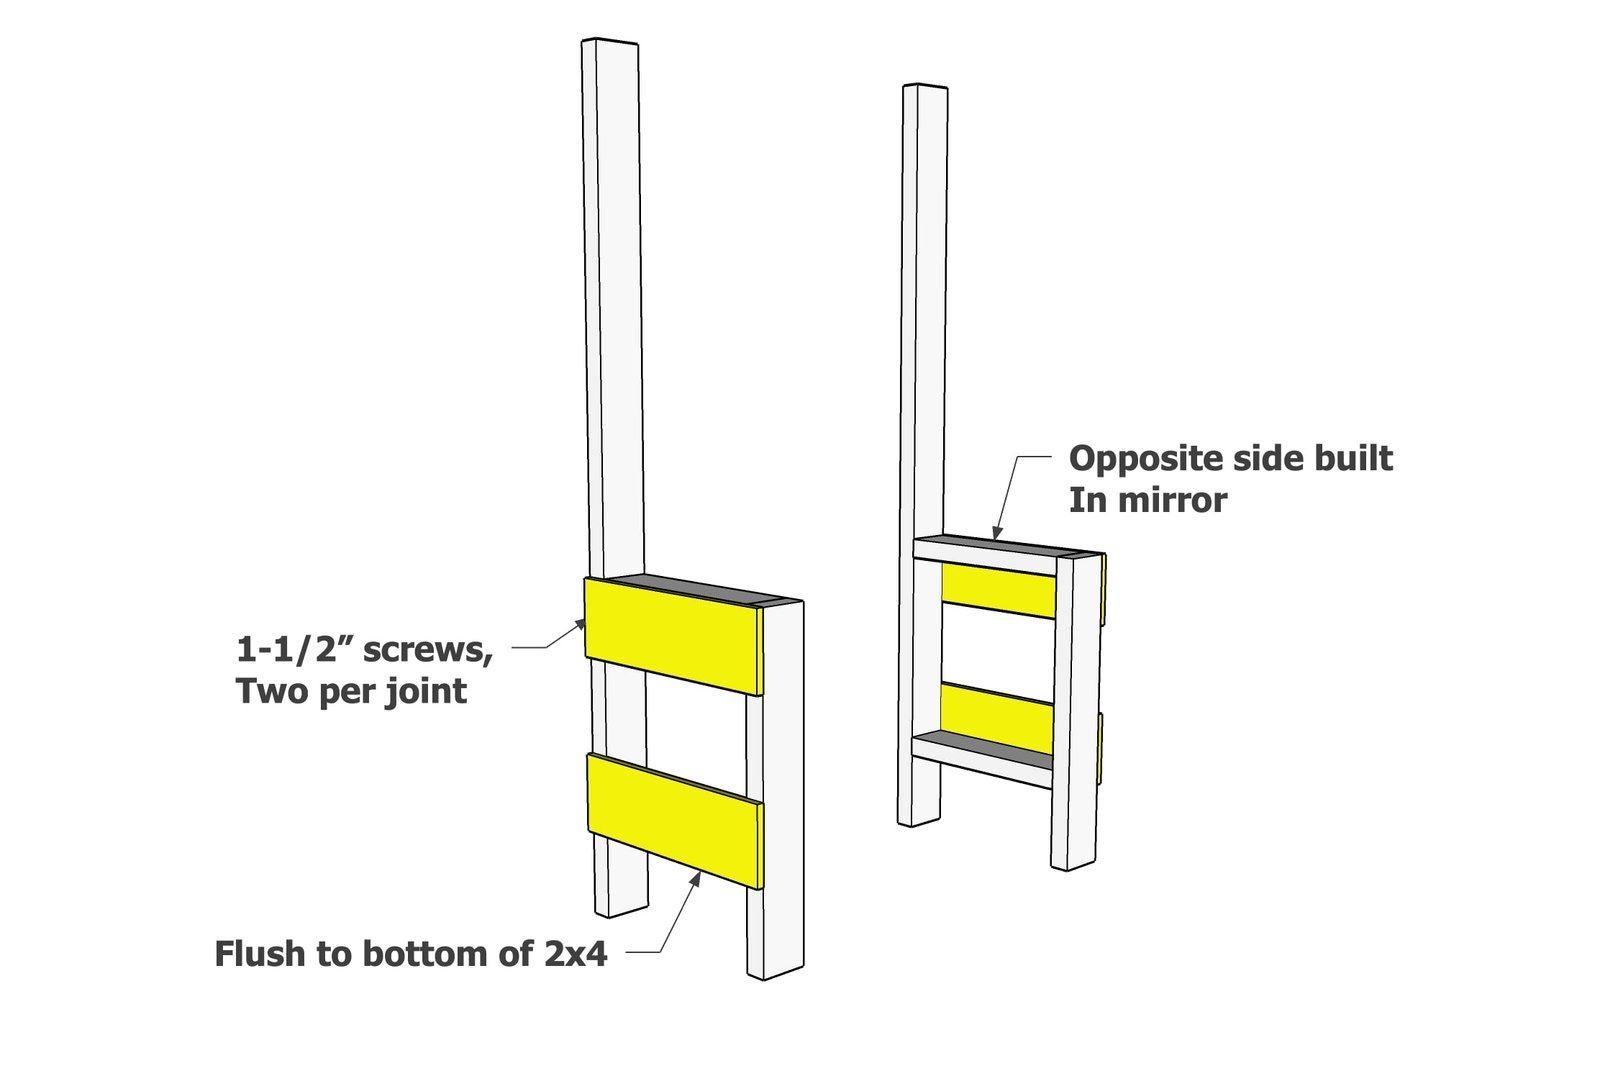
With the shorter screws, attach the side cedar fence pickets to the frames, in mirror as shown.
Step 3
Place the center piece in the center, with even gaps in between.
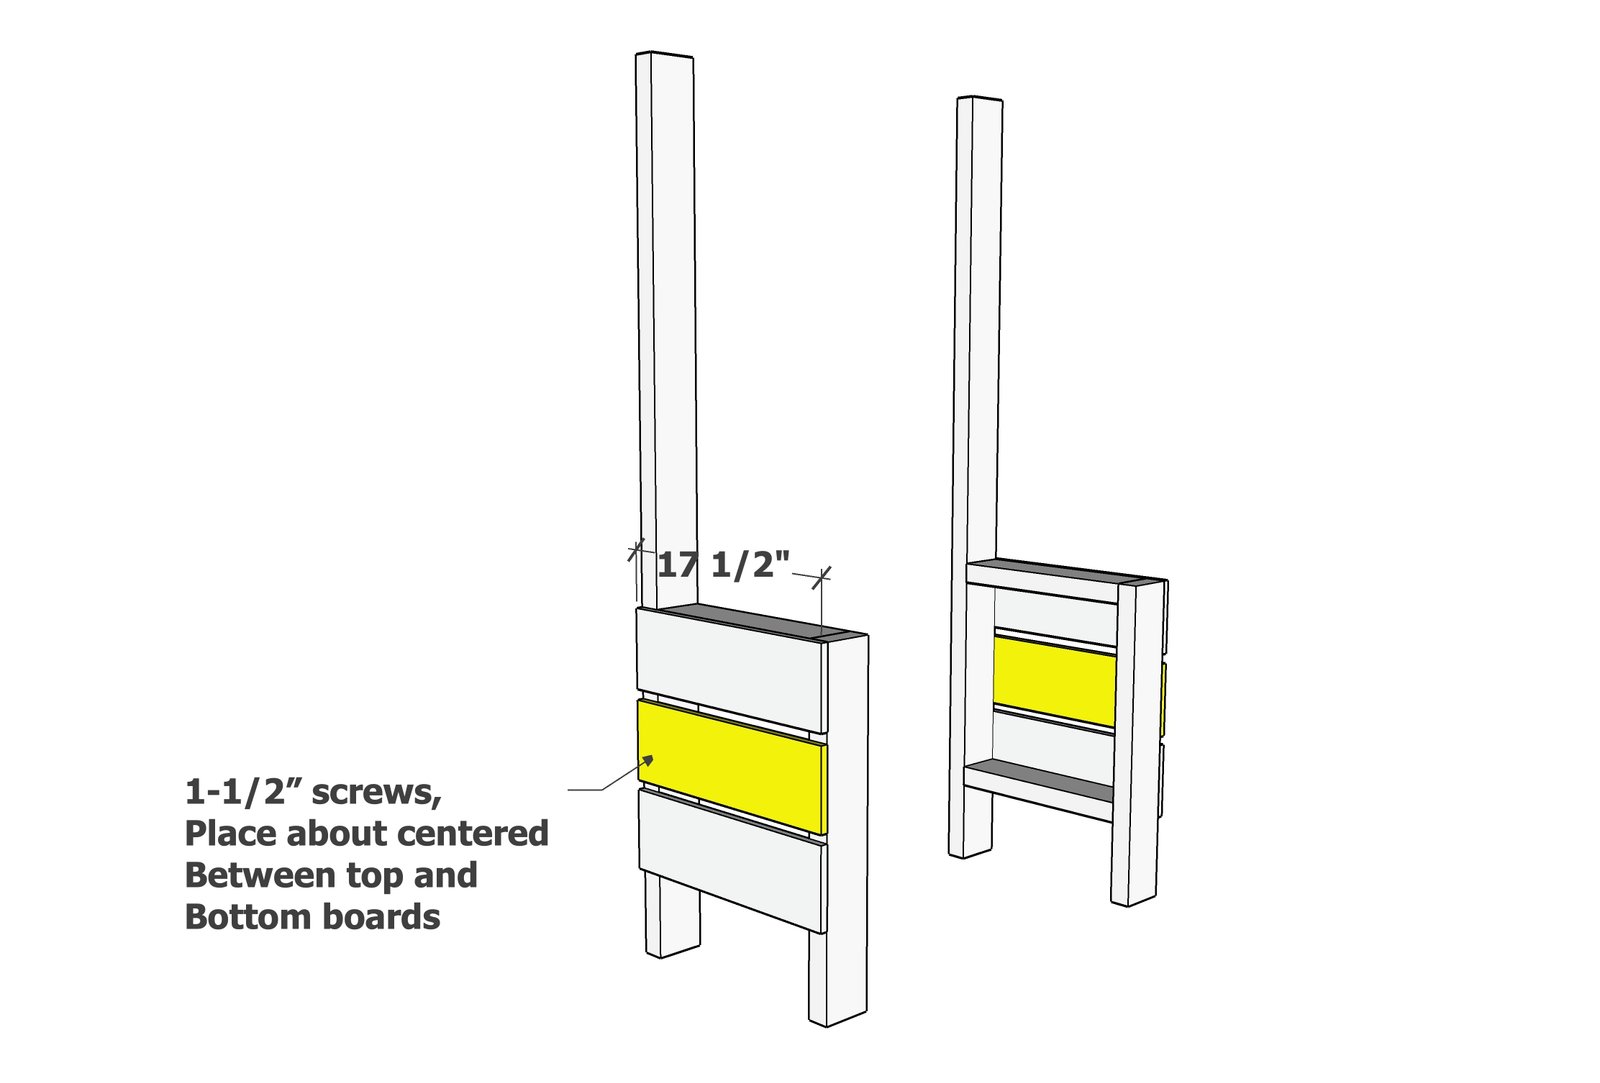
Step 4
On a flat, level surface, add the front pieces, making sure the base still sits flat. Attach with the shorter screws.
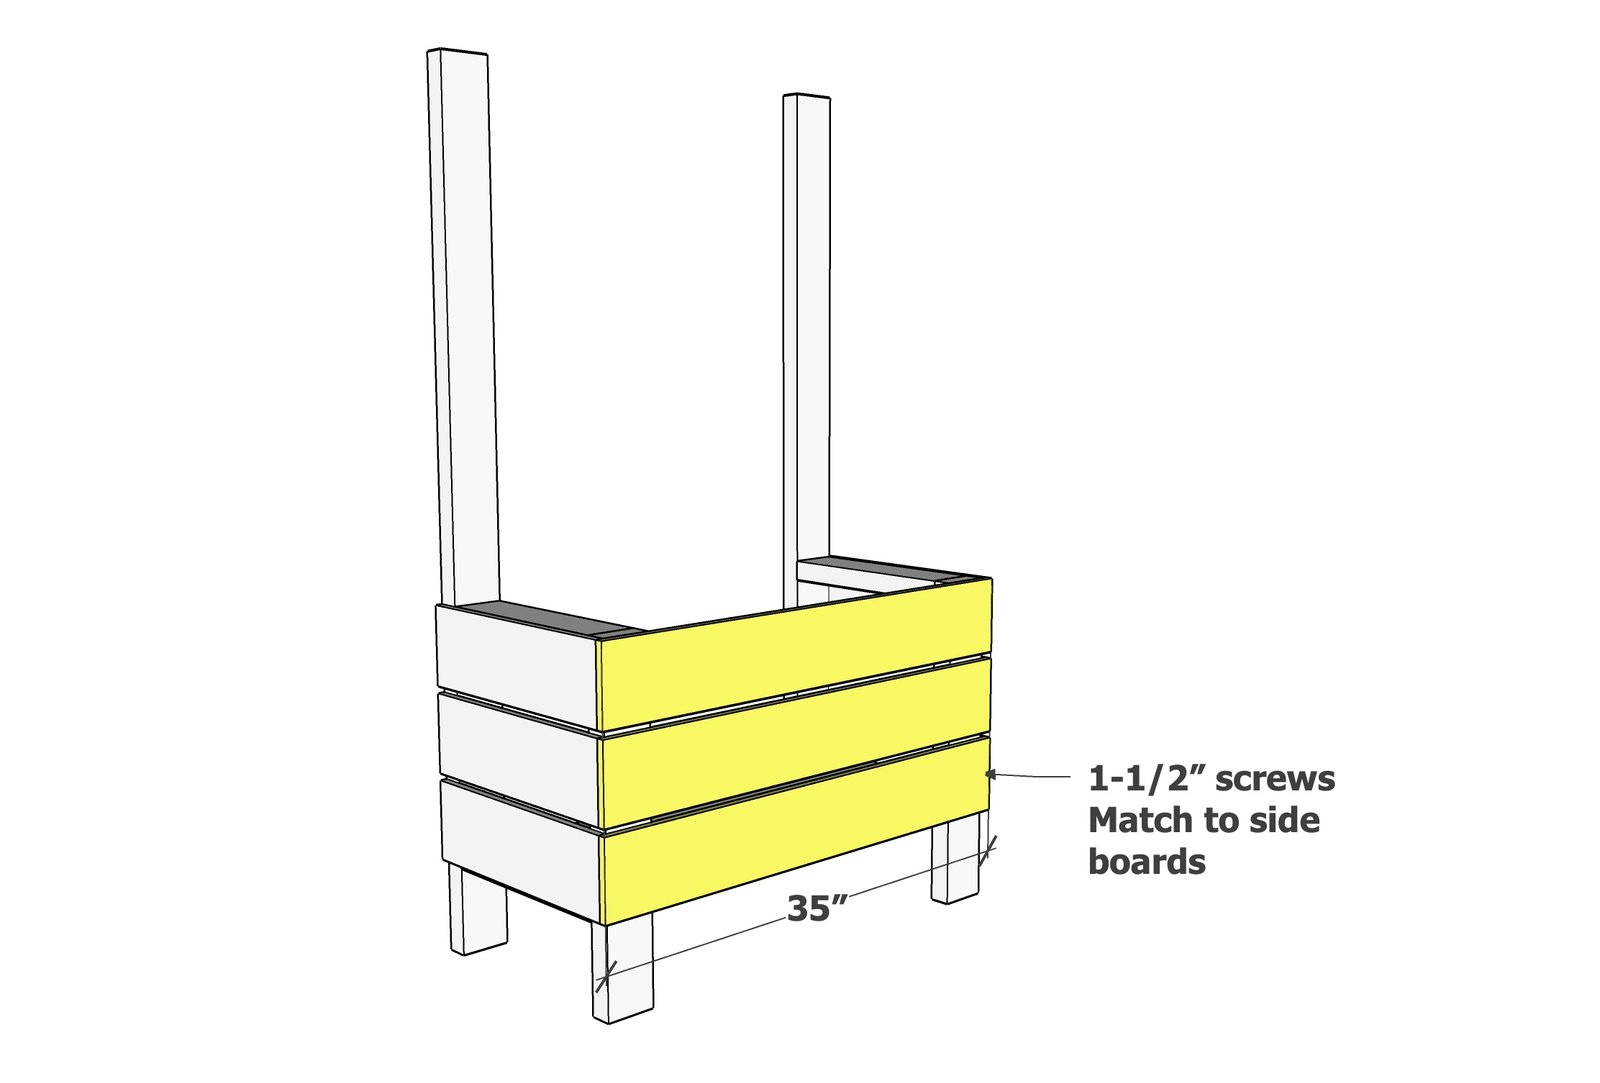
Step 5
Add the top and the sign board.
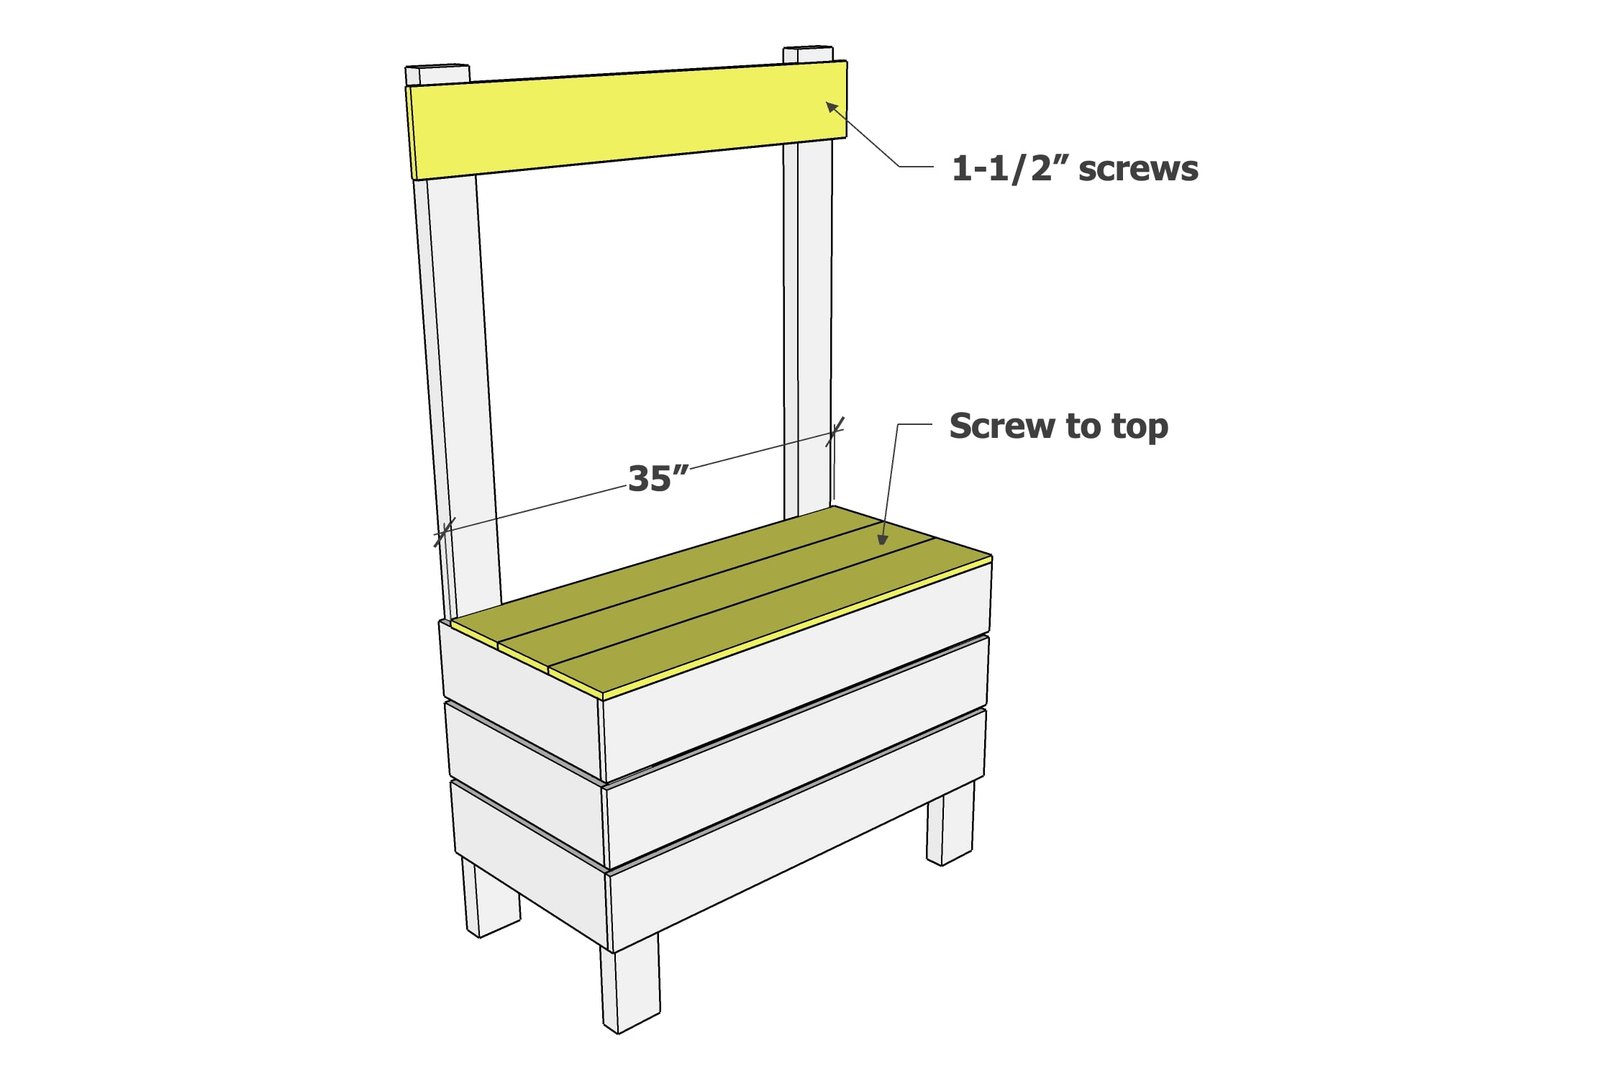
Step 6
Measure and cut the inside shelving pieces and attach with the shorter screws.
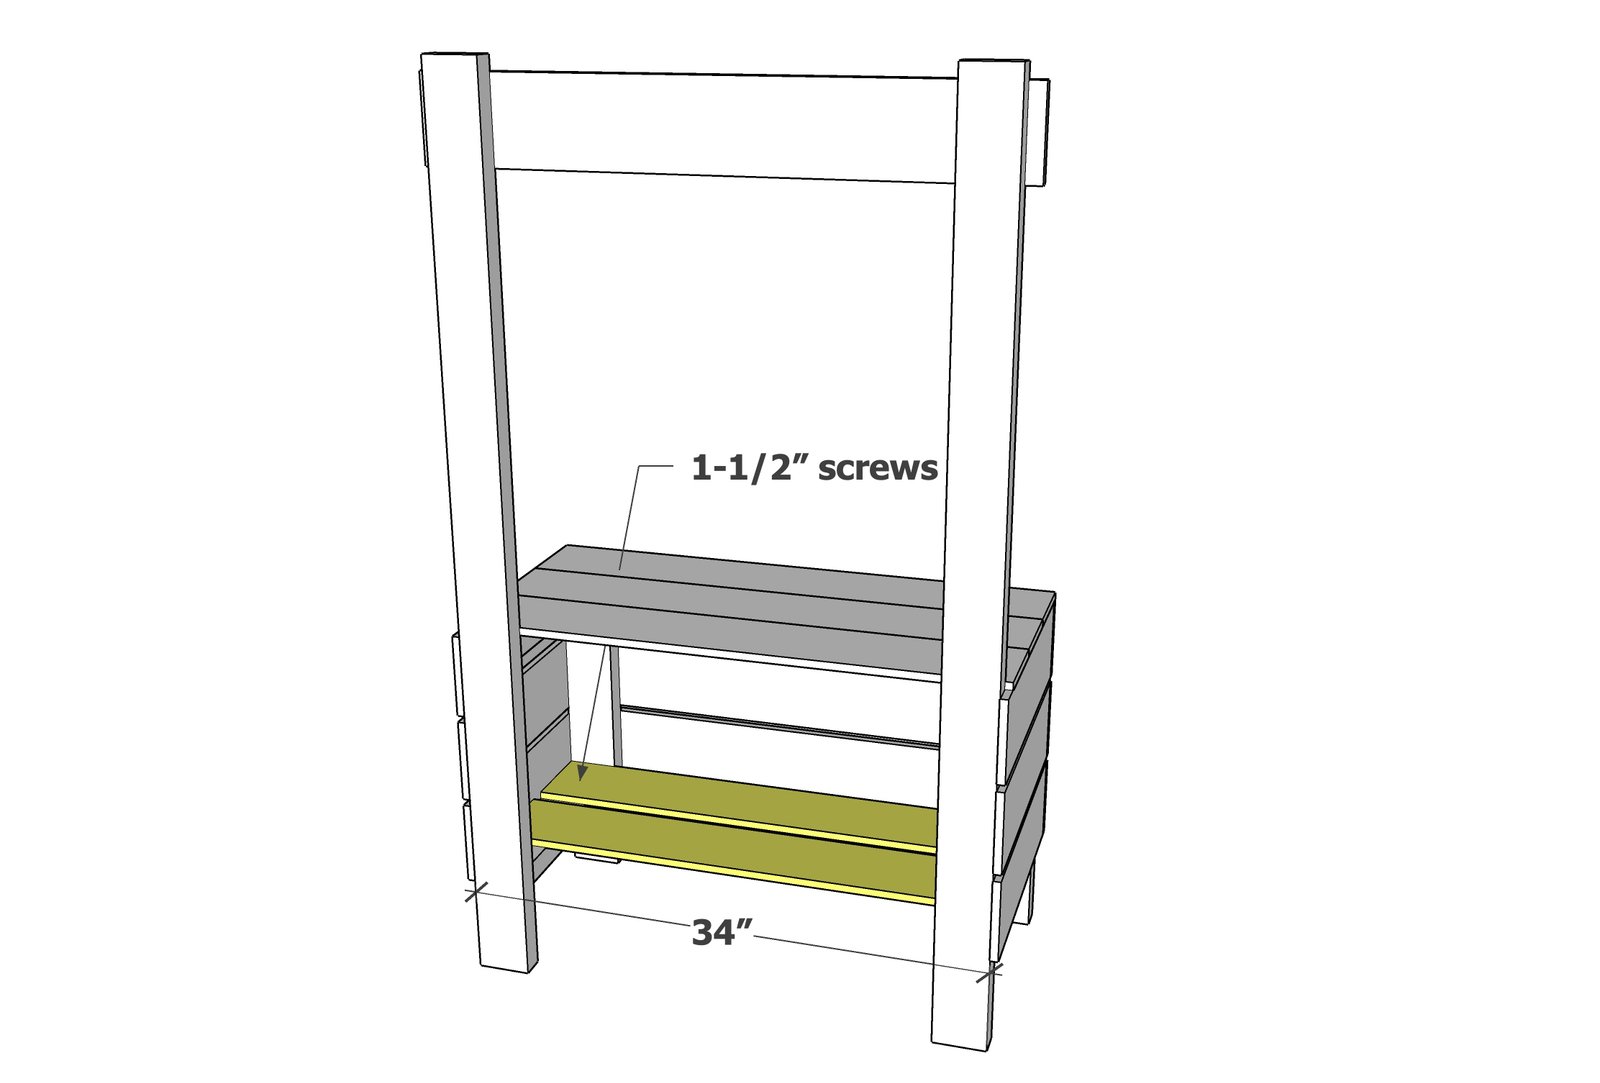
Step 7
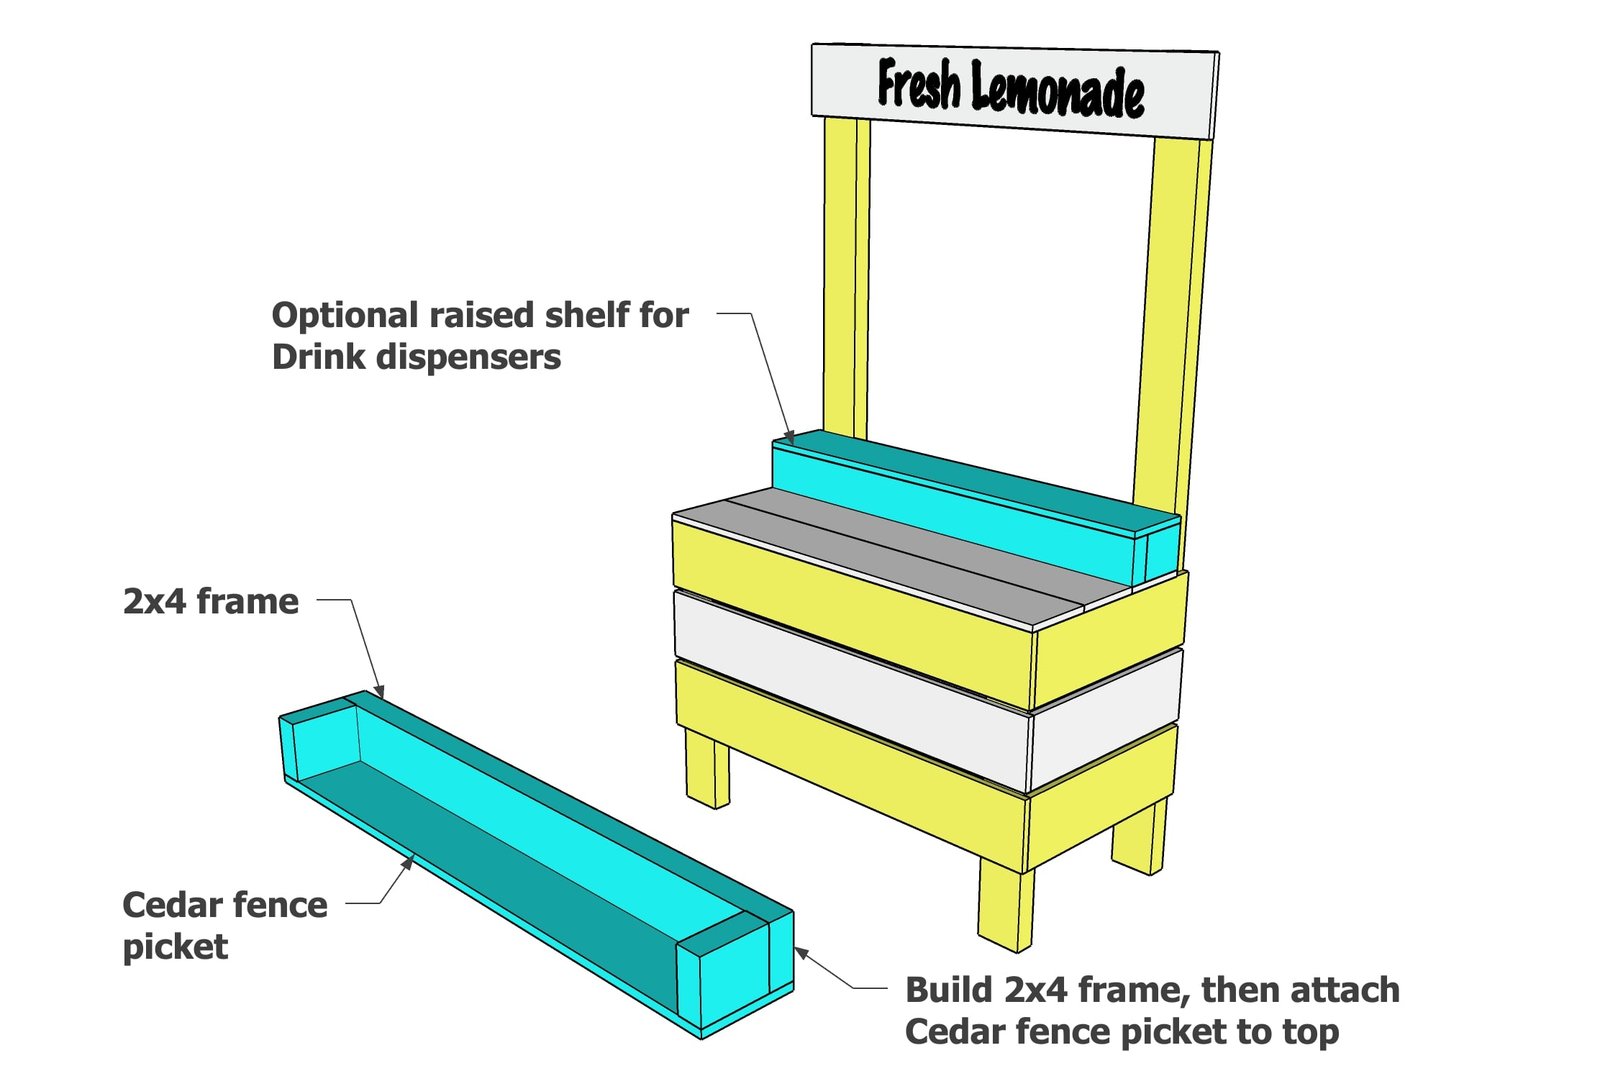
Optional drink dispenser riser - I built this later to create a riser for the beverage dispensers. I left it unattached.
Finishing
Sand all surfaces, starting with a medium grit and finishing with fine. Wipe off the dust, fill any holes or gaps with wood filler, and sand smooth once dry. Apply primer if you're painting, then finish with your choice of paint or stain and seal with a durable clear topcoat. For outdoor projects, use exterior-rated primer, paint or stain, and sealer so the piece stands up to the weather.
Source (temporary): https://www.ana-white.com/woodworking-projects/lemonade-stand-cedar-fence-pickets-and-2x4s