Lemonade Stand for Grace's Town Collection
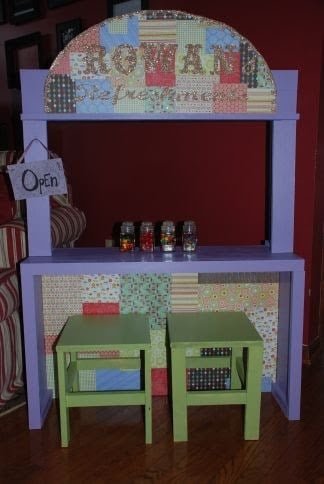
This cute plan works with the wide hutch plans (Grace's Town Collection) to help your little one's in their pretend play. Features a bar and shelving behind the bar, just right height for a cash register, and ample opportunity for creative touches, this lemonade stand is sure to delight little ones. Photos from Shawn, thank you!
Specifications
| Project type | Grace's Town |
|---|---|
| Room | Storage Solutions |
| Difficulty | Intermediate |
| Estimated cost | $20 - $50 |
Dimensions
Use the size-specific shopping and cut lists below.
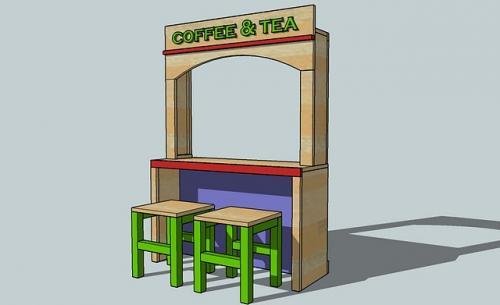
Shopping List
1 - 1x12 @ 8 feet long
1 - 1x4 @ 3 feet long
1 - 1x2 @ 8 feet long
1/4" plywood or beadboard (try a wainscot panel) or 1/4 sheet
Cut List
A) 2 – 1×12 @ 21 1/2″ (Sides)
B) 1 – 1×12 @ 36″ – (Top)
C) 3 – 1×4 @ 34 1/2″ (Shelves)
D) 1 – 1×2 @ 34 1/2″ (Inside, top cleat)
E) 1/4″ plywood or beadboard, 34 1/2″ wide x 21 1/2″ tall (a wainscoat panel would do fine, about $7 at Lowes or Home Depot)
F) 1 – 1×3 @ 36″ (Back Toekick)
G) 2 – 1×2 @ 7 3/4″ (Inside Bottom Front Supports)
H) 1 – 1×2 @ 36″ (Countertop Trim for the Front)
I) 2 – 1×2 @ 20 3/4″ (Front Side Trim)
Tools
- measuring tape
- square
- safety glasses
- hearing protection
- drill
- circular saw
- nailer
- sander
Step-by-step Instructions
Step 1
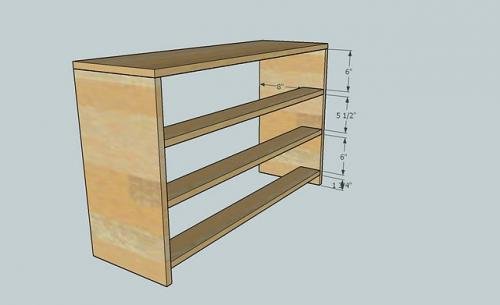
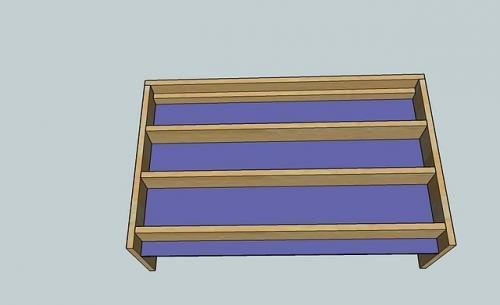
Start by nailing the shelves C to the sides A, as shown above. It is always a good idea to mark your sides first so you know exactly where the shelves will go. Keep the shelves flush with the sides on the back of the base unit, as shown above. After the shelves are in place, nail the countertop, B, to the sides, A.
Step 2
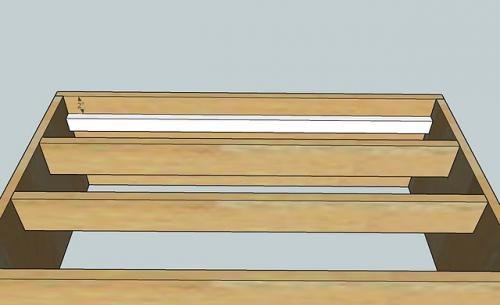
Use 1 1/4″ nails to nail the cleat, D, shown in white, in place as shown above. Also nail through the sides of A into the end edges of D.
Step 3
Mark your plywood according to the measurements in step 1, and then use the 1 1/4″ nails to nail the plywood in place, as shown above. It is always a good idea to check your project for square before adding plywood. If you do not know how to check for square, visit the HOW-TO section.
Step 4
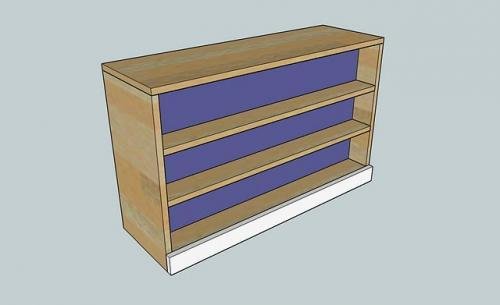
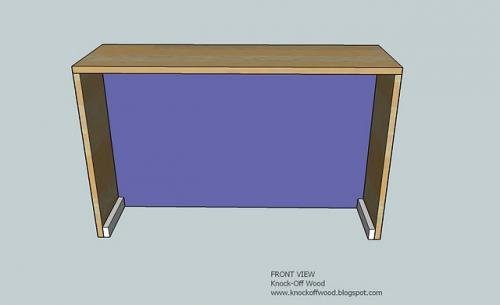
Add the back toekick, F, as shown above to the back of the base unit. Use the 2″ nails, and make sure you nail into both the sides and the bottom shelf.
Step 5
Step 6
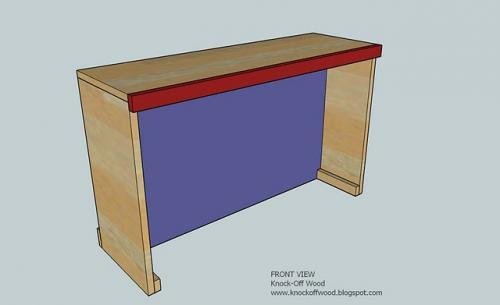
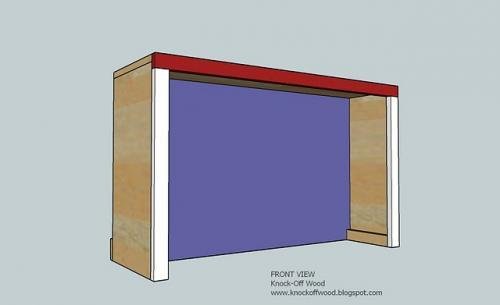
Back to the 2″ nails. Nail the countertop trim, H, in place (shown in red above). Keep top and outside edges flush.
Step 7
The final step is to nail the boards I in place, as shown above. The front side trim should be nailed to the sides, the supports, and you shoul also nail through the top of the countertop trim into the end edges of the front side trim pieces, I.
Finishing
Sand all surfaces, starting with a medium grit and finishing with fine. Wipe off the dust, fill any holes or gaps with wood filler, and sand smooth once dry. Apply primer if you're painting, then finish with your choice of paint or stain and seal with a durable clear topcoat. For outdoor projects, use exterior-rated primer, paint or stain, and sealer so the piece stands up to the weather.
Source (temporary): https://www.ana-white.com/woodworking-projects/lemonade-stand-graces-town-collection